
Perfectly Miter Quilt Borders Without the Math!
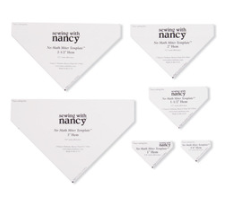
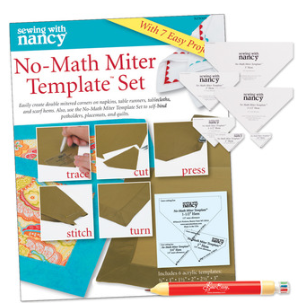
Kate Bashynski, a member of the Sewing With Nancy team, designed the No-Math Miter Template Set to miter corners quickly and easily. Use the No-Math Miter Template Set to add mitered borders plus finish the quilt edge without a quilt binding, in one process. You can choose from six finished border sizes: 3/4″, 1″, 1-1/2″, 2″, 2-1/2″, and 3″.
How to Use No-Math Miter Templates as a Quilt Finish
Determine the finished size of the quilt border. There are six options: 3/4″, 1″, 1-1/2″, 2″, 2-1/2″, and 3″.
Layer the quilt top, batting, and backing. Pin layers together.
Cut the batting the finished width of the border minus 1/4″ on all four sizes.
Cut the backing fabric double the finished width of the border plus 1/4″ on all four sides.

In the example, the finished binding measures 2″. The batting was cut 1-3/4″ wider than the quilt top on all four sides, and the backing was cut 4-1/4″ wider than the quilt top on all for sides.
Quilt the layers together as desired.
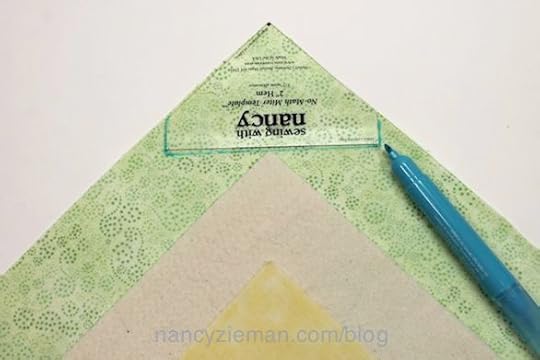
To make a 2″ self-binding for a quilt, I selected the 2″ No-Math Miter Template .
Align the template with the corner of the backing fabric and trace each mitered corner using the 2″ No-Math Miter Template.
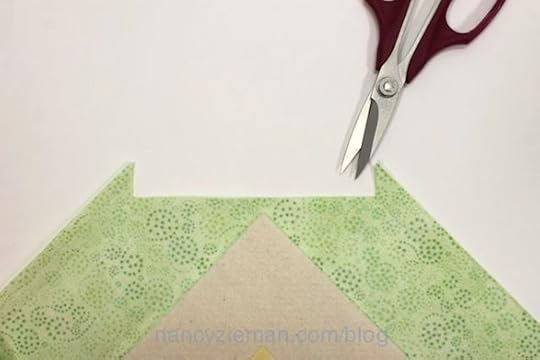
Cut on the traced lines.
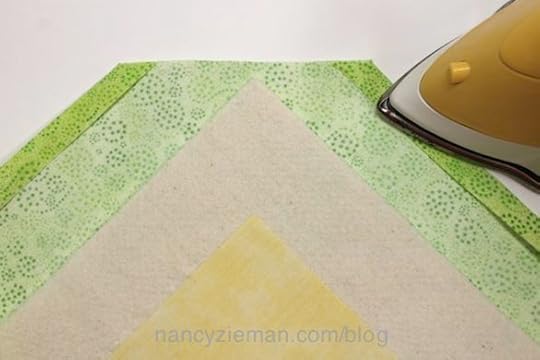
Press up the 1/2″ seam allowance along the outer edges of the quilt.
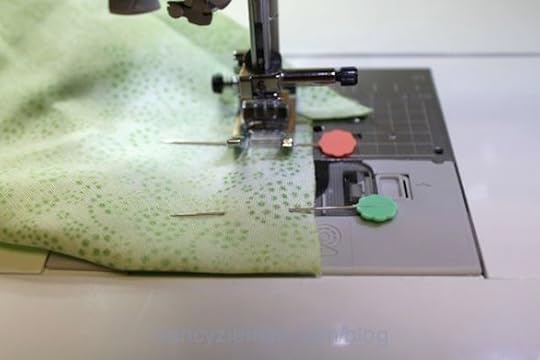
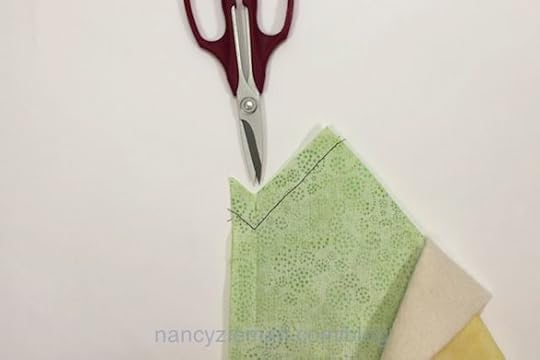
Open the seam allowance and fold each corner in half diagonally, right sides together, and stitch with a 1/2″ seam.
Clip up to, but not through, the stitching at the corner.
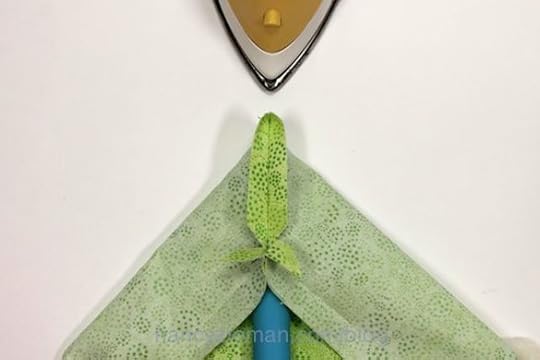
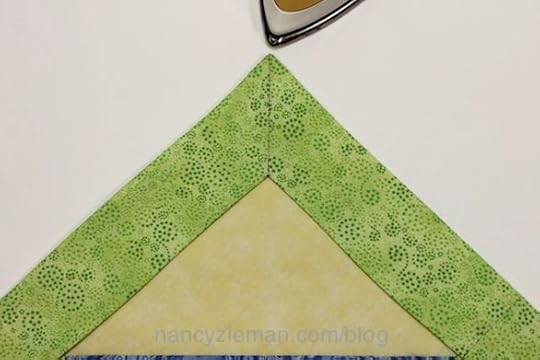
Press the seam open. Use the Iron Finger , a silicone pressing tool, to easily press the mitered corner area.
Turn the backing/border fabric to the right side, turn under the 1/2″ seam allowance, and press.
Repeat these steps at each corner.
Edgestitch the border to the quilt.
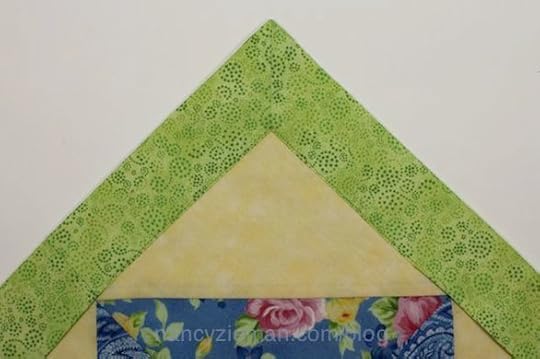
Ta da!
The No-Math Miter Template Set
Isn’t this a handy way to finish a quilt project? If you’d like to have a No-Math Miter Template Set of your own, click here!
What Do You Think of No-Math Miter Templates?
Bye for now,

Nancy Zieman—author, pattern designer, businesswomen, producer, and national sewing authority—is the host of the popular show Sewing With Nancy®, which appears exclusively on public television stations across the United States and Canada. Follow Nancy’s Blog at NancyZieman.com/Blog and sign up to receive Nancy’s E-News for the latest news in Sewing, Quilting, & Creating.
Content in this feed is © copyright 2014 by Nancy Zieman and may not be republished without written permission. You’re welcome to forward the email to a friend or colleague but it’s not okay to add the RSS feed automatically as content on a blog or other website.


No comments have been added yet.
Nancy Zieman's Blog

- Nancy Zieman's profile
- 21 followers
Nancy Zieman isn't a Goodreads Author
(yet),
but they
do have a blog,
so here are some recent posts imported from
their feed.

