30-Minute WordPress Setup Guide
Article by Sam Glover from Lawyerist.com
We have called it “marketing malpractice” not to have a law firm website. That is because most people, whether they are potential clients or referral sources or networking contacts, will expect you to have one so they can look you up online before they contact you. If they don’t find a website, chances are good they will call someone else — someone who does have a decent-looking website.
If you do not have a website, you are probably missing out on clients, networking opportunities, and more. Although you’ll never know unless you get with the program and get yourself a website.
Fortunately, getting a website is really cheap and really simple. This tutorial will walk you through setting up a website using WordPress, the most-popular content-management system (read: a website you can easily edit yourself) around. It is free and open source, and it powers everything from Lawyerist and our Sites network of websites to some of the world’s biggest websites.
All you need to get started is an internet connection and a credit or debit card. The total cost is less than $5.
Sign up for shared hosting and get a domain name
Difficulty: Piece of cake.
There are many options for shared hosting. We recommend going with one we have used before, that comes with good support, and that is a great deal: HostGator.
To sign up for shared hosting, visit HostGator and sign up for the Hatchling Plan. You can buy three years up front and get a great deal, but I think it’s a good idea to start out with a month-to-month plan to get started, and commit to a longer term, lower-priced package once your website is up and running.
Once you click the ORDER NOW button, you can pick a domain name. (Use the option on the left, which is selected by default.)
Choosing a domain name is important. Good domain names contain keywords relevant to your practice, use the .com top-level domain (as opposed to .net, .us, etc.), are short (10 characters or less), and are easy to tell someone over the phone. No hyphens, either.
If that gets your head spinning, just go with the name of your firm. If you can get a great domain name, that’s great, but there is a lot more to good search-engine optimization (SEO) than a domain name. Convenience is worth a lot, too; it gets tiring spelling out your email address military-style (“Charlie Tango Foxtrot law firm dot com”) a dozen times a day.
When you have picked your domain name, go ahead and check out. You should get a confirmation email shortly after completing the payment process with the information you will need to set up WordPress.
If you already have a domain name, you will need to use the box on the right, then forward your nameservers after you complete the setup process. To do this, go to the place where you bought your domain name — try GoDaddy if you aren’t sure — and set your nameservers to ns1.hostgator.com and ns2.hostgator.com. Follow GoDaddy’s and select the “I have specific nameservers for my domains” option. You will also need to transfer your email to your new server. How you do this depends on how you use email; you should contact HostGator or get help in the Labbefore you forward your nameservers.
Install WordPress
Difficulty: Still really easy.
Follow the link in the email you received from HostGator to your control panel. This is the central control panel for your hosting account, which lets you set up email accounts, upload and download files, and much more. For now, find the Fantastico De Luxe icon and click it.

Then, click on WordPress in the sidebar under Blogs, then on New Installation.
Here is what goes in each box:
Installation location
Install on domain. The domain you just registered.
Install in directory. Leave blank.
Admin access data
Administrator username. Whatever you want to use to log into your website.
Password. Pick a password.
Base configuration
Admin nickname. Put your name here as you want it to appear on the site.
Admin e-mail. Your email address.
Site name. The name of your website. For now, you can just use your firm name.
Description. You can leave this blank for now, or insert your firm’s slogan, if it has one.
Once you have filled in all the fields, click the Install WordPress button. On the next screen, you will get the address to log in to your new WordPress website! Bookmark the address, then click the link and log in.
Your new WordPress website is up and running! (Check your watch — did it take more than 30 minutes?) Be honest, you thought that was going to be a lot harder, didn’t you?
Of course, a blank WordPress install is not much use as your website, so let’s get it cleaned up, configured, and start adding content.
Configure WordPress
Difficulty: Like taking candy from a baby.
Now that you have WordPress installed, you should tweak the settings.
To make these configuration tweaks, you need to be logged into the WordPress Dashboard, the “backend” of your new site. The address is usually http://yourdomain.com/wp-admin/ (replace yourdomain with the domain name you registered), and you should have bookmarked it a moment ago.
Here are some of the things I do to configure a new WordPress install:
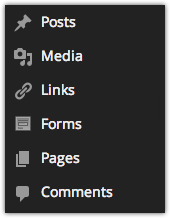
1. Delete default posts. WordPress helpfully starts you out with a Hello World post. Click on Posts in the WordPress Dashboard sidebar and then on the Trashlink under the default post (the Trash link only shows up when you hover the mouse cursor over the post name).
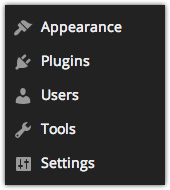 2. Modify the default settings. Click on Settings in the sidebar. Under General, update the Timezone to yours. This is also the place to update the Site Title andTagline if you need to.
3. Under Writing Settings, enable XML-RPC under Remote Publishing. (Make sure the Atom Publishing Protocol is enabled, too.)
4. Under Reading Settings, you can decide whether you want the front page of your website to be a static page or to show your latest posts. (A static page is usually a good idea for law firm websites.)
5. Under Permalink Settings, select Custom Structure under Common settings, and paste this into the empty field: /%postname%/
That takes care of the basics. However, you are not quite done. First, we will install a few plugins to trick out your new website. Then, you can make it pretty.
Install and Configure Plugins
Difficulty: Slightly less easy, but still easy.
One of the reasons WordPress is so popular is that it is so extensible. There are thousands of plugins that add features and functionality, and the vast majority of them are free.
Installing plugins in WordPress is a piece of cake. Just go to Plugins in the WordPress Dashboard sidebar and click on Add New. Use the search field to look for each of the following plugins and install each one by clicking Install Now:
- Broken Link Checker. This plugin will tell you if you have any broken links on your site and allow you to fix the links from a central dashboard.
- WordPress SEO by Yoast. This plugin will take care of most of the easy SEO settings, give you access to more-advanced SEO tools, if you need them.
- Jetpack. This Swiss-Army-Knife plugin from WordPress contains a bunch of great modules, including basic analytics, Markdown support, email subscriptions, social-media sharing buttons, better comments, and much more. (In order to speed up your site, deactivate any modules you do not need or want.)
- iThemes Security. This plugin will help “harden” your WordPress install to keep it safe from hackers and malicious code.
After you install each plugin, go ahead and click the Activate Plugin link on the next page. Broken Link Checker and WordPress SEO will start working without any additional steps, but the rest take a little more work.
Jetpack
Being from WordPress, Jetpack is a user-friendly plugin. Sign into WordPress.com as directed, and you will get to use all the features, including site stats. To activate a module, click the Activate button (some will be activated by default). To deactivate modules, click the Learn More button on any module and then click the Deactivatebutton.
Here are the modules I would activate for a new site:
- Publicize
- WordPress.com Stats
- Jetpack Comments
- Subscriptions
- Sharing
- Related Posts
- Contact Form
Read full article on Lawyerist.com
The post 30-Minute WordPress Setup Guide has been shared by ceo-book.com.