
Caturday Art: The Touchup Edition
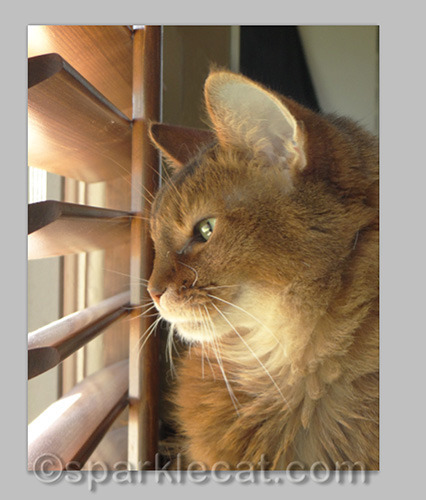
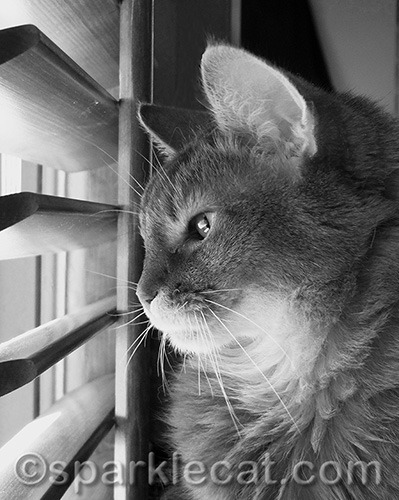
Here is a profile of me looking out the master bathroom window.
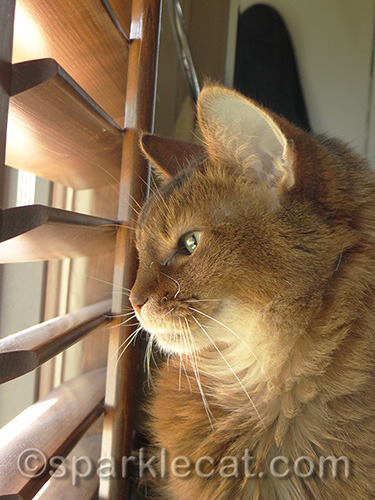
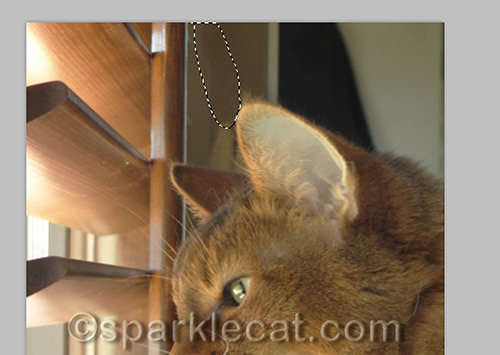
It’s a nice enough photo of me, but a few touchups could make it look lots better. The whole purpose of this week’s tutorial is to point out how making small changes to a photo can greatly enhance its quality. Making these changes before getting creative with your photo will make it look more like a work of art. Think like a painter, for example: if you were going to interpret this photo, you wouldn’t copy it exactly in oils or watercolor. You would make the photo straighter, and you would leave out distracting elements, like the silver hand towel ring over my ear.
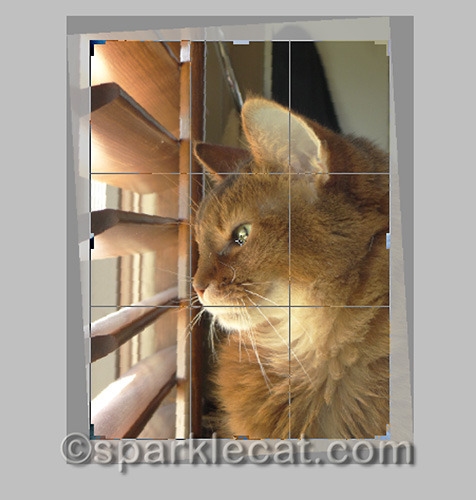
First up is straightening and cropping the photo. In addition to straightening the photo, my human also got rid of a little bit of the photo at the top and bottom — it makes the eye focus more on me, the subject of the picture.
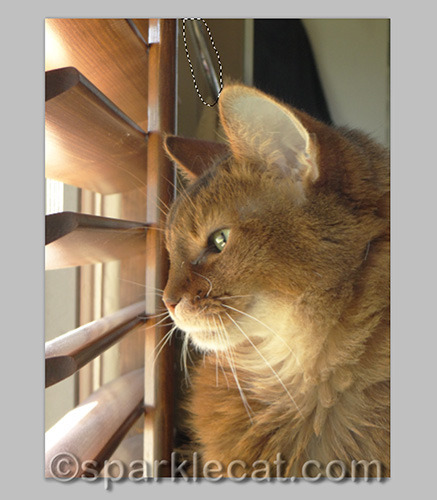
Then she took the Lasso Tool (L is the keyboard shortcut in Photoshop) and drew a close line around the distracting towel ring. But getting rid of it actually took a little work.
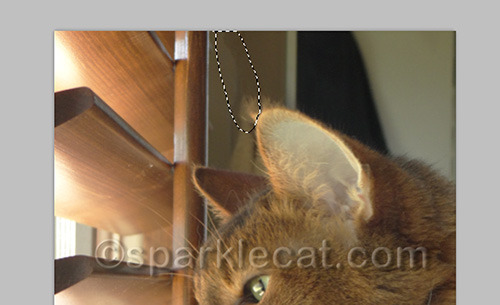
She tried going up to the top menu and clicking on Edit->Fill and using the Content-Aware option, but this is what she got — extra ear fluff that I don’t have! So she used the Clone Stamp tool instead (keyboard shortcut S) to copy and paste the background over the towel ring.
That worked a lot better. She also wound up using the clone stamp to get rid of the yellow hand towel. She left the black towel in the background because it wasn’t as distracting, and it would have been a lot of work to remove — more work than was really necessary.
This is what she had so far. As you can see, the photo is a little on the yellow side. My human does not know why, but she has a white balance problem in our house! Nearly everywhere else she takes photos, they look closer to normal, but here, the pictures almost always have a yellow cast, no matter which setting she uses. So she does a lot of color correcting to get rid of the yellow cast. To do this, she uses Color Balance and Curves, which are found in the Adjustments Panel.
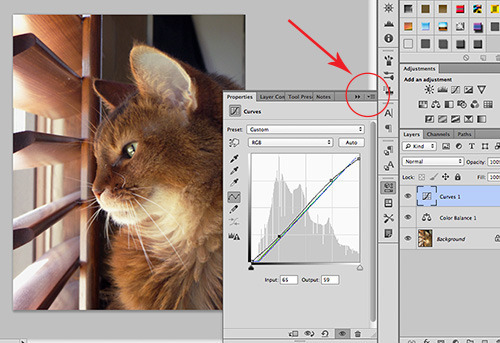
First she sucks some of the yellow out in Color Balance, and then goes to Curves. She has a Curves shortcut — first she goes to flyout menu on the far right hand side of the Curves window (where you see the red circle) and goes to Auto Options. That gives you a choice of several automatic adjustments. She picks the one that comes closest to what she wants and then finishes making adjustments manually.
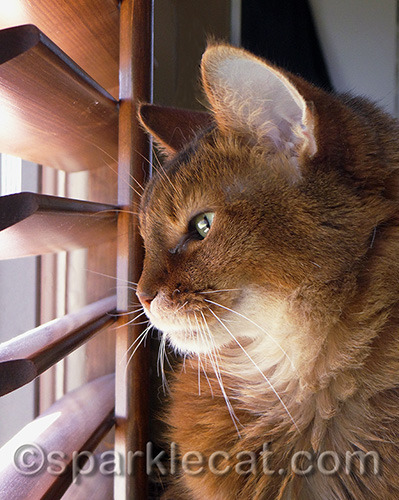
This may sound like a lot of work, but as you can see, the result is worth it. (Did you notice that my human also took out my curly whisker? She thought it was another distracting element.) The photo wound up looking so nice that my human left it like this, without putting any filters on it… although she also made a black and white version, which you can see below.
The point is, when you have a nice photo, why not take the time to make it the best it can be? Especially if you are going to make it into art! Most of these adjustments can be done in Photoshop Elements and other photo editing software programs.
Incidentally, I call this “Photoshop for good, not evil.” Yes, Photoshop can be used to make models look too thin and perfect, but it can also be used to make good photos look really nice!
For more Caturday Art, visit Athena!
* * *
Having problems with your human or the other cats in your house? As the internet’s “Dear Abby With Claws,” I have answers to many annoying problems in my two award-winning books! Visit my author’s page on Amazon to buy one or both of my awesome Dear Sparkle books!


Sparkle the Designer Cat's Blog
- Sparkle the Designer Cat's profile
- 1 follower

