
Caturday Art: The Arty Graycie Edition
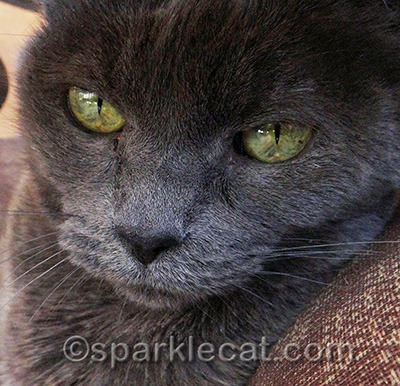
Remember this photo of Grayce from my human’s BlogPaws visit to the Katnip Lounge crew? My human really liked it, and as she does with so many things she likes, she decided to mess with it. First, in Photoshop, she removed some of the distracting elements in the upper left hand side of the photo. Then she evened out the tone between Grayce’s darker forehead and her lighter muzzle. After that, she used some of the elements of the YouTube video she mentions at the beginning of my “Sketch and Paint” Caturday Art post. But of course she did not follow the instructions exactly.
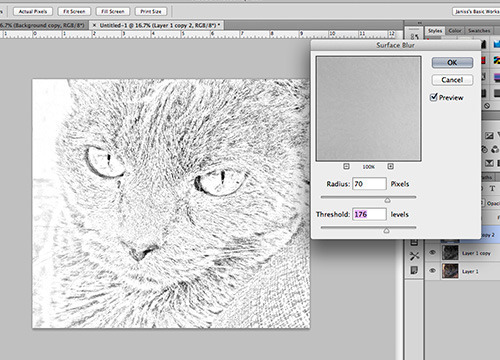
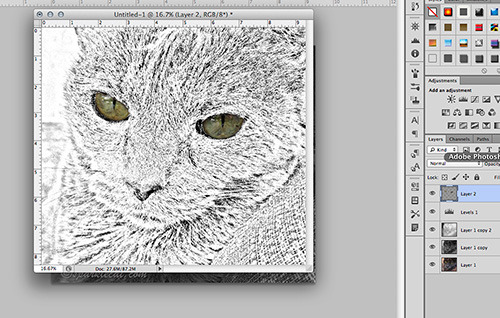
She did follow the instructions up to the part where you are supposed to add the Gaussian Blur filter. But she used a different filter this time — the Surface Blur filter. She felt it got a sketchier effect on this particular photograph.
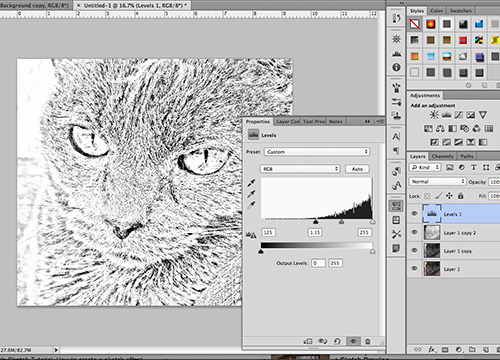
Then to make the sketch effect darker and more defined, she used the levels adjustment (you find it when you click on the little black and white disk at the bottom of the layers panel. When you click, there’s a drop down menu and Levels is one of the choices.
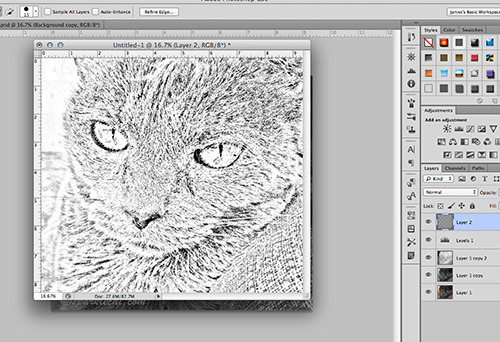
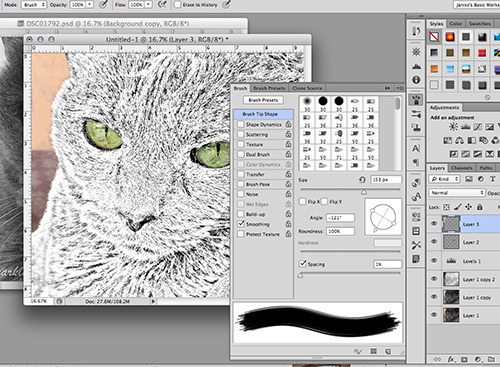
Of course, she could not just leave Grayce like that. I don’t know if you can tell in the above screen grab, but she used the Quick Selection tool (hit W on your keyboard, or it’s on the left hand side menu) to select Grayce’s eyes. Then she copied them. When she did this, she was on the bottom, color layer. Then, you can see above, she had created an empty layer on top of the other layers. She pasted the copied eyes on this layer.
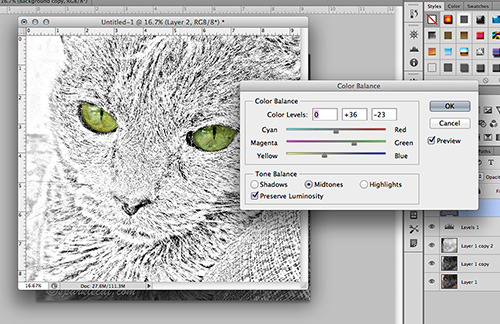
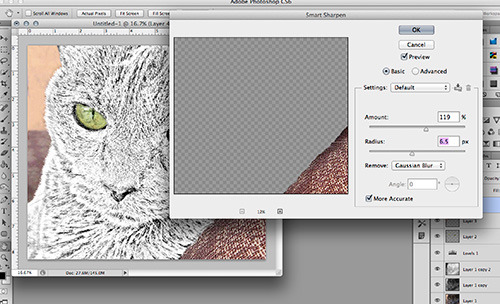
Well, doesn’t that look dark and creepy! Of course there was more to do, but my human just wanted to make the adjustments on the eye layer and leave the others alone. So she went to top menu of Photoshop to the Image adjustments to do the single layer changes. Instead of explaining where you find them, I figured I would just show you the path below.

Using these adjustments, she lightened Grayce’s eyes and made them more green.
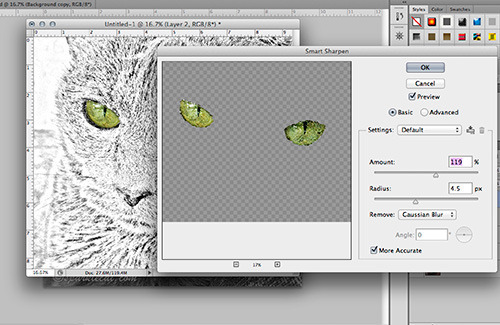
Then she added some sharpening to make them less realistic and more artistic.
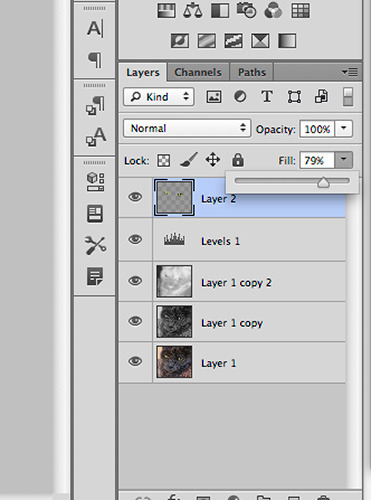
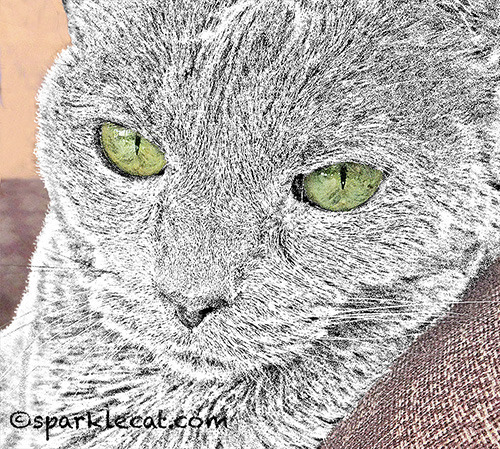
She also dialed down the Fill on this layer. It gave a better effect than lowering the Opacity.
My human liked this effect enough that she repeated it with the background (minus the sharpening). On the layer she pasted this background, she also used the Erase trick from another tutorial to draw in Grayce’s fur on the edges.
Then she did the same thing with the part of the chair that showed up in the foreground — but this time she did sharpen it along with lightening it.
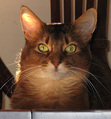
And this is the final picture:
Incidentally, when you are done and you want to combine the layers to make the file smaller (leaving the layers makes the file lots bigger), in this case you want to “Flatten” the image. At the far right hand side of the Layers, Channels and Paths tab is a flyout menu where you will find it. You have the choice of either Merging the layers or “Flattening” them. In this case (but not always) Merging darkens the picture and does things you don’t want, while Flattening keeps the look.
Don’t be afraid to play around with any of the effects in these tutorials! Just remember to make a duplicate of your picture and experiment on the duplicate. You don’t have to follow the instructions exactly, either. Mess around and see what happens!
* * *
Having problems with your human or the other cats in your house? As the internet’s “Dear Abby With Claws,” I have answers to many annoying problems in my two award-winning books! Visit my author’s page on Amazon to buy one or both of my awesome Dear Sparkle books!


Sparkle the Designer Cat's Blog
- Sparkle the Designer Cat's profile
- 1 follower

