How to Launch Your Own Blog in Five Easy Steps

Photo Credit: Pörrö via Compfight cc
I hear these words often,
I would love to start a blog, but I don’t know where to begin. It looks too hard and I’m not technical enough to get started.
I’m excited to walk you through the process. We’ll be walking through a one-click installation through Bluehost, the host I recommend. Click here to get started.
So many people have stories to tell. Whether you want to share your recipes with the world, chronicle your new life as a minimalist (Okay, maybe that’s my dream), or take others on your writing journey, others are waiting for you to get started.
Here are a few more ideas:
Share inspirational stories from others
Start a blog focusing on prayer
Maybe you want to chronicle your weight loss journey
Overcome something huge? Share it with others
If you really want to start a blog, you can make it happen, and it doesn’t have to be as hard as you think it is.
I’m breaking down each step into terms you can understand, not words you need a technical dictionary for.
Enjoy this simple but thorough step-by-step solution to launching your own blog.
Let’s get started!
Let’s get one thing straight: I’m not saying blogging is easy. It can be a lot of work. If you’re not ready for it, I’m not sure starting a blog is for you. But if you are ready and you know you have something to offer, then a blog is just what you need.
When it comes to blogging, I’m a huge advocate for WordPress. As someone who works in website development, it’s the only option I choose, and all my clients have been extremely happy with this choice. With that said, everything I’m about to tell you is based on launching a WordPress blog.
Ready. Set. Go.
Though I’ll provide step-by-step images, if you’d rather follow along with the video tutorial, you can do so above.
Step One: Set Up a Host
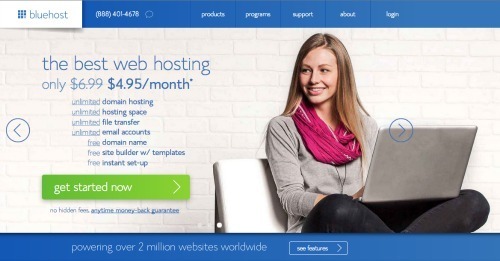
I’ve been using Bluehost for years.
What is hosting? It means your blog needs a home – a place to live. Just like you’ve got to pay the rent or the mortgate to keep a roof over your head, you have to do the same with blog hosting. Don’t worry, though. Bluehost is a great landlord.
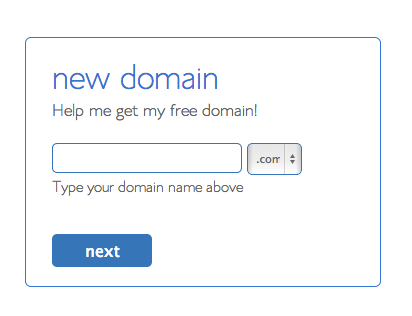
Step Two: Get a Domain Name
Now that you’re renting the “house” from Bluehost, you need to let your friends and family know what the address is so they can send you a housewarming present. This is what your domain is for. It’s your address. When you sign up for hosting with Bluehost, you get to register your domain free. (affiliate link)
Select your domain name carefully.
Here’s what NOT to do: Don’t buy your domain name elsewhere, such as Godaddy or Host Gator, then host it somewhere else. This will set you up for a big headache, especially if you’re not tech savvy. Your domain name is so important. Choose wisely. Here are some tips for choosing the perfect domain:
Never use hyphens (e.g. “sundijo-graham.com”). Hyphenated urls are hard to remember, and the search engines (Google, Yahoo, Bing) don’t like them.
Don’t use numbers (e.g. if your website is thebestrecipes4you, when you tell someone the address, unless you explain the difference in the “4″ and the “four”, they won’t know. Again, it opens the door for confusion.
Keep it short (two words or less is ideal). I learned a hard lesson from this when I created my marketing company, thumbprintmarketinggroup.com. Try writing that out and putting it on a business card. Lesson learned.
Use easy to spell words . If your name isn’t easy to spell, I don’t recommend using it for your domain. Consider using a shortened version, your last name, your middle name, etc.
Make it search-friendly. For example, WeightLossTips.com is a blog about weight loss tips. You guessed it. A LOT of people are searching for a topic like this.
Now that you have your new domain (address), let’s move onto the next step.
Step Three: Install WordPress
Bluehost makes this super easy. Without these simple steps, you’d need to know “Techy” terms.

Select the name of the site you want to install, which in this case was wordpressbysj.com. After you follow those few steps, the screen will let you know your Mojo account is loading. You don’t need to know anything beyond that for the moment.
An error message will pop up. Don’t panic, this is normal for a new blog. Click the “Oops. Looks like something already exists there. I understand that continuing will overwrite the files.”
When the next screen comes up, click “I have read the terms and conditions.” Don’t worry about doing anything with the advanced options button.
Your new URL will show up. Click on it to open a new window where you’ll see the option to log into WordPress. Enter the information given to you earlier.
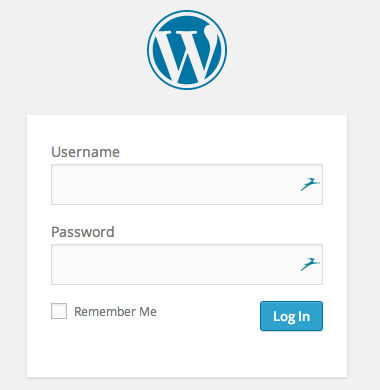
Save your password if you don’t feel like entering it each time.
Now we’re ready for step four.
Step Four: Write Your First Blog Post
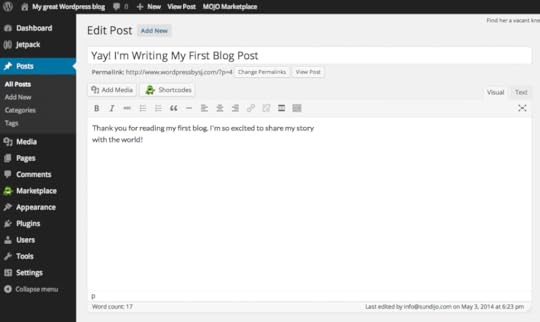
This is where the magic happens. Select Posts on the left-hand side of the screen, then add new.
In the new post screen, enter the title of your blog post. Our sample title is, “Yay! I’m Writing My First Blog Post”.
Here’s where the magic happens.
Now it’s time to write your story. I wrote a little blurb for you. Hit the blue publish button on the right and the world is ready to see your magic.
Step Five: Design Your Blog
Here’s where it can be fun, or scary. But really, don’t let it scare you.
There are so many WordPress themes available for whatever road you’re headed on. If you want to focus on writing, there are themes specifically for that. If you want to share your recipes with the world, the possibilities are endless.
The theme I use is called Tribe Theme, created for writers who want to be minimal and focus on their content. I love it. (No, I’m not getting paid to say that.) The cost is simple as well.
If you’re working with a higher budget, consider the net Get Noticed theme from Michael Hyatt. I installed it for a client recently and love it.
Mojo Themes is a great place to find the perfect theme as well. For example, if you’re a food blogger, search “food themes” and you can see the variety of options available. I promise you’ll find something you’re happy with. I did that search for you here.
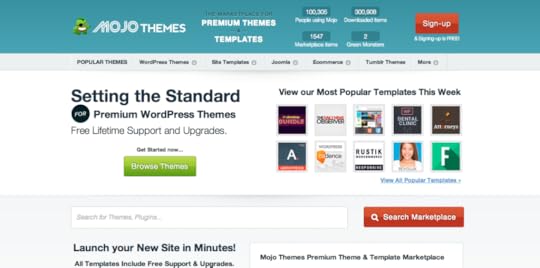
Mojo Themes offers a wide variety available for everyone.
A Few Extras
Here are a few resources to help you along the way.
WordPress Help - There is a lot to learn about WordPress, I know. Don’t get overwhelmed. If you’re the tutorial type, then WP101.com is perfect for you. It’s full of step-by-step instructions to take your WordPress knowledge to the next level.
Website Development Help - Ready to take your website to the next level? Want to change your color scheme? Find the best WordPress theme to suit you? Tweak this and that on your current site? Shoot me an email. I’d love to help. Check out my company’s portfolio to see some of the web development work we’ve done in the past. We’ve built websites for clients, including restaurants, dentists, authors, and more.
Transferring a Domain - If you’re transferring your domain from one host to another, here’s a tutorial to make that a little easier for you:
Share Your Story With Me
Now that you have everything you need to start telling your story to the world, I want to hear it, too. Shoot me an email and let me know about your new blog.