
Caturday Art: The Sketch and Paint Edition
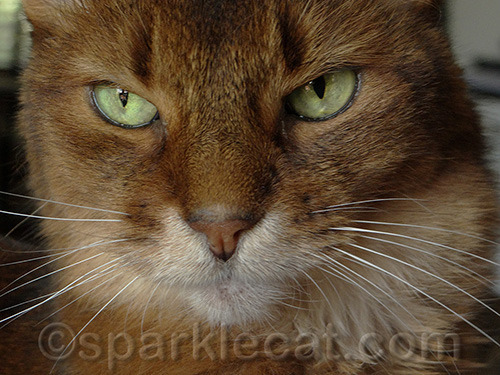
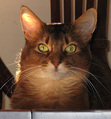
One of the effects my human plays around with a lot is creating a sketch and paint effect, as if someone had added detail on top of watercolor. She started off with this photo (completely unretouched here):
To make the sketch part, she used part of this old Photoshop video tutorial, but she made some changes.
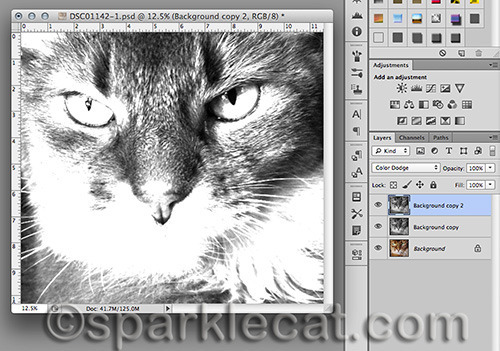
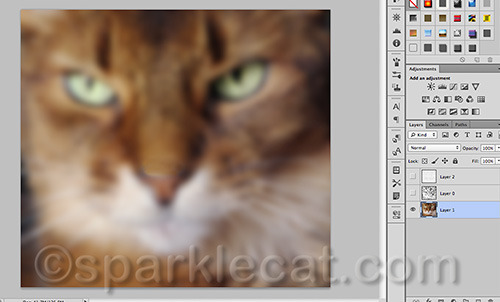
After cropping and color correcting the original photo, she duplicated (Command+J for Mac or Control+J for PC) the original layer and desaturated (Shift+Command+U for Mac or Shift+Control+U for PC) the copy layer. Then she duplicated the desaturated layer and switched the blend mode of the copy layer to Color Dodge, as you can see above. Then she inverted it (Command+I for Mac or Control+I for PC) and you’ll never guess what she got!
It didn’t stay that way for long, though. She went up to the menu at the top of Photoshop where it says Filter and went to Blur->Gaussian Blur. This is where my human and the tutorial started parting ways. The video’s instructor wanted a graphite look so she dialed the Gaussian Blur way up. My human wanted more of a sketch effect, so she kept it lower. This is one of those filters you have to play with because it is going to look different depending on the photo and what you are looking for. Then to bring out the detail of my fur, she went to the Levels Adjustment.
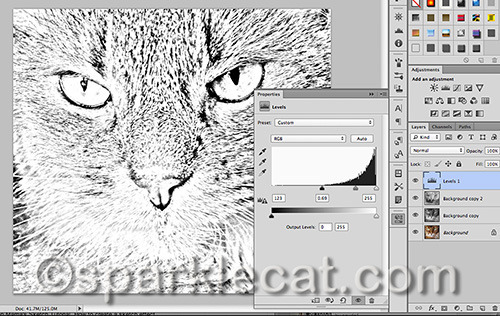
You can easily access the Adjustment layer by going to the bottom of the Layers panel and clicking on the black and white circle. The Adjustment Layer will be in the drop down menu. The instructor was looking for something different than my human with this step. My human was going for more detail, especially in my muzzle fur. Instead of brightening the picture like the instructor, she actually made the details darker.
Next, she duplicated the image the way it was done in the tutorial — she went to the Image tab in the top menu bar, went to Duplicate and when the window popped up, she ticked off the “Duplicate Merged Layers Only” box. This created another file, with just a single layer.

My human used the Unsharp Mask tool on this single-layer file. You find it by going to the Filter menu at the top of Photoshop, and finding Sharpen in the drop-down menu, then going to “Unsharp Mask.” Then you see a box open like the one above. This is another tool that you will have to eyeball to see what looks good to you. Along the way, my human also erased some sketchy detail in my eyes and nose so they looked cleaner.
Next, my human went to the original file she was working on and copied the original color layer only (she did that by selecting the whole image, highlighting the color layer and hitting Copy, not Copy Merged (Copy Merged copies all the layers). Then she created a new layer on the duplicate picture, pasted in the color image and moved it underneath the sketch.
She heavily blurred the color layer with Gaussian Blur, clicked okay, then clicked on the sketch layer to highlight it and changed its Blend Mode to Multiply. This made the color show through the sketch. To finish it off, she added a layer on top with a canvas texture and changed its mode to Multiply too, so that the texture would bleed through. This was the final result:
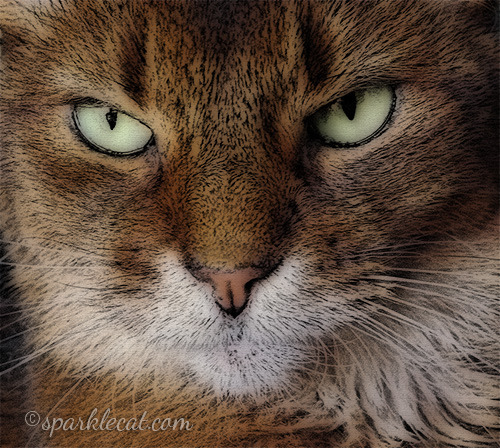
My human worked on a high resolution file, and you can really see the texture there, not so much on this smaller version. There are all sorts of things you can do with this — changing the Gaussian Blur will move the colors around, and you can use different textures to see how they look with your own image. Getting the sketch right is the real key.
For more Caturday Art, visit Athena!
* * *
Having problems with your human or the other cats in your house? As the internet’s “Dear Abby With Claws,” I have answers to many annoying problems in my two award-winning books! Visit my author’s page on Amazon to buy one or both of my awesome Dear Sparkle books!


Sparkle the Designer Cat's Blog
- Sparkle the Designer Cat's profile
- 1 follower

