
DIY Table Top Pressing Board
If there is one thing that your sewing room needs – besides a sewing machine – its a mini pressing board.
Now, I know you’re now going to think me an ironing obsessive, and if I’m honest with myself that is probably the case. But, one of the things that I have learnt about sewing is that pressing fabrics and seams can really and truly make a whole heap of difference to the finished makes. Not only will things look a lot sharper, but when the fabrics are smooth and wrinkle-free they fit together a whole lot better, making things much quicker in the long run.
Like most other folks, space is at something of a premium in my sewing studio – once the machine and overlocker are set out, threaded up and ready to go, there is little room for much else. Erecting the ironing board in the same room usually leaves me boxed into a corner -not much fun. Setting up the iron and board in the next room is usually the best option, but let’s be realistic, if your working on something that requires lots of little seams, like a patchwork quilt, are you honestly going to get up and walk to the next room to use the iron? I thought not. And, I’m pretty sure that are some kind of safety issues with leaving a hot iron unattended in the next room…especially if you have a pup (or Littles) roaming around. So, I decided to make a portable, mini ironing board, that will fit onto the workspace next to my machines – it is literally the best thing to happen to my sewing room since, well, I don’t know what! So, my friends, here is a step-by-step guide to making your own DIY Table Top Pressing Board…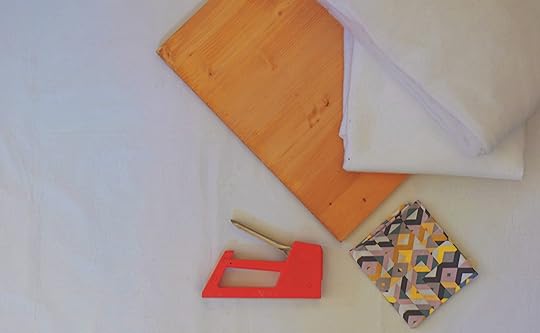 Grab your supplies…
A piece of wood measuring around 40cm square
High loft fleece wadding – like Vilene High Loft Volume Fleece 280
Synthetic insulating wadding – like Vilene Thermolam 272
Fabrics – two fat quarters will be plenty
Staple gun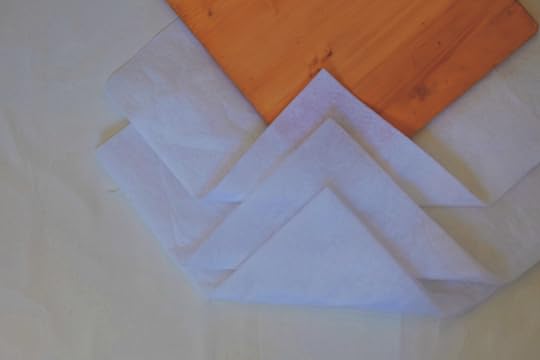 Cut a square of insulating wadding to 5cm larger than the wooden panel, then cut two sheets of the high loft fleece to the same measurements.
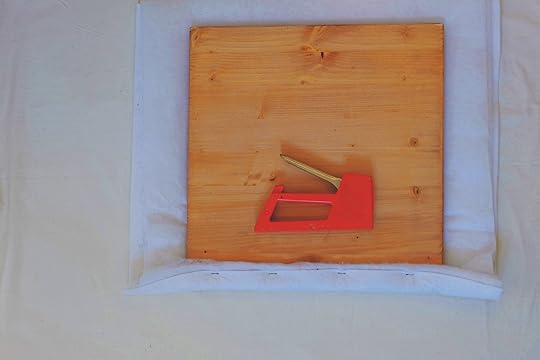 Lay out the square of the insulating wadding and position the two layers of high loft fleece on top of this, aligning all the edges. Position the wooden panel into the centre of the pile of waddings – once constructed the dense insulating fleece will be on the top. Starting on one edge pill the three layers of fleece and wadding over to the surface of the wood and use the staple gun to secure them in place. Once one side is complete, rotate the board and begin securing the opposite side, be sure to pull the layers of fleece taught to ensure a neat flat surface. Secure the two remaining side in turn using the exact same method, leaving the corners of the wadding unstapled.
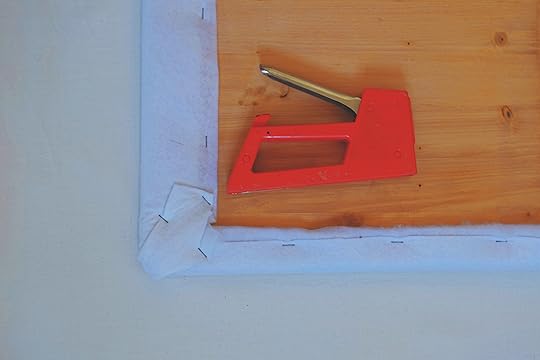 Once the wadding and fleece on all four sides has been stapled securely to the wood, neaten and secure the corners. Making the corners as neat and bulk-free as possible will help to give the pressing board a solid wobble-free surface to press fabrics on. Starting at the tip of the corner, carefully press the layers of the fleece and wadding flat over the corner and secure in place with a few staples. Repeat to create identical neat corners the whole way around the board.
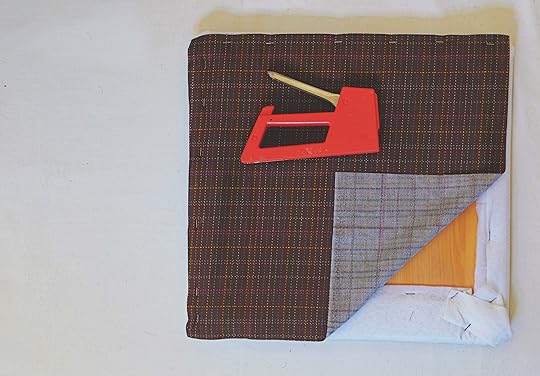 Trim one piece of fabric to 40cm square and position over the back of the board, to cover up the raw edges of the wadding and fleece. Work around using the staple gun to secure into place on all sides.
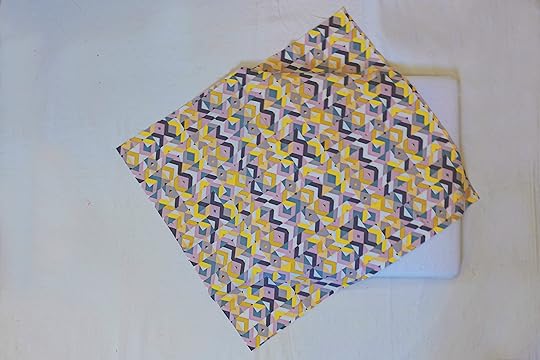 All that is left to do is to add the cover to the front of your pressing board – wonder why I said to get a piece of wood that is around 40cm square? Well, this is not only a great size to squeeze onto your work table next to your sewing machine, it is also the perfect size to allow you to create a cover with a fat quarter of fabric – now, if that’s not neat, I don’t know what is!
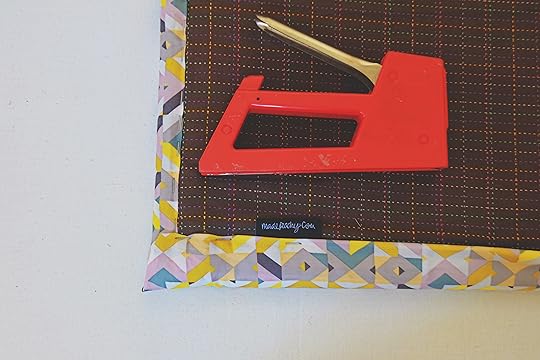 Place the fleece and wadding covered board onto the wrong side of the fat quarter, the fabric backed wood will be uppermost. Starting on one side begin bring the cover fabric around the board and fold the raw edges under by 1cm and secure into place. In the same way as securing the fleece and wadding, pull the fabric taut before securing and once one side is complete, secure the side that is directly opposite. Repeat to secure the fabrics on the two remaining side, tucking the raw edges under and pulling taut before securing. Once again leave the corners unsecured until the end and finish by neatly tucking the raw edges in and folding neat mitres into the corners before securing with staples.
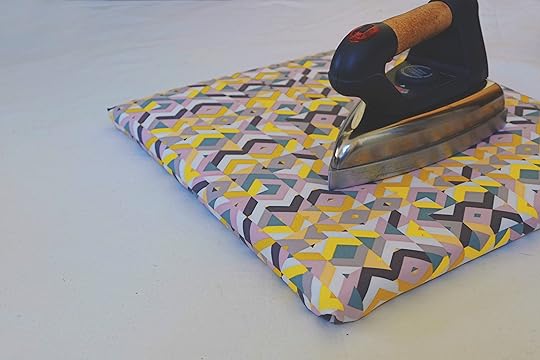 Tah Dah! Now you can position this with your iron next to your sewing machine and you can easily press all those seams without any fuss or bother! Unlike your real ironing board, this pressing board doesn’t have one of those neat rests on which to place your iron while it is hot but not in use. If you just leave your hot iron on the cotton cover of the pressing board while your working away at the sewing machine, this will scorch and ultimately burn the fabric and most like the board too…but let’s not find out! Stay safe by using a silicone iron rest to stow your iron when not in use – there are some pretty neat, cheap and colourful style out there which will help to keep you safe and burn-free!
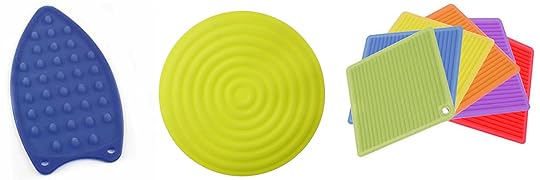
From Left to Right:
Blue Silicone Iron Rest • £2.60 Round Silicone Mat • £1.99 Deluxe Silicone Square Iron Pad • £8.99
Remember to check the temperature guidelines that come with silicone mats against the heat settings on your iron – safety first and all that!
I use this Table Top Pressing Board virtually every time I use my machine – it is so much easier than dragging out the bulky ironing board…in fact, my ironing board has seen a little too much battle action and is in despirate need of a new cover – so, I’ve even been using this on top of my ironing board when pressing small clothes & laundry items. And, because it’s small and fairly light-weight, it’s perfect to pack up to take to shows, workshops and sewing bees! In case you can’t tell, I love it – I hope that this will be a handy addition to your sewing rooms! Tell me, what is your most useful DIY addition to your sewing room?
The post DIY Table Top Pressing Board appeared first on Made Peachy.


