
Taking Photographs of Craft Projects For Your Blog or Online Store
This year, rather than setting resolutions I picked out a few things that I wanted to put more energy into – and coming in pretty high on that list was photography. To get that camera snap, snap, snapping! And, true to my word, I am spending more and more time behind the camera. It’s become part of my daily life, for work and for play. Even though we are only a couple of weeks into January, I’m really loving this new creative pursuit!
About eleventy billion years ago, armed with my Dad’s hand-me-down Fujica ST605 SLR I headed off to night school to learn a few tips about photography…basically I was a bit fed up with shooting off a whole roll of 35mm only to find that the photos were all underexposed, overexposed, blurry and just plain rubbish! I spent that entire summer wondering around in flared jeans, Chuck Taylors and band shirts snapping at everything in sight – before you start thinking that this makes me sound pretty cool, remember this was before the age of the Hipster so I’m pretty sure that I was just a dork – I had the time of my life, and managed to get some pretty great shots out of that mountain of film.
OK, so things have changed, the long lazy summer of being a teenager have sure gone, but so has shooting in film, with most of us working mainly with digital images on a daily basis. Last year I took a long overdue camera upgrade and signed up to a rad online photography class to get back up to speed and brush up on a few skills. And, boy am I ever glad I did that! Taking photographs is a lot of fun, and every shot you take you are able to learn a little bit more about photography – it doesn’t even feel like your practicing.
Attractive photography is becoming more important to people for so many different reasons – to be creative, to capture moments, to share experiences – in fact it is a must for all crafty folks, particularly if you share them on a blog or post them to your online store. Not only do you want to show your finished projects off in true style, but you might also want your reader to follow your ‘how to’ guide, buy the item from your online store or simply add it to their Pinterest board. It might seem like getting the perfect shot is a bit of a minefield, but by following these five simple rules, you will soon be on the road to success in no time.
Firstly, my friends, I’d like to introduce you to Lux - in her finest handknit alpaca dress - who will be my glamorous assistant!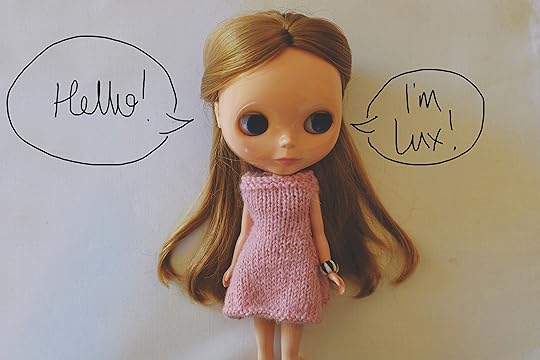 Now that we’re all acquainted, check out these Top Tips for Better Photography at Home!
Right Light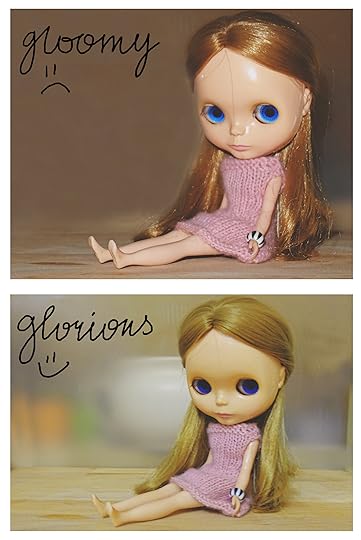
Lighting is one of the most important elements of photography. It is also one of the easiest things to get wrong. Professional photographers work with expensive lighting set up allowing them to have full control of the lighting in each of their shots. Replicating this at home doesn’t need to involve spending out on costly kits. Photographing in natural light is always a brilliant way to get great results. Aim to take your shots in the daytime, in a location where there is lots of natural light. Even if you complete your make in the evening, and are desperate to get your project on the blog, online or uploaded to your online store, avoid taking shots in the evenings or under electric lighting. Taking photographs in poor lighting will cause shadows and gloomy shots and you’ll notice the colours featured in your makes are dulled down. Many cameras have setting that you can adjust to accommodate overhead lights for evening photography, although you might still notice a yellowish wash to your shots. Where possible, selection your photography location based on the availability of good natural lighting, a clear counter top by a sunny kitchen window is a fantastic location and, if you are shooting multiple shots for the same post, try to take this photography consecutively, as this will help to create consistent lighting within the post.
Sharp Shots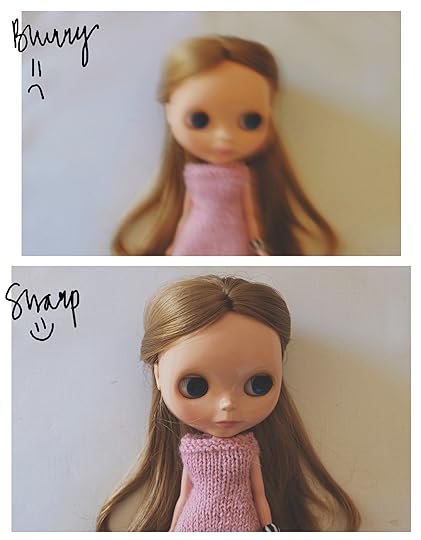 Blurred or out of focus shots are a big no-no. Getting to grips with your camera is a must. All cameras are different – you might be shooting with a fancy DSLR or even using a camera on your smart phone, but ensuring that the project is in sharp focus will instantly make a better picture. Familiarise yourself with the focus setting and try taking a few shots of your make, with a digital camera, check the image preview – are you happy that the main element of the make is in focus? If you can zoom in on the preview this will help you to pinpoint the area of focus and you can check that you are happy with it. Blurred shots can be easily reduced with the use of a tripod. If you are still experiencing some blur to the image, try using the self timer feature on your camera, if it has one, once you have composed and prepared your shot. This will effectively take the photograph ‘hands-free’ meaning that you wont be touching the camera and adding any additional shake as the shot is being captured.
Clear Composition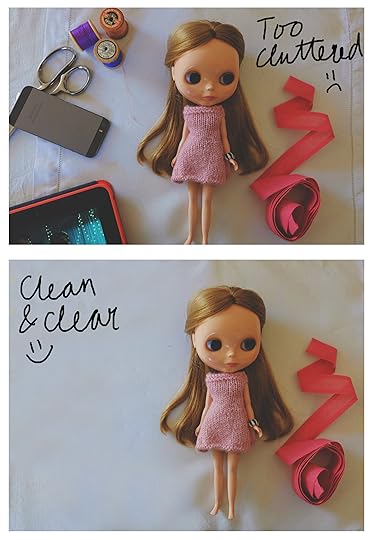 It can take years to master the art of styling the perfect shot. But, there are some basic rules that you can follow. Reduce clutter, remove any items that aren’t needed in the shot – no spare craft materials, your mug of coffee. That photobomb from your pet dog (yes, I’m looking at you Waffle) might seem cute but readers or shoppers can find this distracting – consider reshooting without this the distraction, you can always share in the pet photobomb shots somewhere else if you want to add a little personality to the shots! Consider the camera angle, some items look better when shot from above, others straight on, some look best with a Dutch Tilt (you know, that artistic positioning of the subject at a ‘jaunty’ angle.) Move around your project, looking at it though the camera viewfinder or on the camera screen, trying out different angles until you find one that suits the project best. Give your make enough room to breath – you can include some space around the shot, either keeping it even with the project centre stage, or off-set it to make use of some more dramatic negative space (like I’ve done here). Don’t be scared to crop in, but be careful to include all required elements, chopping off Lux’s toes here makes crop look unintentional and clumsy. If you are intending to take a range of shots of your finished make, work with a variety of shot styles, including ones that include the whole item and other that crop in really close on a single element – this is a great way to showcase any important detail or accents of the work.
Perfect Presentation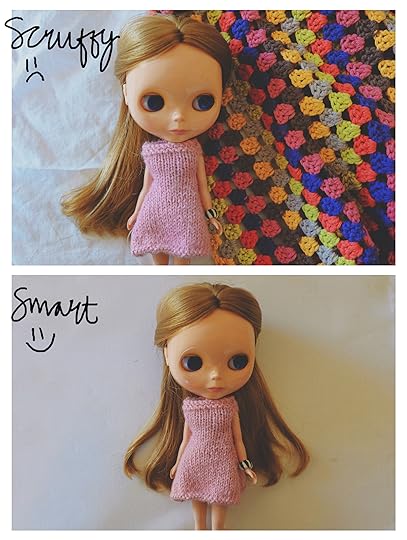 Similarly to composition, the way in which you present your project is key. Does it need ironing? Does the background fabric need ironing? Would it benefit from having any lint or fluff removed? Does it have smudges or finger smears that need to be taken care of? Where you shoot your projects is entirely up to you, but ensure that the surface is clean and – if it’s fabric – wrinkle free. Be aware of the colour or patterns on your surface, that wildy printed floral tablecloth might well be your pride and joy, but might create a distraction from the finished project if used in the shot. Try to pick neutral tones and plain surface for your backgrounds to allow your finished make to be really shown off in the shot. Aim to create a clear, smart background with your project positioned as you desire. Positioning props should always be the final stage of composing your shot, set out your make first and once you are happy with the position, composition, camera angle and lighting consider adding in any additional props. Work by moving your chosen props in and out of the frame at different positions to see the effects it creates. Remember, any props are simply an addition to the finished image, so you don’t need to include all of the item in the frame. Always remember, if a prop is distracting from you finished project, remove it!
Editing Shots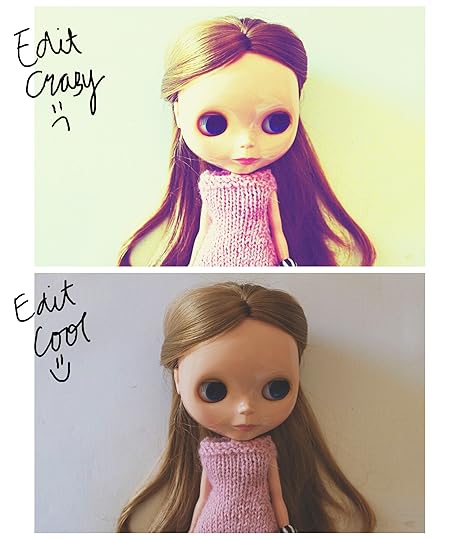 While using editing software is a great tool in perfecting the finish, you should use it with caution. If you are photographing something to sell, making too many after-shot edits can be misleading. Rather than relying on editing software to finish your photograph, think of it as a final polishing tool – removing a speck of dust that you didn’t spot on your lens rather than removing a whole line of wonky stitches from the front of a bag. Your camera might have a date and time function, make sure that you remove this setting when photographing items for your blog or store, while this is a handy setting for some forms of photography, it does give things a ‘crime scene’ feeling! If you use your editing software to add your blog name or even a caption, keep the font size and style consistent throughout your shots, this will help to create a recognisable brand for your blog, store and photographs. While adding in coloured text is tempting, sticking to black for light shots and white for dark shots will instantly give a professional finish to your work.
Of course, learning photography takes time and lots of practice, I’m finding that I’m learning new things each time I shoot something new, having these handy tips make a quick and easy check list for taking rad shots at home – so next time you dig your camera our give it a go and run through five points and see how you get on!
Have you got a Photography Top Tip? be sure to share it below, I’m always ready to brush up on my skills!
Happy Snapping!
The post Taking Photographs of Craft Projects For Your Blog or Online Store appeared first on Made Peachy.


