
Social Media Monday—Add a Custom Tab to Your Professional Facebook Page
by Edie Melson
 Facebook is a valuable tool when it comes to social media. BUT, it’s important to make sure those who follow you on one platform, can find you on the others. There are several ways to do this:Make sure your user name/profile name is the same or very similar.Keep your profile picture consistent. It doesn’t have to be the exact same pose, but make sure you are recognizable.Make sure your blog/website is linked on all of them.
Number three is the one I want to focus on today. I’m going to give you step-by-step instructions on how to add a custom tab to your professional Facebook page.
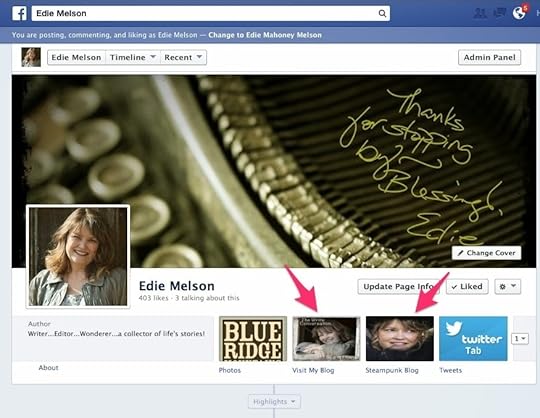
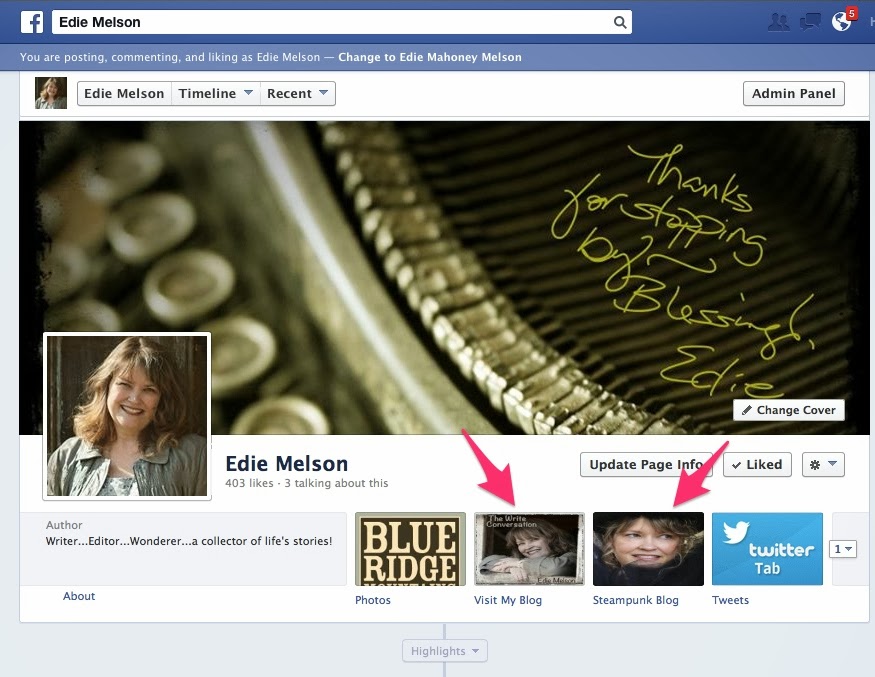
Above is a picture of my Facebook Page. The pink arrows point to the two tabs (boxes) that I linked to my blog sites. Unfortunately, FB doesn't make adding these custom tabs easy.
Step-by-step Directions for Adding Custom TabsHere is the link you need to go to to add these tabs:
https://www.facebook.com/iframehost?sk=app_208195102528120
Once there, click on SETTINGSChoose URLEnter the URL of your website or blog.Do NOT change any other default settings until you scroll down to the Change the Tab NameChange the Tab Name to either Visit My Blog, or your blog's title. On my tabs, the first one links to this blog, The Write Conversation. That's too long to fit under the tab so I used, VISIT MY BLOG. For my Steampunk blog, I abbreviated it. But it's important that EVERYTHING you want to say fits on ONLY one line under the image of the tab.Now Click on Change Tab Image and choose the image you want to use.Finally, Click save settings. Then scroll up and click Grant Permission to Application.Special Note: I had to go back and click save a couple of times on the Steampunk addition, so it may be necessary to play around with it a bit to get everything to show up correctly.
Now, once you've got the image set you're going to need to rearrange the order of your tabs.
Once again, Facebook seems to have made this as difficult as possible. The reason you want to rearrange the tabs is because when someone visits your FB page, only the first 4 tabs will show. If a visitor want to see more, they must click the arrow.
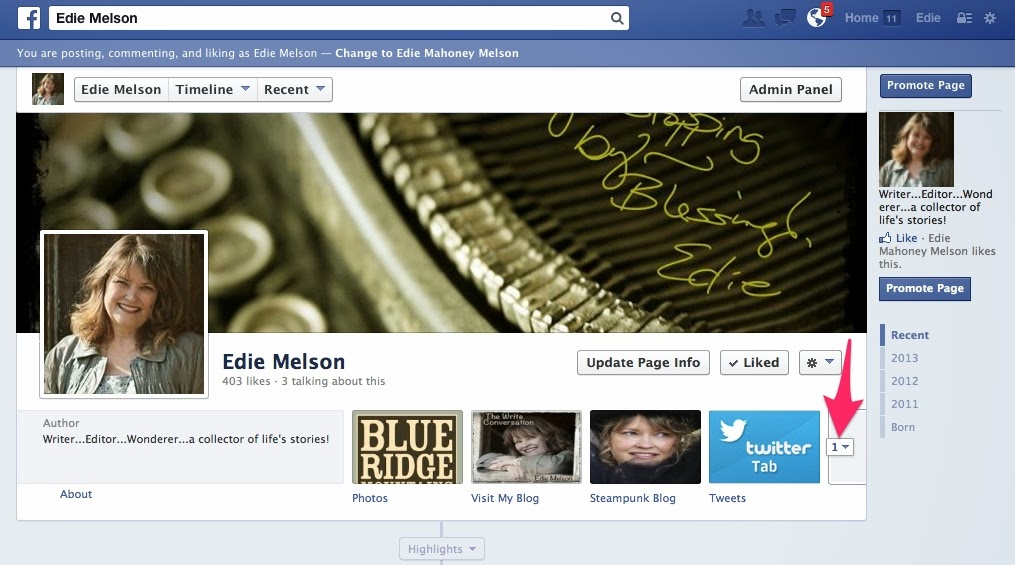
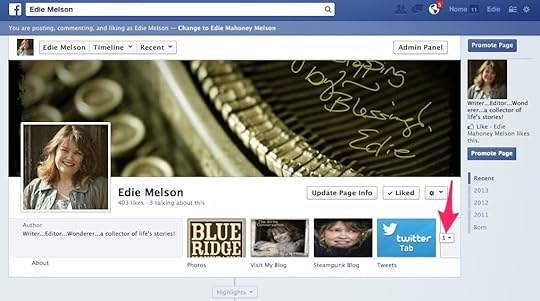 To change the order of your tabs, Click on the small box on the row of tabs. See the screenshot above, the pink arrow is pointing to the box (mine has a 1 in it).
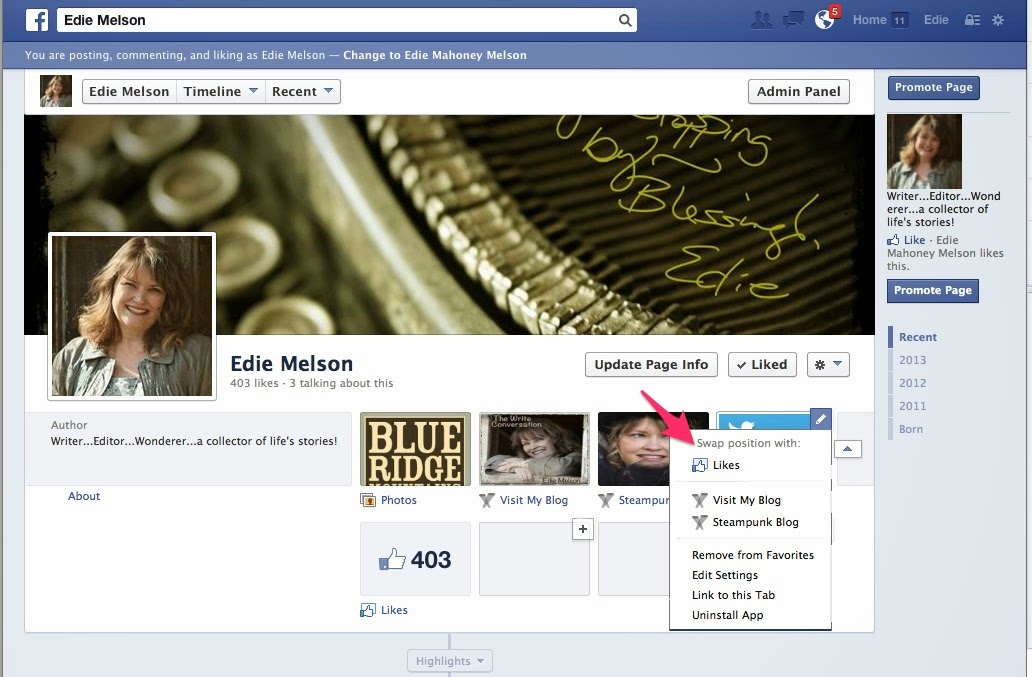
After you click that, you'll see both rows of possible tabs for your page. When you hover over a tab, a small pencil icon will appear in the upper right corner. (see screenshot below)
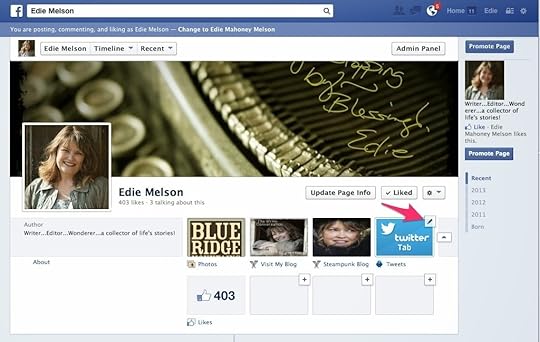
When you click that pencil icon, a drop-down menu will appear. You'll see the words, SWAP POSITIONS WITH. Choose the tab that's in the position where you want your new tab to be placed. (see screenshot below)
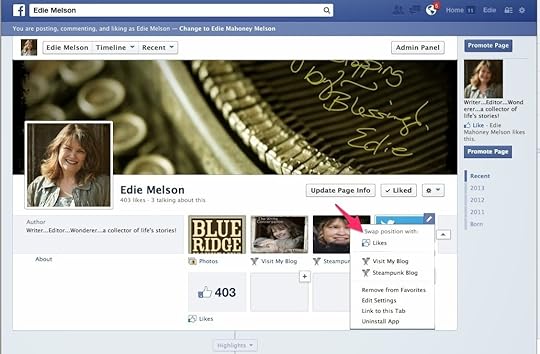
Special Note: The first tab is always photos. You can never its position.
I hope this helps. If you have any questions, be sure to post them in the comments section below.
Don't forget to join the conversation!Blessings,Edie
Tweetables:It's not always easy to customize your Facebook page. Social Media expert @EdieMelson shares the tips you need! (Click to Tweet)
Link your blog on your Facebook page by customizing your tabs. Social Media expert @EdieMelson shows you how. (Click to Tweet)
 Facebook is a valuable tool when it comes to social media. BUT, it’s important to make sure those who follow you on one platform, can find you on the others. There are several ways to do this:Make sure your user name/profile name is the same or very similar.Keep your profile picture consistent. It doesn’t have to be the exact same pose, but make sure you are recognizable.Make sure your blog/website is linked on all of them.
Number three is the one I want to focus on today. I’m going to give you step-by-step instructions on how to add a custom tab to your professional Facebook page.
Above is a picture of my Facebook Page. The pink arrows point to the two tabs (boxes) that I linked to my blog sites. Unfortunately, FB doesn't make adding these custom tabs easy.
Step-by-step Directions for Adding Custom TabsHere is the link you need to go to to add these tabs:
https://www.facebook.com/iframehost?sk=app_208195102528120
Once there, click on SETTINGSChoose URLEnter the URL of your website or blog.Do NOT change any other default settings until you scroll down to the Change the Tab NameChange the Tab Name to either Visit My Blog, or your blog's title. On my tabs, the first one links to this blog, The Write Conversation. That's too long to fit under the tab so I used, VISIT MY BLOG. For my Steampunk blog, I abbreviated it. But it's important that EVERYTHING you want to say fits on ONLY one line under the image of the tab.Now Click on Change Tab Image and choose the image you want to use.Finally, Click save settings. Then scroll up and click Grant Permission to Application.Special Note: I had to go back and click save a couple of times on the Steampunk addition, so it may be necessary to play around with it a bit to get everything to show up correctly.
Now, once you've got the image set you're going to need to rearrange the order of your tabs.
Once again, Facebook seems to have made this as difficult as possible. The reason you want to rearrange the tabs is because when someone visits your FB page, only the first 4 tabs will show. If a visitor want to see more, they must click the arrow.
 To change the order of your tabs, Click on the small box on the row of tabs. See the screenshot above, the pink arrow is pointing to the box (mine has a 1 in it).
After you click that, you'll see both rows of possible tabs for your page. When you hover over a tab, a small pencil icon will appear in the upper right corner. (see screenshot below)

When you click that pencil icon, a drop-down menu will appear. You'll see the words, SWAP POSITIONS WITH. Choose the tab that's in the position where you want your new tab to be placed. (see screenshot below)
Special Note: The first tab is always photos. You can never its position.
I hope this helps. If you have any questions, be sure to post them in the comments section below.
Don't forget to join the conversation!Blessings,Edie
Tweetables:It's not always easy to customize your Facebook page. Social Media expert @EdieMelson shares the tips you need! (Click to Tweet)
Link your blog on your Facebook page by customizing your tabs. Social Media expert @EdieMelson shows you how. (Click to Tweet)


No comments have been added yet.


