How to Make a Bottle Bloom into a Flower: Recycled Projects
Today's post is a special guest post written by my very creative brother, Jamie Langston. Jamie has joined our team. We'll be unveiling many cute coloring sheets for kids and lots of fun projects little boys will love. Welcome Jamie in the comments below the post.
Use your old plastic bottles to create a fun flower project for kids: Bottle Bloom
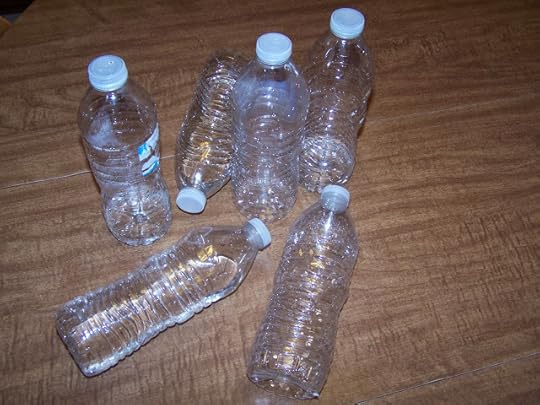
Wondering what to do with all those empty plastic bottles? Make them bloom into something new.
Looking for things to do with plastic bottles? Have you ever seen an old plastic water bottle bloom into a
beautiful flower? Take your recycled items to a new level, and give them new life with our fun, recycled project ideas for kids. Use this as a companion project for a science lesson on naming the parts of a plant.
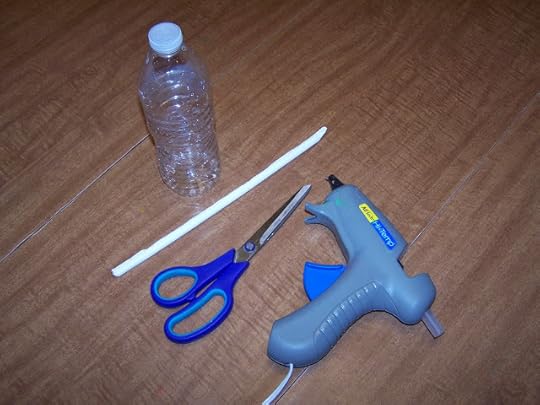
Supplies Needed to make your bottle bloom.
This is a fun way to turn those constantly piling up plastic bottles into a cute craft that anyone can make. All you need is a pair of
scissors, a glue gun, and a straw. Well, of course, you will need a bottle.
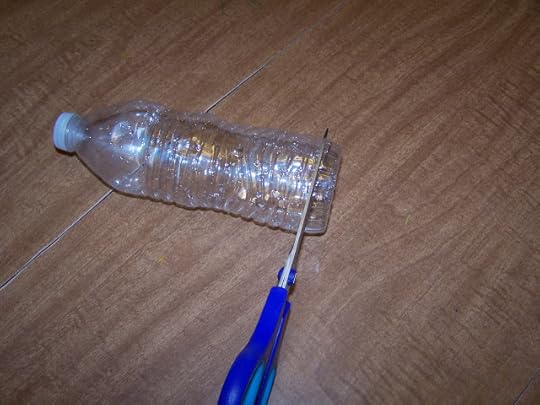
Cut the bottom off of the bottle.
How to make a flower from a plastic water bottle:
Cut the bottom of the bottle off near the end.
Carefully space and then cut out leaves from the remaining
bottle.
Use a cap full of glue to secure the straw in the bottle's
cap. You need to use a lot of glue to anchor the finished flower.
Now, glue the bottom of the bottle to the top of the straw.
Finish with your choice of paint. We chose water colors- not
the best coverage but an interesting look. If you want your paint finish to last use an acrylic or even spray paint made for plastics.
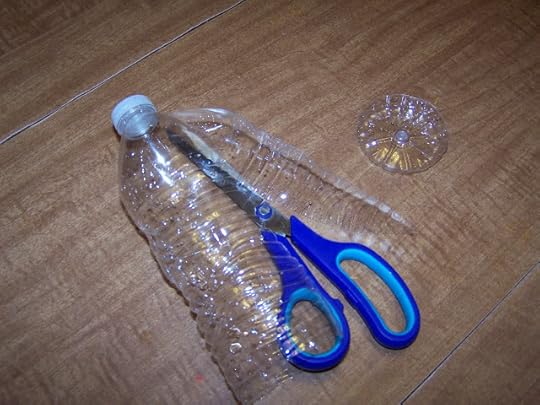
Cut the leaves from the bottle.

Be careful not to cut them all way off, leave the sides (leaves attached near the lid).
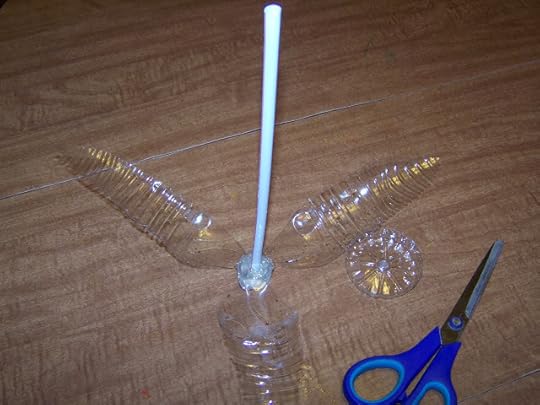
Attach the straw with lots of glue.
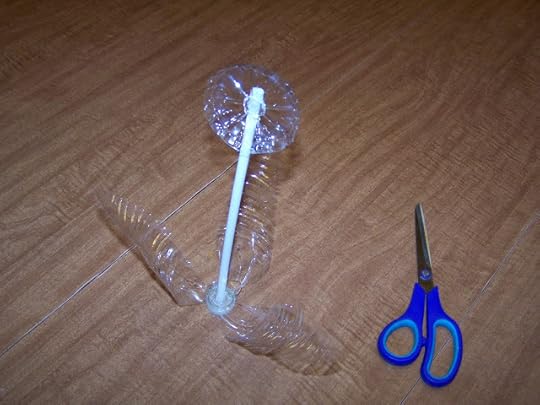
Glue bottom of the bottle to the other end of the straw.
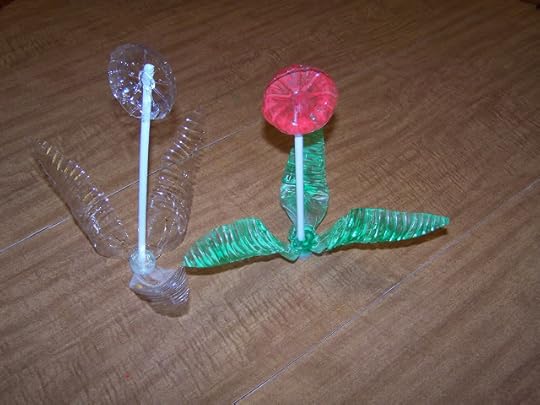
Make an entire flower patch in minutes!
Make a whole flower patch in just minutes!
Sign up for our free newsletter!

Sign up for our free newsletter!


Use your old plastic bottles to create a fun flower project for kids: Bottle Bloom

Wondering what to do with all those empty plastic bottles? Make them bloom into something new.
Looking for things to do with plastic bottles? Have you ever seen an old plastic water bottle bloom into a
beautiful flower? Take your recycled items to a new level, and give them new life with our fun, recycled project ideas for kids. Use this as a companion project for a science lesson on naming the parts of a plant.

Supplies Needed to make your bottle bloom.
This is a fun way to turn those constantly piling up plastic bottles into a cute craft that anyone can make. All you need is a pair of
scissors, a glue gun, and a straw. Well, of course, you will need a bottle.

Cut the bottom off of the bottle.
How to make a flower from a plastic water bottle:
Cut the bottom of the bottle off near the end.
Carefully space and then cut out leaves from the remaining
bottle.
Use a cap full of glue to secure the straw in the bottle's
cap. You need to use a lot of glue to anchor the finished flower.
Now, glue the bottom of the bottle to the top of the straw.
Finish with your choice of paint. We chose water colors- not
the best coverage but an interesting look. If you want your paint finish to last use an acrylic or even spray paint made for plastics.

Cut the leaves from the bottle.
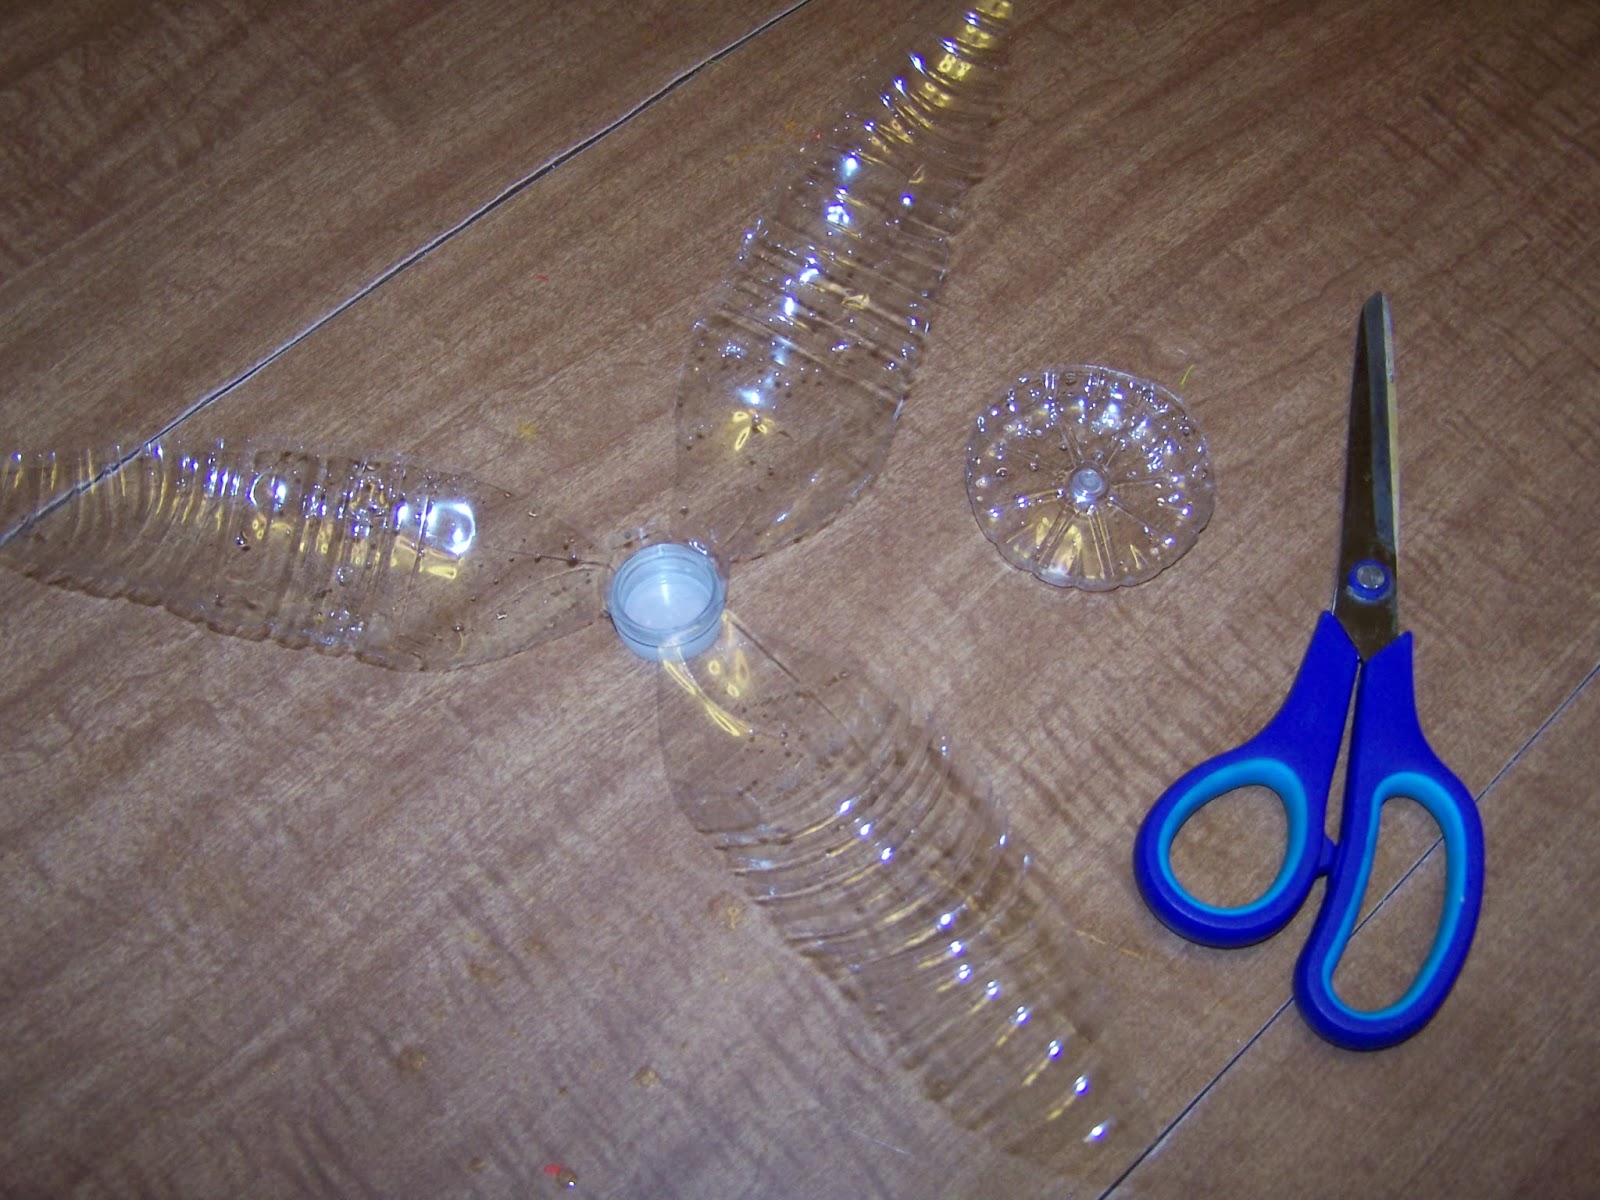
Be careful not to cut them all way off, leave the sides (leaves attached near the lid).

Attach the straw with lots of glue.

Glue bottom of the bottle to the other end of the straw.

Make an entire flower patch in minutes!
Make a whole flower patch in just minutes!
Sign up for our free newsletter!
Sign up for our free newsletter!


No comments have been added yet.