
How to Convert a Traditional Pinata into a Pull String Pinata
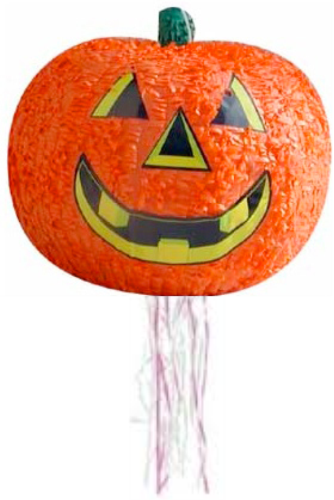 A DIY pull string pumpkin pinata. Sure, traditional pinatas are fun, but sometimes a pull string pinata - which breaks open by the simple pulling of a string - is much more suitable. For example, if you have young children who really can't bash a pinata - or who might bash themselves or someone else trying to...or if you're having an indoor party and don't want the contents of your home accidentally beaten, a pull string pinata is for you.
If you've never used a pull string pinata, here's how it works. Hang the pinata, then have the children, one by one, pull a single string off the bottom of the pinata. Most of the ribbons will just fall off, doing nothing to the pinata. But once one string (indistinguishable from the others) is pulled, a trap door in the pinata will open and all the candy will fall out.
Sometimes you can find ready made pull string pinatas, but often you have to convert traditional pinatas into pull string pinatas. In the past, I've purchased pinata conversion kits, but the truth is, it's really easy to make a DIY pull string pinata - you don't need a special kit. Here's how.
What You'll Need:
A pinta
Exacto knife or box cutter (you could use scissors, but it's more dangerous!)
Scissors
Curling ribbon
Transparent adhesive tape (the kind used for wrapping gifts)
Small piece of cardboard
Extra tissue paper in a matching color
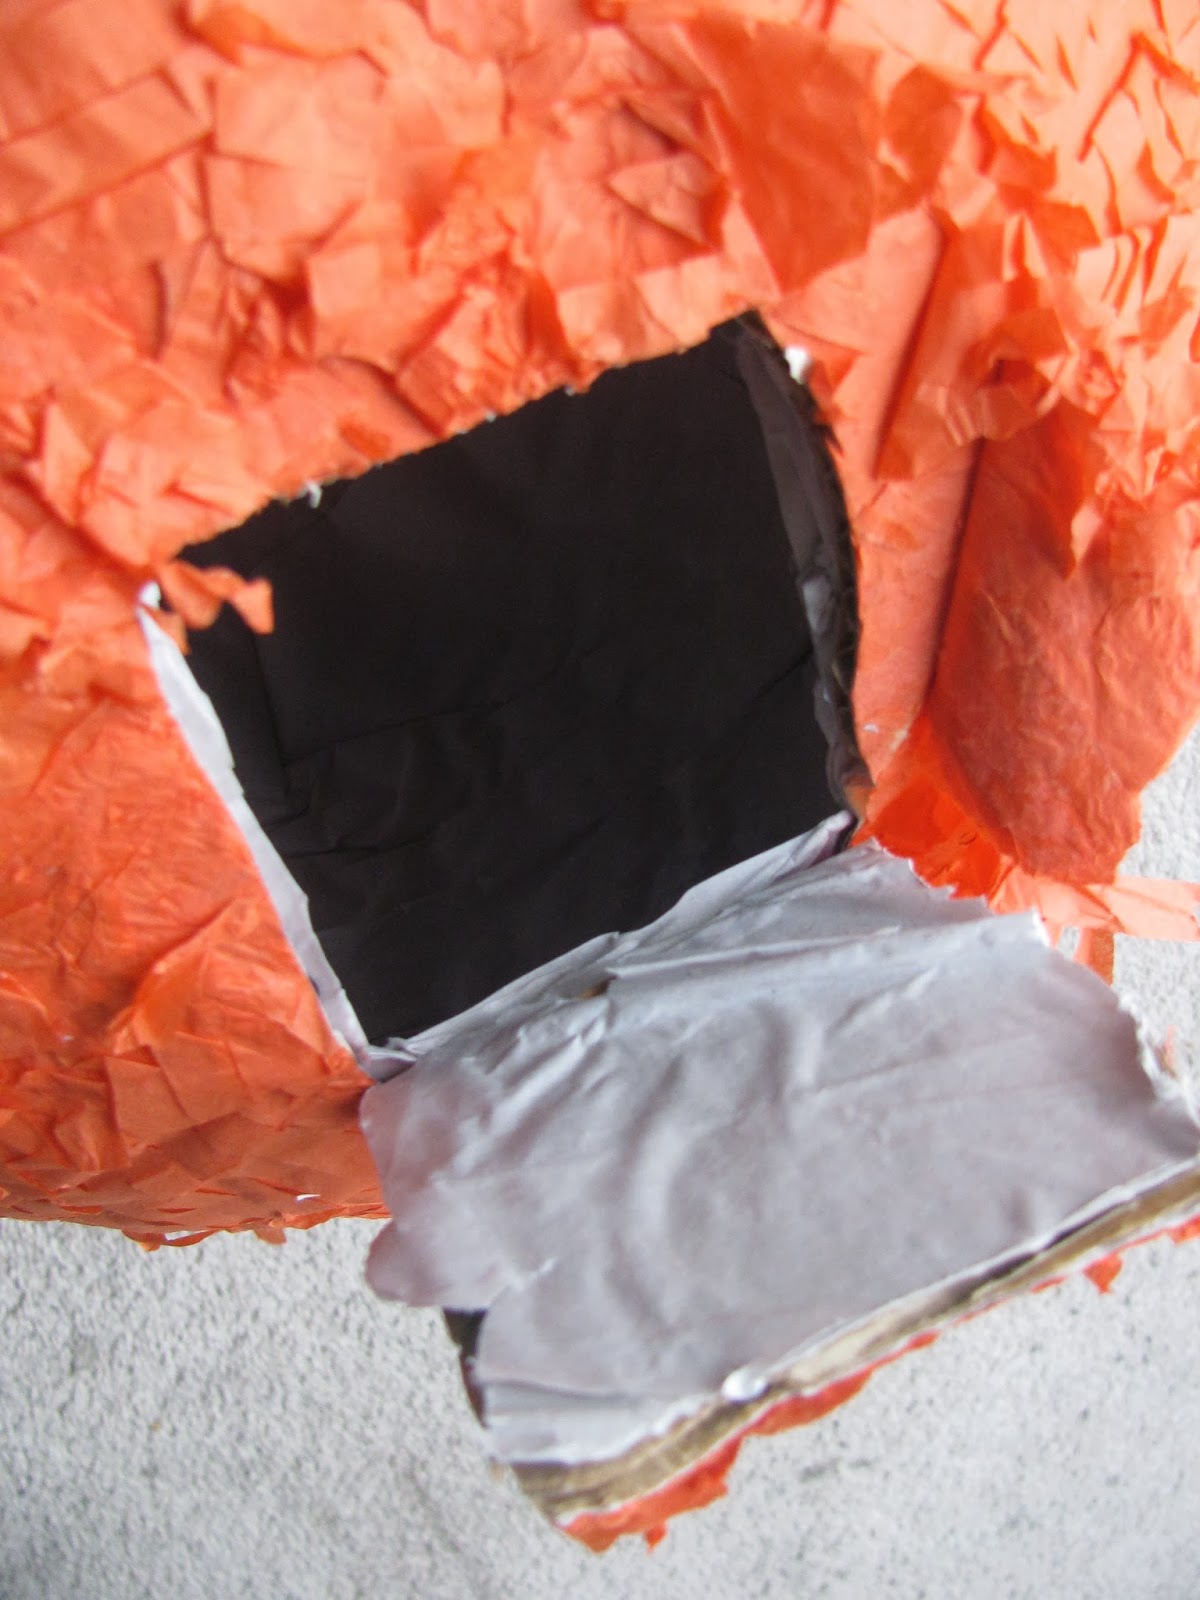
1. Begin by selecting a relatively flat location on the bottom of the pinata. Carefully remove the crepe or tissue paper covering an approximately 3 1/2 inch square near the center of the bottom. (If, for some reason, that seems too difficult, it's fine to skip this step...as long as you have matching tissue paper on hand.)
2. Use an Exacto knife to cut a door (about 3 1/2 inches square) in the "naked" area you just made.
 3. Cut the curling ribbon into long lengths. How long depends upon where you'll hang the pinata and how tall the kids are. (I suggest making the ribbon lengths longer than you think you need them; you can always trim them later.) You'll want at least 2 ribbons for every child who'll be playing the game.
4. With the Exacto knife, make a little hole in the center of the door. Thread one ribbon through it.
5. Cut a piece of cardboard about 1 1/2 inches square. Cut a little hole in the center. Thread the ribbon already in the door of the pinata through this small piece of cardboard.
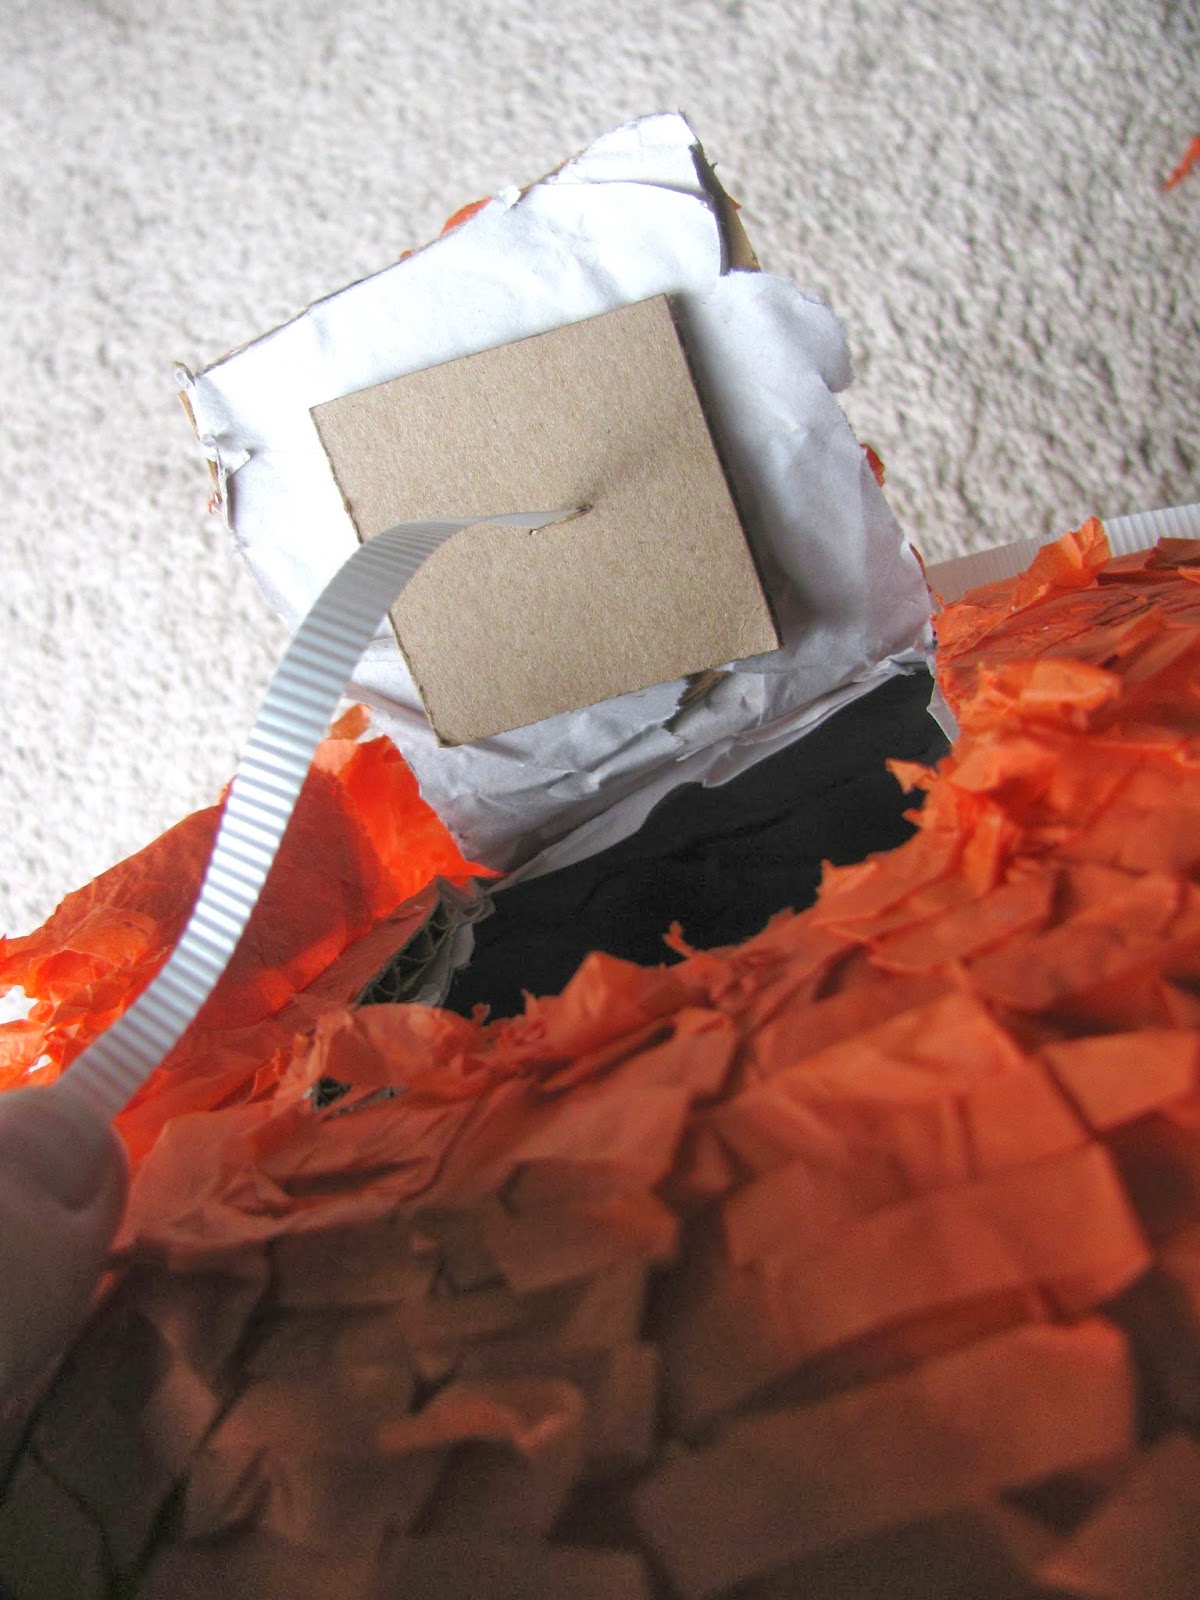 6. Knot the ribbon so it will not slip through the hole it's thread through. (If desired, you may use strong duct tape over the knot as extra insurance. This is the string that will open the door of the pinata, making all the candy fall out, so you want to be sure that when a child tugs it, it won't just slip off without opening the door.)
 7. Close the door. If desired, tape it lightly shut with one or two pieces of gift-wrapping tape. But remember, the door needs to open easily if a child pulls the string on it.
8. Use the gift-wrapping tape to tape the remaining ribbons to the pinata's bottom. Make sure they aren't on the door. (When a child pulls one of these ribbons, the ribbon will just fall off the pinata, not opening the candy door.)
 9. Replace any crepe or tissue paper you took off the pinata's bottom, making tiny slits to allow all the ribbons to come through OR cover the door and the ribbon ends with pieces of matching tissue.
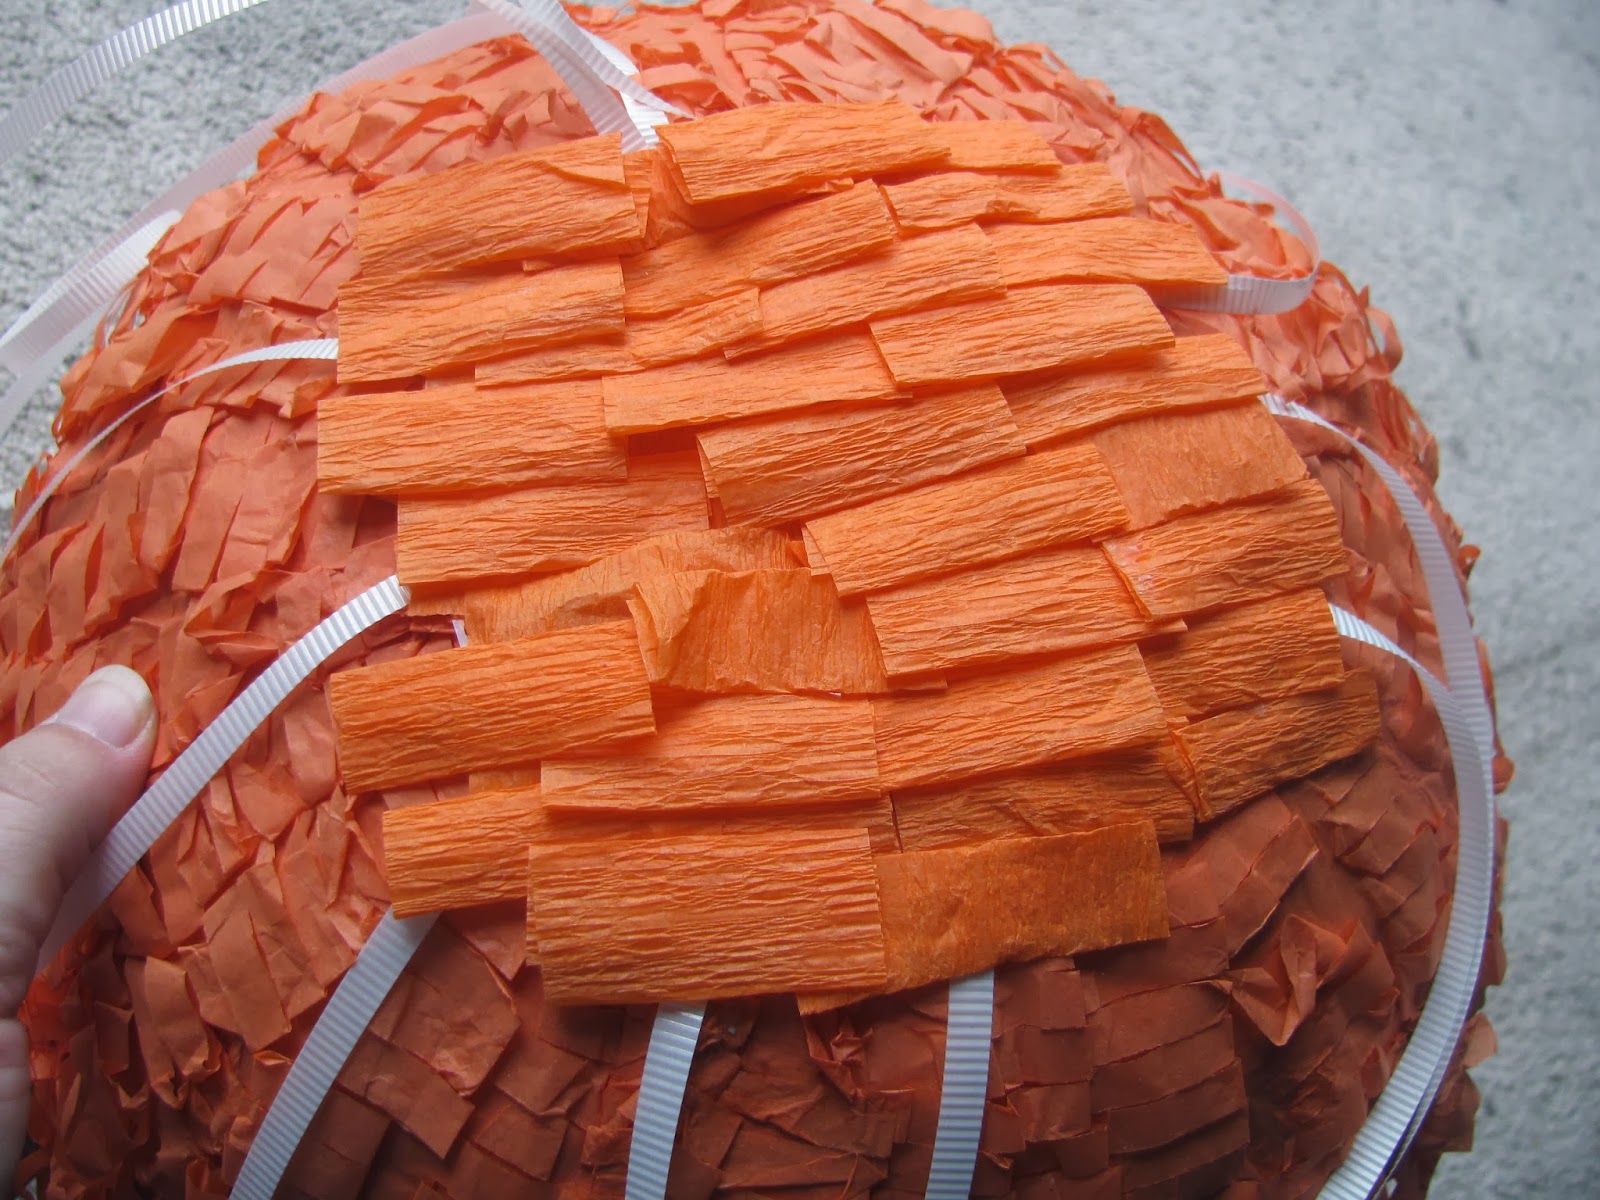 10. Fill the pinata with candy, through the opening provided for this purpose. (If, by chance, you are making your own pinata - which isn't at all difficult, though it is time consuming - you can fill it with candy through the trap door, before closing that door and covering it with tissue paper.)

No comments have been added yet.


