Techie Tuesday: Booklets on a Budget
 A few weeks ago, I posted about making your own bookmarks with the promise of also posting about making your own booklets. I got mine done just in time for the RT Convention so there hasn’t been time to work up this post until now. This is by no means a perfect, definitive guide to making excerpt booklets, this is just how I made them work for me. It’s a bit more labor intensive than the bookmarks, but I believe the final cost was around 36 cent a booklet.
Warning, image heavy post ahoy!
First you have to decide what book you’re choosing to promote. For me, since I was going to a large convention, I wanted to maximize the exposure. Plus, I was doing two book signings (an ebook one and a paperback one) and I have quite a few books. So, while I picked all erotic titles, I did go for a mix of contemporary, BDSM, futuristic and menage.
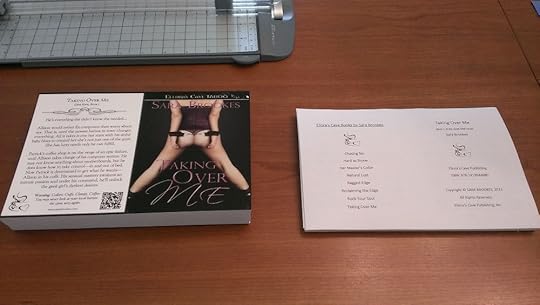
After you’ve chosen the book, you’ll need a cover. Nothing says you can’t make the cover from just a regular sheet of paper, but I wanted to go for something with a little bit of weight and stiffness. Again, like the bookmarks, I designed all the artwork myself using the same template for Vistaprint’s oversized postcards I used for the bookmarks (you can get that template here, but same warning as on the bookmark post, it’s white on white – it can be hard to see…)
Nothing overly complicated here. Just cover, title, series title, blurb, website address, QR code and the addition of the coffee house logo from the story. Just remember to use a setup similar to what you see here with the cover on the right and the blurb (or whatever you choose to put on the back) on the left.
You can design something to go on the inside, but since this was my first attempt, I left the inside blank. Which actually came in handy at the convention because I ended up signing a few for readers who asked (always ask! I’m more than happy to oblige, especially because I made these!!) and I had a clear, heavy weight card to sign on.
Once those are loaded up at Vistaprint, it’s just a matter of waiting for them to arrive at your doorstep. In the meantime, now to get to work on the guts of the booklet. This actually took a few attempts on my part, the first few of which failed horribly. I ended up using Microsoft Publisher after speaking with my local office supply store (handy since I intended to use their services for printing, and this is the program they themselves use).
The other handy thing about this was I could get double the bang for my buck. Since I was making 4.25 x 5.50 booklets, I could set up the files so that two different book’s pages could be printed on one sheet of 8.5 x 11. In the picture below you can see where I have the booklets for Taking Over Me and Rock Your Soul on the same 8.5 x 11 sheet of paper.
The trick with the booklets is having an even number of pages. I went for around 1000 word excerpts with gave me 6 pages of text. That left 2 pages (since I was going to 8 pages a booklet) to put intro information (title, name, series name if applicable, ISBN, copyright info and website) on the front page and list my other books on the last page. I fiddled with the font sizes a bit to make sure it was still legible in this smaller format. Just don’t fiddle and make it too small, you don’t want a reader (or perspective reader) trying to squint at the words.
Once I was satisfied with the set up of all the sheets, I carted a ZIP drive up to the office supply store and in around 10 minutes, they had printed (and cut) them all. That speedy convienience right there was worth it IMHO. And at around $30.00 for 150 sheets of paper (remember, two booklets per sheet of paper was only 150 sheets uncut. Once separated it was 300) and precision cutting them – totally worth the money. Besides, I don’t have a printer with the easy double sided capability without sitting there feeding it. I can’t imagine how many times I would have screwed up the order with that many sheets.
Time for assembly! First order of business. Sort out which innards go with what cover. Remember, you first page is going to be on the right, your last page on the left.
Once that’s sort, it’s time to get out some of your aggression by stapling all those sheets and covers together.
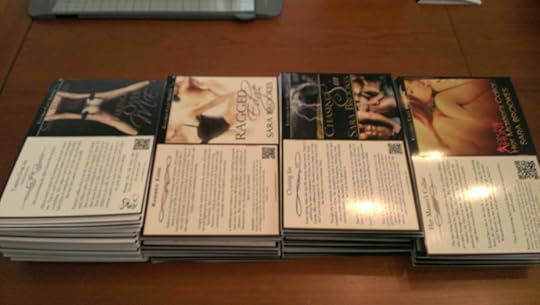
I went for an assembly line type deal, so it was put all the booklets together first. This wasn’t even all of them. Just the first batch I did to get a feel for how long it would take (about an hour from assembly to done for all these you see in the pic below – that’s 50 booklets of each title seen here).
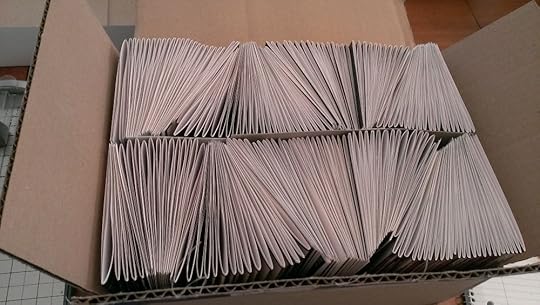
Then it’s time to involve your loved ones. Yup, I enlisted the help of my family for a folding party. Not hard to match up straight edges to make nice, pretty booklets.
This was just the batch I made up for the RT Convention. I still have enough sheets and covers to make up a second batch to take to Ellora’s Cave Romanticon in October for the swag tables and booksigning then.
Unfortunately, I made one very big mistake when it came to the booklets. I didn’t keep any for myself! If you try this and have an tips you’d like to share yourself, let me know – I’m all for ways of saving time and money while still delivering a quality product.


