#Publishing on the #Nook
You may have read my prior post on how to publish on Kindle. Publishing your ebook for the Nook is slightly different, but just as easy. The complicated one will be publishing on Smashwords, so I’m saving that one for last. It’s also the one I typically base my Kindle and Nook files on as it is the most thorough in screening out errors. But first things first, go to www.pubit.com.
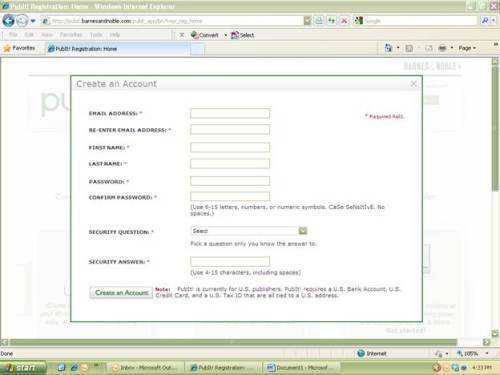
You’ll need to create an account, so click on that link in the upper right hand corner.
It’s a standard registration process, but once you have your log-in information confirmed and log-in you will be on the default ‘My Titles’ tab. There other three are for tracking your sales, entering or changing bank account information (so you can get paid) and if you have any questions. Right now, you want the one you’re already on.
Click the ‘Add a Title’ button.
There are six sections here and you need to supply the information in each before you can publish your title. Section 1 asks the basics regarding your book. What’s it called, how much you’re charging for it (including your UK price—that’s a new feature where you can have it calculate on the US price **recommended** or give it a different cost). Then you’ll enter a publication date. My guess is that’s going to be the date you get all this done, but you can set the date as far back as you need. You can’t set it up to publish on a future date. At this point, Amazon and Barnes & Noble are not allowing independent publishers to upload their books ahead of the actual release date. It would be all kinds of convenient so far as pre-sales and marketing are concerned, but no.
I suggest having a publishing name of some kind, just to give yourself at least a bit of branding, but you can put your name as the publisher if you don’t feel like bothering. Because there is a little more background work so far as registering your company name with either your state or local government. ‘Contributor 1’ is you, the author. Or the author on whose behalf you are uploading this file. You can click the button just below to add other contributors like the editor, illustrator, introduction, etc. For my novella, Fleshbags, I gave Russell Dickerson a credit.
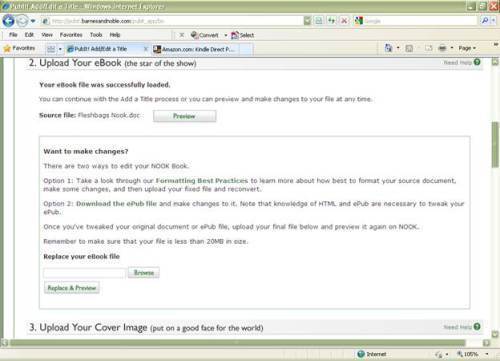
Section 2 is where you upload the actual ebook file:
Just click browse button, locate your file and upload it. It’ll take a moment or two and you can upload your cover image in section 3 by following the same process.
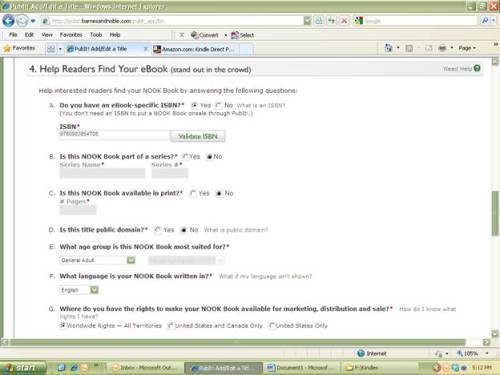
If you have an ISBN for your ebook (which really is unnecessary as B&N, Smashwords, and Amazon all will assign their own in-house version of an ISBN if you don’t have one and you’d have to have a completely different one for a print book) section 4 is the place to enter it. I was so geeked up at having a load of them, I used one for Fleshbags.
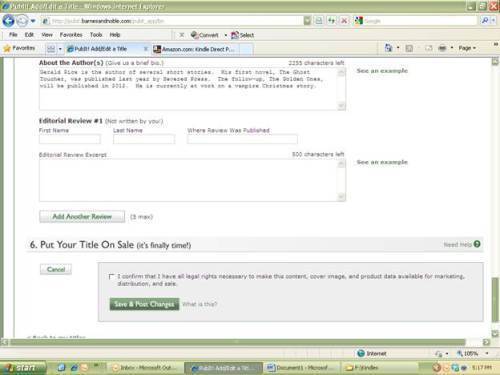
But go through the letters A-G, supplying the requested information until you get to section 5. Here you’ll enter the categories for your ebook and enter keywords. Keywords are important because they help people who are looking for a book in your genre find yours. B&N gives you a certain amount of characters (Amazon gives you seven keywords total) and then you supply information like the description, About the Author and any editorial reviews, if you have them. One thing Amazon does better here is the Author Page. I don’t have to re-enter About the Author information for each book because it all falls under my Author Page, whereas you do have to supply that each time you upload a new book.
Finally, it’s time to put your book on sale. Just click that box, confirming you have the legal rights necessary and then click the button, ‘Save & Post Changes’. It will take about 12 hours or so, but you’ll get an email from Barnes and Noble telling you you’ve been published if you’ve followed these easy steps! Make sure to go back through those other three tabs to be sure you’ve given them all the information required, but you’ve done it—congrats!


