
Photoshop Friday - clipping layers
Main idea: You can choose whether an adjustment layer will affect only one layer, or all visible layers below it.
In Connecting Flight, my Paul model was shot in blue daylight. I wanted him to appear as if he was being lit by a streetlamp, and also to pick up some greens since these colors would be in the foreground lighting.
I created a layer and filled it with a gold-to-green gradient, shown here with other lighting effects layers above it visible.
I set the gradient layer’s mode to multiply and took its opacity down to 67%. This was the effect I wanted for the flesh tones, but I wanted the background to stay exactly like it was before. Now it’s all murky. The adjustment that made Paul look greeny-gold only intensified the greeny gold of the background. That's not what I want.
This is solved by clipping the adjustment layer to the layer I want to affect. In the layers menu, hover the cursor between the two layers and alt/op-click. Your cursor will change (to a box in CS6 or two circles in CS5—my screen capture isn’t picking up the cursor symbol change).
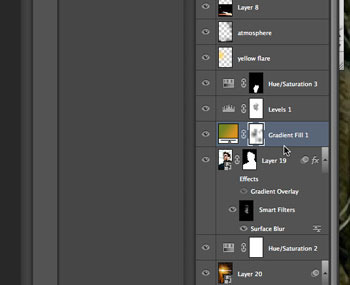
Once you’ve clipped the layers together, you’ll see a downward pointing arrow on the left to indicate the clipping.
Now it's clipped, and the background's contrast is back the way I want it. Here's the final cover:
You can also clip a photo into text this way.
Type your text:

Place a photo layer above it
Clip the photo to the text. The text remains editable. The photo can be
repositioned too. This was how I did the gore-filled lettering effect in
The Starving Years.
I suspect this will work with layer groups, however I don't usually group my layers because it messes up my blending modes.
Find out more about the Turbulence series or download my free cover art gallery at JCP Books!
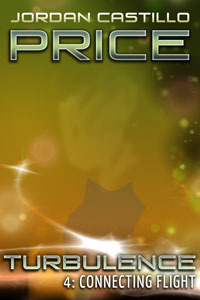
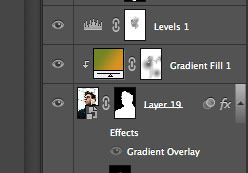
In Connecting Flight, my Paul model was shot in blue daylight. I wanted him to appear as if he was being lit by a streetlamp, and also to pick up some greens since these colors would be in the foreground lighting.
I created a layer and filled it with a gold-to-green gradient, shown here with other lighting effects layers above it visible.
I set the gradient layer’s mode to multiply and took its opacity down to 67%. This was the effect I wanted for the flesh tones, but I wanted the background to stay exactly like it was before. Now it’s all murky. The adjustment that made Paul look greeny-gold only intensified the greeny gold of the background. That's not what I want.
This is solved by clipping the adjustment layer to the layer I want to affect. In the layers menu, hover the cursor between the two layers and alt/op-click. Your cursor will change (to a box in CS6 or two circles in CS5—my screen capture isn’t picking up the cursor symbol change).
Once you’ve clipped the layers together, you’ll see a downward pointing arrow on the left to indicate the clipping.
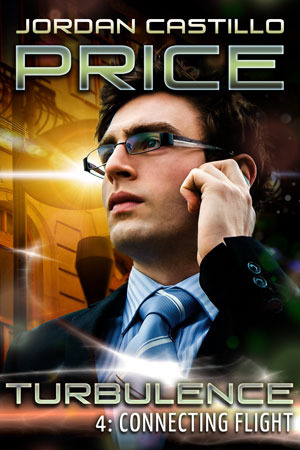
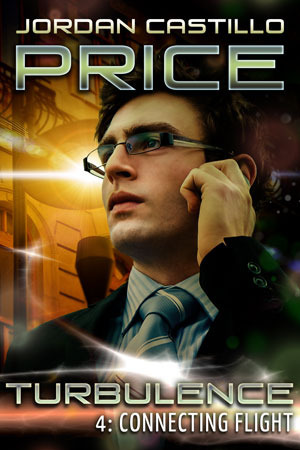
Now it's clipped, and the background's contrast is back the way I want it. Here's the final cover:
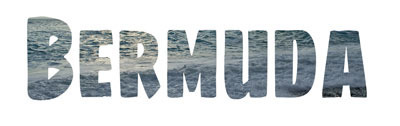
You can also clip a photo into text this way.
Type your text:
Place a photo layer above it
Clip the photo to the text. The text remains editable. The photo can be
repositioned too. This was how I did the gore-filled lettering effect in
The Starving Years.
I suspect this will work with layer groups, however I don't usually group my layers because it messes up my blending modes.
Find out more about the Turbulence series or download my free cover art gallery at JCP Books!


No comments have been added yet.


