Ifc in Power BI — How to
Following my latest piece on how to connect Autodesk Construction Cloud and Microsoft Power BI, I thought I should give some attention to another crucial piece of workflow because — as we saw last time — there is no option to push data from Autodesk Construction Cloud to Microsoft Power BI when it comes to an Ifc model.
Today we’ll see how the connection can be made through a third-party addon.
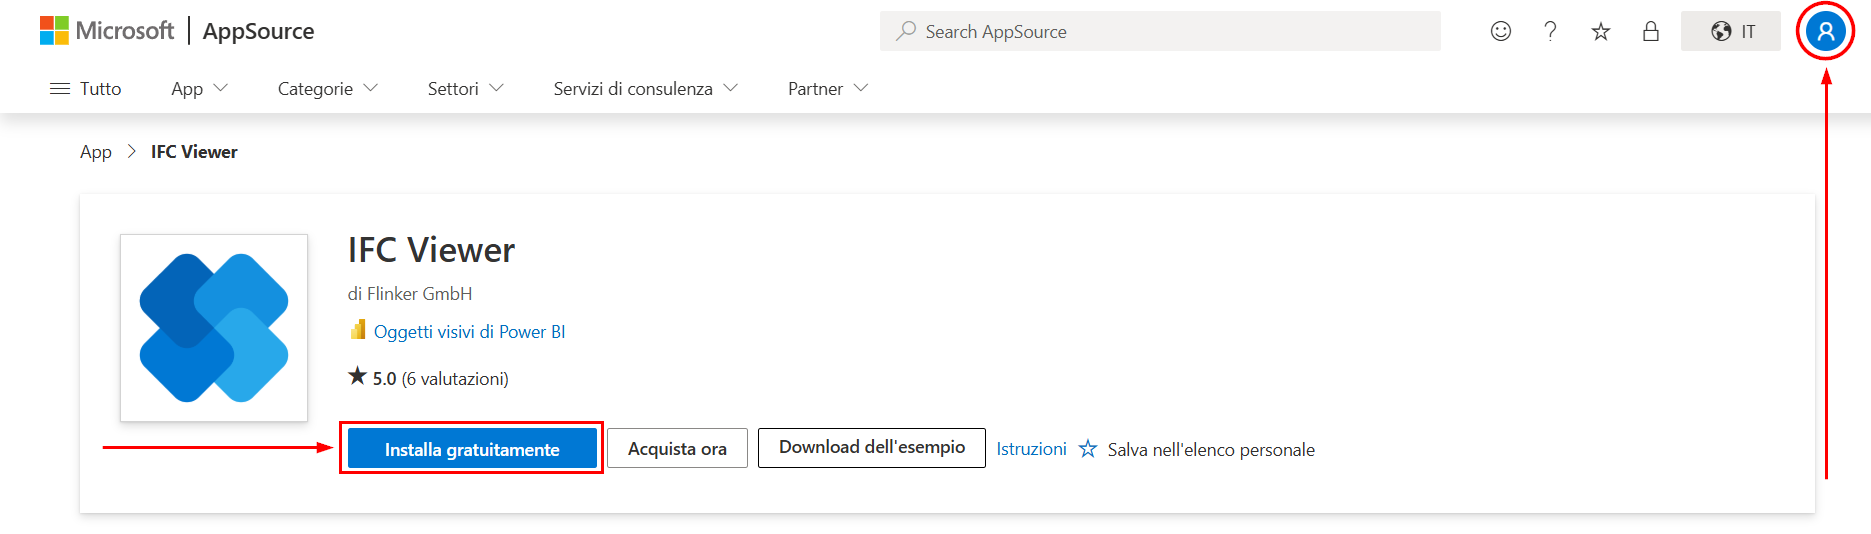
1. Install the ViewerThe viewer can be downloaded from the Microsoft App Store, which means you’ll need a Microsoft account. No purchase is necessary, but you need to be logged in to authorise the download. As we know, nothing ever comes for free.
 Make sure you’re logged in, and then hit the blue button2. Load the Visualization
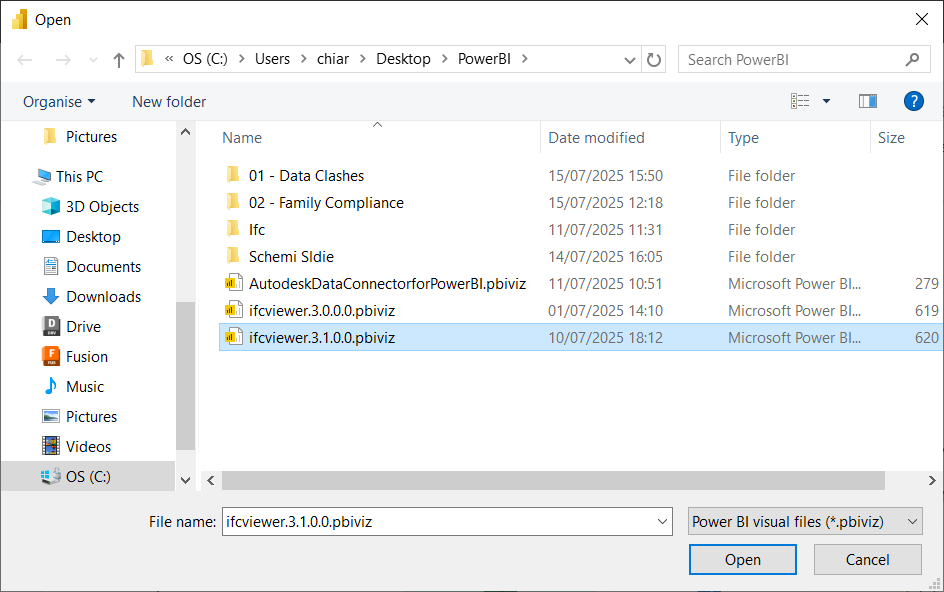
As previously explained in relation to the ACC connector, this will download a .pbiviz file, which is a Power BI Custom Visual. You’ll have to add it manually in your Power BI report by clicking on the three dots at the end of the Visualisations panel in the Report View section, and then picking “Import from File”.
 Import a Visual from a file is the one you want.
Navigate to the folder you downloaded the .pbiviz file into, select it, and hit Open.
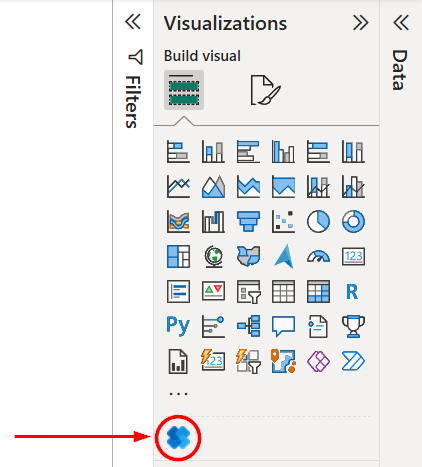
This will add the custom visual to your panel in the form of a small icon, as it happened with Autodesk Construction Cloud.
 Here it is.
When you hit the button to add the visual, the worst seems to be over: a white window will appear and, by clicking on the top cube on the left bar, you’ll be able to open your Ifc.
 Easy, right?
When the model is loaded, you’ll be able to navigate it through the usual shenanigans of the Ifc data structure.

That’s where the fun starts, because… where’s your data? ’cause it’s certainly not here.
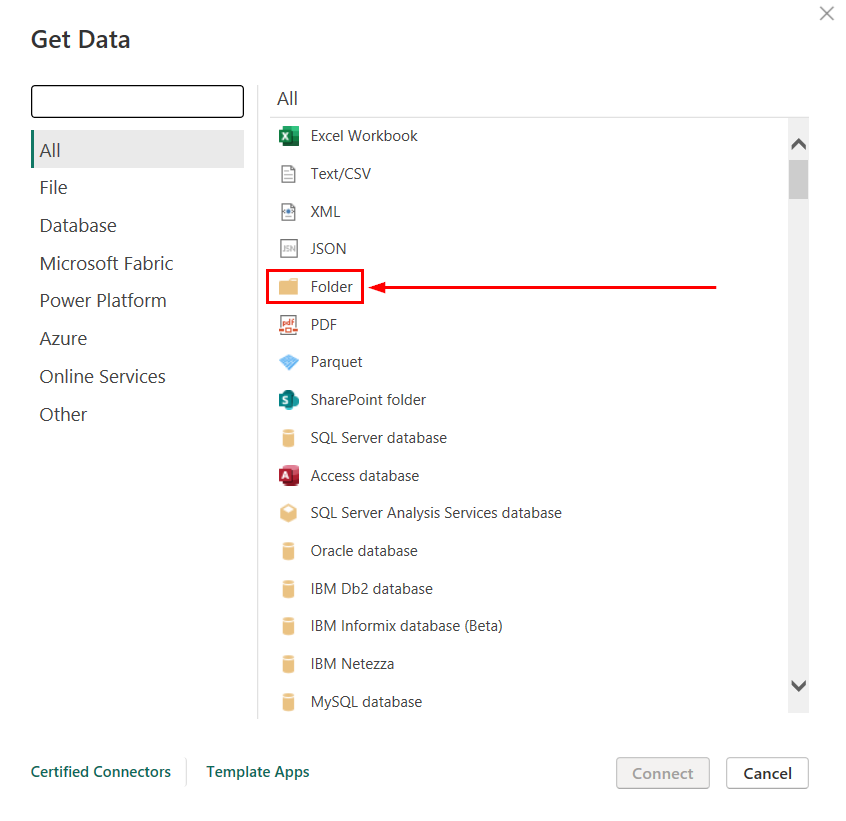
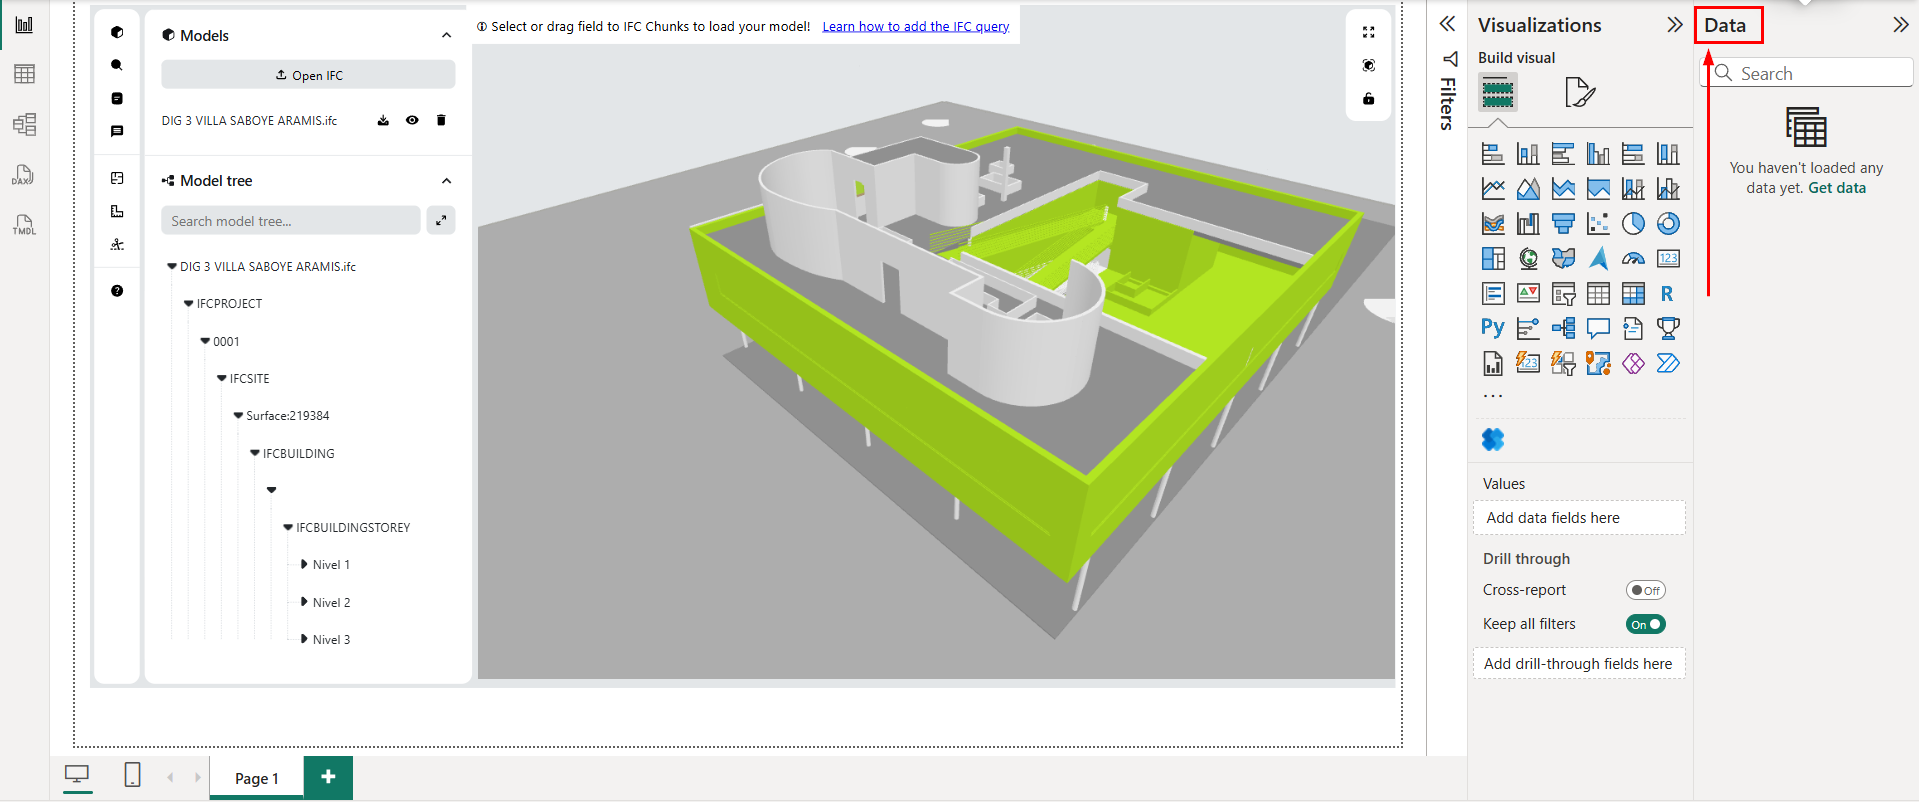 Where’s your data?3. The Data side of things3.1. Load
Hit the Home > Transform Data button to open the Power Queries and then search for a source. The easiest way is to have a folder with just the IFC models and load the folder, so hit that option and push the blue “Connect” button.
 Load a whole folder and be done with it.
Be careful that you won’t be able to see what you’re doing, so the folder needs to be properly prepared in advance, and I strongly suggest you keep only the .Ifc files in that folder.
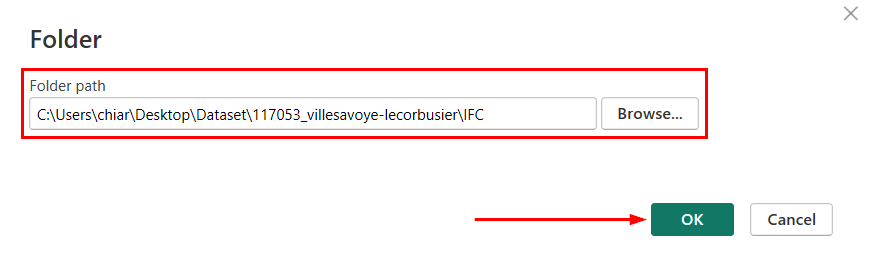 Either Browse or copy and paste the path. The user interface comes straight out from the 90s.
Now, the problem is that you’ll have one row with data on the model, but you need to explode that into a table that sees model objects and their related data. Do not worry and hit Transform: we’re going to fix that later.
The preview you’ll get will be rather disheartening, but I told you not to worry. We won’t work with that.
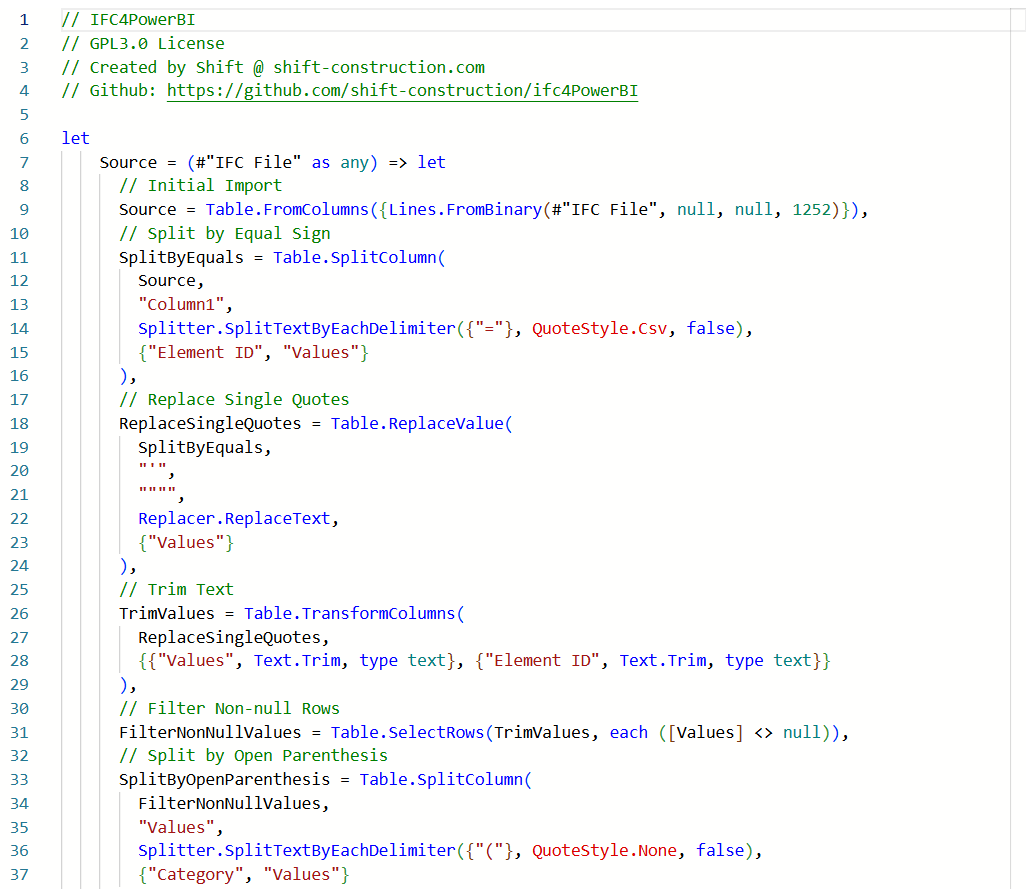
3.2. TransformTo follow these steps, I suggest you disregard the official guide and visit GitHub, where the developers of the AddOn have provided a thorough and straightforward tutorial. It involves a couple of things that your run-of-the-mill users might not be familiar with.
Alongside the viewer, you’ll have downloaded a file called IFC4PowerBI.pq (if you don’t have it, you can find it here). You need to open that with Notepad or a similar tool.
 Do NOT panic. I repeat, do NOT panic.
Once you’ve opened it, you’ll need to select all and copy it to your clipboard.
Back to Power BI, you’ll need to create a New Query, and this will be done from Home > New Source > Blank Query.

The query will be created on the left bar and I suggest the first thing you do is rename it from Query1 to something that makes sense (Right Click > Rename). Then, you’ll have to right-click on it and pick the Advanced Editor.

Take a deep breath, then paste what you copied into the advanced editor and then click on “Done”. I promise it doesn’t bite. You’ll have a function, now.
Now you’ll have to go back to the previous query, the one that was created when you loaded the folders with the IFC models, and create a new custom column.

In the new column formula, you’ll just have to call the function you previously created. This is done by writing IFC4PowerBI([Content]).
 I suggest you give the column a decent name, so we’ll know what we’re talking about.
The additional column will create a table. In practice, the previous query has looked into the IFC model for you and has extracted the model objects into a separate table. Click on it.
 Click on it.
If you click on the table, the function query will power up and it will give you your stuff.
 Here’s your stuff!
Hit Close and Apply, and go back to Power BI. You’ll have your data loaded where expected and you can start playing with it.