
December Daily® 2024 | Ali's Intro + Reason Why + Table Of Contents
If you hear a whispered falala-ing anytime over the next few months it's just me reaching out to you to say "you got this" and "thanks for valuing your own story" and a here's gentle reminder that "magic is something we make."
Welcome to my Intro Page/Reason Why/Table Of Contents post for December Daily® 2024. I'm so happy to be in holiday crafting mode and excited to be sharing with you again this year here on the blog.
It's been a busy few months over here in this particular season and although this post is a bit later than usual (or at least in previous years), I'm truly ready to be here and have fun and make space to get some stories told in December.
Last year I did fewer overall foundation pages (pages I make in advance of December to make storytelling easier for myself during the actual month) and found myself really creatively motivated. I've worked on a few foundation pages so far including 4 that will be featured in our Product Play Workshop (sign up here for class content beginning on November 5th). We are also hosting our annual $5 Prep Day this Sunday - it's always a fun online gathering and time to come together to dive into this year's project or work on a previous year or simply enjoy the company of other like-minded memory keepers.
Did you know this year is year 17 of December Daily®? As you'll see below I talk about that in my journaling as I reflect on the impact this project has had on me and how I approach the season. Next year I'll turn 50 and this project will turn 20: so much to celebrate. As with many previous years, I'm here for the joy of it all.
If you are brand new to December Daily®, welcome! There's never going to be a right or a wrong way to participate in this project - it's something that can evolve with you through the various seasons in your own life. You can simplify when you need to and go all out when that feels like the best path. I've got years + years (literally) of past blog posts showing most of my past albums which is accessible to you here. If you'd like a more structured experience check out my Storytelling With December Daily® online workshop that will set you up for storytelling success + help you wrap both your mind and your heart around this project. Other than that, dive in! We all start somewhere and we are so glad you decided to see what this was all about. We release a new collection of products each year in early September that ship in early October. You can sign up for our mailing list here (and get a free class called "Storyology" too).
This year I've curated a list of products I use in this project for my Amazon Storefront. You'll find links to the printers + papers I use along with other basic supplies and any extras like ribbons. I'll add to it as I use any other items over the next few months. I'll continue to list out supplies at the bottom of each post with a general link to the Amazon Storefront.
Ah, deep breath in + out. I'm so excited!
Let's dive in to my first process video:
Here are images of my intro/reason why/table of contents pages:
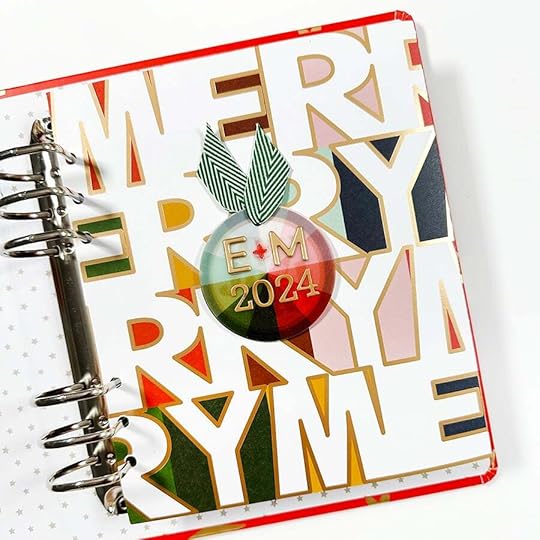
Last year was all about colorful fun and as you can see here, some of that is seeping into 2024. Part of this reason could be that I often design the next year's product collection in December (meaning last year while I was working on my 2023 album I was also designing pieces for 2024). If you aren't a fan of all that color for the holidays you can easily substitute that "merry" paper for a different pattern paper from the Main Kit or 10x8 Paper Pack (or another paper of your own choosing). This colorful "merry" paper is from the 10x8 Paper Pack. Heads up that I do use the same design in the red/white color scheme for an element in one of my Product Play projects.
Rather than cutting up this pattern paper I simply folded it over along the outside edge. This gives me more space on the reverse to hold both my journaling and my table of contents. More on that in a bit.
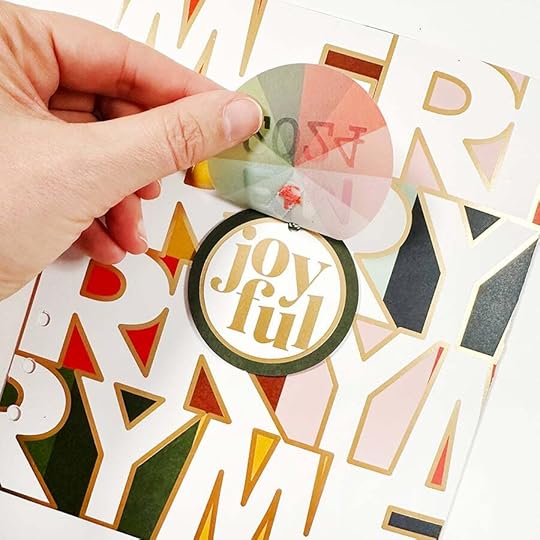
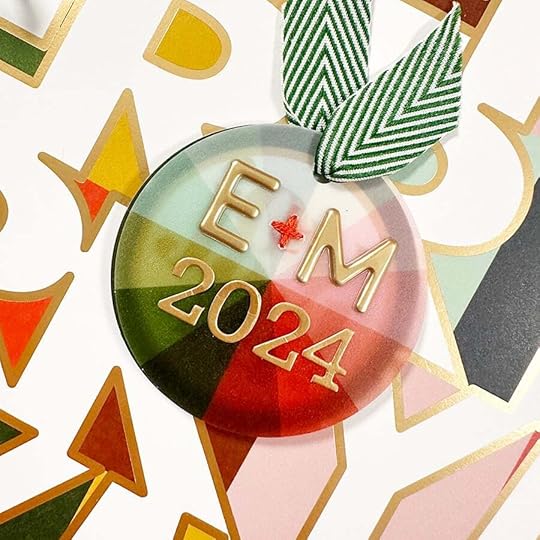
There all kinds of fun things from the collection you can add on top of the pattern paper. I chose a circle tag from the Main Kit as my base embellishment. On top of the that I used a 2 inch circle punch to cut out the "joyful" letter press portion of one of the 4x6 letter press cards from the Specialty Card Pack.
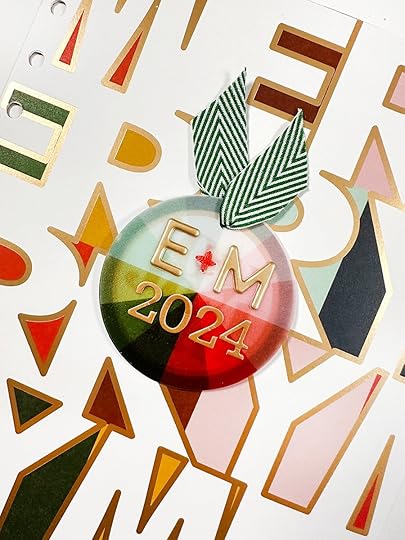
On top of that I layered one of the vellum color wheels from the Main Kit along with gold puffy alpha stickers and number stickers from our new set. I used a little bit of embroidery thread to create the
plus sign between the E and the M. If you are new here the E is from Edwards and the M is for McKercher (the two last names in our household). To hold it all together I'm using a bit of green ribbon that is adhered with a glue dot or a foam dot.
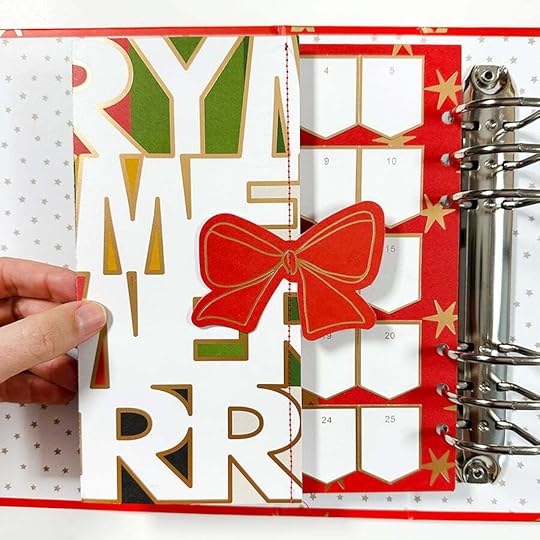
When you turn the page you'll see the folded pattern paper flap. I knew I wanted to add something to the flap that would stick out a bit (in the video you can see me go through some ideas) and ended up choosing one of the red ribbons from the big Die Cut Paper Pack. I ran that through my sewing machine to stitch in place. You could also adhere it with a brad or double sided adhesive or some handstitching.
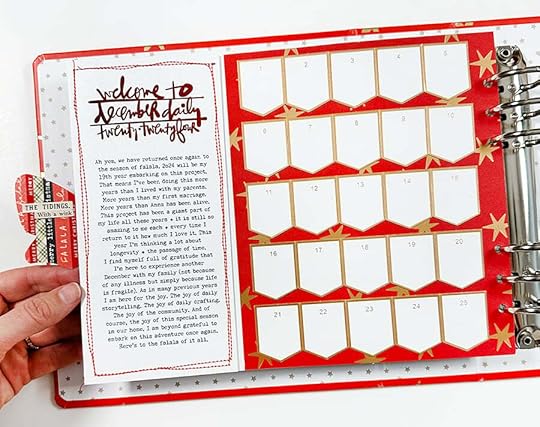
When you open the flap you'll find my journaling and my table of contents using the flaps from the Main Kit. I ended up taping the backs of each of my rows so that they are each one piece before adhering. You can choose any pattern paper for the background.
I created a custom title for this section which can be downloaded here (this is one single PNG file to download).
I printed out the title and journaling on my laser printer before running just the title through my Minc machine to add red foil (it's a little hard to see in the photos). And before adhering it all down into the folded pattern paper I ran it through the sewing machine a couple times (making it imperfect on purpose because that's how I roll right now).
PS: I know I made a mistake in my journaling saying year 19 vs. year 17. HA HA. I might have to rework my journaling a bit - or create an addendum.
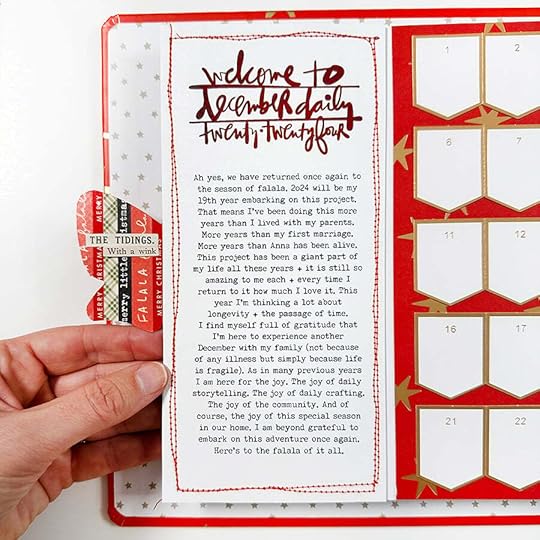
When attaching the bow along the edge of the flap you end up with a white cardstock background. There are lots of things you could do including cover it with pattern paper, stamp on it, etc. I chose to add strips of washi tape and then a couple phrase stickers from Tim Holtz that felt a little falala (I'm creating my own definition which feels fun too).
Feeling all the feels this year.
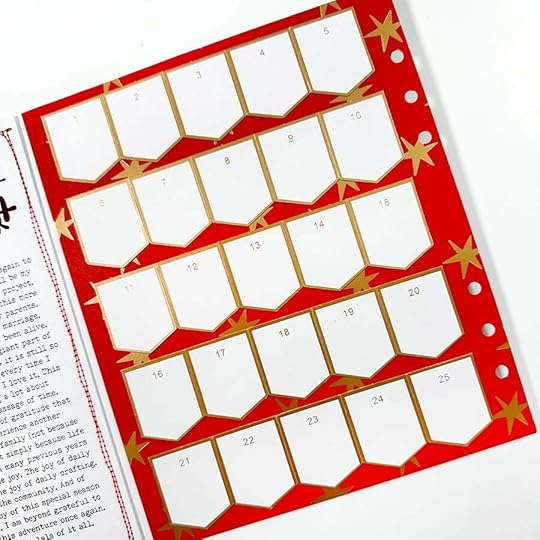
And a closer look at my table of contents. For each of my 25 stories I'll add a title or some other information to the little banners. I've loved seeing my table of contents fill up over the month when I've done this the past two years. I'm so excited to fill up these spaces during December!
And we are off. As always, thanks for being here and for being a part of this community.
I hope to make a few more foundation pages before December begins and I'll share them here on the blog when they are done!
December Daily® 6x8 Album December Daily® Main Kit (digital available) December Daily® 10x8 Pattern Paper Pack (digital available) December Daily® Large Die Cut Pack (digital available) December Daily® Specialty Card Pack (digital available) December Daily® 10x8 Transparency Pack (digital available) December Daily® Gold Number Sticker Pack December Daily® Gold Puffy Alpha stickers Washi Tape (various from my stash including this one from Tim Holtz) Tim Holtz Phrase Stickers “Christmas Noel” (from 2023) Font = Secretary Typewriter Additional Basics (Printers, Trimmers, Sewing Machine, Etc) via My Amazon Storefront


