Ebook Upload 2
The wording, font, headers are done, how to include a cover or any related images to your eBook? Look no further, let’s do it today.
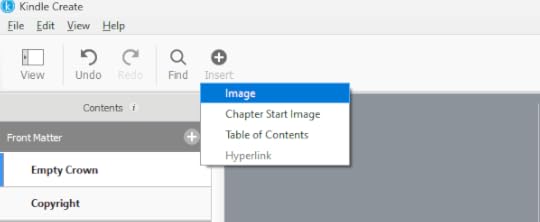
So first step, go to the ‘+’ sign with ‘insert’. Click on that sign and select ‘Image’
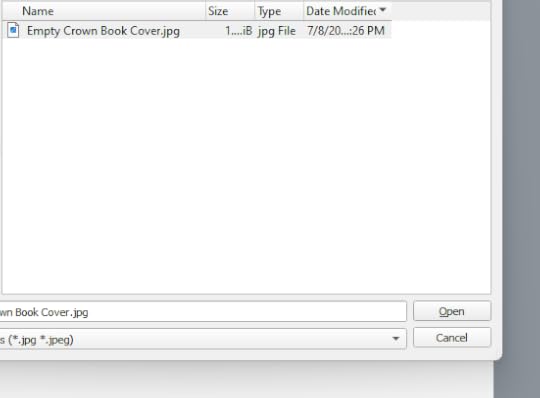
Select your image (I am using a jpg/jpeg image file) and the select ‘Open’.
Remember to input the ‘Alt Text’, it’s compulsory. I choose ‘Full’ and the bleed for the book, both options ‘Place within margin’ nor ‘Place to edge’ cannot be selected.
For large – no options
For either Small/Medium – you can choose the position of the image (left, middle or right).

Your book cover will appear.
To delete image – just click on the image and either select ‘delete’ or ‘replace’ image.
.
I will cover book cover only, since I am not using any other images for this eBook/book.
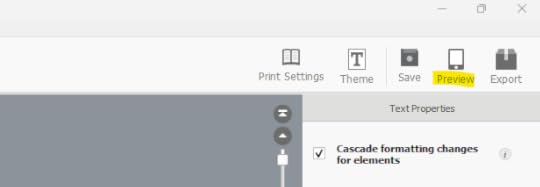
To do a final check (repeating). After you are done rearranging all the headers and you are satisfied with the editing, you can use the second last button ‘Preview’ to have a look at your document before, using the ‘Export’ button to save the file as an eBook. There are two version to choose from.

*Do note, however that tables, footnotes, endnotes are not supported by Kindle Create.
You can also follow what is stated through their website for further information/clarity
Source : https://kdp.amazon.com/en_US/help/topic/G7R2L7V5X6SJH948#toc
.
That’s all from using Kindle Create – now I need to login to Amazon and upload the eBook.
For the current version, I am still missing the eBook ISBN, so I will be getting that first from the Amazon, update the eBook before it’s consider finalized.