Ebook Upload 1
Since all the formatting and layout is done. We can finally move to the upload. Before we start, remember to download Kindle Create so that you can use the software to easily upload your work and create your eBook to be posted on Amazon. Follow the steps as per below.
This is the first page after the program launched itself, go to “Create New’ since we are starting from scratch.

Select ‘Choose File (.doc, .docx)

A pop up will appear, click on your file and then click open then you will be prompt to the next page. (It takes less than 5 mins for me).
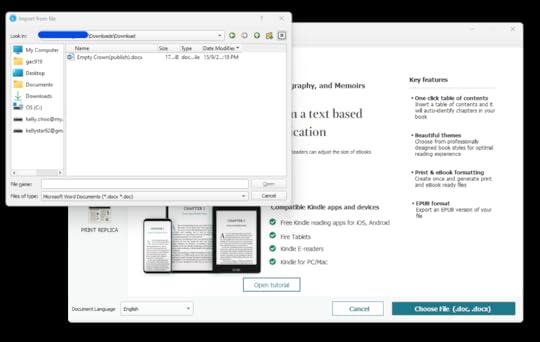
The below will now show in your screen where it will state that your document is successfully imported into the program. Click ‘Continue’ to start working.

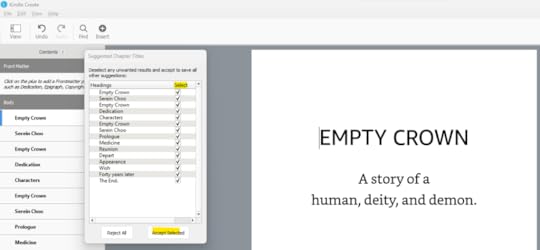
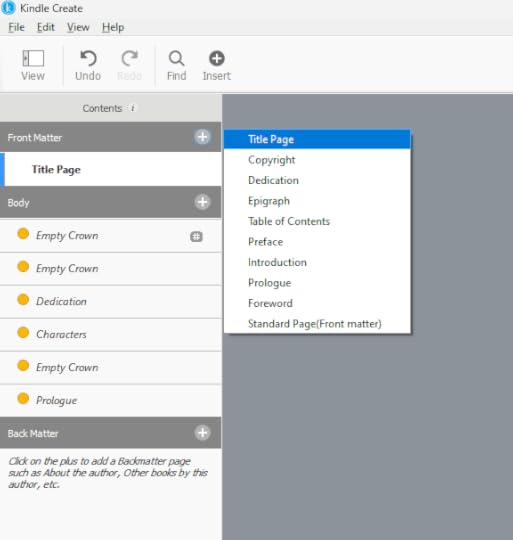
It will auto prompt to create a Table of Contents for you as shown. However, not all the Chapters are captured correctly and the pages that you made previously like the title page, copyright etc, you can exclude those manually by clicking in ‘Select’ column and tick and untick the specific boxes that you want. After you are done, select ‘Accept Selected’. If you clicked on ‘Reject All’, you will have to manually create the Table of Contents, thus I advise it’s better if you allow the program to auto create then you choose which one you want to remain and continued (don’t worry, after creating it you can still edit the table of content to your liking).
*If you notice the font is automatically changed to the default one by the program – it’s because, if you use the default, it allows the readers to select the font they like to read instead of the one that you chosen for your book. (I prefer to have my own font but I don’t know how to set it so at this point, I continue with the default font).
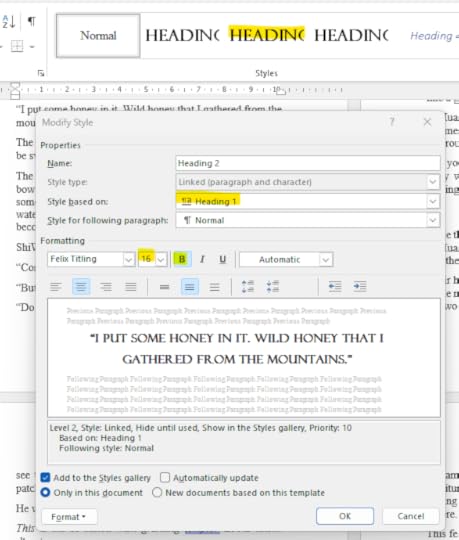
*One more thing, if you didn’t see all your headers appearing – you can change the formatting at the doc./docx. (change all your Headings 2/3 formatting to Heading 1 (same size/font etc., see below on how to change)) (click onto Heading 2 and then click modify : go to ‘Style based on:’ change from Normal to ‘Heading 1’. When everything is set the same as Heading 1, select ‘Ok’. I want all my headers to appear in the eBook for easy access as compared to the paperback i.e. one chapter, multiple sub chapters within that chapter. However for eBook all the chapters/sub chapters will become a header here so that the reader can easily go back to the previous chapter that they wanted to reread.
Okay let’s go back to the main topic.
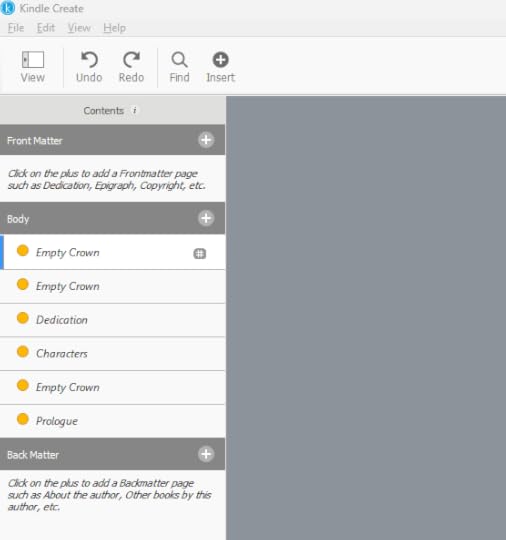
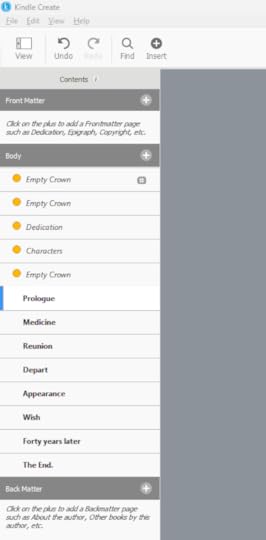
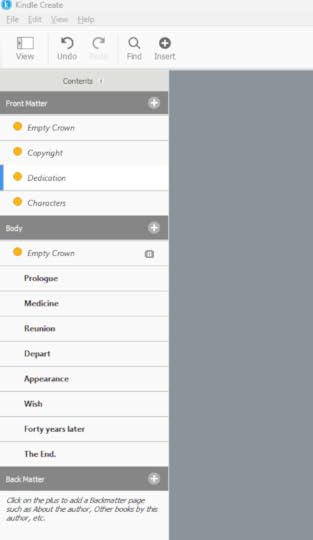
The previous headings you created will be under ‘Body” and shown below. There’s Front, Body and Back Matter.
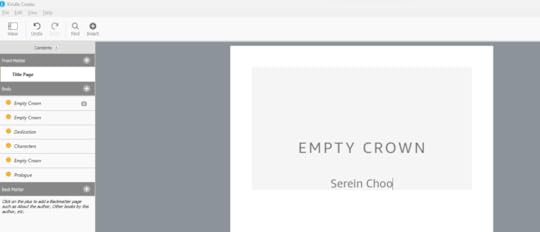
I tried using the ‘Front Matter’, to create a title page, dedication but it looks weird so in the end I leave out the ‘Front Matter’ as it seems and felt strange to me.
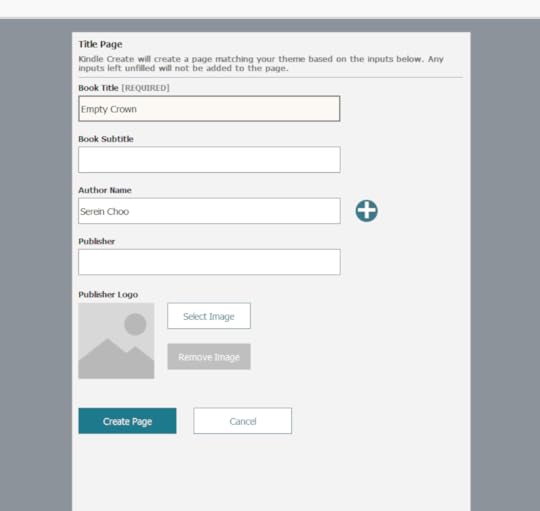
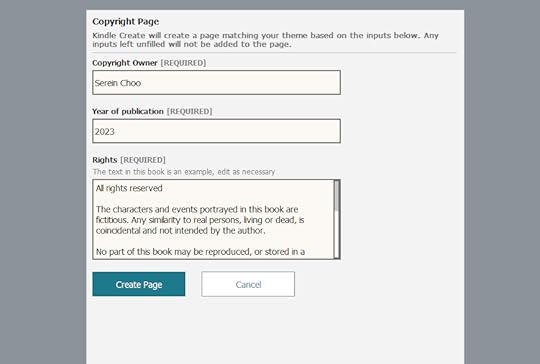
However, I find some parts if you haven’t already done it yourself, you can try using the ‘Front Matter’ layout to create them – like the ‘Copyright Page’. You only need to fill some specific details and it will be generated for you (but do read over, if there’s anything you need to add yourself so that no necessary information are left out).


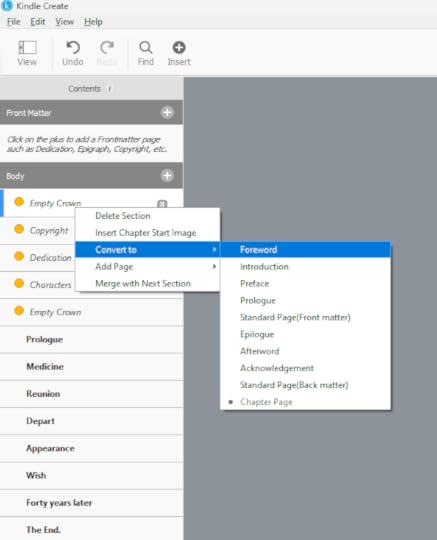
You can also use the existing headers to change the nature of it, right-click on the header and then go to ‘Convert to’ and select the type that you want.
It’s a plus point for me to be able to generate the table but I did notice that the Heading 2/3 in my Word doc is not pickup by the program so I have to manually added them back in as shown below. All the Heading 1 are listed down with the front pages that I created before hand (left bar in program)
*(Scroll above, to know how to change all your Heading2/3 into Heading 1 before using Kindle Create). This here shows the manual steps to change them in Kindle Create. If there’s isn’t a lot, I don’t mind to change a few but when 80% of the headers are missing, I went back to the Word doc to fix it before continuing Kindle Create.
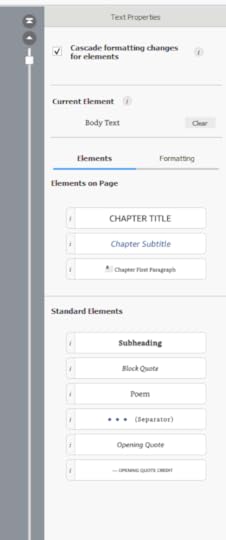
Select the words of your Heading 2 and then go to your right sidebar and then select ‘Chapter Subtitle’ to change it.
Using the convert to button, I change the the previous headers like “Empty Crown”, “Copyright” etc to the Front Matter. Did it matter where I put them (Front Matter or Body)? When I was previewing, I didn’t see any difference. As long as there’s an orange circle on the left, it wouldn’t be consider as part of the Table of Content. I just did it for my own satisfaction.
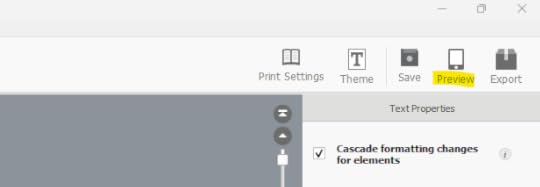
After you are done rearranging all the headers, you can use the second last button ‘Preview’ to have a look at your document before, using the ‘Export’ button to save the file as an eBook. There are two version to choose from.

See you next time, as I explained on adding images to the eBook.
.
You can also follow what is stated through their website for further information/clarity
Source : https://kdp.amazon.com/en_US/help/topic/G7R2L7V5X6SJH948#toc