
December Daily® 2023 | Paint + Play with Jill 02
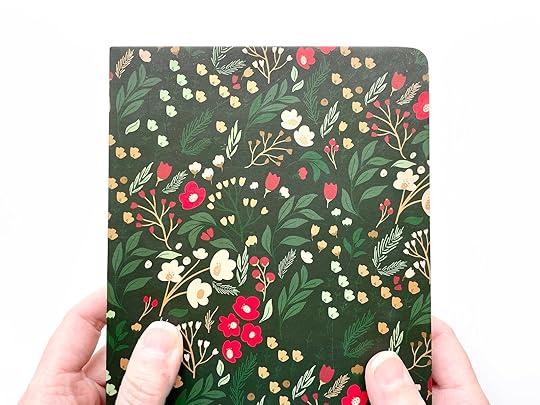
Welcome back to Paint + Play with Jill! This week I am creating a reason why page in the new Floral Art Journal, but you can definitely translate this page idea into something to go into an album by creating on loose mixed media paper.
Part one is a simple numbered page for those of you who just want to dip your toes in mixed media without going too wild. I will show you how to stamp using acrylic paints to create a really fun texture, and how to create easy painted journaling lines. This page would very easily translate into a page for an album and should appeal to all of my friends who prefer a cleaner look. If this is you, feel free to stop here!
Part two is where I will play around with the silk screens, lots of paint, and more stamping for a beautifully messy and layered page. I will also be showing you how I like to hold texture stamps directly in my hand while stamping to create a more organic impression in my mixed media pages.
Let's get started!
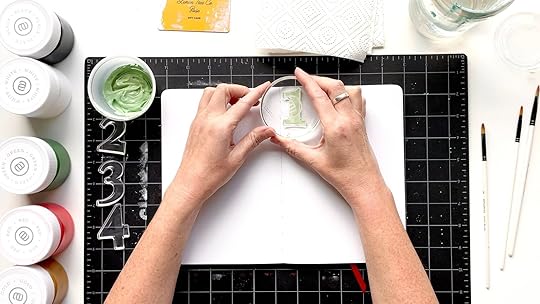
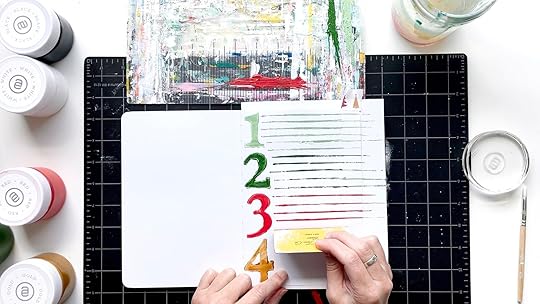
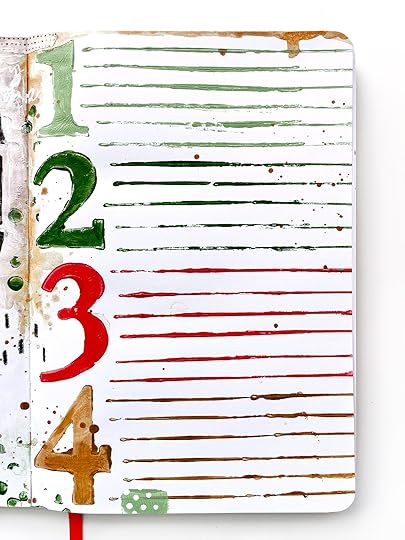
Did you know that you can stamp with acrylic paint? It doesn't work for every stamp (I recommend chunky simple shapes), but it is a fun way to get even more texture from your stamping. For my first page, I have chosen to use the new number stamp to create journaling spots for my reason why.
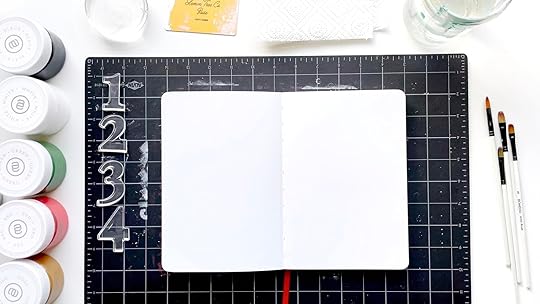
First, let's gather our supplies.
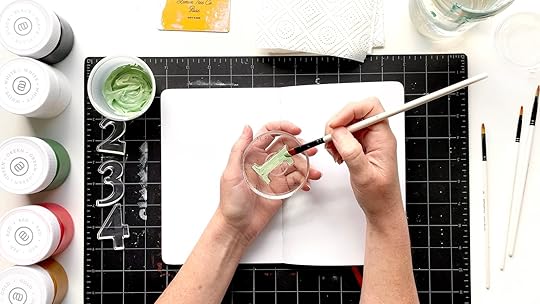
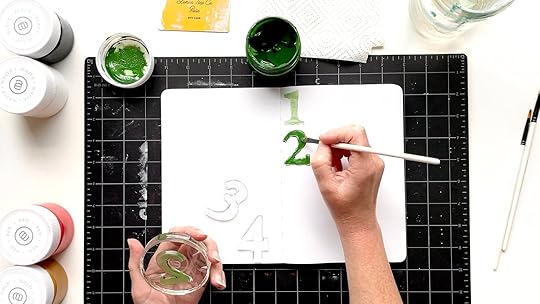
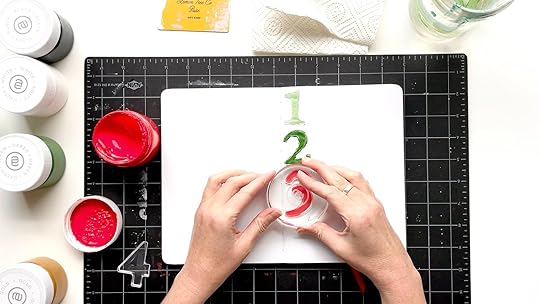
Pick out your stamp and paint colors. I wanted to stamp 4 numbers in different colors so I mixed my own light green from the white and green paints. You will want a fresh paintbrush for every color because you do not want to use a wet paintbrush for this technique.
Have a bowl or glass of water nearby to put your stamps in after you stamp with them. This will keep the paint from hardening on your stamp while you finish the rest of your page and make the clean up of the stamps really easy with just a quick rinse. Have baby wipes handy to wipe off paint from your acrylic block when needed as well as a paper towel to dry it off.
Now we are ready to make some painty stamp impressions!
Put your first stamp on the acrylic block. If it is a brand new stamp, rub it on the skin of your arm to prime it so your impressions turn out cleaner. You will see the difference between when I did that and didn't do that in the video. Apply a thin layer of paint to your stamp with a paintbrush. Do not worry about the brush lines. They will even out. Also don't worry about getting paint over the end of the stamp. That just creates more texture.Stamp down firmly while trying to not let the stamp slide around. The acrylic paint makes it more slippery than you may be used to! Pull straight up and see how it turned out!You can fill in any blank spots in the impression using your paint brush, but I like to leave as much texture as I can. Repeat! Don't wash off your paint brushes just yet if you would like to also try the acrylic journaling lines.
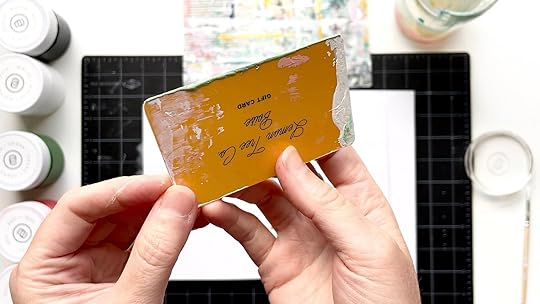
To finish this part of the page, we are going to create journaling lines using our 4 paint colors. Grab a paint pallet or paper plate, an old gift card, and the paint brushes you were just using.
Pick up some paint with your brush and spread it in a line on your paint pallet.Dip the long edge of your gift card into the paint several times until you have a layer of paint along the entire edge.Stamp the edge of the gift card down on your page to create a line. Stamp again right next to it to extend the line to the edge of the page. Reapply the paint and keep going until you have a page of fresh journaling lines!
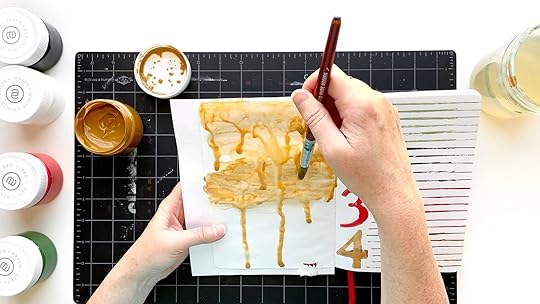
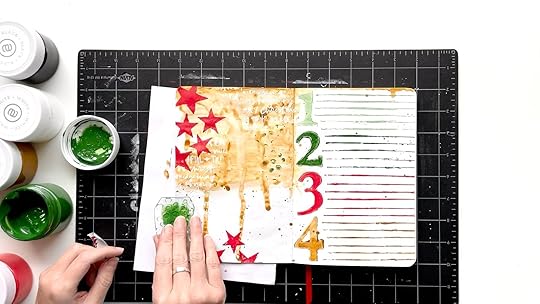
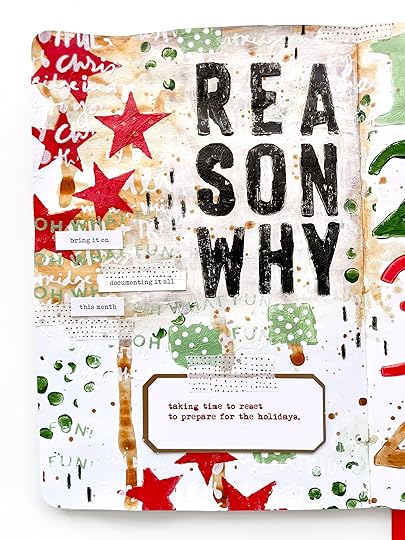
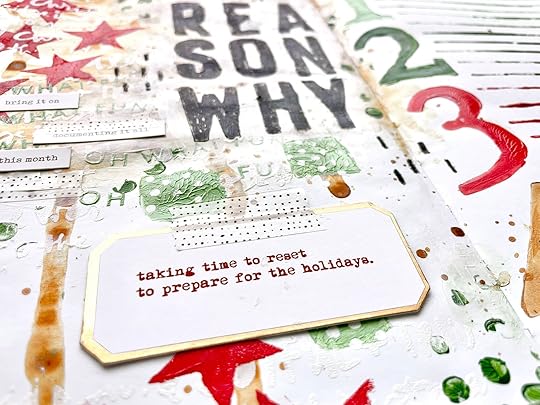
Now it's time to create our title page and I give you permission to get messy! I knew that I wanted to start this page with a drippy watered down acrylic wash, so the day before I applied two thin layers of watercolor ground to my page. This is totally optional, but does help the page to be able to handle heavy amounts of water better.
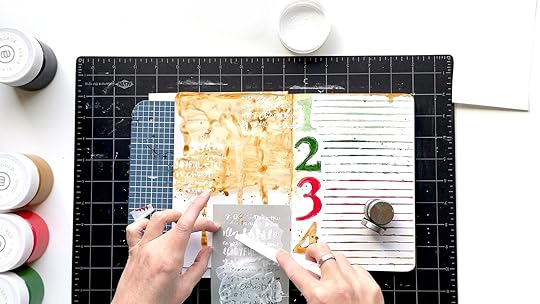
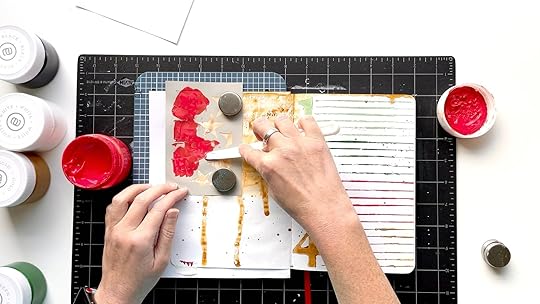
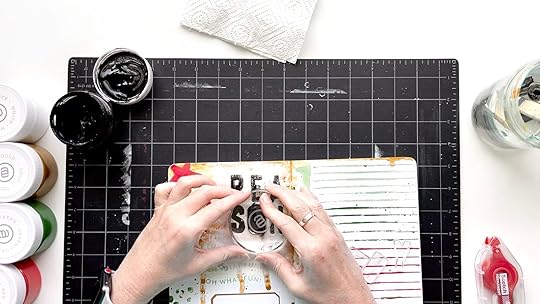
Mixed media pages like this are very intuitive for me so I don't have an exact list of steps for you to follow. Be sure to watch the video to get a better look at how it all came together. I will walk you through how I added a layer of gold using watered down acrylic paint (complete with drips and splatters!), how to use the silk screens, and how I like to hold texture stamps in my hands (rather than on an acrylic block) to get a more organic impression in my mixed media pages. You will also see more stamping with acrylic paint when I make my "reason why" title.
Here are some photos of my process:
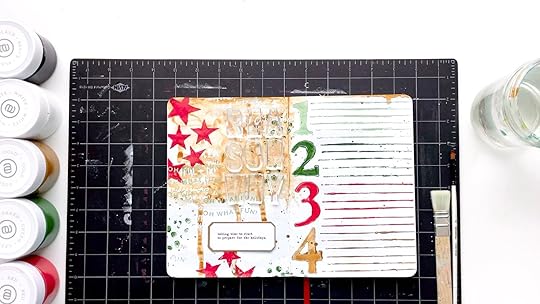
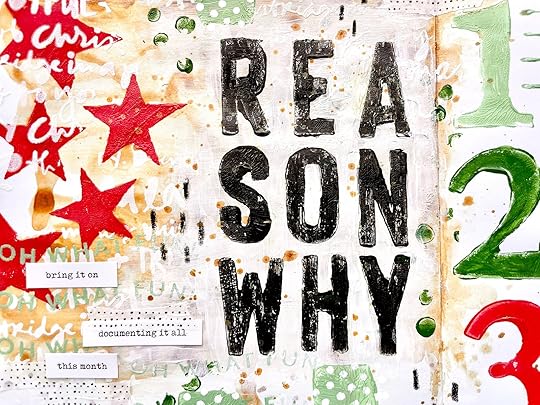
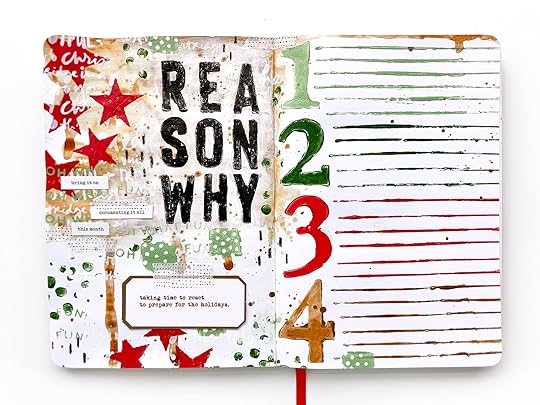
And here is my final spread! I'd like to remind you here to not be too precious with your journal if that's what you are creating in. I give you permission to get it messy! Break it in with some paint and splatters that get on neighboring pages. Embrace the crinkly pages. This journal is gorgeous and I totally understand not wanting to mess it up, but it is not meant to stay pristine and white on a shelf. Happy painting, friends!
I hope this post inspired you to try stamping with acrylic paint and perhaps doing some messy mixed media layering! Let me know if you have any questions about my project and I will see you next week with more mixed media play!
You can find me on Instagram as @jill.drangsholt
SUPPLIES: Floral Art JournalPaint PackA Very Merry Christmas Silkscreen PackNumber 6x8 Stamp SetAlphas Are Awesome #2 6x8 Stamp SetTags 6x8 Stamp Set2023 Main Kit (label)Word Phrase Sticker Sheet BundleMiscellaneous art supplies: Daniel Smith Watercolor Ground, paint brushes, white Posca paint pen, black Neocolor II crayon, washi tape, old gift card


