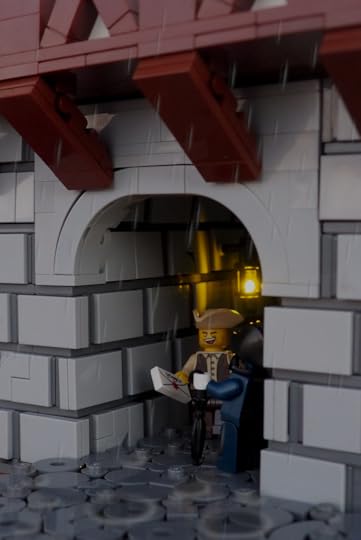
Behind the Scenes: The Alleyway
This alleyway is a shady spot… in more senses than one. But what’s going on behind those complex 2×3 stones complete with grooves of dark grey in between? Is everything connected?
Starting at the bottom, no, everything is definitely not connected. These are “floating” cobblestones, a technique developed by the Snyders and one that I’ve used many times before. The tutorial I’ve just linked to is a great visual, but basically, you just put a layer of round bricks under your round tiles, and then lay those on a layer of tiles and then wiggle everything around until you’ve fit as many stones in as you can.
But the real complexity of this creation is in the wall, where I used clips and brackets to attach each stone. This way I could easily adjust the horizontal placement of each stone to allow for the awkward spacing of a bracket + dark grey tile between each one. On the very top layer I took added advantage of the use of clips and angled the stones slightly.
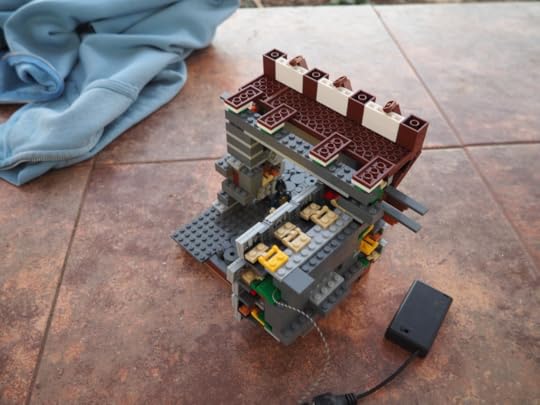
You can’t see it well in this picture (and unfortunately this is all I have), but for the dark grey horizontal lines between each stone, I used 2×4 tiles (at least until I ran out) and attached them to each other via 1×4 plates (or similar) along the back side. Then I laid them between rows of stone. So they’re definitely not attached (they’re pretty far out of system) but they do stay stable at the right offset from the stones.
A couple other things to quickly point out about this MOC: first, notice how much larger it is than “minifigure scale”. Now if we’re honest, minifigure scale is completely out of wack, with most houses being about the size of a bathroom relative to a human figure and yet apples somehow are the size of a whole head. So in fact, my build is more like “real” minifigure scale, and that’s why the minifigures don’t look out of place, but do look a little small.
Second, notice one of my favorite techniques up at the top: flipping studs using a 2×2 donut tile and a 2×2 jumper (green and white pieces under the brown).
Third, my coat is lying on the floor while I get cold because it was performing the useful function of blocking light out of the background. So for the final shot, I had it draped over the empty space at the back. An extra coat or shirt or towel or something is always useful to bring along when shooting a MOC (especially an all-LEGO scene), since there are often little cracks or spots where unwanted light shines through.
The last thing to comment on is the edit–I just drew short black lines and small circles in GIMP, then gave them a white drop shadow and reduced their opacity. Combined with the real LED light for the lantern, it makes the scene feel immersive.
Enjoyed diving behind the scenes on this one? Check out these others:
Behind the Scenes: CleanupBehind the Scenes: Qarkyr Box GardensCharleston SkylineShinmizu VillageLEGO Ninjago Diorama Build LogBuild Log: Swordfish – Ninjago-style SpaceSHIPLEGO Bird’s NestForestman Cottage Breakdown