
Is this the same house?? Part 1- The miracle of Limewashing!
Hi Friends! I hope some of you are having sunshine and rainbows! All I have to say about those of us in Houston is rain rain go away! For those who have been following for a while, you might remember in 2014 when John and I did our last renovation on our home. Taking me 28 years to get my husband open to change my exterior brick, I researched high and low to find the best alternative. Debating between a slurried brick finish (mortar or lime troweled or brushed a top of the brick), a painted brick, or a limewashed surface. I felt with the Georgian-ish style of my home, limewash would be my best alternative.
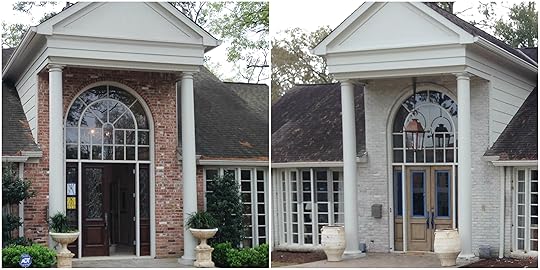
Here you can see the start of the renovation. Limewash lends depth and luminosity to flat walls, brick, or stone by creating surfaces that are mottled and matte with a chalky, nuanced texture. You can apply it, in a thinned-down fashion to show more of the bricks variation or heavier to give a more solid look! It’s so flexible. See more of the transformation here.

There are so many pros to limewash! Because it is breathable it will not trap moisture in your home which can degrade your existing brick and mortar!

And another great fact is that it can be removed or painted over if you ever get tired of the look. Although my home’s exterior architecture is not my fav, the limewashing really gave me a look that I was excited to see each time I pulled up to my home!! I must say that the landscaping also made great improvements to this old house’s curb appeal thanks to Michael Hutchins of Greentouch Landscape.
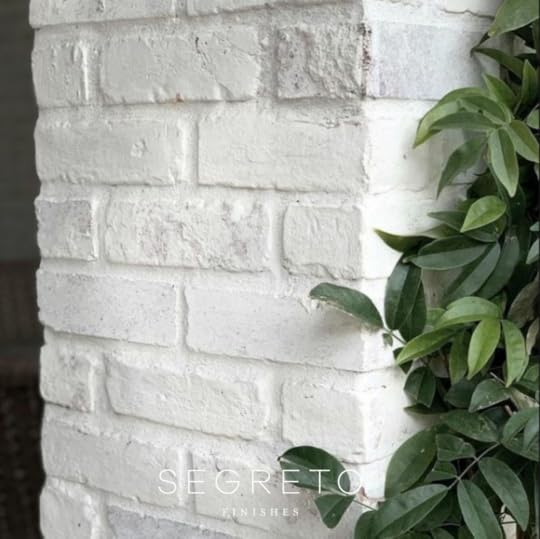
Here is a close-up of my coverage. My husband, although reluctant at the start loved the lighter look so much he opted for a heavier coverage!

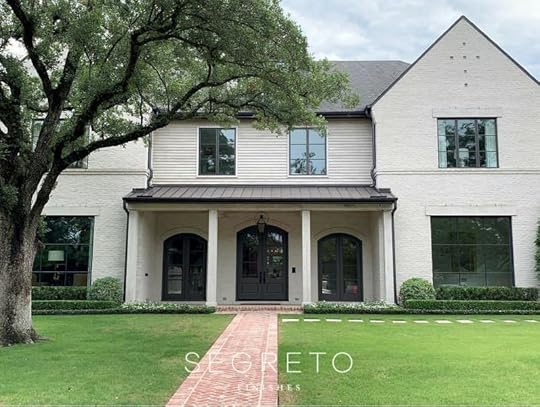
Learning about how to apply limewash to mask the existing tones of the brick of my home gave my team and myself the knowledge to help others with theirs. This wonderful client of 15+ years decided with the help of designer Shelley Melody to give both her interior and exterior a facelift. Shelly designed the new stone porch, metal windows, and lighting.

Consulting to choose the perfect exterior color, it was decided to remove the shutters and limewash the home. I chose Benjamin Moore OC-24 Wind’s Breath for the trim and windows and formulated the limewash to blend! When the shutters were removed it was learned that the previous painter sprayed them in place leaving black overspray on her existing brick. If you are getting your own home painted, please ensure the painter removes the shutters, paints them, and then reinstalls them. This was not an easy fix!!

Can you imaging pulling up to this house now? It now not only looks classic and timeless but also like a brand new house!

Notice the stone above and between the first-floor and second-floor windows. Previously very yellow, we also toned those to blend better with the new stone at the entrance!! I honestly want to move in! I also like that we chose not a bright white but a softer tone- just beautiful!!

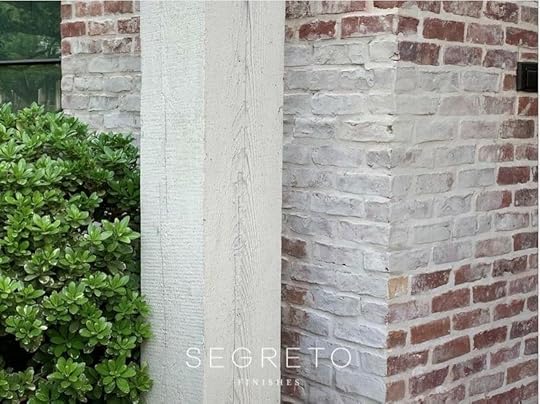
This next project was for designer Beverly Schaeffer. This home had a very textured brick so it was decided to go heavy on our limewash. She wanted the stone features to be at the forefront of the home’s design and did not want the variation of the brick to distract.

What a difference!! The brown doors will be painted to blend with the stone and the front door will be coated in a blue hue!! This home now would fit in in the French countryside!! Although it is more solid- the matte finish and subtle modeling of the limewash unlike a painted finish, lends a softer appearance to the home more in keeping with its style.

It’s amazing how beautifully this treatment transforms any style of home. Living in this new home, the owners felt the exterior just wasn’t quite right for them. Working with designer Laura Weaver we were called in to formulate a game plan.
Night and day difference! Both looks are beautiful but the limewash gave this home a clean, modern feel! Did you know lime’s high pH level means microorganisms can’t survive which adds a hypoallergenic quality and makes it naturally bacteria-resistant?

I do love even with a heavier coverage you still see the soft variations of the brick as opposed to painting which sits on top of the surface and is solid in tone. Not only beautiful but the mottled, shadowy effect helps hide dirt.
When we start a job, we always put up samples until the tone and variation are exactly to our client’s liking- or loving should I say!!
BUT HOW DOES IT HOLD UP?
After living with limewash for almost 8 years now, I have loved how the product has held up. Houston, with its humidity, is not easy on any exterior finish and no coating is no maintenance. I now need to power wash and spot paint or repaint the trim. The limewash has held up well, but where my sprinklers hit the brick the limewash is worn. It’s an easy quick fix. Just spot limewash in these areas. On my to-do list!! We have also found better bonders over the past 8 years. I hope you join us for our next post where we will show how this magical material will transform exterior stone! Till next time! XO Leslie
The post Is this the same house?? Part 1- The miracle of Limewashing! appeared first on Segreto Finishes.


