
Mouse Guard Vermeer Homage
 I've released a new Mouse Guard sketchbook titled 'Dawn, Daye, & Dusk'. It can be found in my online store: https://mouseguard.bigcartel.com/
 I've created new pieces for almost the entire contents of the collection––mostly themed on trying to get certain lighting effects in to show time of day.
This piece to the left is a finished piece for that collection. And below I'm going to go through the process steps to create the art.
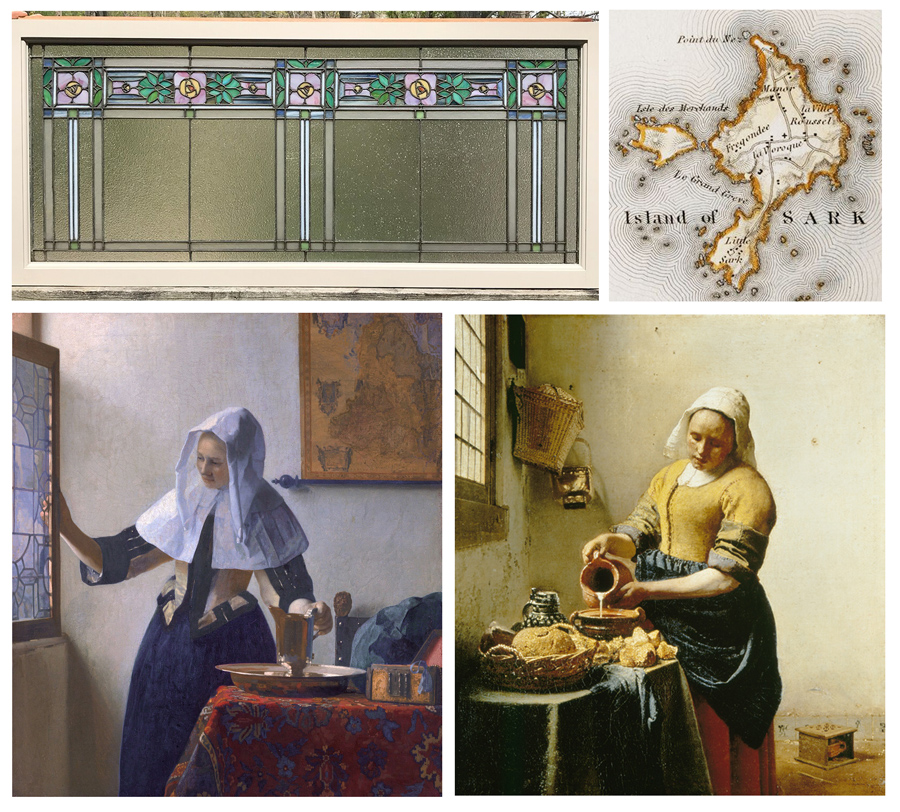 Reference:I wanted to do a Mouse Guard piece that was a peaceful slide of life...not the struggle to survive, but the rewards of mouse society thriving. I looked at two Vermeer paintings: The Milkmaid, and Young Woman with a Water Pitcher to draw from for this tranquil scene of domestic bliss. For the stained glass in my piece, I went to the website of materialsunlimited.com (the antique architectural shop I was working for when I started Mouse Guard..and to decorate the wall, a map of the Island of Sark.
 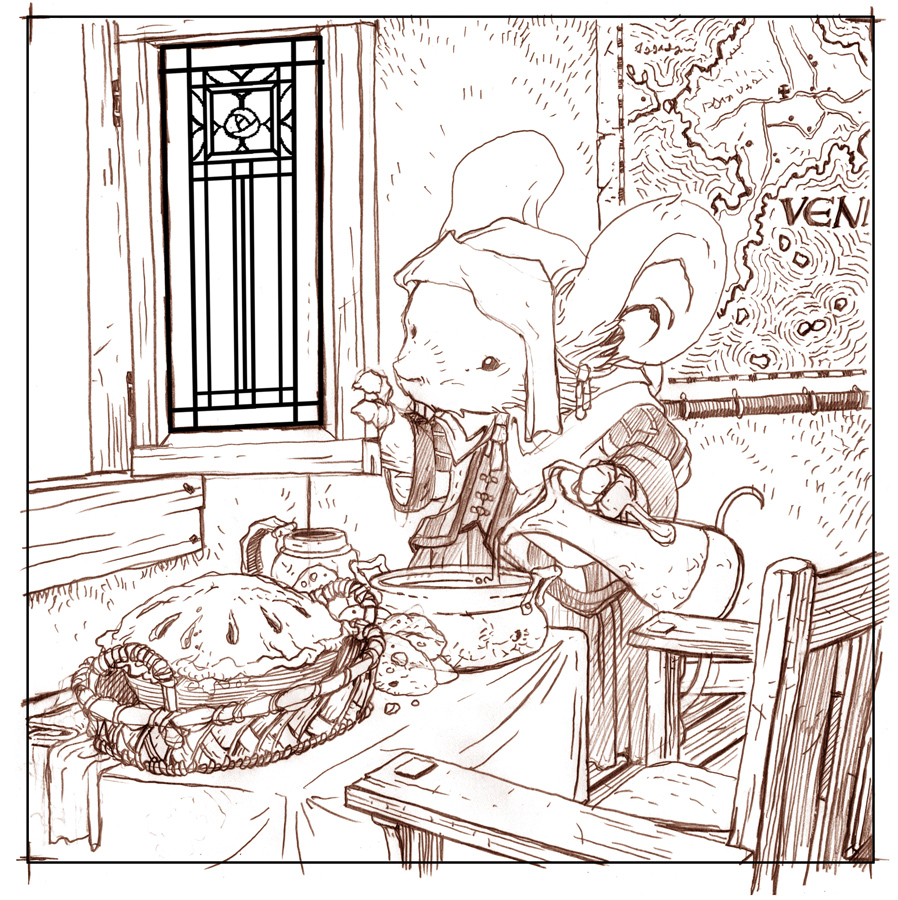 Pencils:
It's rare that I pencil everything at once--but in this case, I did! I'll often layer drawings together on a light pad and then assemble them in Photoshop--but here I did the entire drawing on the paper. With a few exceptions...I did trace out the map over the top of my printed out reference, where I'd also digitally replaced the text with VENN. The Isle of Venn is a small island in Mouse Guard I've referenced before and is a nod to some family friends who own a cottage on an island in Michigan. For this layout, I also digitally added in a digital version of the window's leading.
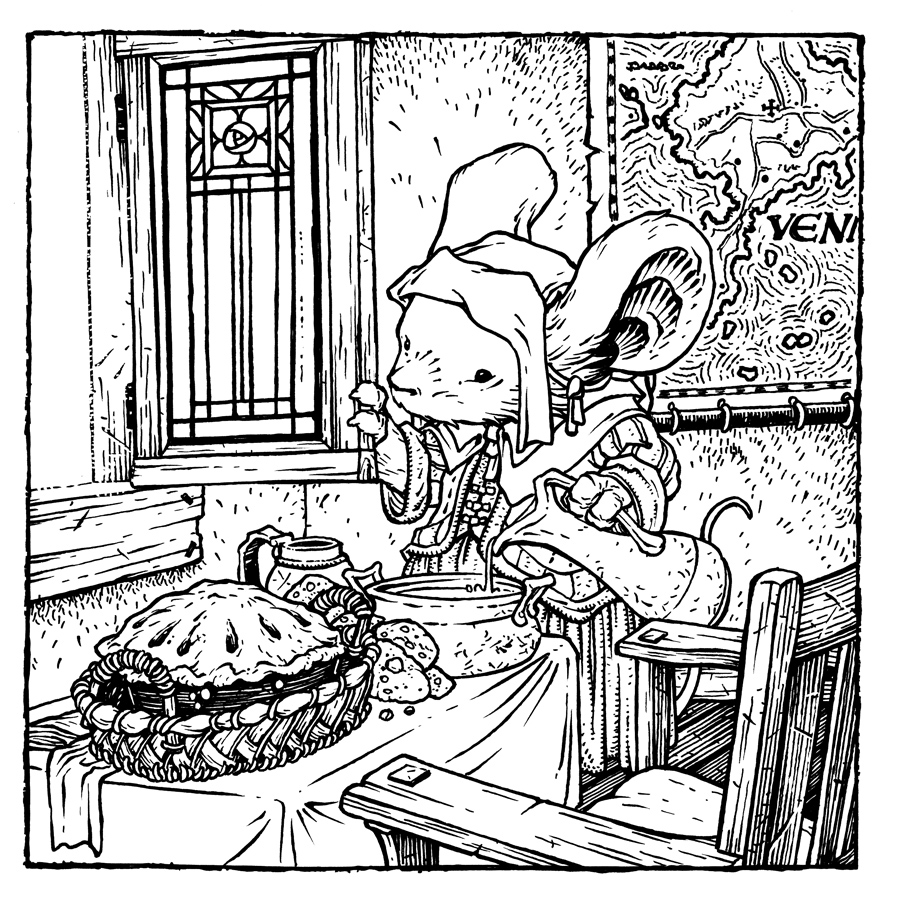 Inks:To ink the piece I printed out the above layout and taped it to the back of a sheet of 300 series Strathmore Bristol. On my lightpad, I was able to see through the surface of the bristol down to the printout to use as a guide to ink from. I used Copic Multiliner SP pens as I inked the Vermeer homage.
 Flat Colors: With the inks done I scanned in the physical artwork back into Photoshop to start the coloring process. Here I painted in flat versions of all the colors––where those colors started and stopped, like a professional version of coloring-in-the-lines. I also established a color holds on the window leading, the map details, the milk, and a lighter streak where the light would be pouring in from outside.
 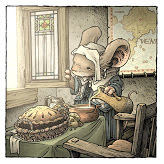 Final Colors:The last step was to render the final colors in Photoshop using the Dodge and Burn tools. Those tools are used to darken and lighten base colors to form shadows and highlights. Using a stock texture brush also helps add some life to the rendering.
This one was definitely a challenge for me to render a more painterly idea of real light––while also being an illustration with inked outlines.


No comments have been added yet.
David Petersen's Blog

- David Petersen's profile
- 339 followers
David Petersen isn't a Goodreads Author
(yet),
but they
do have a blog,
so here are some recent posts imported from
their feed.

