
Increasing the Contrast on Inked Pages- Digitally Correcting Watercolor Pages- Part 4
Our little digital corrections miniseries is almost at an end. In the first installment, we talked about color correcting traditional watercolor pages digitally, in the second installment, we talked about resizing elements, adding shadows, and adjusting tone. In the third installment, we talked about lettering and creating balloons that fit a watercolor page. And today, we're going to discuss ways to adjust lineart contrast on watercolor comic pages that have been inked before painting.
Sometimes when painting, your watercolors can leave an opaque layer on top of your inks. This can make the whole page feel dull. If you scanned your inks before you started painting, you can layer them on top, using the Multiple mode, to recapture that clarity.
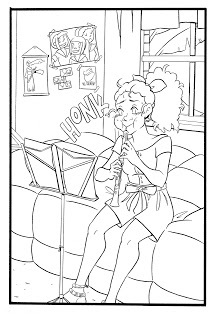
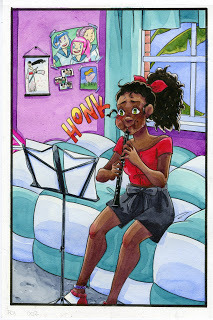
 Top: Scanned inks, scanned at 600DP.Bottom: Left: Original Scan, not color corrected or adjusted. Right: Color corrected scan.
This is a pretty simple procedure, but it does take patience and a keen eye, as watercolor illustrations can shrink or warp while painting, and it may be challenging to match the two scans.
Right now, there isn't an elegant way to share my tweets, so I hope you guys will bear with me and endure the ugliness. Tweet threads are also linked, for a more organic way to pursue the topic. You don't need a Twitter account to see the threads. To view the images, I HIGHLY recommend clicking the provided links- Twitter is able to serve up large versions of the images so you can see what's going on.
Increasing Lineart Contrast Digitally Thread Readable Here
Correcting pages! Already finished with color correction, now I'm layering lineart scans to increase my lineart's contrast. pic.twitter.com/wIyc8Gzzyg
—


No comments have been added yet.


