
Sourdough Starter a.k.a. making your pet "Sour Doug"
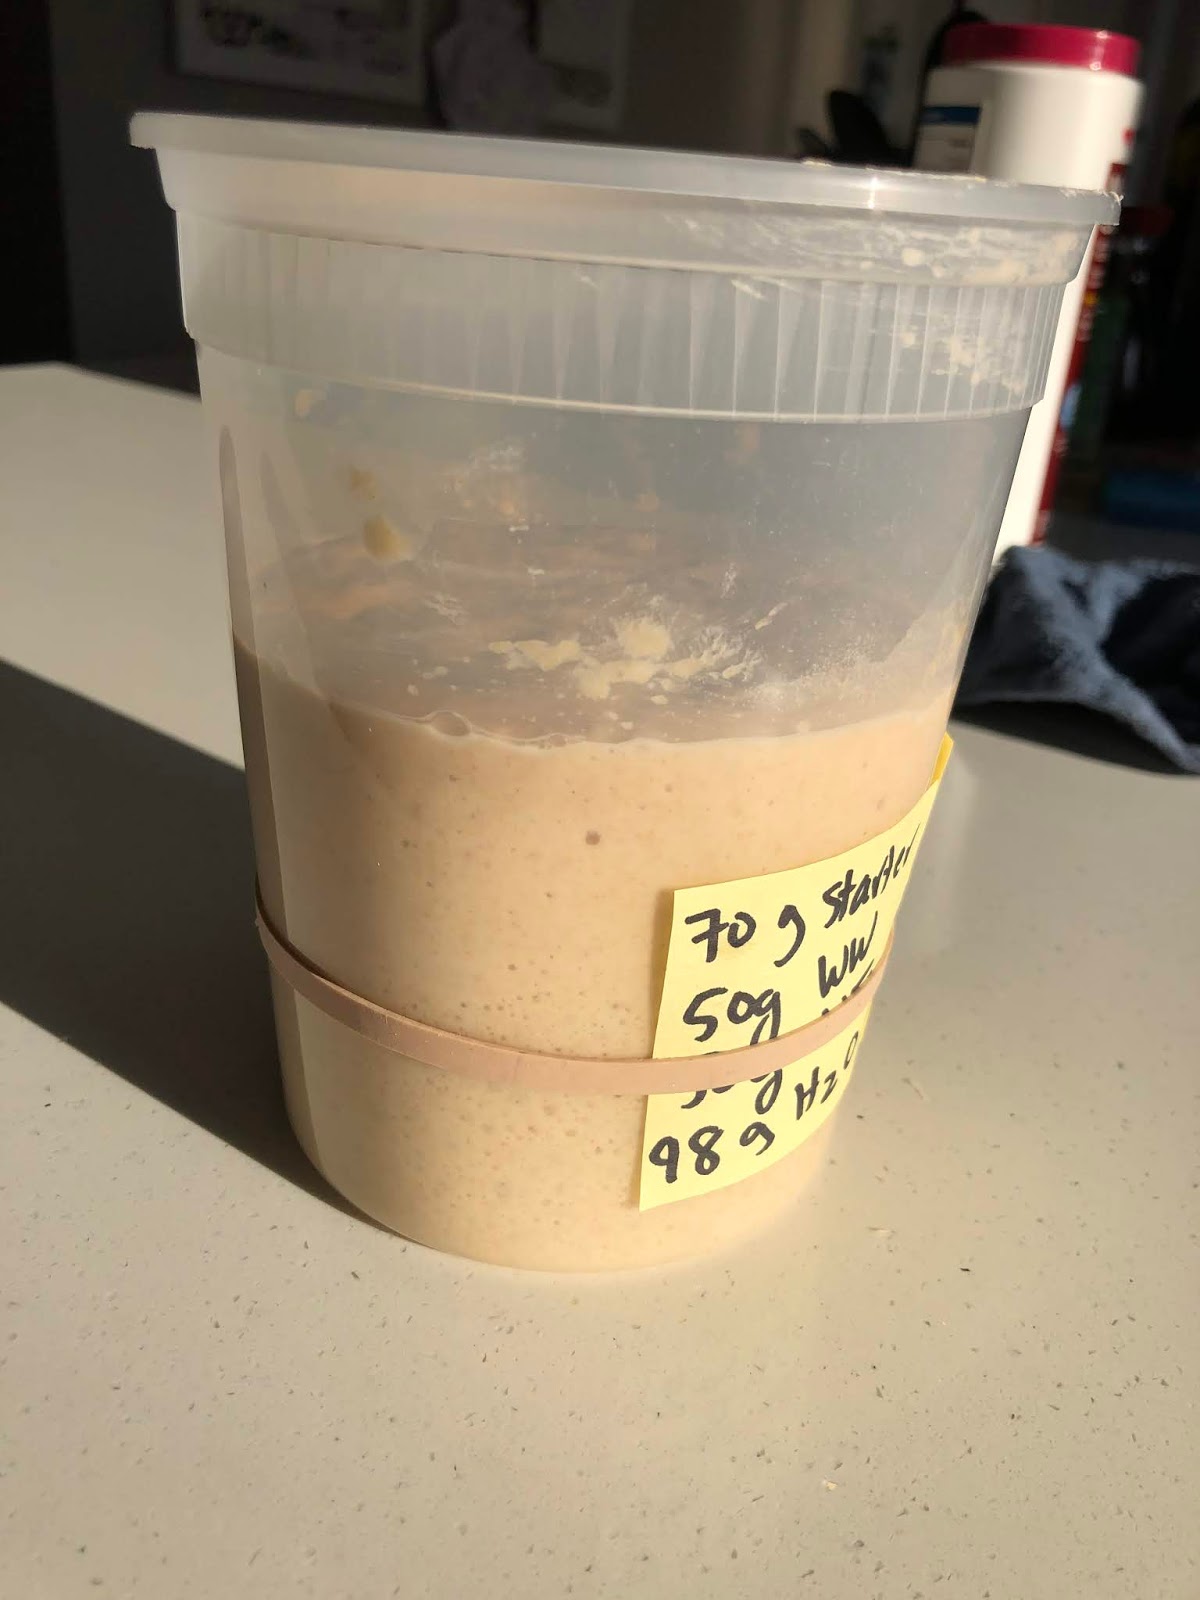 Sour Doug all grown up.
 Here he is after he's risen to his full peak, about 12 hours after a feeding.
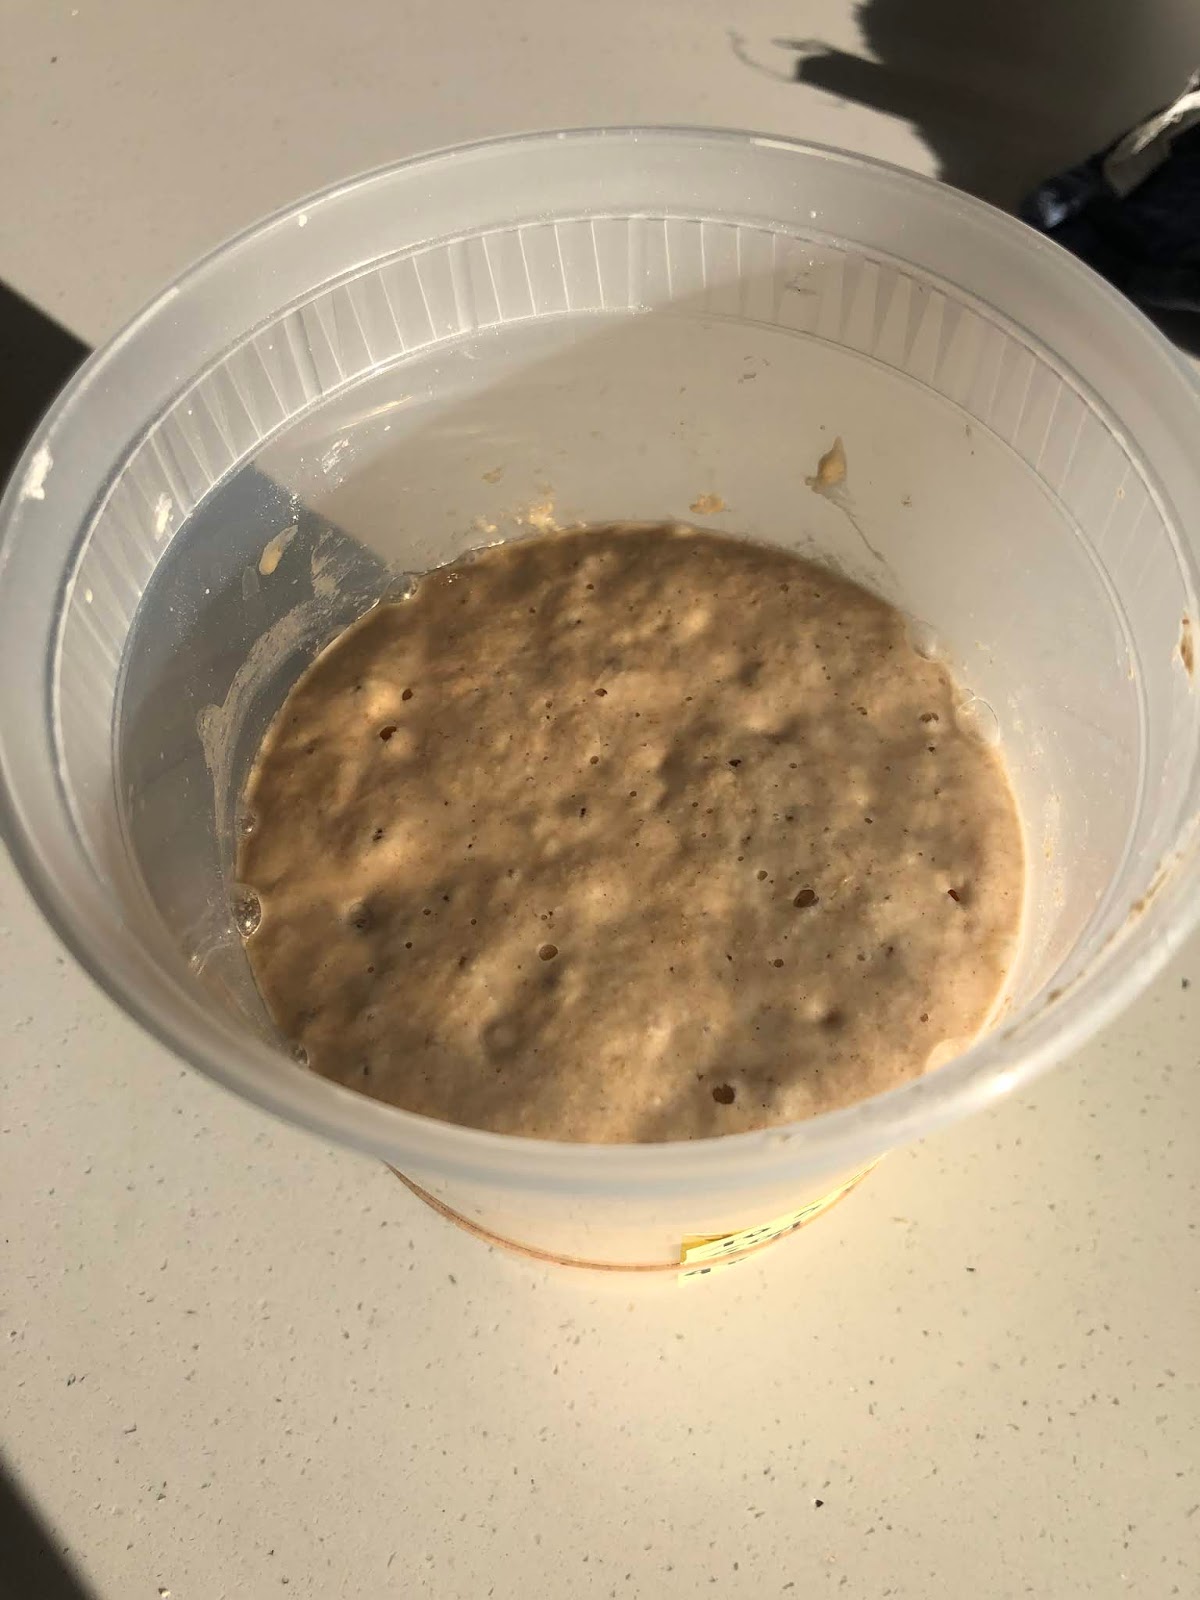 From the top: slightly domed, bubbly, no hooch. Ready to use for baking!
 Hi. It's me. It's been ages since I've blogged, but I've gotten a few requests on how I do my sourdough starter and bread, so why not share it with the world?I very much hope you, your friends, and family are all staying safe during this pandemic!
Here goes!
What is sourdough?
Sourdough is a mix of water, flour, and natural yeasts and bacteria that grow from the air and the flour itself. It's a bit tangy, as the bacteria produce a little lactic acid (like in yogurt). It's the way to make risen breads, cakes, and other pastries without relying on active yeast you need to buy. Once you've got a "starter" you basically can make bread forever without worrying that a pandemic is going to make active dry yeast hard to buy!
Is it very sour?
The sourdough breads I've made are only a touch sour. Some sourdoughs like the famous Eli's in NYC, or San Francisco's famous sourdough (a very specific mix of yeasts and bacteria) are a bit more strong (deliciously so!) but my homemade has been pretty mild.
For more sour taste, a longer rise when you're making dough, or using starter straight from the fridge, will probably give you a more pungent flavor. Using more starter in your recipe oddly makes it less, sour, compared to more sour with less starter. Confused? Watch this guy.
A few notes to start with:
*Try to use filtered water, not tap/chlorinated. There's a theory that the chlorine will slow the growth of your sourdough microbes, but I know some people who just use tap and it's okay. I like to use filtered, to be safe. If you don't have a filter, just sit some tap water on the counter for a few hours and the chlorine evaporates.
*When possible, use 50/50 unbleached white flour plus whole wheat flour or rye flour. I think the whole meal flours help the sourdough grow better. Vitamins and minerals and all that. But if you only have regular unbleached, at least be sure it's unbleached!
*if you don't have a digital scale, then measurements are in parentheses
*container: I love using those takeout plastic containers. They're wide-mouthed and easy to use. I've used mason jars but I don't like how even the wide mouth ones make it difficult to stir. There are pricier glass Weck jars, but this is about using what you have, so.
*metal: Some people say never use metal instruments or bowls or whatever. I think that's probably bunk. I tend to use plastic, glass and silicone, but I've used metal spoons and it's fine.
Day 1 (These are about 24 hours apart. I usually do my starter stuff at 8 AM)
Mix 100 g flour (about 3/4 cup) and 115g (about a teaspoon + 1/2 cup) filtered water together. Use either a plastic or glass jar. I like those plastic take out containers because the opening is wide. Keep loosely covered (if itâs airtight itâll explode and it needs oxygen to grow, too). Use a rubber band to show where the level is, so if it rises youâll see growth. Keep in a warm place, like near the stove.
You may notice it will get a little bubbly.
Day 2
It should smell a little yeasty. It may have risen, or not. That's okay.
Remove 70g of starter (1/4 cup of stirred down starter) and place in a new container. Store the rest of the starter (the âdiscardâ) in the fridge or throw in compost (there are recipes online for using the discard if you donât want to be wasteful. Remember it has a 50/50 water to solid content, so you can figure out substitutions in recipes. I have a great banana bread recipe to come to use with starter that I'll post soon.
To your 70g of starter, add 100g flour and 115 g filtered water. Mix really well so itâs well incorporated. Wait another day.
Day 3:
You may notice it rose a little more. It should smell yeasty, but possibly a touch yogurty as the yeast is also mixing with bacteria and fermenting to make some lactic acid. Thatâs cool. Repeat your discard and feeding (keep 70g starter; add 100g flour; this time, add 110g water (1/2 cup + half a teaspoon).
Day 4:
Repeat, but this time, use 70g starter, 100g flour, and 105 g water (1/2 cup).
Day 5:
Repeat, but this time use 70g starter, 100g flour, and 100 g water (barely less than half cup).
By now, youâll notice a rhythm. Your starter will get bubbly and rise. As it rises, itâll look domed on top. At some point, it will flatten out, and start to fall. This is a sign that itâs eating all the food supply and going anaerobic. Sometimes youâll notice a touch of liquid on topâthat's âhoochâ or alcohol. A little bit wonât hurt your starter, but a sign that you need to feed it more often. A lot of hooch isn't great.
If you find that your starter rises and is falling around 12 hours after you did your morning feeding/discard, then itâs time to start feeding every 12 hours.
At this point, use 70g starter, 100g flour, and about 98 g water (little less than 1/2 cup). (Good god, does that -2g of water really matter? Dunno for sure. But it seemed happy by being 2% less wet.)
Keep repeating. When your starter has more than doubled reliably 2x within 12-18 hours after each feeding/discard, itâs ripe and ready to use.
Using starter:
Ideally, you should use the starter when itâs at its maximum rise after a feeding. So you need to time this for your baking. Often, it means feeding at night, and baking the next morning.
Storing:
Once your starter is ripe and mature, and youâve named it something memorable, itâs time to store.
Take 70g starter, add your 100g flour, 98 g water, mix well, and leave alone for about 2 hours. Then stick it in the fridge, and feed/discard once a week. I find that Dough gets hoochy after a full 7 days, so I feed on day 6.
Using starter after itâs been in the fridge.
I'll take it out the night before I'm going to bake, don't discard, just add 100g flour and 100 g of water, and let it rise overnight. The next morning, it should have doubled and be pretty bubbly.
Some people use starter straight out of the fridge for a recipe, but generally it takes more time to rise and will have a slightly stronger flavor.
Problem Solving:
Your starter smells like nail polish remover.
It probably went too far and wasn't being fed often enough. Either start over, or start with a very tiny bit of starter, like a tablespoon, and mix with 100g flour and 100g water and see how it goes.
It also may mean your environment is really warm and your starter is eating through its food supply very fast. It may need to be fed more often, like twice a day.
Are you covering the starter? it should be loosely covered, not airtight.
You're getting a lot of hooch.
See above--probably needs to be fed more often. Or it's not getting enough air.
No rise or activity at all
Probably too cold? Try turning on your oven to 200 degrees, then shutting it off and leaving your starter in there for several hours and see how it goes. Remember it should be loosely covered, not airtight.
It's liquidy and bubbling, smells okay, but never rises.
It probably needs less water, and a touch more flour. Decrease the water amount so after a feed, it feels like a thick, moist dough, not a liquidy, pourable dough.
Good luck all! I'll try to answer questions in the comments!


No comments have been added yet.


