
Using the Scrivener Timeline

We’re continuing the #52WeeksOfScrivener series today by taking a look at the Timeline view.
The Scrivener Timeline feature is so intuitive, it’s hard to believe that it wasn’t one of the first things developed back in version 1.0, but it didn’t become a thing until version 3.0. It was worth the wait. Here’s how it works.
Label Your Chapters
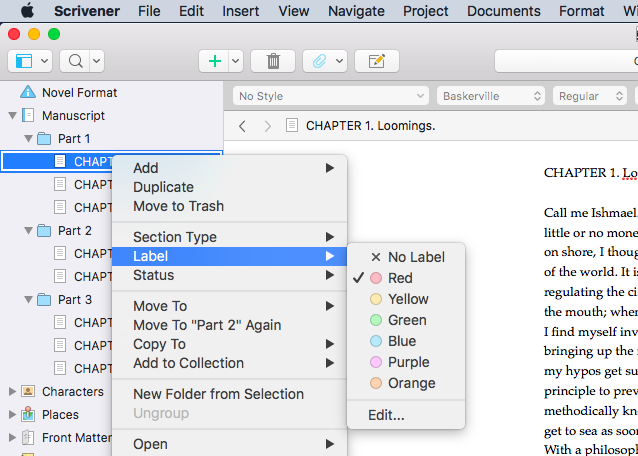
The first step is to label your chapters/sections/folders (whatever unit of your story you want to work with, really, but for this example I chose chapters). Do this by right clicking the name of the chapter (not the icon), and choosing the option for “label.” It should look something like this:
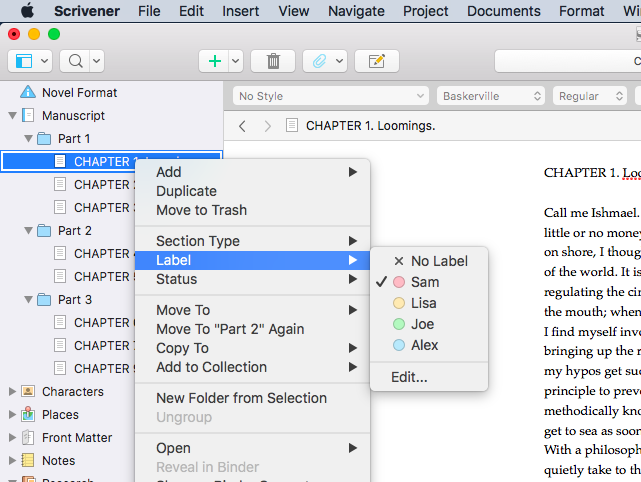
Now, you can use the colors provided there, or you can click edit and make those colors represent anything you want. Maybe you have four POVs in your story. Maybe you jump around in time. Maybe you have alternate universes in your story, or you move from planet to planet. Who knows. It’s your story.
Point is, you can change the labels. For this example, I’m going with POV. Here’s what it looks like once I’ve edited the labels to represent the four POVs of my story:
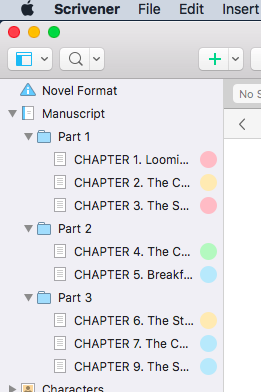
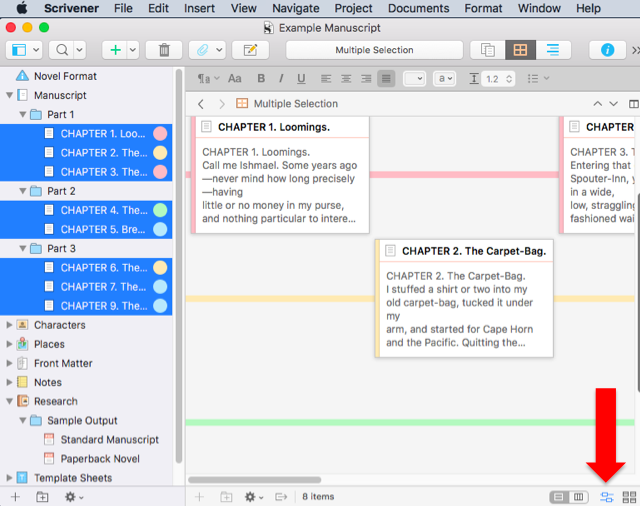
It’s important to note that you won’t see any sign of those pretty colored labels in the binder unless you go to VIEW > USE LABEL COLOR IN > BINDER. Then it’ll look like this (see image on the left there).
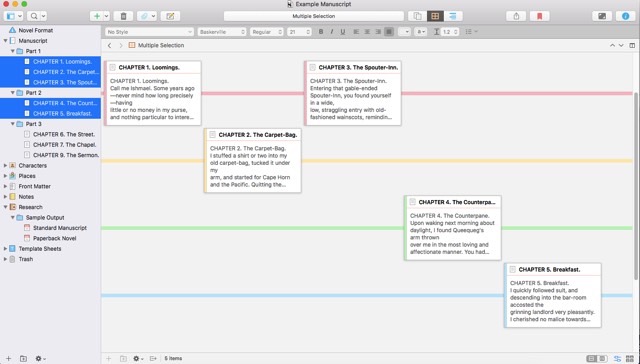
And this is kind of neat and all, but where it really gets useful is when you click to go to corkboard view. To do that, you can either click the little icon at the top (just right of the header bar) that looks like a waffle…
OR you can cherry pick the items you want to work with (COMMAND-click on my mac), then click the icon at the bottom right of your screen to display those items in the corkboard.
Now, if I zoom out a bit, you can see how this looks with all of my chapters lined up by whose POV they’re told from:
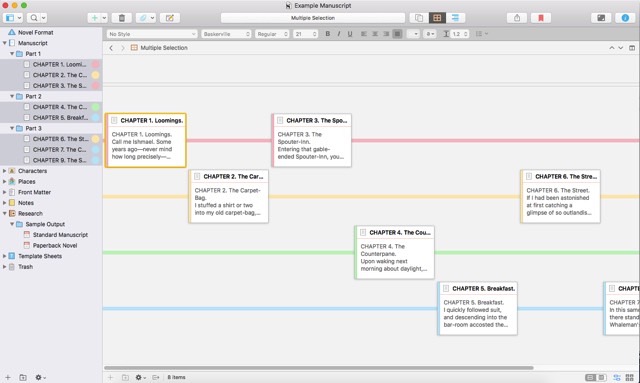
Looking at it like that I can see that my story starts out with more of Sam’s POV, then kind of shifts to more of Alex’s POV. Maybe I intended that, maybe not.
A Few Cool Things to Know
You can change the size and spacing of the cards which really helps a writer see all their cards in whatever space they happen to have. I like my little laptop screen, but I know some writers work on big ‘ol screens, and this feature works for both. To do that, click the little icon that looks like 4 note cards in a square formation, them adjust as you like:

If you move a card around (say from one timeline to another, or to a spot earlier or later in the story) it will move accordingly in your binder. Even the color will change automatically.
You can add research to your timeline. Say you’re writing a historical novel and you want to lay out the actual historical timeline next to your story, simple create documents in your research folder for each event you want on the timeline, and label them something like “historical.”
Next Week
Next Monday I’ll show you a super easy way to highlight the adverbs in your writing. Seriously. It’s so easy. You’ll love it. Stay tuned, follow on Twitter with #52WeeksOfScrivener, or sign up for my newsletter to get a weekly digest of all my posts.


