
Using Scrivener Keywords to Track Ideas at a Glance

This is post number 25 in my #52WeeksOfScrivener Challenge. Next week is the halfway point! Time is zipping past… Today we’re talking about how to use Scrivener Keywords to track themes and bigger ideas in your story. Keywords take a few minutes to set up, but they can be really revealing when used well.
Add Key Words
To start, you have to add key words to your project. To do this go to Project -> Show Project Keywords.
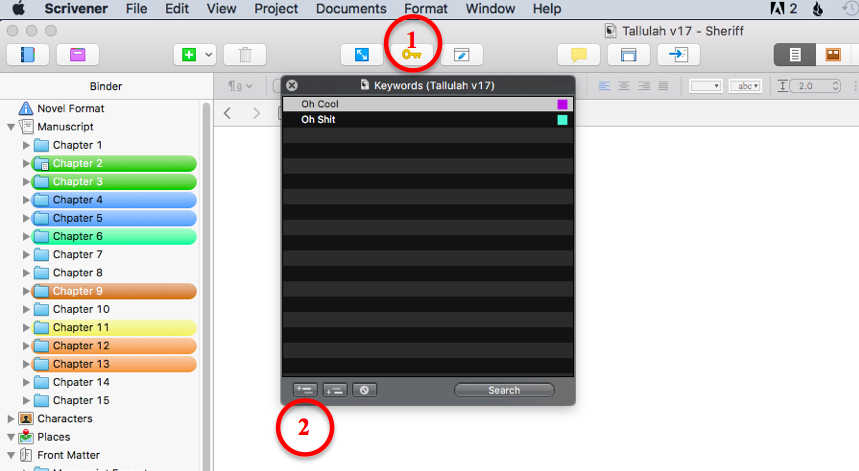
You’ll get a pop-up window that looks like this:
I’ve added three random keywords to use as examples, but you can add your own by clicking the + symbol at the bottom left hand corner of the pop-up window. Don’t worry, you can change these at any time, so feel free to play around, get creative.
You can even use subcategories by using the second button on the bottom there. I imagine you could waste a ton of time geeking out, but keep in mind, the goal is to be writing, so let’s get on with it. Go ahead and close that pop-up window.
Now let’s see how to actually use the keywords.
Tag Each Scene with a Keyword
In each scene, you can add as many key words as you want. First, open the inspector window, then click on the metadata tab (the upward facing red arrow in the image below). If you click on the wheel icon in the Keywords bar (downward facing red arrow), you will be presented with a list of the keywords you added in that last step. You can choose from those, or Show Project Keywords to add more.

I would advise against simply clicking the + icon at this step, because if your keywords don’t match exactly, they won’t work.
See Your Keywords In Action
To check your work, go to the outline view by clicking the outline icon at the top of the page.

Once you’re in the Outline View, you will see columns of info. To change what displays here, click the little “greater than” sign near the top (downward pointing arrow in the next image), and then click or unclick the options in the drop down menu.
Click to display Keywords. I like to see the actual words, so I leave the box immediately below that one (the option that reads “as Color Chips”) unchecked, but you can play with that.
Note that you can move the columns around by dragging and dropping. For this example, I’ve dragged my Keywords to second position after Chapter Title and Synopsis.

After adding keywords to a few more chapters, my outline looks like this:

Looking it over, I might notice that the topic of soup is playing pretty heavily in this manuscript. Maybe I want to mix it up a bit. Or maybe I just can’t get enough chapters about soup and I should go back and revise those first two so that they’re less about the ocean and love, more about soup.
You get the idea.
Get Creative
I imagine you could use keywords to track all kinds of things.
You could create keywords of your characters’ names and see at a glance who appears consistently and who drops off the page for five chapters.
You could track themes. Like say you’re working with the themes of trust and abandonment. As you write each scene you could add a keyword marking which theme you hit. Then when you view them all lined up, you can see if you weigh in too heavy with one or the other.
You could use them to track timelines, if you have a story that jumps around a lot.
So many possibilities… If you have a way you use keywords in Scrivener, please leave a comment below.
Next Week
Next Monday we’ll celebrate the halfway mark of this year of Scrivener by diving into Binder Icons. Stay tuned, follow on Twitter with #52WeeksOfScrivener, or sign up for my newsletter to get a weekly digest of all my posts.


