Sourdough bread thoughts and tips
I just got back from visiting Suki — you can’t even imagine how hot it is in this picture. We weirdly paid no attention to the thermometer (basically it was 100 degrees out) and opted for a fried chicken picnic by the river.


Of course I had a wonderful time with them!
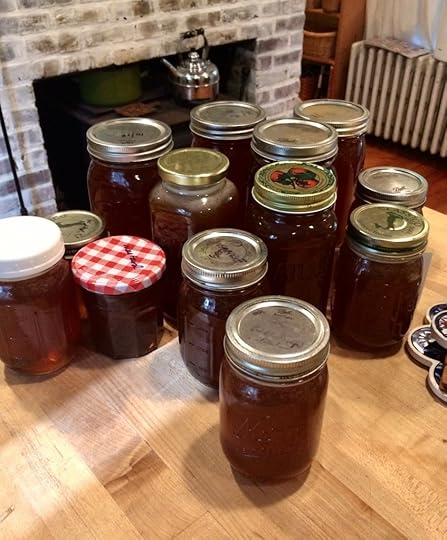
Before I left home I made this bread and we harvested honey (and plan to harvest yet more tomorrow! I’ll keep you posted on IG!).

I know you want to me to tell you about making sourdough, but I have to resist getting into all the particulars. You’ll have to do what I did: keep looking up various methods by actual experts, and trying different things.
Suki and I talked about how we learned to bake sourdough. I think we arrived at the same place of doing it our own way (that is, we each have our own way!) by the same means, trying to follow different methods and just seeing what works. (Search for sourdough baking and click on King Arthur, The Perfect Loaf, Full Proof Baking; go to Instagram and follow the sourdough hashtag.)
Like so many things, you just have to do it and see what happens, but always test against your previous experience (no matter how little you have — you have to build on what you know and remember your mistakes and your successes).
One thing that frustrated me from the get-go is that all the instructions for the home baker are for one small sourdough loaf. I’ve been baking bread for my whole married life and I cannot contemplate for one instant making one measly loaf of bread!
I feel like I’ve wasted my time if I don’t make four loaves; three feels like an efficiency lapse.
So early on I put my normal yeast-dough knowledge to work. Here are my tips (you really have to know how to bake yeast bread to follow, and I do have lots of tips on that — I know, I know, not as much as you would like!):
Treat your starter like it’s the sponge you’ve developed with your yeast. Start at that point in your process (where you’ve proved your yeast with about a cup of water and enough flour to make a loose dough or batter — just think of your small amount of starter as your yeast). Just pretend and keep mixing your dough as usual, after that sponge step.
Let the mixed dough rest. This is the autolyse (it isn’t really, because you’ve mixed everything, not just the flour and water, but still, the rest allows the grains to absorb liquid and for the gluten to begin lining itself up).
Use more liquid than you think. If you want to wrap your mind around baker’s percentages and use a scale, you can. Lots of info out there to explain it. But you know how to make bread — if you’ve listened to me over the years, you’ve paid attention to how a good dough feels in the mixer or under your hands. Add that much water or a little more. Don’t get caught up in the high hydration craze for now. Aim at 65-68% hydration for now, which is not a stiff dough but is not wet either.
Use more salt than you think or than you are used to from your yeast recipes. For 8 cups of flour I use almost 2 tablespoons of salt.
After the rest (20-40 minutes), mix or knead well. I use the stand mixer.
In your first rise (“bulk rise” or “fermentation”), try doing some stretch and folds 30 and 60 minutes into it. A good demonstration is here — but I would never make this small amount of dough. You can leave your dough on the counter and skip the bowl or container. Just cover with a tightly woven wet cloth in between handling.
Make sure your dough rises fully the first time. Don’t skimp on this step. It should look soft and big.
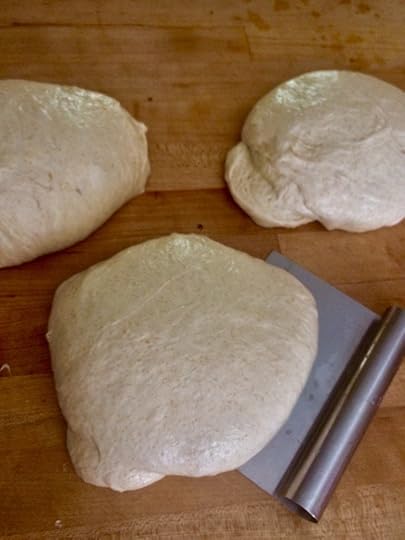
Gently turn your dough out, folding and stretching it if it’s been in a bowl; if it’s on your counter, just use your bench scraper to divide it and fold it into rough shapes for the loaves you have in mind. When I fill my Kitchenaid 5 qt. mixer with all the flour it can handle, I get enough dough for 4 sandwich loaves (my pans are on the smaller side for loaf pans) or 3 boule-style loaves.
Let the dough rest for 20 minutes. Shape for your loaves. For the best rise and crumb, do something that resembles folding it in thirds, giving it a turn, and folding it again or rolling it on itself. It should resist you slightly (that’s the gluten structure) so don’t force it to deflate, but do firmly get it folded up on itself so that the gluten strands create a matrix for your nice bubbles. Place seam-side down in your loaf pans or seam side up in your bannetons or baskets lined with cloth napkins or tea towels (scrupulously clean of course). I like to use rice flour for dusting and find that I don’t need the liners for the wooden bannetons.
Here’s the trick for sourdough — if you’re making bread in loaf pans, proceed as usual, letting the dough rise at least 50% and baking as you usually do, then popping in a hot oven (375-400) for 40 minutes or until the instant-read thermometer reaches 200.
But for your lovely crusty loaves, after about an hour rising on your counter (depending on the temperature in your house — maybe in summer this would be less and in winter, more), refrigerate your shaped dough for at least 8 hours and up to who knows, a day or even two. Heat your oven on high (450) with your baking stone on a middle rack and get your pan of boiling water ready. Turn your cold dough onto a piece of parchment paper on a baker’s peel, score it, and slide it onto the stone. Or sometimes if I have two loaves to bake at once, I have two pieces of parchment on big baking pans (like cookie sheets) and turn the dough on those, having them as far apart from each other as they can comfortably be.
Suki uses a cast-iron combo-cooker — like this one. I just rely on the steam from a baking tray with boiling water on my oven floor and have had good success with another one on a high top rack.
After about 16-18 minutes, remove the steam pan(s) or lid of the combo cooker and reduce the temp to 425 or 400. Bake for 15-20 minutes more or until the instant-read thermometer registers 200.
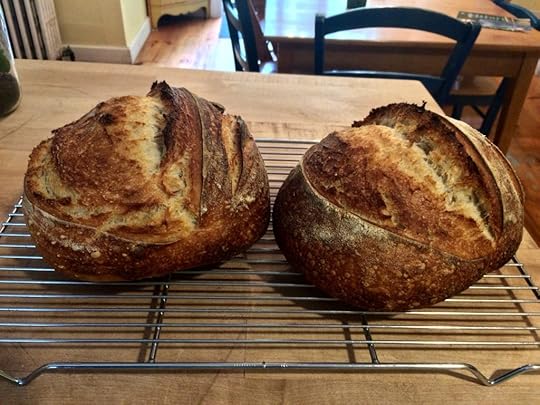
 This dough is not what I used to make those loaves, but I’m doing my best here to show you some of the process — you know I’m not the expert on these here interwebs!
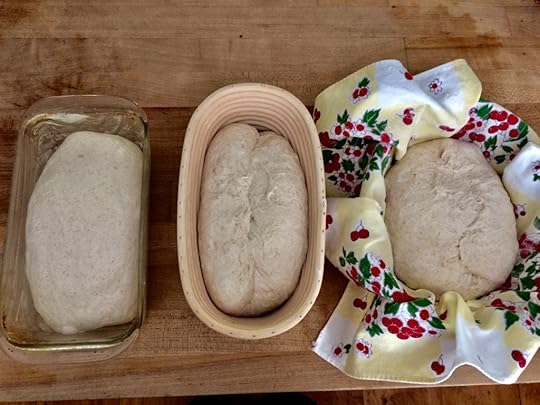 The same dough can be a sandwich loaf or a sourdough crusty loaf. This batch has a little leftover oat porridge, some milk, and some whole wheat.
 I have these little shower-cap like things that I cover my dough with for the fridge. I just use a damp towel for sandwich loaves that are sitting out on the counter.
Cool your loaves completely. If you are freezing loaves, let them cool for a good 6 hours at least before you do so.

I am happy to answer questions in the comments! The main point is that if you already know how to bake bread, you can do this!
Bits & pieces
Please stop me before I knit a fence using giant knitting needles made from curtain rods but so help me it’s gorgeous. So is the place where the artist lives.
It took me so long to listen to this short clip of two chants, one Hebrew and one Latin, that I forget who pointed me to it and why… but it’s incredibly beautiful, isn’t it?
Melody Lyons on mothers wondering what their apostolate or mission might be.
A plastic surgeon speaks out on the child abuse that is “sex-change” surgery. Like abortion, there is a vague “wave your magic wand” idea about what actually goes on. Even though this is hard to read, I think for us to be able to speak knowledgeably about our opinions, we need to know the information that leads this doctor to say that these approaches are “totally unacceptable.”
The personalism of John Henry Newman.
The Scientific American had an article almost five years ago, about fetal tissue research, that is worth bookmarking.
From the archives
The binder will help you organize your home school.
Got cucumbers? Make bread-and-butter pickles!
Today is the feast of St. Matthew!
Follow us everywhere!
Stay abreast of the posts when they happen:
I just share pretty pictures Auntie Leila’s Instagram.
If you want politics, rants, and takes on what is going on in the Church:
Auntie Leila’s Facebook (you can just follow — my posts are public — sometimes I share articles here that don’t make it into {bits & pieces})
Pinterest is annoying me right now with its PC nonsense, but if you want to see my boards: Auntie Leila’s Pinterest.
Or the boards of the others: Rosie’s Pinterest. Sukie’s Pinterest. Deirdre’s Pinterest. Habou’s Pinterest. Bridget’s Pinterest.
And the others on IG: Rosie’s Instagram. Sukie’s Instagram. Deirdre’s Instagram.Bridget’s Instagram.Habou’s Instagram.
The post Sourdough bread thoughts and tips appeared first on Like Mother Like Daughter.