
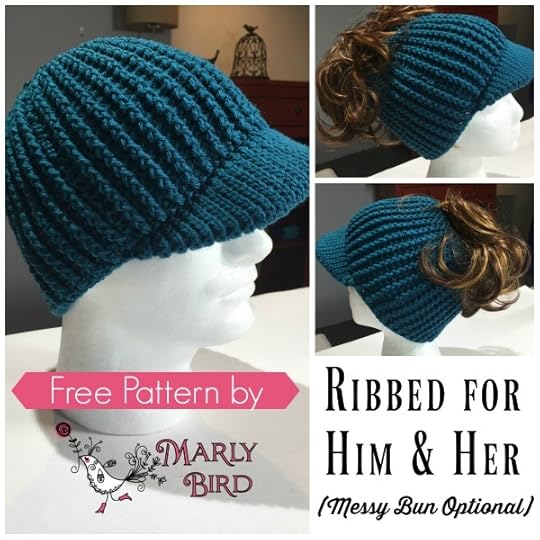
Free Crochet Messy Bun Hat Pattern
Get a Free Crochet Messy Bun Hat Pattern that is for Him and Her! The Ribbed For Him and Her hat pattern is a fun project to crochet. It does take a bit more time than a simple double crochet messy bun hat but it is worth it!
First question everybody has is, “what did you add to the brim to make it an actual brim?” The answer to that is NOTHING! The unique construction of the brim allows it to extend from the forehead as one is intended to do.
Learn how to make this wonderful hat that only uses 1 ball of yarn. Making this project is not only cute but cheap to make! And it’s a great gift for your loved one, a great addition to your craft fair wares, and a great addition to your own wardrobe.
 Add to favorites and Queue the Free Crochet Messy Bun Hat Pattern, “Ribbed for Him and Her” pattern on Ravlery
**this post includes affiliate links**
Ribbed for Him and Her Hat Pattern
Pattern Details
Finished Circumference: 20” around at base of hat.
Gauge
16 sts and 12 rows = 4″ [10 cm]
Yarn
[4 Medium] RED HEART® With Love™, Art. E400, available in solid color 7 oz (198 g), 370 yd (338 m); multicolor 5 oz (141 g), 230 yd (211 m), skeins
Hook
Susan Bates® Crochet Hook: 5 mm [US H-8]
Notions
Removable Stitch Markers (Marly uses these)
Notes:
Make all slip stitches on BRIM through back loop only (TBLO).
When going to the body of the hat work through both loops.
Stitches Used (and YouTube Video links to help you learn)
Chain Stitch (ch)
Slip Stitch (Sl St)
Through Back Loop Only (TBLO)
Through Front Loop Only (TFLO)
Foundation Double Crochet
Double Crochet
Front Post Double Crochet (FPDC)
Back Post Double Crochet (BPDC)
Front Post Double Crochet Two Together (FPDC2Tog)
Pattern Stitch
Foundation Double Crochet: Ch 3, yarn over (yo) hook, insert hook into 3rd loop from hook, yo and pull up a loop, yo draw through one (this is the chain of the foundation chain), three loops remain on hook, (yo, draw through 2) twice. One Foundation Double Crochet completed.
1×1 Double Crochet Ribbing Pattern (in the round)
Rnd 1 (RS): Ch 2 (does not counts as a stitch), * fpdc around next st, bpdc around next st; rep from * to end, join with a slip stitch into the first fpdc. Do not turn.
Repeat round 1 for 1 x 1 Double Crochet Ribbing Pattern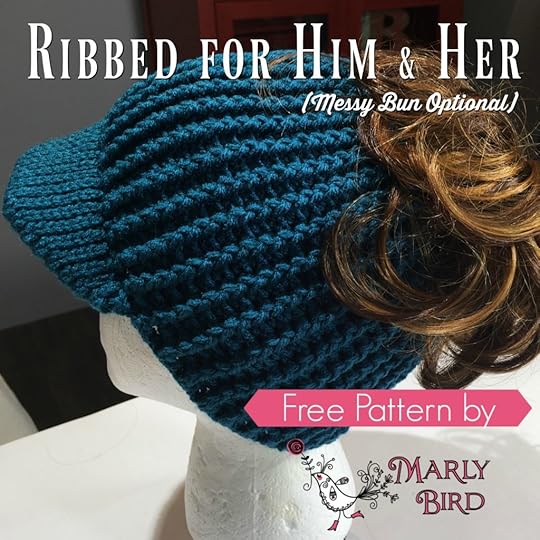

Free Crochet Messy Bun Hat Pattern
Brim of hat
Chain 6, slip stitch (sl st) in the 2nd chain from hook through back loop only (TBLO) and in each chain to end, ch 1, turn –5 slip stitches.
Place a marker in the middle stitch
Row 2 (increase row): Slip stitch in each stitch TBLO to 1 stitch BEFORE the marker, sl st TBLO TWICE in next stitch (this is the stitch before marker), sl st TBLO in marked stitch, move marker to newly made middle stitch, sl st TBLO TWICE in next stitch, sl st TBLO to end of row, ch 1, turn–2 stitches increased.
Row 3: Slip stitch in each stitch TBLO to marked stitch, sl st in marked stitch, move marker to newly made middle stitch, sl st in each stitch TBLO to end of row, ch 1, turn.
Repeat rows 2 and 3 until there are 21 stitches. Continue to move middle stitch marker up each row.
Use a second marker, place it at the end of the last row 2 you completed. This will help you know where you need to measure from for the next part.
Work row 3 only until the piece measures 5” from the 2nd marker then remove the 2nd marker.
Row 1 (decrease): Slip stitch in each stitch TBLO to 1 stitch before center marked stitch, skip stitch, sl st in center marked stitch, move marker to newly made middle stitch, skip next stitch, sl st in each stitch TBLO to end of row, ch 1, turn–2 stitches decreased.
Row 2: Slip stitch in each stitch TBLO to marked stitch, sl st in marked stitch, move marker to newly made middle stitch, sl st in each stitch TBLO to end of row, ch 1, turn.
Repeat rows 1 and 2 until 5 stitches remain ending after a row 2. Do NOT fasten off.
1st Finishing
Fold piece in half, working only into edge of every other row, sl st to close piece. You need an even number at the end of the row. I had a total of 34 total stitches.
Body of Hat
Rnd 1: Continue working from the slip stitches used to fold brim, work 46 foundation double crochet, then, working into the first slip stitch of the brim, join to work in the round by doing a double crochet through front loop only (TFLO) of the sl sts that closed the brim to the end, join with a slip stitch into the first foundation double crochet. Do Not Turn—You need a total of 80 dc at the end of this round. If the number of slip stitches after the 1st finishing is not 34 then you should alter the number of foundation double crochet you do to get to the 80 total dc needed.
Yes, at the point where the foundation double crochet joins the slip stitches on brim it will be separated; that will be seamed closed later.
Rnd 2: Ch 2 (does not count as a stitch), front post double crochet (FPDC) into the first stitch (this is the stitch you just joined to with a slip stitch), back post double crochet (BPDC) into the next stitch, * FPDC, BPDC; repeat from * to end of the rnd, join with a slip stitch into the first FPDC. Do Not Turn.
Repeat rnd 2 until body of hat measures 6″ from rnd 1 of the body of hat.

Crown of Hat
Rnd 1: Ch 2 (does not count as a stitch), * FPDC into the first stitch (this is the stitch you just joined to with a slip stitch), skip the next BPDC; repeat from * to end of the rnd, join with a slip stitch into the first FPDC. Do Not Turn. –40 FPDC remaining.
Rnd 2: Ch 2 (does not count as a stitch), FPDC into the first stitch, and in each stitch around. Do Not Turn.
Rnd 3: Ch 2 (does not count as a stitch), FPDC2tog over two stitches; rep from * to end of rnd, join with a slip stitch into the first FPDC2tog. Do Not Join. –20 FPDC2Tog
Rnd 4: Ch 2 (does not count as a stitch), FPDC into the first stitch, and in each stitch around. Do Not Turn.
—For Free Crochet Messy Bun Hat Pattern — Messy Bun Only– Fasten off leaving long tail. Continue to the 2nd Finishing.
Rnd 5: Ch 2 (does not count as a stitch), FPDC2tog over two stitches; rep from * to end of rnd, join with a slip stitch into the first FPDC2tog. Fasten off leaving long tail. –10 FPDC2Tog.
2nd Finishing
Closed Hat: Thread the tail of the yarn in a Bent Tip Tapestry Needle. Thread the needle through the FRONT LOOP ONLY of all stitches on the last row completed, pull together like a drawstring. Push needle to the inside of hat weave the tail in on the wrong side of the crochet hat to secure.
Messy Bun Hat: Thread the tail of the yarn in a Bent Tip Tapestry Needle and weave the tail in on the wrong side of the crochet hat to secure.
Use another length of yarn to seam the edges of the brim to the base of the hat. Weave in any remaining tails on wrong side of crochet hat.
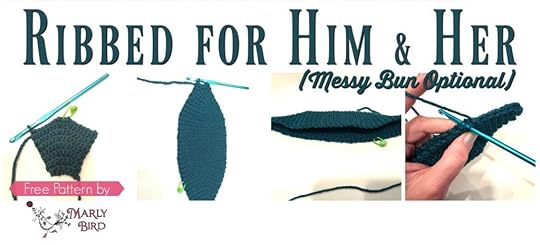
There you have it. A fun and Free Crochet Messy Bun Hat Pattern that can also be made into a basic hat! Perfect for both men and women. Here are a couple more graphics for you to use either on your Ravelry Project Page, Facebook Post, Pinterest Link or your blog. Please feel free to use these images but please link back to this page 


Marly Bird's Blog

- Marly Bird's profile
- 19 followers

