CUSTOM TRANSFORMERS: FROM SIDESWIPE TO TURBO BLITZ, HOW TO CUSTOMIZE TRANSFORMERS - PART 1
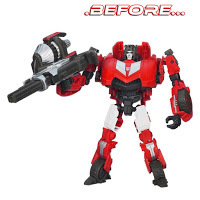 All right guys, this particular custom kitbash job had to be broken down into two parts, because I didn't want to put almost 40 before-and-after pics into one single post. So this article will show some rough tips on how to customize Transformer toys, although the techniques used will vary from person to person.
The base model that I utilized was the FOC - Fall of Cybertron - Sideswipe toy, released roughly 4 years ago. It was red and it had a rather bulky chest, which drooped over the gut / central torso of the toy. And I didn't like the skinny legs of the robot, so that was definitely one of the complaints that I had with the design. Additionally, there were no flaring doors mounted upon his back, which would remind you of the other Transformer Deluxe toys like Jazz, Prowl or Bumblebee. Therefore, I bought a small model toy car for like $7 from ebay [Kinsmart Diecast Red Mercedes Benz ML Class SUV, 1:36 scale]. And it's so small that it can fit in your hand... that would be the item that I butchered for spare parts, as shown in the pics below.
To begin, I took the Sideswipe toy apart. And then I started adding putty to his legs, since I wanted to make them bulkier. I also had to shape and cut out some 0.040-inch-thick white styrene plastic sheets [from the Plastruct brand,which you can find on ebay]. And when painted over, those white plastic sheets will look like metallic plates. The front wheel axle of the small Benz had to be cut as well, so that I could get the tires and glue them to the feet of the renamed toy, Turbo Blitz. I also had to cut the Sideswipe toy in half, in order to lift his torso and make him a bit taller, while I filled his inner body with putty and glued him back together.... and no, he can't transform anymore, since I cut him up LOL. Plus I didn't like his kneepads or his feet, so I had to mold new ones for him, as shown below. And I used quite a lot of Scotch Mounting Putty on this job.
Note 1: after putty is molded and added to a limb, you can put the molded limb under a bright light / lamp, which will cause it to harden quicker.
Note 2: How to tighten Transformers toys joints... if your toy joint is ever loose, just add some drops of nail polish, and rotate the joint a bit, just to get the slim coating all over the joint. Let it dry for an hour [but it will probably take less time than that], and then the limbs should be tighter again.


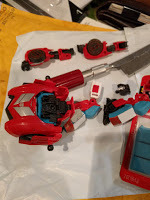
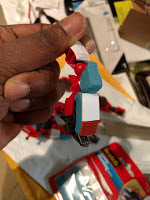
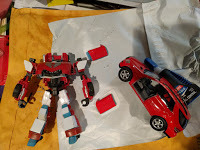
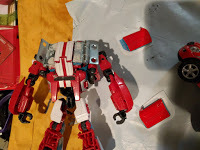
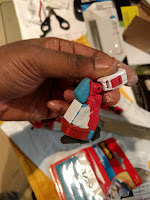


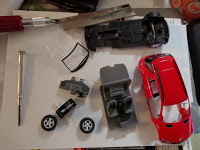
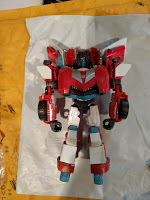
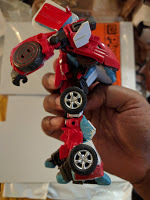 For my other tools, I needed blue metallic paint, white stickers, silver metallic sharpies, gray metallic paint, and a compact SAW, along with lots of glue and putty. I also needed to buy some small 1-inch hinges from Home Depot, because I wanted to attach the Mercedes SUVs car doors to the back of the custom toy. The hinges were glued into place.
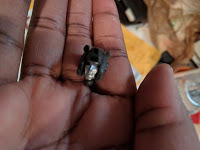
And here are the pics to show the work done to the re-assembled limbs and the body of the robot. Even the toy's face needed a new face-mask, like the one that Optimus Prime uses. So I made that from some slim plastic, like the kind that you find at Publix or Kroger - it is used to package fresh cookies for sale, or doughnuts ;)
All right, the next blog article will show the final product, fully painted and assembled - and those who follow me on Instagram have already seen some teaser photos... so stay tuned!
Update: Part 2 of this article is now live, over HERE!- Article written by the artist & author of the DSNG Sci Fi Series
[http://dsngsfm.blogspot.com]

Published on December 08, 2016 12:00
No comments have been added yet.


