
Format Your Own Damned Book Part IX -- A Book Interior Template
As readers we don't pay much attention to the format of the pages of printed books, but as publishers we need to start doing that. Before you prepare the PDF to submit to Create Space, have a look at the books in your collection, especially those books that are like what you're going to sell. If it's a science fiction novel, just look at those. It it's a how-to book, look at ones on similar subjects. For example, if you're going to do a how-to book on computer programming, don't look at books on getting the most from your new gas grill.
I'm going to recommend that you use Libre Office to format your book, even if you use something else to write it. MS Office lets you style paragraphs, which is sufficient for e-books, but Libre Office lets you also style pages, which makes formatting book interiors much easier. Libre Office is free to download and use, and I recommend that you do that and try out the things I'll describe in this installment. That way, even if you decide to use something else to format your interior pages you'll have a better idea of what you're doing and why. Libre Office is available for Windows, Macintosh, and Linux. It has excellent documentation on the web, so you can easily learn to use all of its features.
When you have that installed you can download and open templates from archive.org:
https://archive.org/details/BhaktaJim...
Select Show All Files and pick the one that matches the size of the book you want to create.
I should point out that Create Space has its own collection of templates for MS Word. You'll find it on the part of the site where they tell you how to format a PDF for interior pages. There are two templates for each size of book that they publish. One just sets the page size and margins for you, and the other has sample text in it for the different parts of a book. If you use MS Word you could check them out.
There is much room for improvement with the Create Space supplied templates. Whoever created them didn't realize that MS Office will automatically generate a nice Table of Contents for you as long as you use Heading 1, Heading 2, etc. as styles for your chapter headings and subheadings. Thus he defined styles for chapter headings that don't work with these feature, and he put in a table of contents that is literally a table you must fill in by hand.
If you're willing to use Libre Office instead you'll find that my template is much better, because it uses the right kind of headings but mostly because Libre Office has Page styles, not just paragraph styles.
When you open my template in Libre Office you'll see this:

My template has the following page styles:
1. First Page. This is for the title page of the book, the verso (copyright page on the other side of the title page) and other front matter that would not have numbered pages. If you have glowing reviews of your book given by famous people you can also put them in front of the title page using this page style.
2. Front Matter First Page which has a title (like Introduction, Preface, Acknowledgments, etc.) and a page number in lower case roman numerals, but no page heading.
3. Front Matter pages, which are the pages that come after the Front Matter First Pages and have a page heading plus a page footer with the page number in lower case roman numerals.
4. Chapter First Pages, which are much like the Front Matter First Pages except that they are numbered with Arabic numbers. These are the first pages of your book's chapters.
5. Default Pages, which are the rest of the pages of the book. They have page headings and footers. The footers have page numbers in Arabic numerals.
Before you use the template you may want to customize it. Here are things you might change:
1. Page size. This template was created for a friend, who needed an 8.5 x 5.5 inch size. Most of my own books are 6 x 9. That is a size that Create Space recommends for novels, etc. Be aware that Create Space books are priced by page count, and smaller pages are no cheaper than larger ones. The best thing is to use a size that is common for the kind of book you're selling.
You can change the page size in the Page Style. You need to change the size of every page style you plan to use in your document. There is no way to change it one place and have all page styles affected.
2. Page headers and footers. The way my stylesheet does these is to put the title of the book on the left pages and the current chapter title on the right pages. Chapter titles are automatically gotten from your Heading 1 chapter titles.
This is a good way to do things if you name your chapters, but if you just number them then you might put author name on the left pages and book title on the right pages.
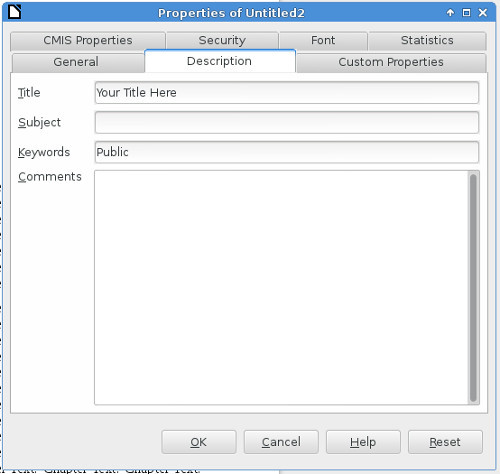
In my template the title is taken from the Properties dialog (File->Properties... in the menu):
You might also consider whether you want the headings left justified on left pages and right justified on right pages.
3. Text alignment. Really only two options here: Left and Justified. Most published books use Justified, which spaces out the words so you have a neat left column of text and a neat right column. I favor Left because it makes for easier reading. In Left only the left column is neat, and the right is ragged (in other words, the lines are allowed to be different lengths).
4. Fonts. Update the Text Body style to use your choice of fonts. There is no shame in using 12 point Times New Roman (AKA Liberation Serif in Linux) but if you want to impress people you'll pick something else. Serif fonts are supposed to be easier to read.
You can be more adventurous when choosing your chapter heading fonts.
5. Paragraph indent. Two choices: indent the first line and don't space between paragraphs or don't indent the first line and do put space between paragraphs. Publishers seem to favor a very small indent and no spacing. It saves paper, if nothing else. I favor no indent and a small amount of space between paragraphs and that is what the style sheet is set up to do.
Something you'll see in many published books is the drop cap. This is where the first letter of the first paragraph in every chapter is much larger and maybe in a different font than the rest of the text. This is something that you should apply to each first paragraph rather than to the Text Body style.
Personally, I don't like drop caps and don't use them.
When you're happy with your template save it and close it, the do New->Templates from the menu. You'll see a dialog like this:
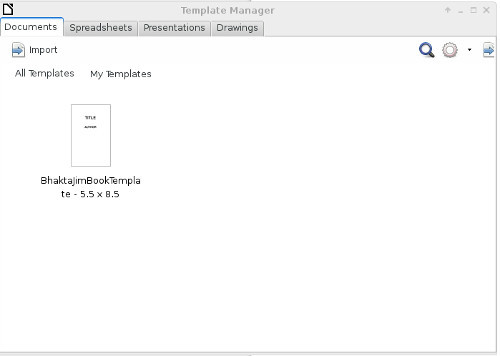
Use the Import button to copy the template into this window. To create a new document using this template, select the template and click on the Open button that appears above it when you select it. You'll get a new document with my sample text in it. Replace my sample text with your own content.
If you use Copy and Paste to move your content from some other word processor, be sure to use the Paste Special menu option and choose Unformatted text as the option. This will copy your text into Body Text without copying unwanted formatting (fonts, font size, etc) with it. You'll have to manually replace italicized and bolded text afterwards, but your text will be in the Text Body style and you can change the appearance of that style in one place and affect all the text in the document, which would not be possible if you had copied formatting as well as text from the old document.
Experiment with your new document until you're happy with it, then use File->Export as PDF to create a PDF ready to submit to Create Space.
I'm going to recommend that you use Libre Office to format your book, even if you use something else to write it. MS Office lets you style paragraphs, which is sufficient for e-books, but Libre Office lets you also style pages, which makes formatting book interiors much easier. Libre Office is free to download and use, and I recommend that you do that and try out the things I'll describe in this installment. That way, even if you decide to use something else to format your interior pages you'll have a better idea of what you're doing and why. Libre Office is available for Windows, Macintosh, and Linux. It has excellent documentation on the web, so you can easily learn to use all of its features.
When you have that installed you can download and open templates from archive.org:
https://archive.org/details/BhaktaJim...
Select Show All Files and pick the one that matches the size of the book you want to create.
I should point out that Create Space has its own collection of templates for MS Word. You'll find it on the part of the site where they tell you how to format a PDF for interior pages. There are two templates for each size of book that they publish. One just sets the page size and margins for you, and the other has sample text in it for the different parts of a book. If you use MS Word you could check them out.
There is much room for improvement with the Create Space supplied templates. Whoever created them didn't realize that MS Office will automatically generate a nice Table of Contents for you as long as you use Heading 1, Heading 2, etc. as styles for your chapter headings and subheadings. Thus he defined styles for chapter headings that don't work with these feature, and he put in a table of contents that is literally a table you must fill in by hand.
If you're willing to use Libre Office instead you'll find that my template is much better, because it uses the right kind of headings but mostly because Libre Office has Page styles, not just paragraph styles.
When you open my template in Libre Office you'll see this:
My template has the following page styles:
1. First Page. This is for the title page of the book, the verso (copyright page on the other side of the title page) and other front matter that would not have numbered pages. If you have glowing reviews of your book given by famous people you can also put them in front of the title page using this page style.
2. Front Matter First Page which has a title (like Introduction, Preface, Acknowledgments, etc.) and a page number in lower case roman numerals, but no page heading.
3. Front Matter pages, which are the pages that come after the Front Matter First Pages and have a page heading plus a page footer with the page number in lower case roman numerals.
4. Chapter First Pages, which are much like the Front Matter First Pages except that they are numbered with Arabic numbers. These are the first pages of your book's chapters.
5. Default Pages, which are the rest of the pages of the book. They have page headings and footers. The footers have page numbers in Arabic numerals.
Before you use the template you may want to customize it. Here are things you might change:
1. Page size. This template was created for a friend, who needed an 8.5 x 5.5 inch size. Most of my own books are 6 x 9. That is a size that Create Space recommends for novels, etc. Be aware that Create Space books are priced by page count, and smaller pages are no cheaper than larger ones. The best thing is to use a size that is common for the kind of book you're selling.
You can change the page size in the Page Style. You need to change the size of every page style you plan to use in your document. There is no way to change it one place and have all page styles affected.
2. Page headers and footers. The way my stylesheet does these is to put the title of the book on the left pages and the current chapter title on the right pages. Chapter titles are automatically gotten from your Heading 1 chapter titles.
This is a good way to do things if you name your chapters, but if you just number them then you might put author name on the left pages and book title on the right pages.
In my template the title is taken from the Properties dialog (File->Properties... in the menu):
You might also consider whether you want the headings left justified on left pages and right justified on right pages.
3. Text alignment. Really only two options here: Left and Justified. Most published books use Justified, which spaces out the words so you have a neat left column of text and a neat right column. I favor Left because it makes for easier reading. In Left only the left column is neat, and the right is ragged (in other words, the lines are allowed to be different lengths).
4. Fonts. Update the Text Body style to use your choice of fonts. There is no shame in using 12 point Times New Roman (AKA Liberation Serif in Linux) but if you want to impress people you'll pick something else. Serif fonts are supposed to be easier to read.
You can be more adventurous when choosing your chapter heading fonts.
5. Paragraph indent. Two choices: indent the first line and don't space between paragraphs or don't indent the first line and do put space between paragraphs. Publishers seem to favor a very small indent and no spacing. It saves paper, if nothing else. I favor no indent and a small amount of space between paragraphs and that is what the style sheet is set up to do.
Something you'll see in many published books is the drop cap. This is where the first letter of the first paragraph in every chapter is much larger and maybe in a different font than the rest of the text. This is something that you should apply to each first paragraph rather than to the Text Body style.
Personally, I don't like drop caps and don't use them.
When you're happy with your template save it and close it, the do New->Templates from the menu. You'll see a dialog like this:
Use the Import button to copy the template into this window. To create a new document using this template, select the template and click on the Open button that appears above it when you select it. You'll get a new document with my sample text in it. Replace my sample text with your own content.
If you use Copy and Paste to move your content from some other word processor, be sure to use the Paste Special menu option and choose Unformatted text as the option. This will copy your text into Body Text without copying unwanted formatting (fonts, font size, etc) with it. You'll have to manually replace italicized and bolded text afterwards, but your text will be in the Text Body style and you can change the appearance of that style in one place and affect all the text in the document, which would not be possible if you had copied formatting as well as text from the old document.
Experiment with your new document until you're happy with it, then use File->Export as PDF to create a PDF ready to submit to Create Space.


No comments have been added yet.
Bhakta Jim's Bhagavatam Class

If I have any regrets about leaving the Hare Krishna movement it might be that I never got to give a morning Bhagavatam class. You need to be an initiated devotee to do that and I got out before that
...more
- Bhakta Jim's profile
- 15 followers

