
Day In The Life™ | July 2016
This past Saturday I documented my day by taking a photo and doing a bit of journaling each hour for Day In The Life™. Today I'm sharing how I brought those photos and words together using Project Life® Design F page protectors (I'm adding these into my Project Life® album).
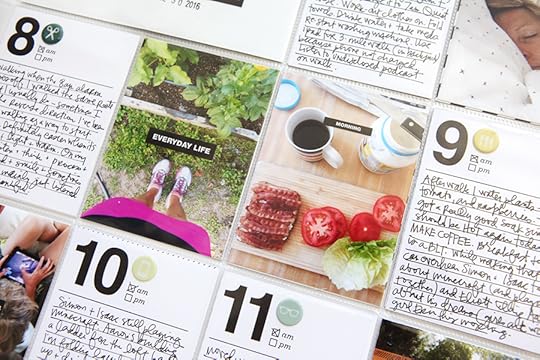
First off I have to say that I really, really loved setting the hourly alarms on my phone as the reminder to take a photo and journal each hour. I've never approached this project that way before and it was a totally different experience. Usually I'm just taking photos whenever I feel like it throughout the day with the goal of simply capturing the real life routines of a regular day. I actually loved the limit/restriction of just taking a photo when the alarm went off. I ended up with 15 photos and 15 journal cards (I used the cards that came with the Day In The Life™ Mini Kit No. 2) that represent the day I lived. It was also super easy to just have the cards out on the kitchen counter to fill them in as the day went along.
Another thing I loved about the process this time was that I took all vertical photos. I did this because I knew I was using the Design F page protectors with the 3x4 pockets. Generally almost every single photo I take is horizontal - it's just what I've always done and since I religiously use the Design A page protectors for Project Life® with seven of the 4x6 pockets for photos it just makes sense (when I do use an occasional 3x4 photo I just crop it before printing to adjust the orientation). It was a fun creative challenge for me personally to play with the vertical orientation - all it takes is a simple thing like that to ignite a different part of my creative lens.
Yesterday I printed out the photos, created the title card, added the stickers and slipped everything into the pockets. Voila.
Simple and easy for the win.
Here's a look at how my day came together with a video overview below that includes information on using the new silkscreens in my shop (what I used for my title card):
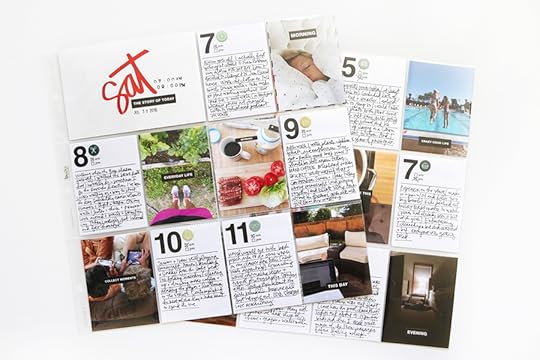
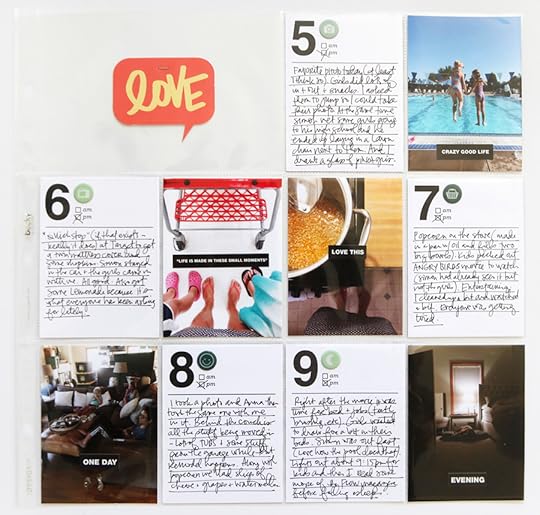
I ended up using two sheets of the Design F page protectors (all of one and 1/2 of the other - on the back of the second one I'm just planning to tell a different story).
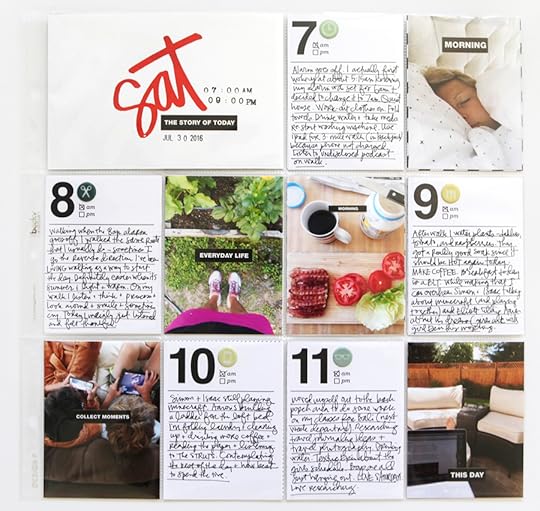
I varied the placement of the time cards and the photos - sometimes to the left and sometimes to the right - just for some visual variety.
My formula was simple: on top of the journal cards I added one circle icon and on the photos I added one black & white phrase sticker.
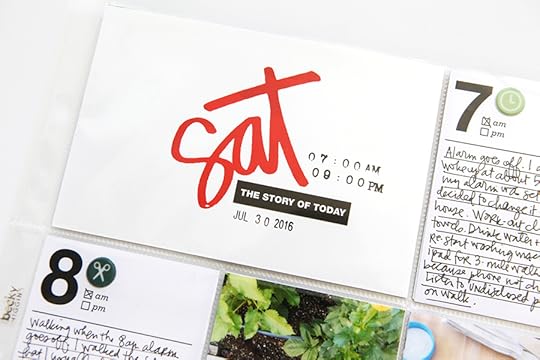
For the title card I used one of my new Days Of The Week silkscreens + some of my Pendleton (red) paint. I've included the how-to for using those silkscreens in the overview video below.
In addition I used the Time Roller Stamp and a rolling date stamp to add both of those onto the title card.

On the back of the first page I continued to add my photos and journal cards. On the back of the title card I paired a fun number pattern paper (this was from a past Studio Calico kit but they have the pattern available as part of a 4x6 paper pad here) with one of the speech bubbles from the Day In The Life™ Mini Kit No. 2. I didn't end up using most of those speech bubbles on this project but love that they are "everyday" enough to use in future Project Life® spreads.
For the third page of content I repeated what I had done on the first two. In the 4x6 pocket I added a "love" speech bubble and simply stapled it to the front portion of the page protector to keep it in place. The back side of this page is currently empty and waiting to be filled with another story (maybe one about all the stuff around here related to Aaron and kids moving in).
Overall, I loved this different take on the process and will definitely do it like this again another time in the future.
VIDEO OVERVIEW + SILKSCREEN DEMOSUPPLIESDay In The Life™ Mini Kit No. 2 Days Of The Week Silkscreen Set AED Pendleton Paint Time Roller Stamp Project Life® Design F Page Protector Studio Calico 4x6 Paper Pad - June 2016 (or via the Scout Scrapbook Kit) Rolling Date Stamp Tiny Attacher Stapler


