InDesign Cheat Sheet 2: How to Get Started
As promised: Exploring my Crazy Journey through InDesign. Today: Some basics I skipped over.
A couple of exchanges I’ve had suggest that I need to back up a step and make sure it’s clear how to initiate your wrestling match—uh, your friendly encounter—with InDesign. Getting started is not that much different from getting started in Word, but it looks a little different.
The screen that opens for me when I first click the InDesign app is black with white lettering, but you can change the colors if you want. via Preferences—>Interface, located, as usual in many programs, under the program icon in the upper left-hand corner.
Not unlike a Word menu, the opening screen presents you with two choices, “Open” and “New.”
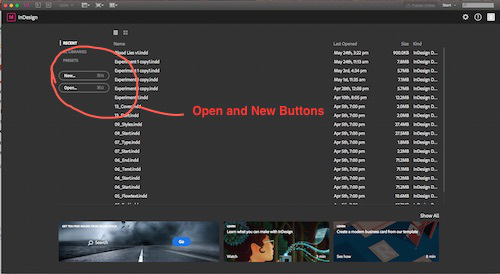
Again not unlike the command in Word, “Open” in InDesign allows you to return to something you’ve already created. “New” says what it means. Here’s where you start.
And here’s where there is a small difference from Word. My version of Word gives me a blank document, cursor just a-blinkin’ away. In the more recent versions of Word I’ve used on PCs, the program offers you a choice of kinds of documents, but once you pick one, it once again welcomes you with little Mr. Blinking Cursor, your best friend.
In contrast, InDesign offers you a dialogue box. But this is really almost the same dialogue box you’d use if you wanted to make changes to the default Word document you’re used to seeing.
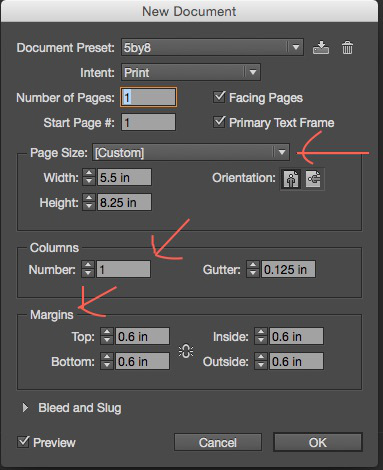
For now, all it really wants you to do is set the size of your page, the number of columns and the margins within which you’ll place your materials.
For the kind of book I’m discussing, the correct number of columns is one.
The most common page sizes, or “trim sizes,” seem to be 5X8 or 5.5X8.5. You can just type your preference in.
You should set your margins based on the particular look you want, or on the recommendations of whoever will be printing your book. Ingram required 0.5 inches. I went with 0.8.
Make your top margin larger, at least one inch, since you’ll need to add running heads with your name as author and your book title. I also put my page numbers in the heads, but if you want to put them at the bottom, you should set the bottom margin larger as well.
I also decided that for the next book, I’ll expand the “inside” margin by about 0.025 inches, because I felt it came out ever so slightly narrower than I liked if the inside margin was the same as the outside.
Margins matter, of course, because you don’t want your lovely text cut into when they cut the pages to “trim size.”
You’ll see all this at work—running heads, page numbers, margins versus trim size, by taking a look at any published book on your shelves.
Once you make these three decisions and click OK, bingo. You have a page!
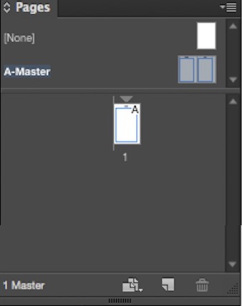
Go to Window—>Pages and open the Pages Panel. You’ll see your newly birthed page sitting there as well, a little white icon in the dark field.
You can’t type in anything just yet. I’m getting there.
First, in the Pages Panel, note the “spread” above the dividing line. These are your master pages. Double click on either one, and you’ll open the masters in your main window. You’ll see that they are set up with the specifications you selected for size, columns, and margins.
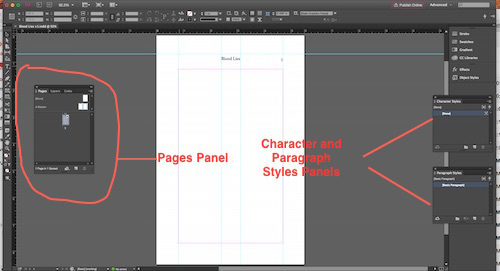
Next, click on your lonely page icon in the Pages Panel. It returns to your window. If necessary, go to “View,” and tell it to Fit Page in Window.
Your screen may not automatically provide you all the elements you need. An easy fix: Window—>Workspace—>Advanced. Almost every panel you’ll need to format your book will pop up. (Choosing “Book,” oddly, hid my Pages panel.)
Ignore all the stuff at the top. You’ll only use it once in a while, for example, to choose a different alignment, font, and font size for titles, etc.
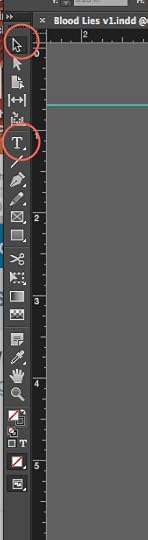
By default, the Tools menu will be lined up along the left side of your screen. Now I’m going to tell you about the only two tools you’ll really use that much.
The black “Selection” arrow at the very top.
The Text tool, indicated by the letter “T,” probably about a third of the way down.
If you choose the black selection arrow and click inside the margins of your document, you’ll see that the margins become selected. They have the little handles you should have encountered in boxes in other programs. You can tinker with size and whatnot with these handles. More on that later when I try to convince you that running heads are no big deal.
You’ll use the Selection tool much less often than you’ll use the Text tool. If you click on its icon in the Tool menu, your pointer becomes a large cursor image. Use this shape to click inside your margins, and guess what? Mr. Blinking Cursor appears.
Now you can type to your heart’s content. Except that you probably won’t want to. In the next installment, I’ll tell you why.