Signature Sketches: When I started signing Mouse Guard bo...
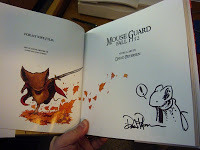 Signature Sketches: When I started signing Mouse Guard books, I did a little mouse sketch next to my signature in each hardcover as a nice "thank you" to anyone who bought it and/or lugged it to a show for me to sign it. Now, with 3 hardcovers, an RPG, and the Fall B&W ed. I can't keep up with doing a doodle in every one. At C2E2 I saw the line backing up, and me rushing through the doodles (therefore making them a bit sloppier than I'd like). So I have a solution:
 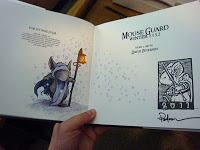 Annual print-stamps: I will hand carve a stamp each year and in lieu of the mouse doodle, I'll stamp your book. This will also mean that I can re-stamp it the following year with the new stamp if you like. While I wish I could do an individual doodle for everyone, I just can't anymore. So this stamp is a better quality image, that I still handmade and will stamp myself (and sign) in every hardcover you bring me. I plan to only do custom doodles on request in the oversized B&W limited books.
 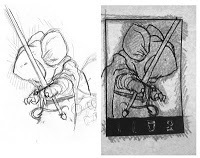 Stamp process: I started with a doodle in my sketchbook of a random mouse with a sword. I scanned the doodle, added the '2011' date, resized it to fit my stamp material, and them mirrored the entire image before I printed it out. The mirroring is so that when the image is stamped into your book, the date and design will be facing the right direction. I scribbled with a soft lead pencil over the back of the image so that I could transfer it to the stamp material.
 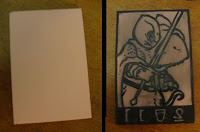 The base material for the stamp is Speedball's Speedy-Carve. It's a linoleum substitute printmaking students can use that is easier to carve. It is also soft enough that you can use the carving like a stamp instead of a block print (where the paper must be applied to the block and then rubbed to get the final print.) Placing my design print-out over the material and retracing it, I got a graphite transfer on the Speedy-Carve. I then used a permanent marker to firm up the lines and make sure I didn't rub them off as I handled the material.
 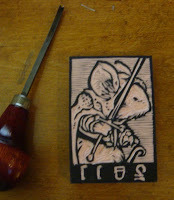 Just like I would carve a block print, I carefully carved into the Speedy-Carve with my woodcutting chisel. The idea is to cut away all the white space leaving only the areas you want to print. I covered another example of this printmaking process called 'relief printing' in a previous post. At this stage I also decided to add a series of lines to the background, something the eye would interpret as an optically mixed grey.
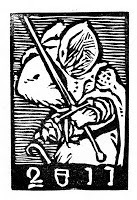 Using a stamping ink pad, I was able to make the print on paper by just using the Speedy-Carve block like a rubber stamp. The final 'prints' will all be a bit unique where the ink transfer wasn't perfect, but I tend to like those imperfections, as they will also make everyone's stamped books a bit more unique.
 2011 Appearances
Motor City Comic Con: May 13-15
Phoenix Comic Con: May 26-29
Cherry Capital Con: June 25-26
San Diego Comic Con: July 20-24
Baltimore Comic Con: Aug. 20-21
Detroit Fan Fare: Sept. 24-25
New York Comic Con: Oct. 14-16
Published on March 29, 2011 06:00
No comments have been added yet.
David Petersen's Blog
- David Petersen's profile
- 339 followers
David Petersen isn't a Goodreads Author
(yet),
but they
do have a blog,
so here are some recent posts imported from
their feed.


