Robyn Dolan's Blog, page 9
March 8, 2017
How to Make a Portable Trailer Skirt
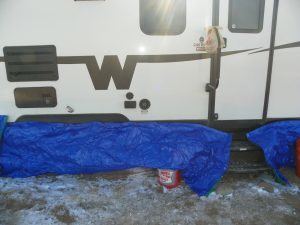
Over the past year, I have improved upon my trailer skirting. I knew I wanted it to be inexpensive, easy-on, easy-off, and compact enough to be easily portable. I think I have finally hit on a working combination. Here is how I made my current Portable Trailer Skirt.
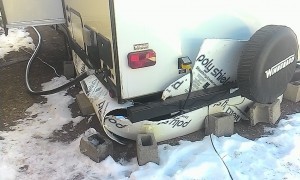 minimal foam board skirting
When we got the Minnie, we started off with foam board and heat lamps. This necessitated being hooked up to electricity to run the heat lamps. My new skirt keeps the salt-water charged waste tanks thawed down to zero. Then it’s time for some supplemental heat down there. Or preferably a move to warmer temps.
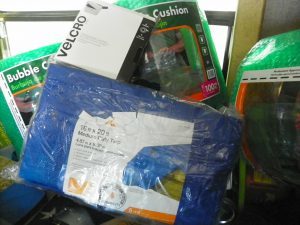
Materials for the Portable Trailer Skirt:
The supplies:
• 16’ x 20’ blue tarp.

• 4, 12” x 100’ rolls of bubble wrap
 .
.• black spray paint
 .
.• adhesive Velcro

80 feet of 24-inch Reflectix
 insulation board
2 dozen turn button fasteners
 , with grommets
Putting it together:
1. Cutting the tarp down to size.
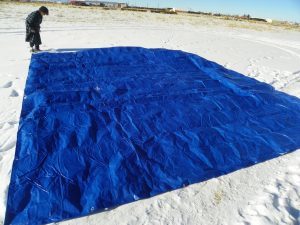
My trailer measures 8’ x 26’ plus the tongue, which holds the house battery and 2 propane tanks. I figured I might want the tarps to wrap around those as well, so I estimated a
length of 80 feet, just to have some wiggle room. I cut the tarp into 5 strips measuring 3’ x 20’. To do this, I had to open it up outside. There was snow on the ground at the
time, so the tarp stayed fairly clean. I had my son stand on it to help hold it down and help fold up each piece as we went. We also used rocks to help hold the tarp down as I
cut.
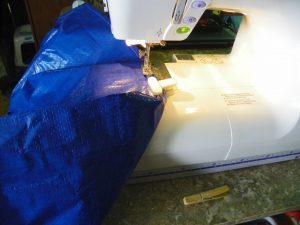
2. Sewing on the bubble wrap.
The bubble wrap was only 12” wide, so I had to sew 3 tiers onto each strip of tarp. This was the most tedious part of the project. I was also concerned that it would be hard on
my sewing machine, but it did fine. I had to clean the tarp dust out frequently and had to be careful not to catch the presser foot on the bubble wrap, but otherwise, it was
straight seams and easing the bulk through the machine.
3. Black paint.
After sewing on all the bubble wrap, the next step was to paint the outside of the skirting black. This is to absorb more sun and help retain the heat around the trailer. It is very
windy where we usually are, so I had to wait for a still day to get the paint to stick to the tarps instead of floating away.
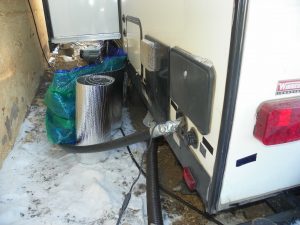
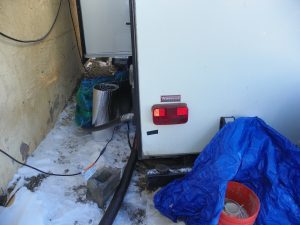
We first tried attaching the tarp with velcro, but the wind made short work of that. We also found the addition of Reflectix insulation to be a major factor in keeping the temps under the trailer more stable. First, we stand the Reflectix around the perimeter of the trailer. Over that goes the portable trailer skirt.
I looked at what other people were doing with trailer skirts and liked the idea of attaching it with turn buttons. Amazon had them listed so I ordered 2 dozen and my son-in-law helped me to install them. I put the grommets on my tarp and attached it to the trailer turn buttons. It stayed on perfectly, but I now discovered that I needed to seal up the loose ends. This was a much better use of the velcro and keeps the wind from whipping the skirt up and blowing the Reflectix away.
Finally, around all this, we place our heavy tent weights, our extra sewer tank
 , and propane tank just for extra insurance in case the wind blows. If the temps dip below zero or stay below 30F for several days we still have to break out the heat lamps, but the skirting is doing its job and helping us stay warm and cozy.
And the best part about the Portable Trailer Skirt is that it comes off easy, rolls right up (both the skirt and the Reflectix), and stows away in the back of the truck or in the basement when it’s not needed.


The post How to Make a Portable Trailer Skirt appeared first on Mrs. D's Traveling Homestead.
February 27, 2017
Pompeii

The 2014 movie Pompeii
 is great historical fiction. I have found movies to be a great tool to use in the homeschool. Especially historical fiction.
Pompeii got the boy and me (and his older brother!) discussing the AD79 eruption of Mt. Vesuvius. We talked about how volcanoes work. We discussed other events of the era. The persecution of the early Christians. The historian Pliny the Younger, who witnessed the event from his Uncle Pliny the Elder’s villa across the Bay of Naples.
The boys, of course, were fascinated by the whole gladiator thing. I love to scrutinize the costumes and settings. And so many ways to die as a volcano erupts. Even though we knew the real ending, we couldn’t help but hope for survivors.
Despite the goofs in period accuracy and geography, we enjoyed Pompeii. It made for good discussion and fun escape.


The post Pompeii appeared first on Mrs. D's Traveling Homestead.
Jungle Doctor and the Whirlwind

Jungle Doctor And The Whirlwind – Review
http://christianaudio.com/jungle-doctor-and-the-whirlwind-paul-white
Jungle Doctor and the Whirlwind is a fun read, rather like the tradition of James Herriot and Tom Dooley. The book follows Australian missionary Dr. Paul White on his daily adventures. As a physician to tribal peoples in Tanzania, Africa, navigating mud tracks, surviving violent whirlwind dust storms, and battling a dysentery epidemic are all in a day’s work.
Dr. White passes on biblical principles in his daily practice through fables and story telling. His faithful friend and assistant, Daudi, also serves as his interpreter with the natives. The doctor performs surgery and treats patients in the most primitive conditions. As a result, he faces off against witch doctors and drug lords.
White’s narrative style hooks the reader and rivets him until the final page. Thankfully, there are several more books in the series, so readers can satisfy their need to hear more Jungle Doctor adventures.
I enjoy the way narrator Paul Michael reads with distinct and clear character voices. Yet he is easy to listen to. Of the 29 Jungle Doctor books written by Paul White, Christian Audio has 4 of them in audiobook. Each book runs about 2-3 hours. Priced at $10.98, Jungle Doctor and the Whirlwind is great for family listening, car rides, and storytime. Produced in audiobook form for Christian Audio (c)2012.
Thanks to Christian Audio for providing me with a free review copy of this audiobook. No other compensation was received for this review.


The post Jungle Doctor and the Whirlwind appeared first on Mrs. D's Traveling Homestead.
February 20, 2017
40 Books Reading Challenge

Somewhere in the last month I read an article about a 40 books reading challenge. A teacher had challenged her class to read 40 books for the school year. The theory is that this will foster a love of reading. It sounded like a good idea. I did a quick search so I could let you know where I first read about it and I discovered that this challenge has been around a long time.
Yak has reading assignments for school, but he does not really enjoy them, and he gets through them as quickly and minimally as possible.
There is much discussion and many variations on the 40 book challenge, but I kept ours simple. My goals are to get the boy reading for pleasure again, and expand his teenage mind beyond video games. With this in mind, we set some ground rules:
Yak will read:
4 books a month of his choice = 1 brand new book of his choice.
Books must be:
at least 200 pages (not including index, etc.)
over 300 pages = 2 books
must not be objectionable to mom
prize book not to exceed $20 unless mom okays it.
There will be a bigger prize at the 1/2 way mark (20 books read). This is not decided yet, but may involve pizza, a special dinner out, a trip to a trampoline park, or some other excursion.
There will be a grand prize when the goal of 40 books read is reached. Disneyland is a possibility, or maybe a water park. Not for sure there yet, either.
A journal must be kept, documenting:
name of book
author
date started
date finished
how well he liked it
main points he noticed
So far he is on track with a book a week, and well on the way to his first prize. I am enjoying our book discussions (I try to read what he is reading) and they also help me to determine whether he is actually reading!


The post 40 Books Reading Challenge appeared first on Mrs. D's Traveling Homestead.
February 16, 2017
Humanure Handbook
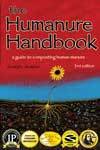
The Humanure Handbook, (c)2005 (3rd Edition) by Joseph Jenkins
I tried a homemade composting toilet years ago, but I didn’t have the whole picture of what to do with the “waste”. The Humanure Handbook
 , (c)2005 (3rd Edition) by Joseph Jenkins, gives concise, complete instructions. It also offers supporting information about sanitary practices, composting times, and materials to use. He highly recommends sawdust.
Mr. Jenkins has been using sawdust toilets for decades. He has researched and collected data on the safety, sanitation, and practicality of sawdust toilets. “The Humanure Handbook” began as his thesis for a Master’s degree in Sustainable Systems. He presents detailed information on pathogens, parasites and other critters present in human waste vs. properly cured compost.
I cannot stand the stench or dust of cat litter, so we have been using feline pine with our new kitty. The odor is pleasant and masks the odor of cat waste better than clay litter. It also lasts much longer. It consists of 100% compressed sawdust pellets, with no chemicals or other additives. The pellets absorb moisture and break back down into sawdust, so I can add it to the compost pile.
I am also looking for options for the trailer. The handy fold up toilet is nice, but the bowl is cracked and I cannot get replacement parts for it. Instead of epoxy sealing it, I am going with a sawdust toilet in there, as the gray/black water tank is only about 10 gallons. I also like the composting toilet because it never gets clogged, which happens quite frequently with the water flush toilet.
If you are investigating off-grid options for toilets, looking for more ways to conserve water, or just plain fascinated with why someone would even consider such an option, check out the Humanure Handbook and website. They have a “pile” of information on the subject!
I did not get any compensation for this review.


The post Humanure Handbook appeared first on Mrs. D's Traveling Homestead.
February 9, 2017
Urban Oasis?
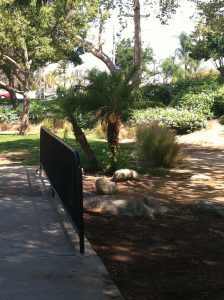
Rain is greening up Southern California.
It’s wonderful. Green. Before the next round of drought and water restrictions starts, I want to say my piece. Brown is not the new green. We need green spots in the city, especially with all the brown lawns.
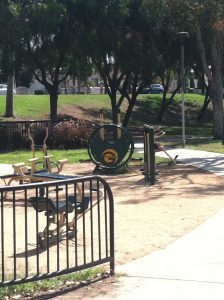
We need spots where children can play,
and people can breathe. Places where dogs can run on the grass, and those with disabilities can have a day of serenity, outside of the facility. The cement and linoleum facility. We need places where people who can’t afford gym memberships can work out. Where parents who don’t want to leave their children for yet another hour or three, can work out. And city parks have always been those places.

We need places with shade,
where mothers and grandmothers with young children can take them to play in the quiet mornings. When older children are in school, and young adults are sleeping off the night before and are not yet out in the park.
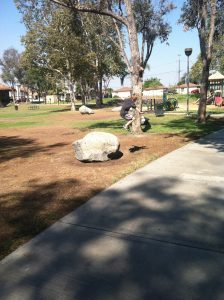
Before the rain ends and the temps heat up, we need to start addressing our water problems.
We need better solutions.
Gray water filtration systems for irrigation and toilet flushing. Desalination plants – there’s an ocean out there. There are so many options for solutions. So many low-cost solutions. It’s time to put our water needs above corporate greed. We need our urban oasis.


The post Urban Oasis? appeared first on Mrs. D's Traveling Homestead.
January 31, 2017
How to use Cloth Produce Bags

Cloth produce bags are an old idea whose time has returned. They are simple and sanitary. You can keep a dozen on hand and they take up barely any space. Produce stays fresher and mold-free for longer. They can be used damp or dry, depending on what you are storing. They go in the fridge, on the counter, in the pantry or cupboard.
Cloth produce bags reduce packaging waste and let produce breath so it doesn’t spoil so fast.
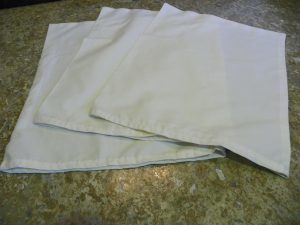
They can be washed, bleached, sun-dried, or dried in the dryer and used over and over again. Cloth produce bags are so versatile, you will wonder why you didn’t think of using them before.
How do you use Cloth Produce Bags?
Cloth produce bags come in many sizes. You can even make them yourself and customize your size. You can use a cotton kitchen towel and forget all about the bags. But we’re focusing on bags, here. On the homestead, wherever we happen to be, we use plain muslin bags, with no ties, approximately 12″x14″.
wash bags in hot, soapy water and air or tumble dry
insert produce
place in fridge or cupboard
when empty, turn inside out and wash in hot, soapy water…
That’s it! For leafy greens, you may want to keep the bag damp, depending on your storage conditions. I find that keeping greens in a damp bag makes them stay crispy longer. I usually wash them and put them in the (dry) bag, still wet. Then I dampen it under the faucet when it dries out.
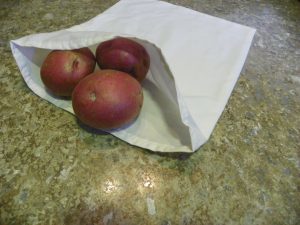
What kind of produce can you keep in a produce bag?
Any kind! Okay, just about. Berries are kind of messy and should be kept in a bowl. Cut tomatoes, beets, prepared salads, and such should probably also be kept in bowls. Most whole fruits and vegetables can be kept in cloth produce bags. Unless the fruit flies are about, I keep most whole fruits in a large bowl on the counter. A basket in the pantry holds potatoes, onions, hard squash, and garlic. Greens and most other veggies go in the produce bags in the refrigerator.


The post How to use Cloth Produce Bags appeared first on Mrs. D's Traveling Homestead.
January 19, 2017
Homemade Vitamin C
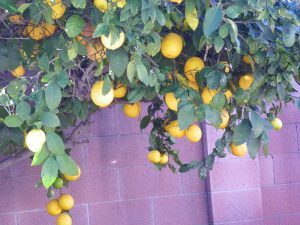
Homemade Vitamin C was today’s project. The urban homestead has a lemon tree and a grapefruit tree, so we have lots of raw material. We have never used any pesticides on the trees, so this stuff will be all organic! I have always felt wasteful throwing all those peels away. To find out I could have been making Vitamin C, among other things, out of them, made me very happy.
The Ingredients
We eat grapefruit every morning, so afterward, I take the peels and scrape out the remaining fruit and membrane, leaving the white pith.
The Process
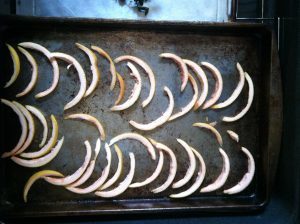
Then I slice the peels very thin and lay them on a baking sheet. When I have a full sheet (not more than a day or two) I turn the warming oven on to 150F and dry them for an hour or 2. Then I turn the oven off and leave them in there while it cools. After all that, if the peels are crispy and snap when I break them, I go on to the next step. If not, I repeat the drying process.
Here in Southern California, the humidity is such that if the peels sit for too long, they start to mold. So drying them in the oven is a must.
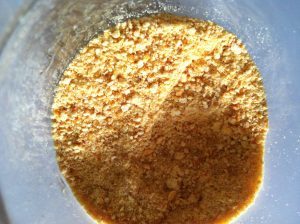
Next, the dried peels are placed in the high-speed blender and ground as fine as it will get them. This is fairly powdery, but there do remain a few chunks. I put the powder into a pint or quart jar and add a paper napkin or small piece of paper towel, to absorb any moisture.
Potential Problems
This is a new project, so I am not sure if mold is going to be a problem. My sources say the powder should last about 3 months on the shelf and 6 months in the freezer. Hopefully, I will get enough made to last from final harvest to the following season’s first fruits.
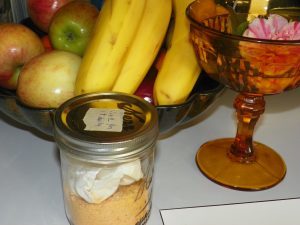
The Results
I stir a teaspoon of this into my carrot juice in the morning. Sometimes 2t if I have a cold. Seems to work great. The rest of the family is not excited about the taste, so I am going to mix it with some raw honey and make little pills for them to try.


The post Homemade Vitamin C appeared first on Mrs. D's Traveling Homestead.
December 1, 2016
Is Brown the New Green?

So is brown the new green? I think not! Cities in Southern California are covering their greenscapes with brown mulch chips and putting out cute little signs proclaiming “brown is the new green”, encouraging people to change their landscaping over to brown mulch chips, dirt and rocks.
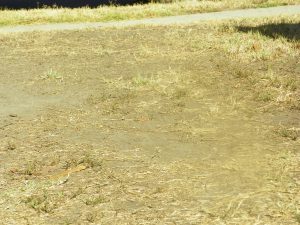
Well, it’s not pretty in Phoenix or Palm Desert, and it’s not pretty in the city. Coming from the Northern Arizona area, where it is very dry and it is a struggle to get anything to grow, brown is not green in any way, shape or form. Brown is brown. It’s dirt. Dirt blows around and makes the air all dusty. Green absorbs carbon dioxide and greenhouse gasses and converts them back into oxygen, which it puts back into the air. As our city’s air quality gets worse, due to supposed global warming, it is not more brown, but more green that is needed to convert the greenhouse gasses caused by our asphalt, concrete, and industry back into oxygen. More green, not less.
Now, I’m not advocating water-hogging lawns. But trees, shade, drought tolerant plants, lavender, food plants, fruit trees. Even though fruit trees and vegetable gardens use a lot of water, they are also giving back in the form of food, edibles. Herbs and flowers are also useful, as well as attractive. That’s much more efficient than a lawn. I’m also not advocating getting rid of green grass entirely, just cut back on it. We took a walk down in the beach cities a couple of days ago and a lot of homes had strips of grass in geometric patterns on their driveways. Instead of front lawns. And it looked great!
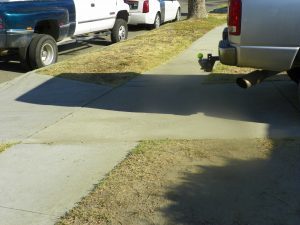
Do we really need so many golf courses? At the expense of letting our public parks go brown? I do not see that as heroic, nor as conserving water. We have the technology to inexpensively filter gray water
 into irrigation water. With all the hotels, homes, and businesses with copious amounts of gray water, there would be more than enough to filter and recycle back to flushing toilets and watering public greenspaces, as well as golf courses. Why not give tax credits to retrofit homes and businesses to filter and recycle their gray water?

So what are solutions to brown is the new green? Well, we water on our watering days, we reuse graywater, with one of the many legal systems, several of which can be installed by the homeowner without any permits required. And, if you run the gray water through a bucket of sand and gravel, it takes out a lot of the junk that is not so good for the plants and the lawn that you’re watering. Doing dishes and washing veggies in a dishpan and dumping that water on the yard. Putting in drought tolerant plants and using that brown (or red, or green) mulch. Or even the free mulch that Calmet gives away several times a year. Retrofitting your home with a gray water recycling system.
What would your suggest?


The post Is Brown the New Green? appeared first on Mrs. D's Traveling Homestead.
October 5, 2016
Jackson Stables Trail Ride, Estes, CO
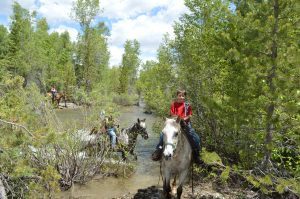
Trail rides are a great way to enjoy horseback riding. Especially if you don’t have time, money or facilities to own your own horse. Well kept grounds and large paddocks characterize Jackson Stables. Uniquely located in the YMCA camp complex in Estes Park, CO and right outside Rocky Mountain National Park, it is an ideal spot to begin a trail ride. Confident, well-trained guides pair visitors with well groomed, stout and healthy looking horses. Each with a unique personality and good temperament.
Our guide, Liz, was a friend of my daughter from college, who was working at the stables for the summer. Guests can ride, rain or shine. As a matter of fact, guides are trained to deal with the frequent summer storms. Additionally, horses carry rain slickers for guests. Moreover, several areas are earmarked for waiting out inclement weather. Apparently, the horses are used to such situations. Liz told us that they rarely have a problem during the storms.
My daughter’s ride was Otis, a stunning black and white paint, for the more experienced rider. Not only do horses pick up on nervousness and inexperience but some will also see how much they can get away with. Of course, Otis picked up on her confidence and performed flawlessly.
Likewise, Yak drew Dallas, a slow, deliberate buckskin. His only mischief was grabbing mouthfuls of the tall grass growing alongside the trail.
In contrast, my mount was John. John was in much more of a hurry than anyone else. Apparently, our trail ride interrupted his break. While the first half of the trail was fine, John seemed to sense when I got tired. As a result, he decided to have a little fun with me. Almost before my legs got tired of holding on, seems like his trot became more like a bouncy room. With no padding. After a few trots, John and I came to a compromise and I was able to survive the rest of the ride. I definitely need to ride more often.
For the most part we enjoyed partial cloud cover and temps in the mid-seventies. The trail through Rocky Mountain National Park winds through pine and aspen groves, past streams and waterfalls and along some spectacular view points.
Although Jackson Stables is located in the YMCA camp, YMCA membership is not necessary to use the facilities. The 2-hour ride is $55 per person. They accept credit cards. Tip the guide with cash.
Jackson Stables, Inc.
YMCA of the Rockies Livery
Allen and Julie Jackson, Owners
PO Box 20549
Estes Park, CO 80511
SUMMER PHONE:
(970) 586-3341,
ext. 1140/1149
WINTER PHONE:
(970) 586-6748
(Nov.1 – March 3)
FAX:
(970) 577-1401
EMAIL:
info@JacksonStables.com


The post Jackson Stables Trail Ride, Estes, CO appeared first on Mrs. D's Traveling Homestead.
Robyn Dolan's Blog
- Robyn Dolan's profile
- 1 follower


