Christine Haynes's Blog, page 11
October 15, 2014
New Emery Dress PDF Pattern + It's 30% Off!
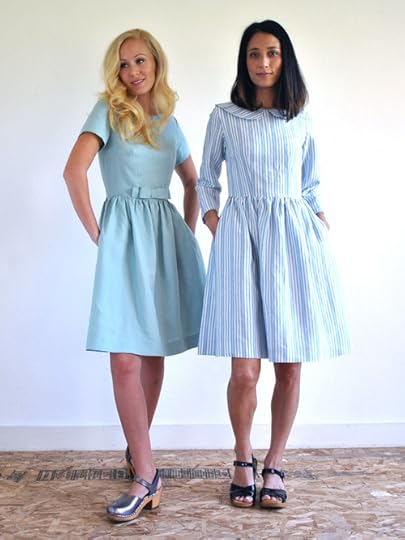
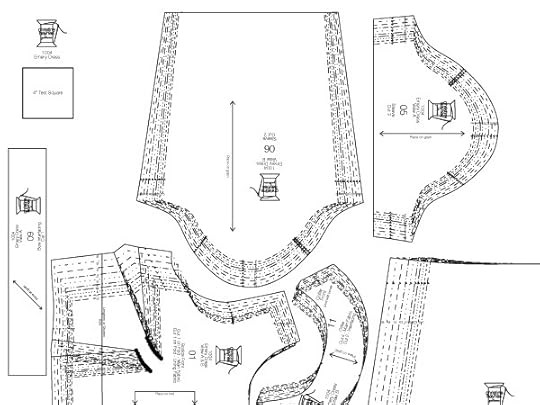
I am so excited to announce that my popular Emery Dress pattern is now available as a print-at-home PDF pattern! And to celebrate, it's 30% off!!! The sale only runs until end of day Sunday, so don't hesitate! Regularly priced at $14, the sale brings it down to a sweet $9.80! Wowza!
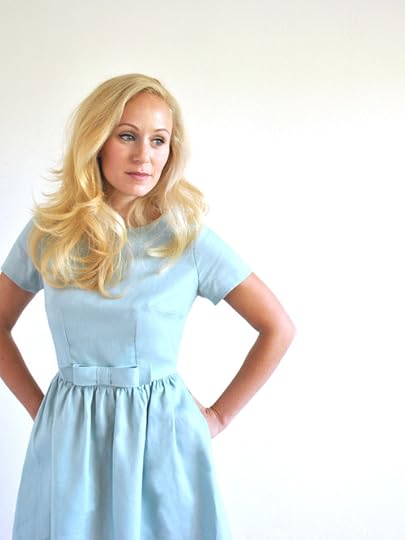
The Emery Dress PDF has two files, one for instructions and one with the pattern. The pattern is 40 pages in total, which isn't too bad for a full-sized dress pattern, and the instructions are 20 pages long. I know many people don't print the instructions, but if you choose to, there is only color on the first and last pages, making it very printer-friendly, as most of it is simple black & white ink.
Also, the instructions and pattern pages have been formatted to fit both US and international pages, so it should work just fine for everyone. Yay!
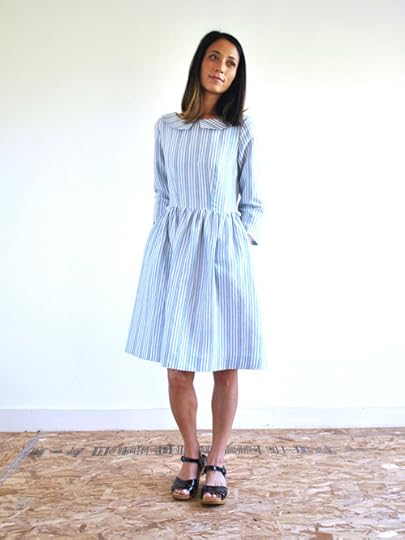
In addition to the Emery Dress PDF, you might notice that there are all new photos up on the site too! Remember that photo shoot I did a bit ago for the upcoming Marianne Dress? Well, I also made all-new versions of all my older patterns and shot them too! I really wanted a consistent look and my model pals Liz and Tessa agreed to spend the day modeling for me, giving each pattern a needed refresh. I hope you like them!
Soon my Derby Dress and Chelsea Dress patterns will also be available as PDF patterns too, but in the meantime, go and check out the Emery Dress PDF pattern before it goes back to full price!
Thanks everyone!


October 14, 2014
The Cecelia Dress From The Magic Pattern Book

I often am contacted by publishers and people promoting products with the intent of me blogging about it on my site. Rarely do I say yes, but every now and then it's something that I think could be interesting to both me and my readers.
I've used patterns by Amy Barickman and her Indygo Junction line of patterns in the past, so when the publishers asked if I wanted to check out her new book, The Magic Pattern Book , I was intrigued. I liked her patterns that I used in the past, so there a chance I would like her book as well.

After receiving the book, I was really impressed at the number of variations achieved by using 6 base patterns, and knew that not only were there a number of things in it that I'd like to make, but you all might be interested in this as well!
To honestly speak about the quality of a book and its patterns, I felt it was only fair to try one of the projects out. I decided to go with the Cecelia Dress, a peasant-style dress with elastic around the neck, a full a-line shape, a single pocket at the hip, sash belt, and a 3/4-length sleeve with a curved hem detail.

The Cecelia Dress is really similar to a dress I've made in the past from a vintage pattern that I wear all the time, so I knew right away that it was the one I wanted to start with. To be fair, I prefer this style of dress without the included sash belt, which doesn't make it the most flattering item, but that's my personal taste. The model looks really great with it sashed, but I prefer mine with a 60's house-dress vibe.

The pattern went together perfectly and I made zero alterations, except for cutting a few extra inches off the hem and adding a second pocket to the front. I made up the size medium based on the finished garment measurements, and it fits perfectly. The patterns are sized from small-XXlarge, so if you're especially tiny, you might find these to be a little big, but it's refreshing to see the sizes go up as far as they do.

One of the nicest details is the hem of the sleeve, which has a curve at the center. This is made with a facing and is something I totally plan to repeat on other garment sleeves. It's a really nice touch on an otherwise simple item and was incredibly easy to do. A lot of bang for a little effort for sure.
I made my version from a soft cotton and linen blend that I picked up at the Los Angeles branch of The Fabric Store. It is a great weight for this dress, though a rayon or something with good drape would be even nicer. I think a quilt weight might be a bit stiff for my personal taste with this dress shape.

I totally plan to whip a bunch more of these out to wear at home, as they really make lovely dresses for everyday comfort. Some of the other patterns in the book will get my attention too!
So, interested in winning your own copy of this book? Stay tuned for a giveaway and full review of the entire book that is coming up as part of the official book blog tour on Friday! One lucky reader will get a copy sent to them directly from the publisher, and I'm happy that I get to keep mine!
*I was sent The Magic Pattern Book from the publisher for free to try, but all opinions are my own.*
October 10, 2014
Fitness Update: a New Name for a Familiar Workout
As I reported in my last fitness update, my new freelance schedule has really thrown a wrench into my workout routine. For every other aspect of my life, I am 100% happier being completely freelance and am shocked and amazed at how well it's going. Fingers crossed it remains this great for a long time to come!
But I was really bummed to leave my gym and trainer behind, and as much as I have tried to get to the gym, I just could not seem to make it happen. I think it all stemmed from the perception on the word "gym" and what that was to me, and what it should be moving forward.
The gym I belonged to in Atwater Village was a nice, medium-to-small sized mom & pop operation. Haley and I always referred to it as being like Average Joe's Gym from the film Dodgeball. We meant that in the best possible way, as it is a comfortable place to be yourself in a world of mega-gyms. But unfortunately, near my home are mostly the big mega-gyms. I read review after review of the 24-Hour Fitness nearby and the other similar type establishments in my neighborhood, and though they were affordable, they did not excite me in any way. Aside from the fact that the reviews were mostly horrendous (staph infection waiting to happen type reviews), I really wasn't excited about just going and being a gerbil on a treadmill.
So I stopped for a second and rethought what the gym is to me. First, I asked myself: what did I like best about my old gym? Answer: my trainer workouts. Next question: did I enjoy the gym part of the gym? Answer: kinda. Hmmm... What were my favorite things to do at the gym? The challenges that my trainer set for me, walking away sore and feeling strong, like I had gone beyond what I thought I could do. Okay, now I'm getting somewhere... So the conclusion I came to was this: my favorite part of the gym were my trainer workouts. Bottom line.
So if this is true, why was I looking to join a boring mega-gym where I would go from machine to machine? Clearly I needed to rethink what kind of place I wanted to be part of. Also, it's probably not a big mystery that I don't make millions of dollars, so of course, price was a consideration. However, while I had the inexpensive monthly fee of my old gym burned in my head, the reality is that I never actually paid that little to go there, since I also ponied up for personal training sessions. So the real truth was that I could afford more than I thought I could.
Back to Yelp I went, looking beyond the predictable gym experience, searching for what else might be out there. What did I like in my workouts? Jumping rope, punching and kicking, general circuit training and hand weights, and jumping on planks. We almost never used gym equipment since my trainer was martial arts trained, and we did basic but effective things.
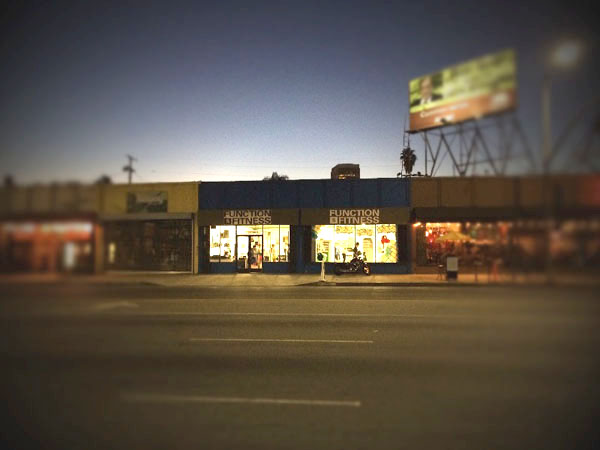
After some searching, I found Function 5 Fitness, a mere half mile from my home. I didn't initially consider them, because their specialty is Muay Thai, which basically looks like boxing or kickboxing. I thought, no, that's not for me. I've never hit anyone, nor was I looking to be punched in the face. Moving on.... But wait, perhaps I'll just watch the video on the homepage (embedded below) and see what this is about. And am I glad I did.
Hold the phone people, turns out that Muay Thai is basically what I was doing! Punching? Check! Kicking? Check! Jumping rope? Check! Oh, and want to make it even better? It's owned and operated by a former Muay Thai fighter, that's a woman! Yep, a female-owned fighting gym. Perfect.
I stopped by one random afternoon and filled out a general contact form and was emailed by the office manager later that day. We set up a time for me to come and see the gym, get a tour, watch part of a class, and get to know each other. I was there for nearly 2 hours, as she asked me questions, found out about me and my past, and made sure that this was a good fit for the both of us. Quite a dramatic difference from the 24-Hour Fitness down the road where you can actually just sign up on their website to become a member. I loved that F5F wanted to make sure it's a good fit for everyone. They are clearly not just after your money, and for that I was instantly put at ease.
I should stop right now and say that I have no association with them, I've only met the owner in passing, and I am in no way writing this on their behalf. This is so glowing so far (and it will continue to be below) that I want to make that clear. They don't know I'm writing this unless they've found me through Google or something, and this is honestly my opinion. Just wanted to clear that up from the get go!

If you've been following me on Instagram you know that I've been going to classes now for a week and I'm in love with it. I'm also literally black and blue (and purple and brown and red) with bruises all over my body, and yet, I'm going back tonight for more. It's empowering, fun, intimate, and kicks my ass. It's also incredibly hard, challenging, and as someone that likes to be good at what I do, it's an incredibly humbling experience because it will take me a while to really be good at this sport.
(Note- my former training required me to wear shoes while kicking, so that's largely why my feet are bruising so badly, because they've never been hit like this before. Also, the bruising will calm down with time, so don't think that I (or you if you try this) will be bruised this bad forever!)
I still have no intention of punching anyone (without pads) or having anyone punch me (without pads), but hey, if I ever had to punch or kick someone, clearly I will be more prepared!
My body is toughing up and I look forward to feeling strong as I did in May when my workouts ended. I know I'm on my way and am so grateful that I've found something that I really like to do. Thanks as always for supporting these updates and if you are curious about Muay Thai, check out if there's a place near you that offers it!
October 6, 2014
Studio News
First, thank you so much for all the kind comments on last week's Wildwood Emery post! If you are regular reader, you know that posing for the camera is not my strength and I'm trying to get more comfortable doing it. I honestly liked those photos and I'm glad that you all did too!
For today, as there is a lot going on behind the scenes right now, I thought I would give you all an update on what is coming up in the next few weeks, as there is a lot coming on the horizon!
Marianne Dress Pattern
First up, my Marianne Dress is off to the printer this week (yay!) which means that we now are simply waiting for her to get printed and shipped back to me. I thought about giving everyone a sneak preview, but I think that takes a bit of the excitement away from the day of the release, so sorry, you'll just have to keep waiting! But if you didn't already get the hints in previous blog and Instagram posts, it's a knit dress, so get those knits washed and ready!
PDF Patterns
I also have some exciting news that my old patterns will soon be available as PDF downloads! Many many many people have requested a PDF print-at-home option for my Emery Dress and I'm happy to report that the lovely Devon is making that happen as I speak. Look for those soon! Marianne will also launch as both print and PDF options for those of you that have mail issues, or want the instant gratification of the PDF.
I have debated this choice for a very long time, but have decided to take the plunge. Why did I hesitate? Honestly, I have seen the print-at-home option be abused with people sharing their files and making printouts for their friends, essentially giving the product away for free, which is stealing. But I have decided that there are more honest folks out there than not, hopefully! So for all the lovely people in mail-challenged places like Brazil and Mali that have emailed me, I hear your need and want to offer you the PDF choice so you too can enjoy the patterns too!

Giveaways
Also coming up in the next couple of weeks are two book giveaways! I'm making garments from both of them right now so you can see a finished item from the book, and also so I can honestly report from a maker's perspective on how the book and patterns worked. Stay tuned!
There are other things happening that I'm not quite ready to report on, so just trust me when I say that there is a lot going on here! Plus I'm sewing a ton of sample garments for Quilt Market which is keeping me rather busy too! Thanks as always for the constant support and I'll see you back here later this week for a fitness update!
For today, as there is a lot going on behind the scenes right now, I thought I would give you all an update on what is coming up in the next few weeks, as there is a lot coming on the horizon!

Marianne Dress Pattern
First up, my Marianne Dress is off to the printer this week (yay!) which means that we now are simply waiting for her to get printed and shipped back to me. I thought about giving everyone a sneak preview, but I think that takes a bit of the excitement away from the day of the release, so sorry, you'll just have to keep waiting! But if you didn't already get the hints in previous blog and Instagram posts, it's a knit dress, so get those knits washed and ready!

PDF Patterns
I also have some exciting news that my old patterns will soon be available as PDF downloads! Many many many people have requested a PDF print-at-home option for my Emery Dress and I'm happy to report that the lovely Devon is making that happen as I speak. Look for those soon! Marianne will also launch as both print and PDF options for those of you that have mail issues, or want the instant gratification of the PDF.
I have debated this choice for a very long time, but have decided to take the plunge. Why did I hesitate? Honestly, I have seen the print-at-home option be abused with people sharing their files and making printouts for their friends, essentially giving the product away for free, which is stealing. But I have decided that there are more honest folks out there than not, hopefully! So for all the lovely people in mail-challenged places like Brazil and Mali that have emailed me, I hear your need and want to offer you the PDF choice so you too can enjoy the patterns too!

Giveaways
Also coming up in the next couple of weeks are two book giveaways! I'm making garments from both of them right now so you can see a finished item from the book, and also so I can honestly report from a maker's perspective on how the book and patterns worked. Stay tuned!
There are other things happening that I'm not quite ready to report on, so just trust me when I say that there is a lot going on here! Plus I'm sewing a ton of sample garments for Quilt Market which is keeping me rather busy too! Thanks as always for the constant support and I'll see you back here later this week for a fitness update!
October 1, 2014
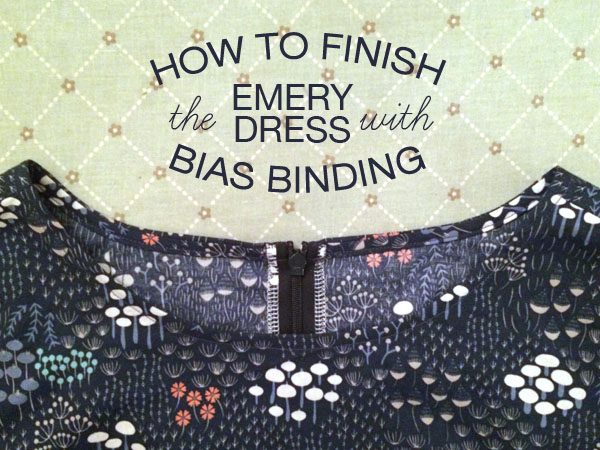
How to Finish the Emery Dress with Bias Binding
As I mentioned in yesterday's post, I didn't line the bodice of my recent Emery Dress make, and instead I finished the neckline with bias binding. For some of you, this method will be old news, but if you aren't sure on how to do this technique, I thought I would break down how I bind a neckline that has a zipper up the back. Since I was doing it on my dress anyway, I figured I might as well document it for all of you that might find this interesting! So here we go...
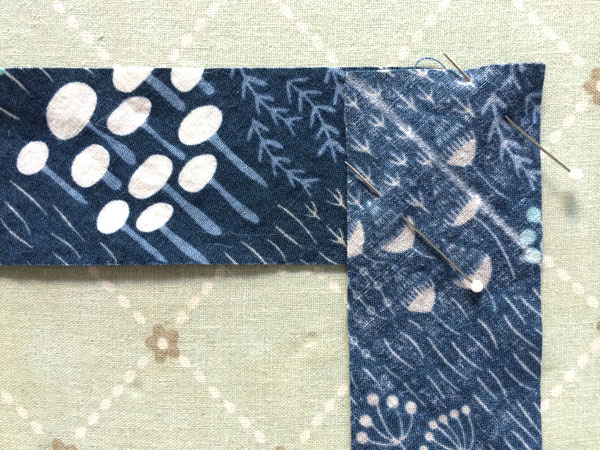
Step 1: Cut strips of fabric on the bias. If you can get one strip to go all the way around the neckline (with some overhang) then you will only need one piece. I had barely enough of the Wildwood fabric to make bias at all, so I had to piece it in multiple chunks. It doesn't matter though since the binding ends up on the inside so all the joined seams will be hidden from view. I cut my binding 1.5" wide and then line them up to form a right angle, right sides together, with the top and right sides flush. Pin together and draw a line from the upper left corner to the lower right corner.

Step 2: Sew along the line you drew in step one. Trim off the extra fabric, leaving about 1/4" of seam allowance. Press the seam allowance open, making one continuous strip.

Step 3: Press the bias strip into double fold bias tape. To do this, simply fold the fabric in half, wrong sides together, lining up the top edges, and press. Unfold the fabric, and fold each side into the center crease, being sure not to unpress the first fold. This should leave you with three folds and four sections of equal width. Fold the whole thing closed and give a final press so it looks like the folded bias tape above.

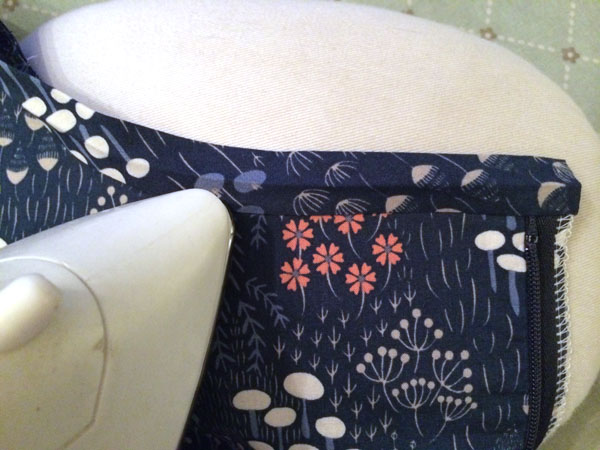
Step 4: Open up the bias tape and place on the neckline with right sides together. Line up the long end of the bias tape with the neckline, keeping the raw edges flush. Leave some overhang at both sides of the center back. Your zipper and seam allowance should be opened to the center and not folded into the dress. Pin in place.

Step 5: Sew around the neckline in the groove of the first fold of the bias tape. Sew directly over the zipper, but be careful of any metal on the zipper as this will break your needle. (Ask me how I know!)

Step 6: Trim off the excess fabric at each side of the center back so it is flush with your seam allowance.

Step 7: Trim the seam allowance down to about 1/4". As always, be careful not to trim anything else around the neckline!
Step 8: On the right side of the fabric, press the seam open, pressing the bias binding up away from the dress. The seam allowance on the inside should also be pressed up at the same time underneath the seam.

Step 9: Fold the bias binding to the inside of the dress along the center fold. This will cover up the seam allowance.
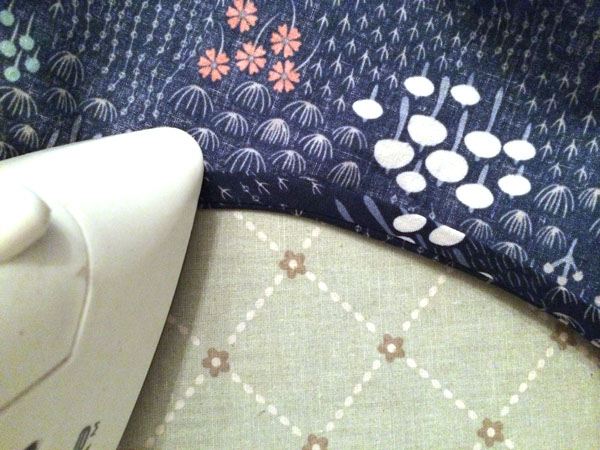
Step 10: Fold and press the binding again, rolling the seam from step 5 just to the inside of the neckline. Pin in place.

Step 11: Stitch the binding to the neckline, sewing as close as you can to the inside fold of the bias binding. Press the neckline well after sewing.

Step 12: Fold and press the zipper and seam allowance to the inside of the dress. Pin in place making sure that the top edge of the seam allowance is tucked inside the dress and not poking out above the neckline.

Step 13: Handsew the seam allowance to the bias binding around the top edge of the zipper tape. Repeat on the other side of the top of the zipper. You can also install a hook and eye if you have a gap between the two sides.

The right side of the zipper should look like the above photo, with the teeth facing out toward the center back seam and the top all tucked into the wrong side of the center back.

And you're done! This is a perfect technique if you want to keep your Emery Dress lighter in weight without the bulk of an added lining. Just remember that using this particular method will mean exposed topstitching around the neckline. If you'd rather it be invisible, you could handsew the binding to the seam allowance instead of stitching by machine. Hope this is helpful!
As I mentioned in yesterday's post, I didn't line the bod...
As I mentioned in yesterday's post, I didn't line the bodice of my recent Emery Dress make, and instead I finished the neckline with bias binding. For some of you, this method will be old news, but if you aren't sure on how to do this technique, I thought I would break down how I bind a neckline that has a zipper up the back. Since I was doing it on my dress anyway, I figured I might as well document it for all of you that might find this interesting! So here we go...
Step 1: Cut strips of fabric on the bias. If you can get one strip to go all the way around the neckline (with some overhang) then you will only need one piece. I had barely enough of the Wildwood fabric to make bias at all, so I had to piece it in multiple chunks. It doesn't matter though since the binding ends up on the inside so all the joined seams will be hidden from view. I cut my binding 1.5" wide and then line them up to form a right angle, right sides together, with the top and right sides flush. Pin together and draw a line from the upper left corner to the lower right corner.
Step 2: Sew along the line you drew in step one. Trim off the extra fabric, leaving about 1/4" of seam allowance. Press the seam allowance open, making one continuous strip.
Step 3: Press the bias strip into double fold bias tape. To do this, simply fold the fabric in half, wrong sides together, lining up the top edges, and press. Unfold the fabric, and fold each side into the center crease, being sure not to unpress the first fold. This should leave you with three folds and four sections of equal width. Fold the whole thing closed and give a final press so it looks like the folded bias tape above.
Step 4: Open up the bias tape and place on the neckline with right sides together. Line up the long end of the bias tape with the neckline, keeping the raw edges flush. Leave some overhang at both sides of the center back. Your zipper and seam allowance should be opened to the center and not folded into the dress. Pin in place.
Step 5: Sew around the neckline in the groove of the first fold of the bias tape. Sew directly over the zipper, but be careful of any metal on the zipper as this will break your needle. (Ask me how I know!)
Step 6: Trim off the excess fabric at each side of the center back so it is flush with your seam allowance.
Step 7: Trim the seam allowance down to about 1/4". As always, be careful not to trim anything else around the neckline!
Step 8: On the right side of the fabric, press the seam open, pressing the bias binding up away from the dress. The seam allowance on the inside should also be pressed up at the same time underneath the seam.
Step 9: Fold the bias binding to the inside of the dress along the center fold. This will cover up the seam allowance.
Step 10: Fold and press the binding again, rolling the seam from step 5 just to the inside of the neckline. Pin in place.
Step 11: Stitch the binding to the neckline, sewing as close as you can to the inside fold of the bias binding. Press the neckline well after sewing.
Step 12: Fold and press the zipper and seam allowance to the inside of the dress. Pin in place making sure that the top edge of the seam allowance is tucked inside the dress and not poking out above the neckline.
Step 13: Handsew the seam allowance to the bias binding around the top edge of the zipper tape. Repeat on the other side of the top of the zipper. You can also install a hook and eye if you have a gap between the two sides.
The right side of the zipper should look like the above photo, with the teeth facing out toward the center back seam and the top all tucked into the wrong side of the center back.
And you're done! This is a perfect technique if you want to keep your Emery Dress lighter in weight without the bulk of an added lining. Just remember that using this particular method will mean exposed topstitching around the neckline. If you'd rather it be invisible, you could handsew the binding to the seam allowance instead of stitching by machine. Hope this is helpful!
September 30, 2014
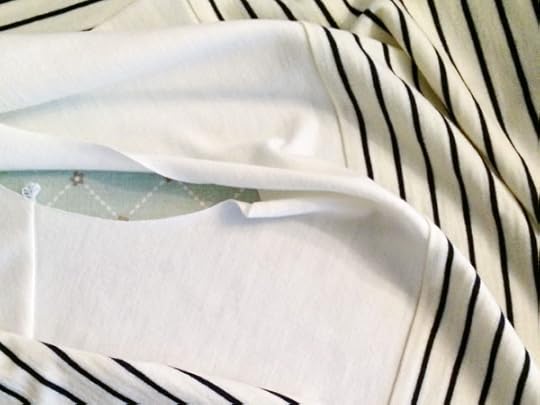
Wildwood Emery

It's been ages since I have featured a finished make here on my blog, and for that I sincerely apologize! I made it a resolution to be better about blogging the items I sew for myself and I had a decent run there for a bit, but the ratio of how much I sew for myself to how much I blog is dramatic. So not only am I blogging a finished make today, there are more on the horizon!

But let's talk about today's dress. This is my Emery Dress in gorgeous organic quilt weight cotton from Cloud9 Fabrics with the most adorable print by surface designer Elizabeth Olwen. I have been following Elizabeth's Instagram feed for a while now, totally in awe of her cute prints on every surface you can think of. Suffice it to say, when Cloud9 contacted me to see if I wanted some of her fabric to make something with, the answer was a very quick yes!

Not only do I love Elizabeth's designs, I have developed a friendly relationship with Michelle and Gina from Cloud9 over the years of attending Quilt Market, and I can say that these are two incredibly nice and hardworking ladies! They are producing organic fabric for the mass market and employing incredible designers along the way. I have a really strict policy of only accepting and reviewing things on my blog that I believe in and give my honest opinion, and Cloud9 is a company I can wholeheartedly endorse.

This print, Midnight Flora in Navy, is from Elizabeth's new collection called Wildwood, which is hitting stores this week. Cloud9 has a really great feature on their site where you can sort the retailers by collection, so you can see who bought that group so you can track it down. Find out who's carrying Wildwood here. In addition to this print, there are many other really great prints, just perfect for both garment and quilt projects.

As for the dress, I made this as usual, but I didn't line the bodice and instead finished the neckline with bias binding. I never showed how to do this in the Emery Dress sewalong, so coming up tomorrow is a tutorial on how I do this, in case you are unsure on how to finish the neckline in this way.

I made my usual size 10, but with my body changes I can see that there is a bit of excess in the bust and bodice, as things are still shifting with my weight loss and exercise. More on those developments in the coming weeks. I've joined a new kind of gym and it's pretty unique and badass.

Huge thanks to Michelle and Gina for giving me some of Elizabeth's fabric to feature here on my blog, and thanks to Elizabeth for making such cute designs!
*I was given 2 1/2 yards of fabric from Cloud9 Fabrics in exchange for my review of the product. I was not paid for this review and all opinions are my own!*
September 24, 2014
Fall Classes!
My October–December classes are announced! As usual, I am teaching locally at the lovely Sew L.A., so to sign up contact them directly or click on the link below to sign up on-line. If there's no link yet, it's just because it's not yet on their site, but the class is happening so you can sign up by giving them a call at 323-665-7097.
Hope to see you in an upcoming class!


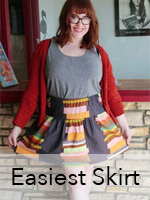
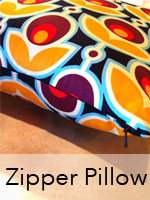
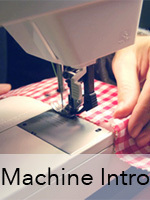
October 11 - Throw Pillow Covers - 11amOctober 11 - Machine Intro - 3pmOctober 18 - Zipper Box Bag - 3pmOctober 20 - Machine Intro - 6:30pmOctober 21 - Aubepine Dress - 6:30pmNovember 1 - Easiest Skirt - 11amNovember 5 - Belcarra Top - 6:30pmNovember 6 - Zipper Pillow - 6:30pmNovember 8 - Machine Intro - 3pmNovember 22 - Machine Intro - 11amNovember 22 - Throw Pillow Covers - 3pmDecember 4 - Zipper Box Bag - 6:30pmDecember 6 - Machine Intro - 11amDecember 6 - Vintage Pocket Skirt - 3pmDecember 13 - Easiest Skirt - 11amDecember 30 - Machine Intro - 6:30pm
Hope to see you in an upcoming class!


October 11 - Throw Pillow Covers - 11amOctober 11 - Machine Intro - 3pmOctober 18 - Zipper Box Bag - 3pmOctober 20 - Machine Intro - 6:30pmOctober 21 - Aubepine Dress - 6:30pmNovember 1 - Easiest Skirt - 11amNovember 5 - Belcarra Top - 6:30pmNovember 6 - Zipper Pillow - 6:30pmNovember 8 - Machine Intro - 3pmNovember 22 - Machine Intro - 11amNovember 22 - Throw Pillow Covers - 3pmDecember 4 - Zipper Box Bag - 6:30pmDecember 6 - Machine Intro - 11amDecember 6 - Vintage Pocket Skirt - 3pmDecember 13 - Easiest Skirt - 11amDecember 30 - Machine Intro - 6:30pm
September 18, 2014
Sara's Sassy Librarian Blouse + Craftsy Sale!
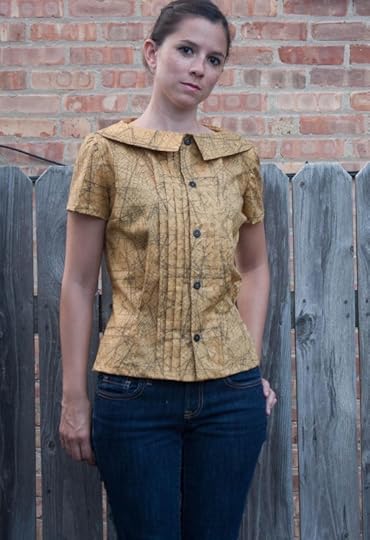
I was so thrilled when fabric and pattern designer Sara Lawson recently chose to make and review my Craftsy class, the Sassy Librarian Blouse. Seriously, how insanely cute is her version?! I am honored when such a busy person takes the time to make and review one of my patterns, plus this required her to watch the whole class!
If you want to read her review, check it out here on her blog Sew Sweetness. She goes into detail about certain elements of the class and what she particularly liked.

And if you want to make your own, you're in luck because Craftsy is running their annual big fall sale, where all classes are on sale! Click here to check out my class and all the others that are currently on sale. There are some amazing instructors on there, so hop to it! Seriously, look at just some of the sewing classes below! The fall sale runs through Monday, September 22, so pop on over and sign up to learn some new skills!

September 17, 2014
Craftcation 2015!

If you've been reading my blog for a while, this is not the first time you're learning about the insanely fun Craftcation Conference that takes place in the beach-side community of Ventura, CA every spring. Well, believe it or not, it's time to think about signing up for next year's event!
Craftcation 2015 will take place from March 26–29, 2015 and yours truly will again be in attendance! I've been at this event since year one and I hope to be there every year moving forward. The energy of the attendees is contagious and a great time is always had by all.
Though it's not released yet, I can tell you that one of the classes I'll be teaching is my upcoming Marianne Dress! Want to learn how to sew with knits? Yep, this is the year! I'll also be teaching a class on basic garment construction skills like darts, gathering, and the like. And making a return will be the really popular and fun zipper bag class.
The list of presenters grows every year and gets more and more impressive. Seriously, check it out here and find your favorite crafter!
So, why are we talking about it now? Because it's time to sign up! And if you sign up now, there is an early registration discount to be had! Plus the first 50 guests get an extra discount! Learn all about it on the registration page.
I hope to see you there!