Robin M. King's Blog, page 5
January 16, 2017
Remembrandt Series: A Spy Series for Young Adults with Art History Flair
You know how you meet people and immediately know that they are way too cool for you. Yeah, that's what I thought when I first met Hikari @foldedpagesdistillery. She's now one of my favorite people! Even though she had to move away from Utah, she still made this beautiful layout for me when Memory of Monet came out.
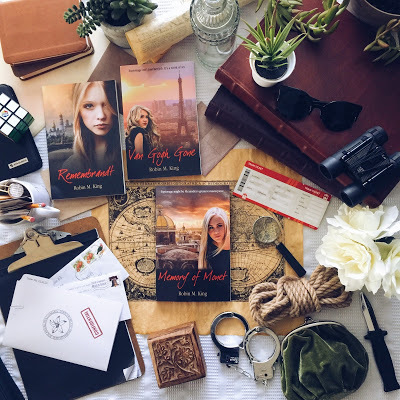
Like seriously, it is so beautiful! When she first sent it to me, I may have teared up. I had so much fun writing this series and now that it has come to a close, I'm so happy to have this momento with all the books. It's like a tribute to the main character, Alexandra, because she's like a real person to me. And, in another life, I would have been her.
If you haven't had a chance to read the series (think Covert Affairs for a slightly younger audience), I'd recommend starting with Remembrandt, then Van Gogh Gone, and finally Memory of Monet. You won't regret it!


December 19, 2016
Whitney Awards Nominee: Memory of Monet

I'm so grateful that Memory of Monet has been nominated for the Whitney Awards. Both Remembrandt and Van Gogh Gone were nominees, so I am hopeful that the 3rd time's the charm and this one will become a finalist!

The reviews that are coming in on this third and final book in the Remembrandt series are so great and make me so happy just thinking of them and all the work I put into the book. The review in the Deseret News calls Memory of Monet "another masterpiece in the collection." It describes the book as a "spy thriller meets teen romance." If you want to read the full article, you can check it out here.
An author isn't an author without readers so I am doubly grateful to all of those who have read my books :)!
And don't worry, just because the Remembrandt series is now complete, doesn't mean I don't have some things up my sleeve. I will be giving some updates on my progress and other books in early 2017!
November 14, 2016
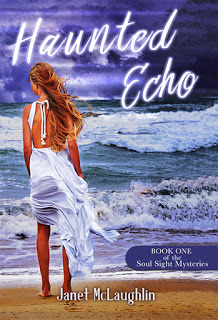
Robin Reviews It: Haunted Echo by Janet McLaughlin
If you are in the mood for a little bit of spookiness and a whole lot of fun, Janet McLaughlin's Haunted Echo is sure to be a teen crowd-pleaser. The dialogue is witty and the story line unique. I normally shy away from stories that scare me, but this book is more mystery and less horror. I would describe it as a "Ghost Whisperer" for teens with clean romance and a plot that will have you second-guessing where it is headed. With it's simplistic writing, you'll breeze through this read in one sitting - just make sure it's not too late at night, or you might give yourself a little scare.
 Title:
Haunted Echo
Title:
Haunted Echo
Author: Janet McLaughlin
Genre: YA Mystery
Summary: Sun, fun, and her toes in the sand. That’s what Zoey Christopher expects when she joins her best friend and fellow cheerleader Becca on an exotic Caribbean vacation. What she finds instead is a wannabe boyfriend, a voodoo doll, and Tempy – a tormented young ghost whose past is linked to the island grounds. Zoey has always seen visions of the future, but when she arrives at St. Anthony’s Island to vacation among the jet set, she has her first encounter with a bona fide ghost. Forced to uncover the secret behind the girl’s untimely death, Zoey quickly realizes that trying to solve the case will place her in mortal danger. Shaken and confused by a menacing threat and by her budding feelings for the too-cute, too-nice Chris, will Zoey find a way to survive this vacation and put Tempy to rest?
About the Author:
 Janet McLaughlin has been involved in the communication field most of her life as either a writer, teacher, or editor. She is a member of the Society of Children's Book Writers and Illustrators and is an avid fan of all things spiritual and mystical. In fact, she's convinced she was a Shaman in a past life! Her other passions involve reading great books, playing tennis with her daughter, traveling with her husband, and meeting people from all walks of life.
Janet lives in Florida with her husband Tom. HAUNTED ECHO is the first novel in her Soul Sight Mystery Series.
 Title:
Haunted Echo
Title:
Haunted Echo
Author: Janet McLaughlin
Genre: YA Mystery
Summary: Sun, fun, and her toes in the sand. That’s what Zoey Christopher expects when she joins her best friend and fellow cheerleader Becca on an exotic Caribbean vacation. What she finds instead is a wannabe boyfriend, a voodoo doll, and Tempy – a tormented young ghost whose past is linked to the island grounds. Zoey has always seen visions of the future, but when she arrives at St. Anthony’s Island to vacation among the jet set, she has her first encounter with a bona fide ghost. Forced to uncover the secret behind the girl’s untimely death, Zoey quickly realizes that trying to solve the case will place her in mortal danger. Shaken and confused by a menacing threat and by her budding feelings for the too-cute, too-nice Chris, will Zoey find a way to survive this vacation and put Tempy to rest?
About the Author:
 Janet McLaughlin has been involved in the communication field most of her life as either a writer, teacher, or editor. She is a member of the Society of Children's Book Writers and Illustrators and is an avid fan of all things spiritual and mystical. In fact, she's convinced she was a Shaman in a past life! Her other passions involve reading great books, playing tennis with her daughter, traveling with her husband, and meeting people from all walks of life.
 Janet lives in Florida with her husband Tom. HAUNTED ECHO is the first novel in her Soul Sight Mystery Series.
October 28, 2016
DIY Harry Potter: Fleur Delacour Costume (FREE Collar/Cuff Patterns)
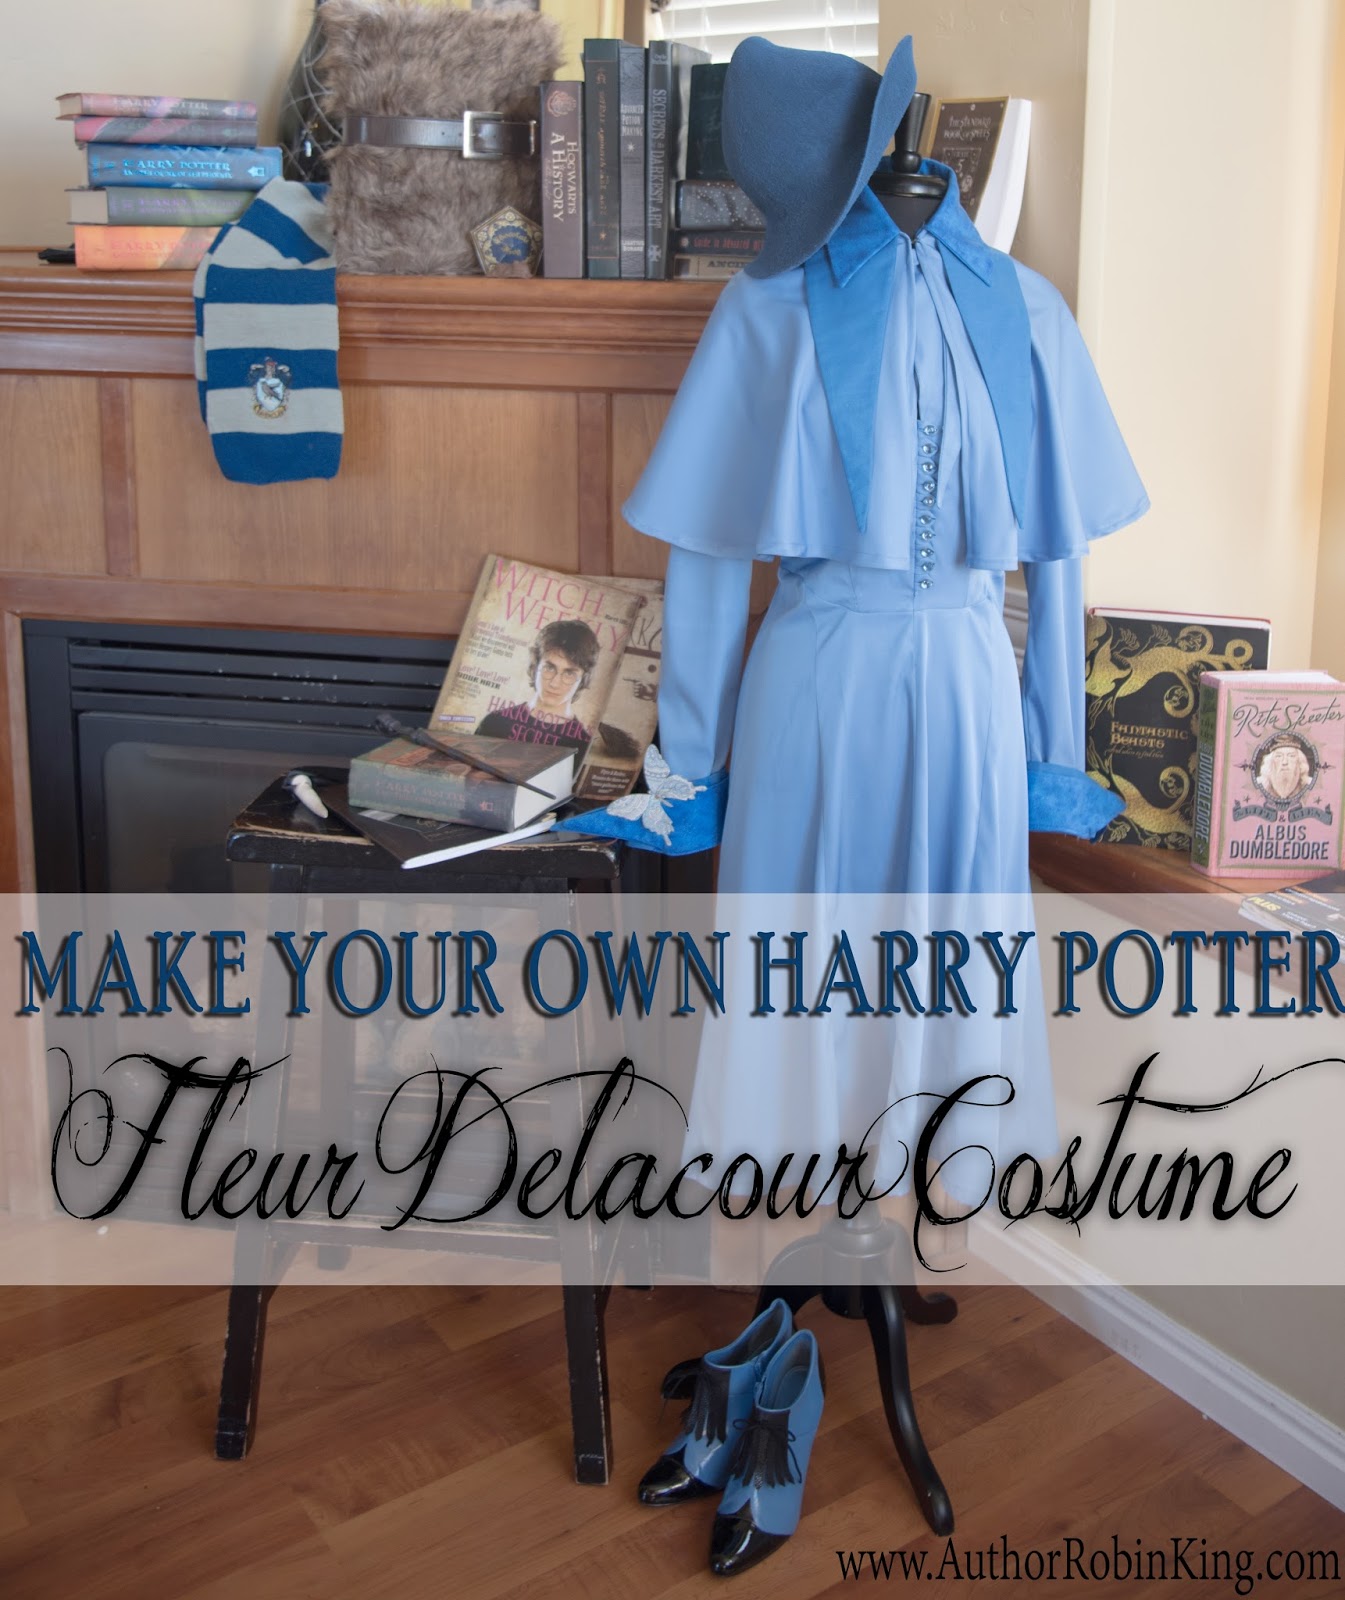
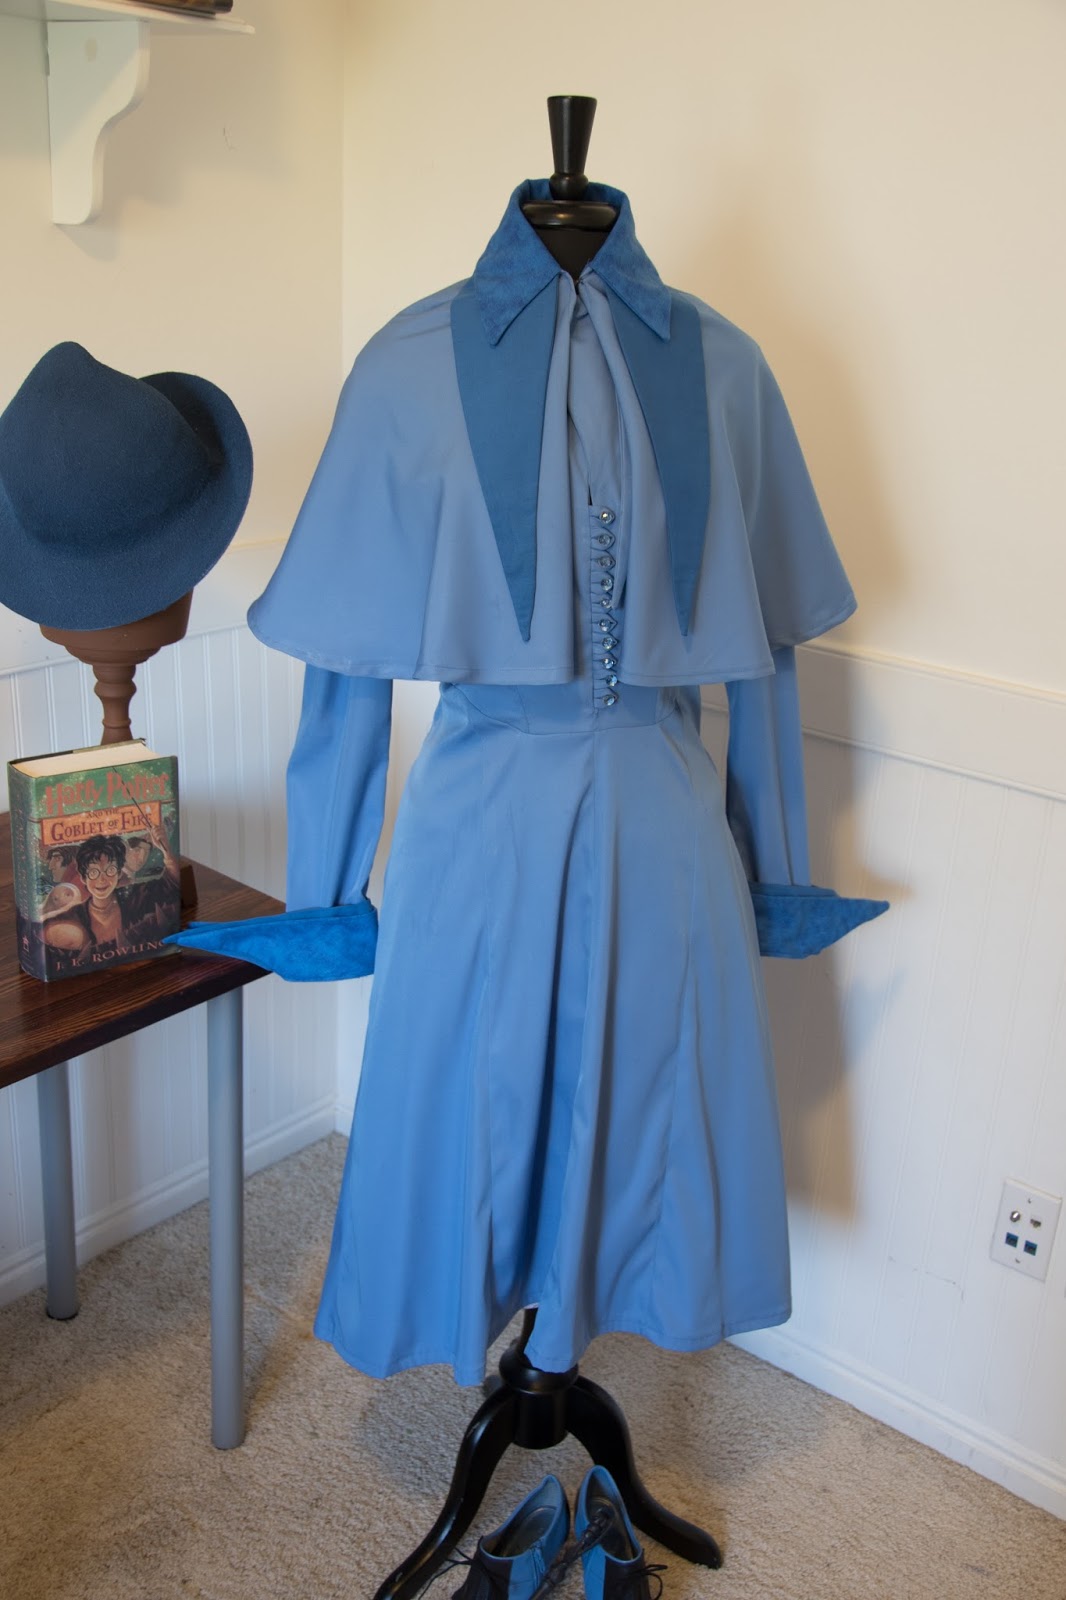
Okay, all you Harry Potter obsessed (including me). I'm writing this while wearing my Ravenclaw shirt and a lightning bolt necklace (thank you www.deliciousreads.com). Halloween is coming up (or your next Harry Potter Party). My friend is even going to a Harry Potter wedding soon. Don't we live in a lovely nerdy world! For out ten year anniversary of Delicious Reads, we decided to go all out and read all seven Harry Potter books and then have a huge weekend filled with book discussions, crafts, quizzes, an ultimate horcrux hunt and, of course, costumes! Since I was in charge of book #4: Harry Potter and the Goblet of Fire, I decided it would be perfect to be Fleur Delacour from Beauxbatons Academy of Magic (see my post on our activities, decor, and food ideas for your next Harry Potter Party).
Well, it's lucky I know how to sew because I couldn't find a suitable costume anywhere and the few I found online were like $600 or more. Just the hat alone was close to $100. Well, being the frugal gal that I am, I decided I could do it on my own. I researched ideas, watched way too many videos on youtube, learned all about millinery (the art of making hats), and then visited my local fabric store and used clothing store. Below are my instruction for the dress and capelet. You can find my tutorial on the shoes here and the hat here.

Here's what you need to make your dress and capelet:
The Dress:
1.) Pattern: Simplicity 8050 - 1940s Vintage (Any empire waist, flared skirt dress will do, but I liked this one because it had a collar and was long-sleeved.)
2.) Cape Pattern: I modified a McCalls 4139 pattern. I would suggest just draping fabric over your shoulders and cutting it if you don't already have a pattern.
3.) FREE Collar and Sleeve Cuff Patterns (see below)
4.) 4 yds of 60" or 4.5 of 45" Blue Silky Fabric - the color of mine was called "cornflower blue". You don't have to use real silk and I honestly hate working with it. My fabric was a polyester blend that was a little thicker.
5.) For collar and cuffs: 1/2 yd of a textured blue fabric darker than dress (I found one with a marble-like effect in flannel)
6.) For collar and cuffs: 1/2 yd of plain blue fabric slightly darker than texture fabric
7.) Blue Thread (I used Coats 4250)
8.) 10 1/2" Buttons (mine were a light blue diamond-like one)
9.) 14" invisible zipper
 I found a butterfly clip that reminded me of the butterflies that flew out of the Beauxbaton's hands when they arrived at Hogwarts.
How to Make the Fleur Delacour Beauxbatons Dress and Capelet:Step 1: Cut out dress fabric. Though I did use the Simplicity 8050 - 1940s Vintage Dress Pattern, unless you are an experienced seamstress you might want to try an easier pattern. I ended up adjusting the front a bit because I couldn't get the lines to match up. I still think it turned out lovely and I would use the pattern again, but I'd probably get rid of the part in front where it darts to a point.

Step 2: Sew the dress using the instructions that came with your pattern, with two exceptions. The first difference is that instead of using piece 7, substitute for my piece 7 below. Print each image below on 8.5 x 11" paper. Cut out the pattern below and use as described in pattern.


 Just for fun, I added blue tinged crystal buttons to the front of the dress.
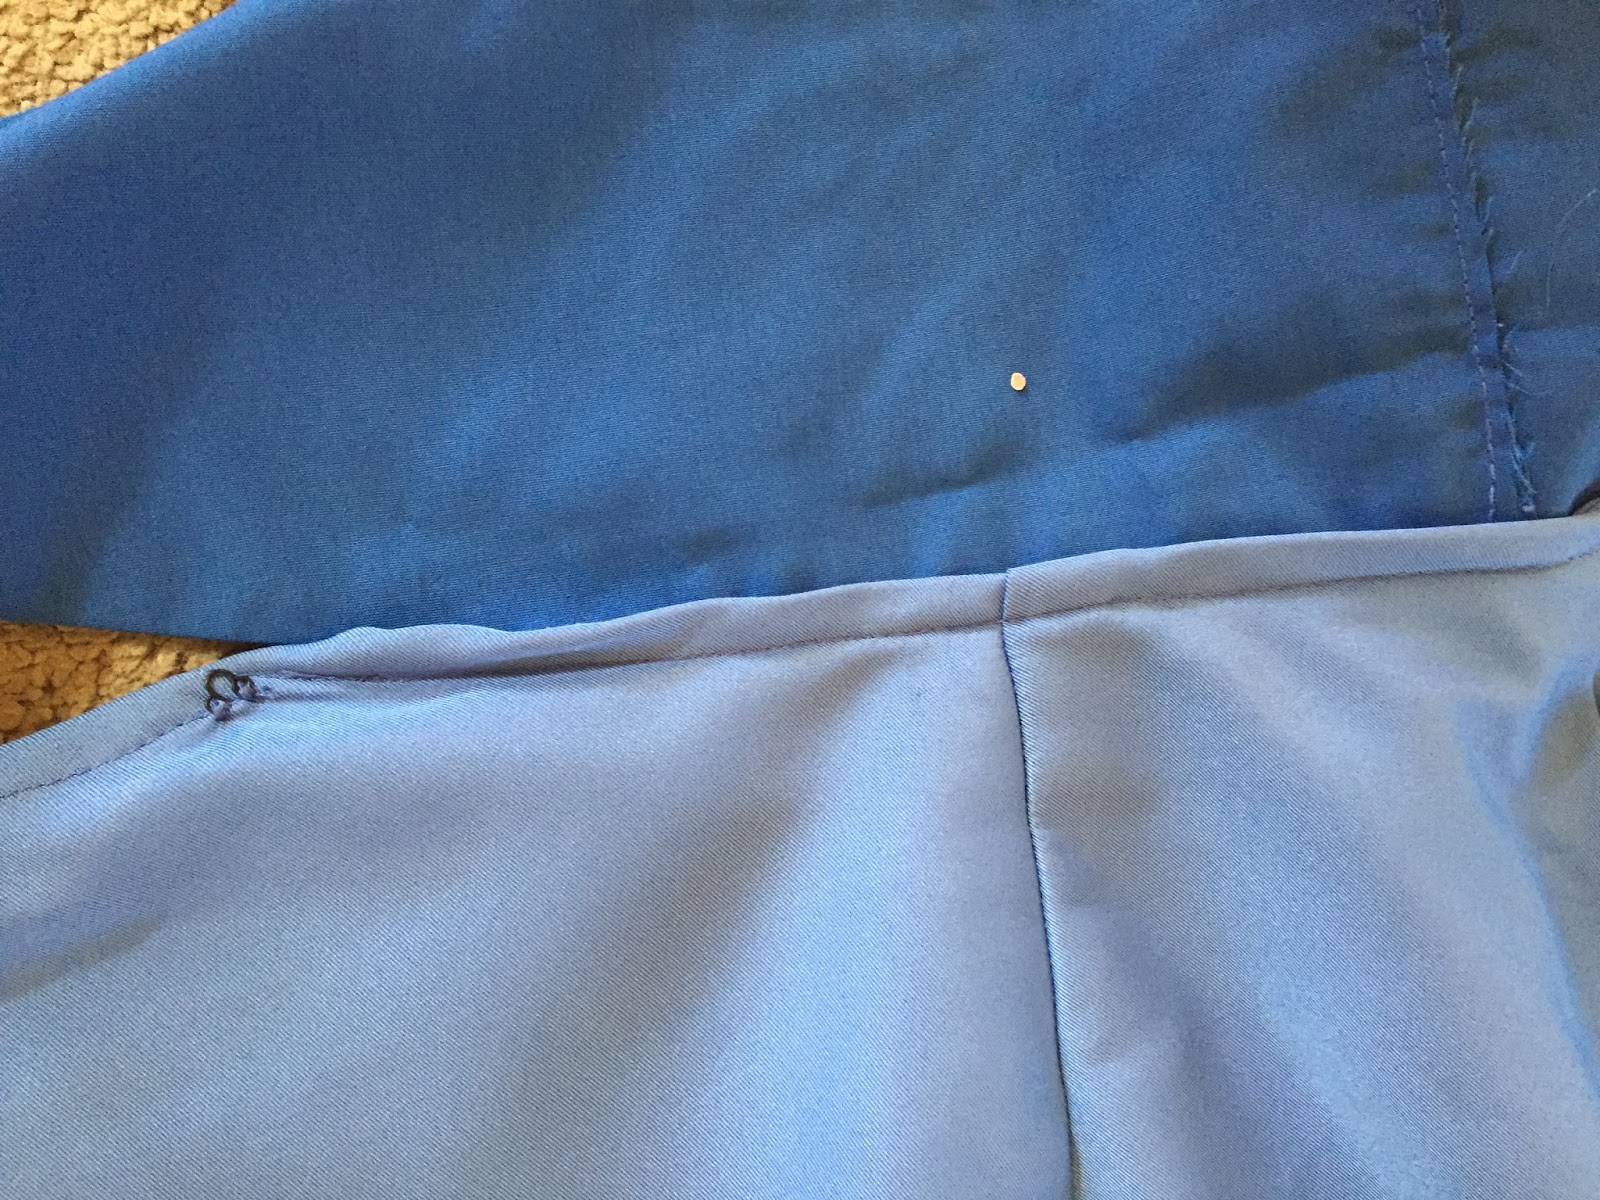
Step 3: Print the dress sleeve cuff pattern below and cut out using the instructions on the piece. Sew together coordinating pieces (there will be two complete cuffs per side, one in darker blue and one is marble blue.) Make sure to leave an opening on the side to turn the cuff right side out. Attach to sleeve edge as picture shows, making sure one of the cuffs is set slightly off from the other.
 Wear you sew the cuffs to your dress, make sure to stagger the two different fabrics like I did here.

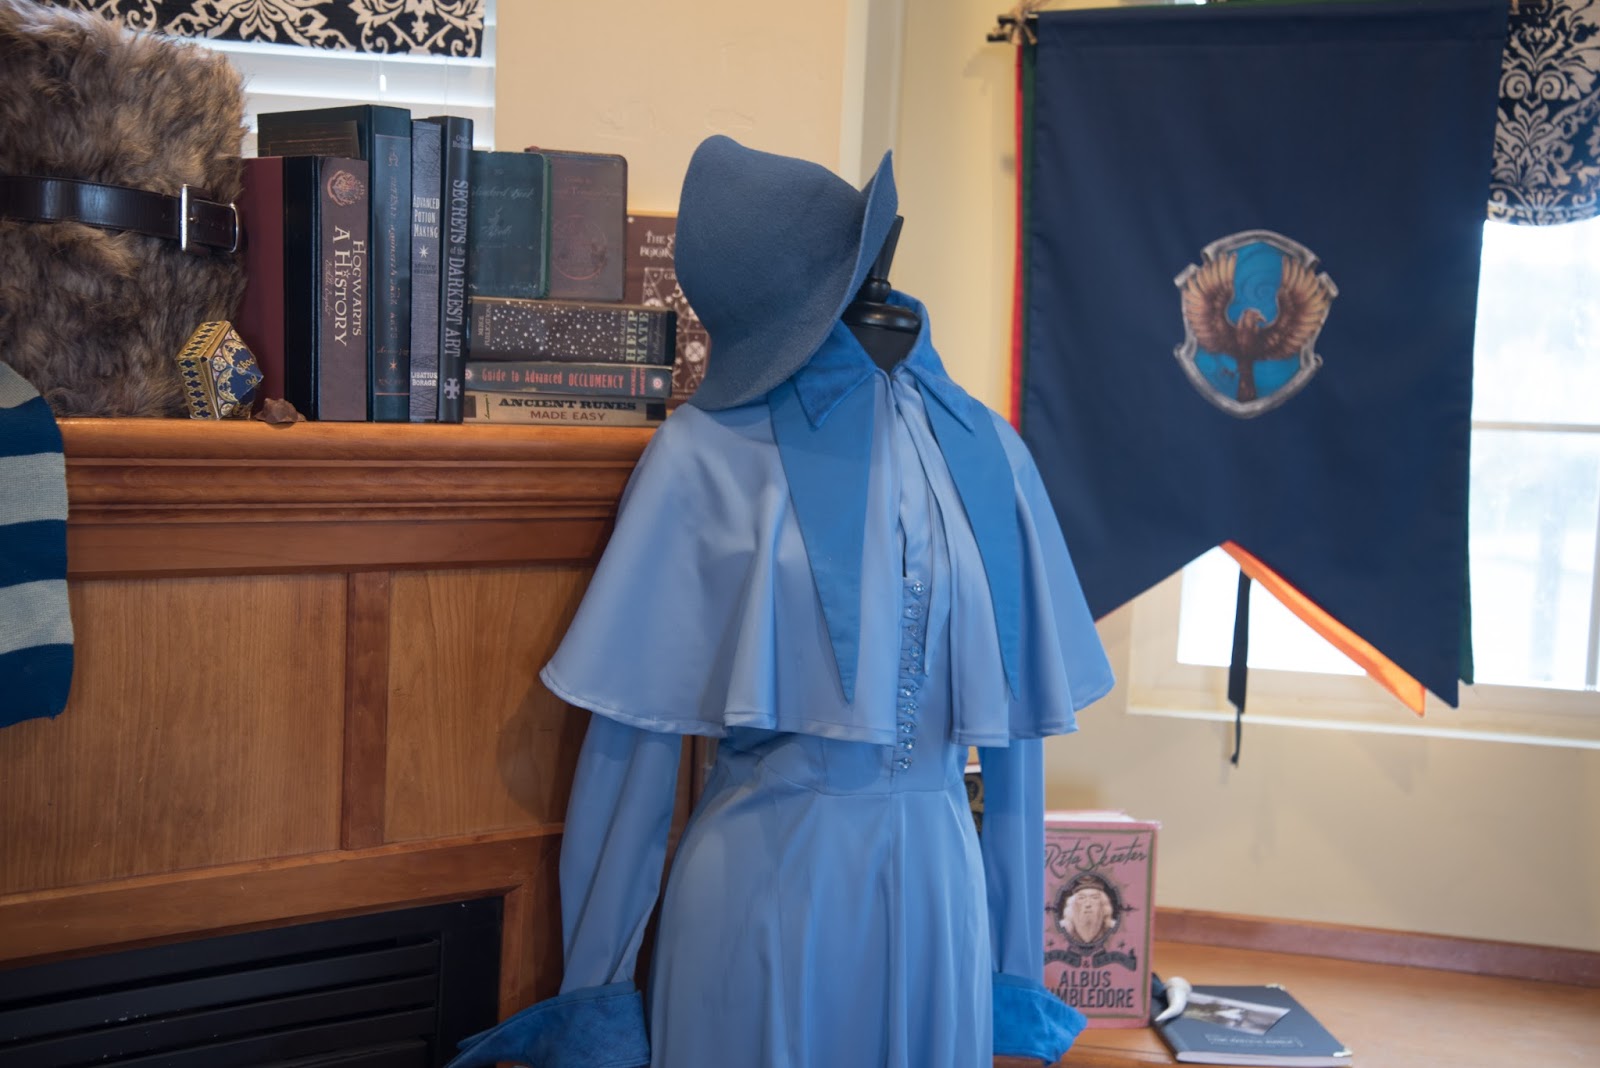
Step 4: Cut out and sew cape or caplet pattern. I modified this Cape Pattern: McCalls 4139 pattern.

Sew together the darker pieces of blue fabric you cut from piece #7 in Step 2 from above (Fleur Delacour Collar #1), making sure to leave an opening at the bottom (about 5 inches wide) to turn the collar right side out. Then cut out Fleur Delaour Collar #2 below (print on 8.5x11"):
 Sew together collar #2, making sure to leave an opening at the bottom to turn the collar right side out. Iron collar #1 and #2 (don't worry about sewing the openings closed). Pin collars to the finished capelet so that the edge of collar #2 folds under the cape.

Add a hook and eyelet to close it and voila! You're done.
 Sew a hook and eyelet to keep the cape closed.

TOTAL COSTUME COST: $36 Dress ($20 fabric, $10 pattern, $2 thread, $2 zipper, $2 buttons), $45 Hat ($30 hatshaper, $10 hood, $4 dye). $10 Shoes ($6 Used shoes, $2 blue paint, .50 leather fabric, $1.50 laces/cording) = $90


Make sure to wear a pair of black pantyhose with your dress. I hope you enjoy making your costume and geeking out with everything Harry Potter!
XoXo,
Robin
October 19, 2016
DIY Harry Potter: Beauxbatons Fleur Delacour Hat

My favorite parts about dressing up are the tiny details that add to the costume. There are also parts to the costume that make it the most recognizable. This is true for the costume of Fleur Delacour in Harry Potter and the Goblet of Fire (Harry Potter #4). When the Beauxbatons Academy arrives with their blue dresses sashaying behind them and magical butterflies surrounding their twirls, it's the Beauxbatons' hats that add the detail and make their costumes perfection.
This is what you'll need to make your own custom Fleur Delacour Beauxbatons hat:
Materials
1.) Wool felt capeline -or- wool felt hood (Jedrzejko)
2.) Flower hat shaper (I got "The Flower" hat shaper from hatshapers.com)
3.) Blue Dye (I used Rit liquid dye in "Denim Blue" from Walmart. Just make sure it matches your dress fabric, unless your wool felt already matches it)
-or-
Rustoleum Satin Wildflower Blue Spray Paint. Pick either the dye or the paint. Honestly the results are similar. I like how my dyed hat felt smooth, but I like how my sprayed hat's rim turned up on one side and stayed there.
Honestly, I think the hat is the key to making the perfect costume. And it really is easier than I thought to make a hat. I watched a ton of videos on YouTube on how to do it from scratch - like they take this thready looking wool felting stuff that you had to pull and layer and layer and let dry and . . . it seemed like such a lengthy and expensive process when you can just buy a pre-shaped hood or capeline like these for between $10-15:
 White Wool Felt Capeline from Jedrzejko - notice how this one already flares out.
  Light Blue Wool Felt Hood from Jedrzejko (these are cheaper than capelines, but are harder to shape/stretch)
I bought a capeline and a hood to test out so I could see which looked better. I think they work equally well - it all just depends on your fabric color. I bought an off-white hood (C578) and a blue (525) hood/cone from Jedrzejko because I wasn't sure of the color hues. I ended up spray painting the blue one because the color wasn't close enough to my fabric, but I think the light blue one is actually perfect in color if you compare to the movie. The off-white one, I dyed first.

Step 1: Dye your fabric. Since my fabric was a different blue than any of the capeline colors I could find, I planned on dying it. I just followed the instructions on the Rit bottle (3 gallons of boiling water, 1 cup vinegar, and half the bottle of dye). I used this big black canner because they recommend not using a pot that you cook in. Honestly, as long as you wash the pot really well afterwards (you could boil soap and water in it when you're done), I don't see a problem with using it for dying.
 If your sink water is really hot, boiling the water may not be necessary.
 I just added mine to the really hot water.
 It's a little scary to place the white wool into the pot, but it works really well. If for some weird reason, your dying fails, all hope isn't lost. Just jump to my alternative spray painting method (Step 5).
I swirled it around in my big black canner/pot and then let it sit for about 30 minutes. I probably could have left it for about 10 minutes and it might not have gone so dark, but I still like it. After your dye soak is done, rinse the capeline/hood until the water is clear.
Step 2: If your wool felt is already the right color, just boil some water and stick your hood/capeline in it. Otherwise, dye it first. Once the wool felt is completely wet, take it out and put on your hatshaper. You can buy just about any hat shaper from hatshapers.com! I found this one (called the flower). It is made from this really hard plastic stuff, super durable and easily reusable.
 Flower hat form/hat shaper from Hatshapers.com
Step 3: Then the fun part! Pull and press with your hands until the hat fits the shape of the hat shaper. I probably spent 15-20 minutes doing this. The hardest part is getting the top to fit to the tip of the hat shaper. I ended up using my iron on a steam setting to get it perfect.
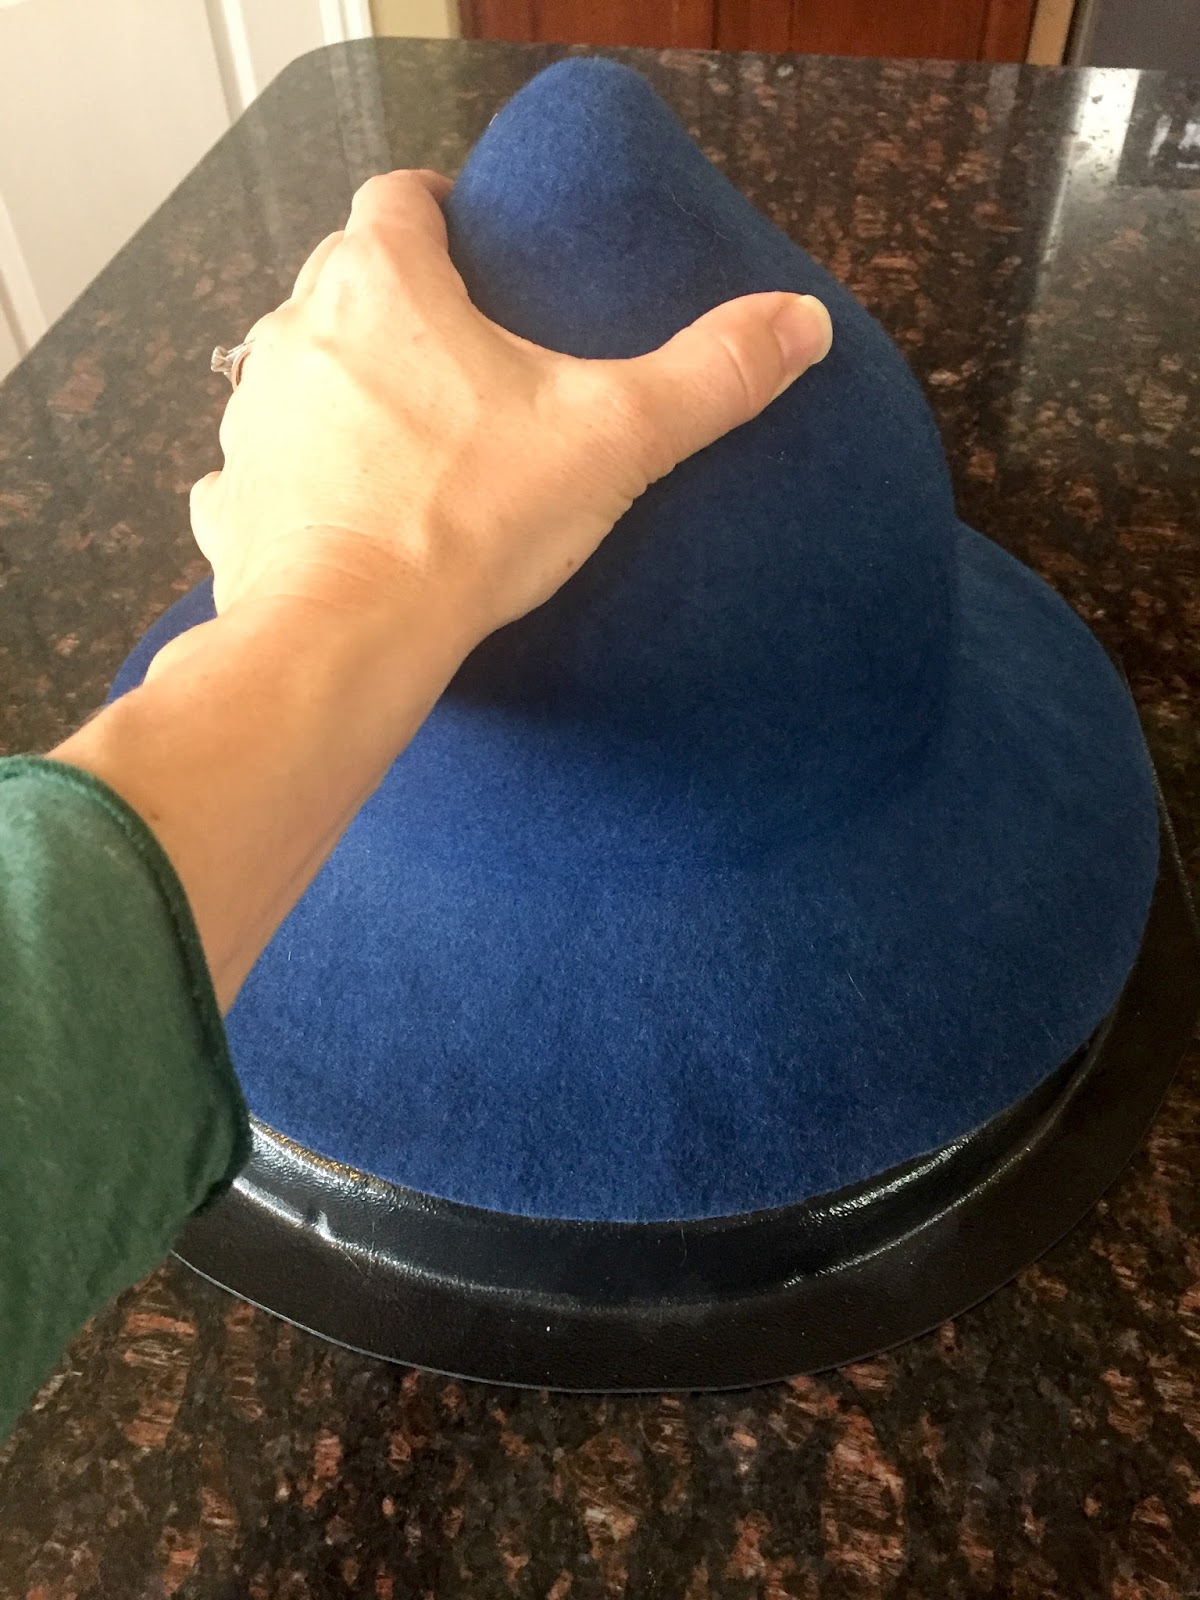
Once it is close to the shape you want, tie some yarn, ribbon or fabric around the part right before it flares to help it hold it's shape.
 All I had on hand to wrap around the hat shaper was some wool yarn.
 A large rubber band or even a strip of fabric would work well too.
Step 4: Let it dry. This can take a day or two. I used a couple of hand towels to soak up as much water as possible to speed up the process.
Step 5: Trace a nice edge along the brim (I used a piece of chalk) and trim off any excess. (If you dyed it from white, you might have to use a marker or a little more of the dye to paint the edge where you cut it off. My dye didn't completely penetrate the wool, so I just used a tooth brush and a little more of the dye with water and painted along the edge. I used an old wet rag to rinse off the dye and let the hat sit back on the hatshaper for the edge to dry.
Step 5 (alternative to dying): Once that hat is shaped and dried, if you didn't dye it or the color is quite what you wanted, spray paint it! I used the same paint as I used to make my shoes.
 I spread out some newspaper in my garage, removed the hat from the hat shaper and sprayed just the outside. I waited about an hour and then spray painted the underside of the brim. I didn't paint the inside of the hood. I used my hands to turn up the brim on one side before it completely dried and used some crumpled newspapers to keep it tilted while drying. I think this was the key to capturing the turned up edge.
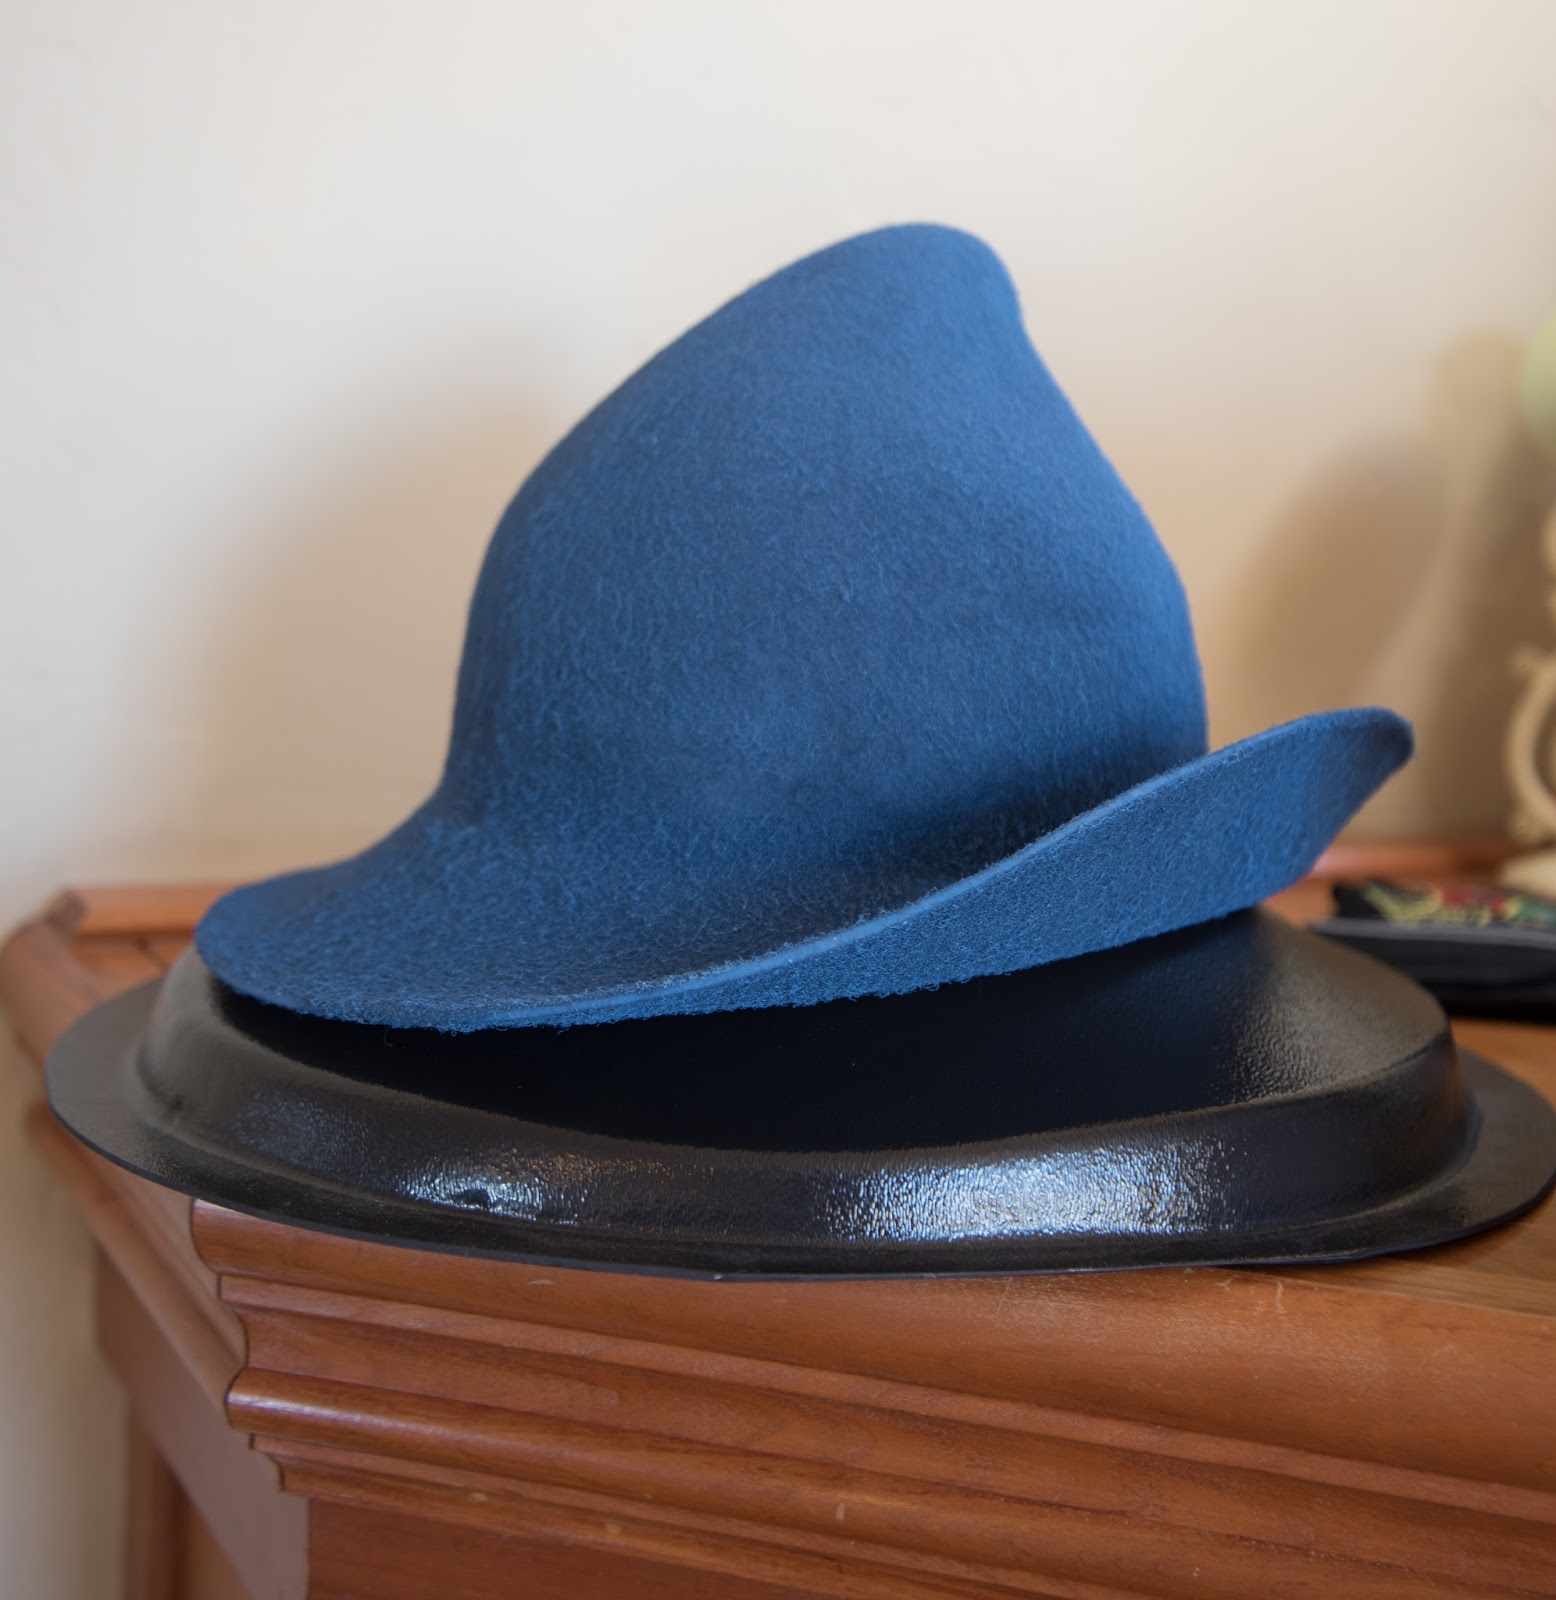

Step 6: Wear it! You hat may not tip up on one side like Fleur's in the movie. If you end up spray painting your hat (it works surprisingly well on wool felt), the hat will become stiffer. I also had some stiffener on hand for the hat I dyed (it was basically a starch spray) that I used just on the inside of the hat. You can also use mod podge painted on the inside, but I was worried it might soak through the hat so I didn't try it.

 I couldn't have made the hat without this shaper from hatshaper.com.
 If you want to get Fleur's wand, you can order it from AliExpress here.
 I bought the metal core one ($12.99) because I was worried about it breaking.

I hope your hat turns out. Let me know if you find any more tips or tricks while making yours! And don't forget to check out my Fleur Delacour Beauxbatons Shoes. I'll be posting instructions on making the dress and capelet later this week (including a free pattern for the collar and cuffs)!
XoXo,
Fleuraka Robin(and my little Dobby too)

October 14, 2016
DIY Harry Potter: Fleur Delacour Beauxbatons Shoes

How to Make the Fleur Delacour Beauxbatons Shoes:
Step 1: Find a pair of old shoes with a pointed toe and heel. An oxford would be the best, but I couldn't find one. I found these ankle boots at my local Deseret Industries (a used clothing store) for $6. Clean them with a cloth and soap and water. Let dry.
Step 2: Print my pattern (below) on a 8.5" x 11" paper. You may have to adjust it to fit your shoe, but the general idea should be the same. The fringe part on the pattern should fit any shoe.
 Step 3: Place wax paper on top of pattern. Trace the pattern of the heel and toe onto the wax paper (I used a permanent marker). Do this twice for both shoes so that you have 2 heels and 2 toes. You don't need to trace the fringe yet. Put tape over the traced part of the pattern. You are basically turning the pattern pieces into stickers. I used a combination of painter's tape and clear tape because the shiny surface of my shoes would only allow really sticky tape to adhere to it. Cut out the wax paper/tape in the correct shapes.
Step 4: If your base color of your shoe isn't what you want as your darker color, spray paint the darker color now and allow to dry for at least one day. Since my shoes were black, I decided to just keep the black. In the movie it is more of a navy blue with a baby blue for the heel and toe. I picked this Rustoleum Ultra Cover Satin Wildflower Blue. Splurge on a spray paint that is for indoor/outdoor use and meant to cover to plastic or fabric. Adhere the "stickers" to the shoes, making sure it sticks really well at the edges. Cover the heel of the shoe with more tape so that when you spray paint the shoe it remains the darker color.
Step 5: Spray paint the shoes. I let the first coat dry and then did another coat. Let the paint dry before you remove the tape. At this point, your shoes will look like this:

Remove the tape and clean up the edges with either some paint remover and a cotton swab, or some of the paint you used on your base coat. I even used a black permanent maker to make my edges perfect.
 Using tape as a stencil/sticker isn't an exact science. There will be some bleeding of paint.
 Luckily, you can fix it easily! I actually used nail polish remover and a cotton swab and then a Sharpie to fix mine.

Step 6: Cut out your fringe pattern piece, Place on top of your Leather Fabric. Pin. Cut out 2 fringe pieces. Since I got my fake leather on clearance in a maroon color, I spray painted black after I cut it out. If your leather isn't the same color as the base color of your shoe, paint it to match.


Step 7: Fold over your cut leather fringe pieces following the pattern and hot glue the fold over. Punch two small holes near the top by the fold. I used a Crop-o-dile, but you can use a hammer and a nail. Pull your leather laces or suede cording (like they use to make jewelry - I found 3mm suede cord at Joann Fabric in the jewelry-making aisle) through the holes and tie in a bow.


Step 8: Hot Glue or sew (it just depends on your shoe material) the fringe near the ankle of the shoe. If your shoe isn't a short boot like mine and it is more like a pump, you can shorten the fringe or even just tie fringe piece around your ankle using the cording and then tie it.
 Before I glued on the fringe. See how I cleaned up the lines. You can't even tell I made any mistakes!
 Hot glue the fringe on. You could probably use a shoe glue too.
 You have to place it quick before the glue dries.
 The finished product. Aren't they cute!?!
 I think the fringe really makes the shoe look similar to the original in the movie.
I hope you enjoy making and wearing your shoes. Be sure to check out my posts on how to make the dress and cape (coming soon) and how to make the hat (coming soon)! Please send me your finished products and any shortcuts you found. I'd love to post them!
 Don't they just go perfect with my Fleur Delacour Dress?If you are throwing a Harry Potter party or book club, you have to check out my post here on Harry Potter and the Goblet of Fire and the rest of the books that we celebrated on DeliciousReads.com.
 XoXo,

Robin
October 5, 2016
Harry Potter 4:The Goblet of Fire Party Ideas
As many of you know, I'm part of the best book club EVER, Delicious Reads. We recently had a book club retreat where we read all seven books over an 8 month period and then met for a 24 hour BOOK CLUB EXTRAVAGANZA. We had moderators for each book, decor, costumes, food, and much more. I got to moderate Book #4. Here's my guest post for them (and links at the bottom to all the other amazing posts from each book to give you ideas for your next Harry Potter party or book club).
 Moderating Harry Potter and the Goblet of Fire (Harry Potter #4) for Delicious Reads was EPIC. The whole weekend was perfection. Each moderator went all out with discussions, activities, decor, and costumes.
Start off with a Goblet of Fire and have each person put their name in. I created my own version of the Goblet of Fire. I just used wood glue to attach a large wooden candlestick to a ceramic popcorn bucket from DI (my local thrift store). Then I painted them a wood color. My plan was to use this recipe for blue fire. My brother also suggested getting blue cellophane, cutting it to look like fire, and putting a light and fan in the bottom of the cup, which I think is an excellent idea.
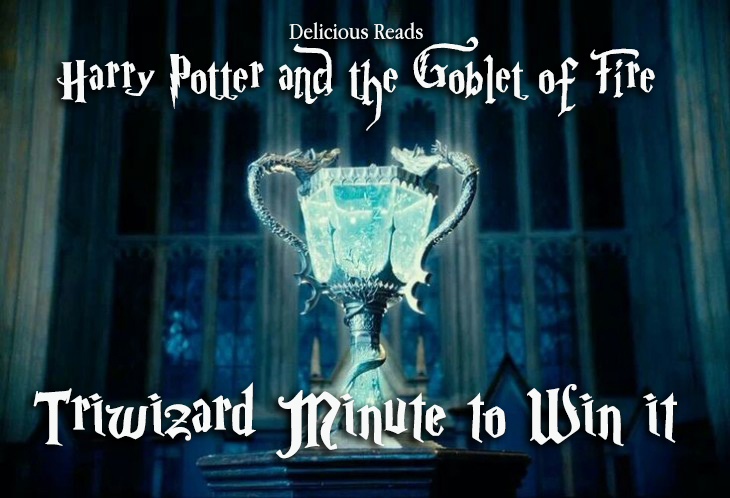
I decided to begin the discussion with our very own Harry Potter Triwizard Minute to Win It. I figured it would remind everyone of the main plot line of the book and it would be a lot of fun too!
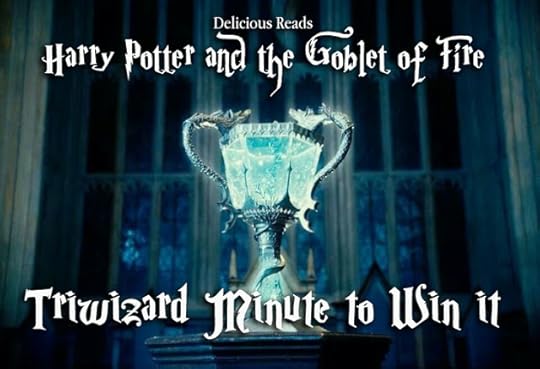 Harry Potter Tri-Wizard Minute to Win ItIn Harry Potter #4, the Triwizard Tournament is a contest between three schools in Europe: Hogwarts School of Witchcraft and Wizardry, Durmstrang Institute, and Beauxbatons Academy of Magic. Each school is represented by one champion, but in the case of HP #4, Harry Potter is the 4th champion chosen by the Goblet of Fire. Selected contestants compete in three tasks that test their magical ability, intelligence, and courage. I chose to do three activities as part of our book club discussion.
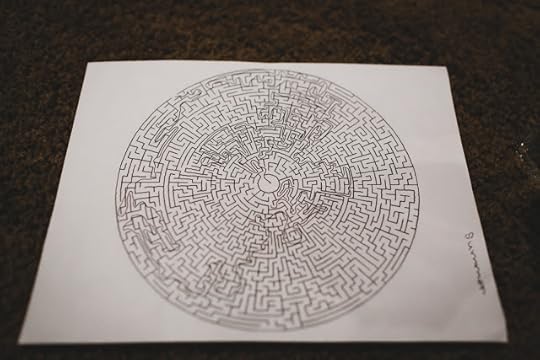
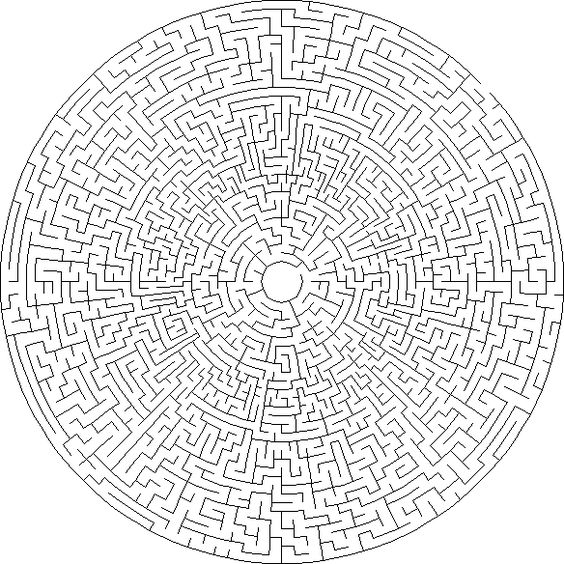
TASK#1: Adult Maze (Task of Intelligence)
I know, technically this should have been last (if you are following HP#4), but I wanted a task everyone could participate in and would easily whittle down our 25 book club members to 4 champions. This one took several minutes longer than one minute, and it was hard! Just print off a copy for each person and have it face down. We had these fantastic wand pens created by our amazing Kellie. We all started at the same time and the first four to complete the maze were the winners. I was only going to give one minute, but it actually took over 5 minutes for the first person to solve it!
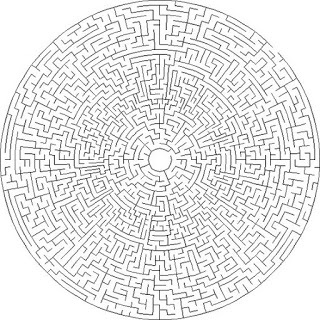 FREE PRINTABLE:
An "Adult" Maze
(and, no, that's not a dirty joke)
(more great mazes here)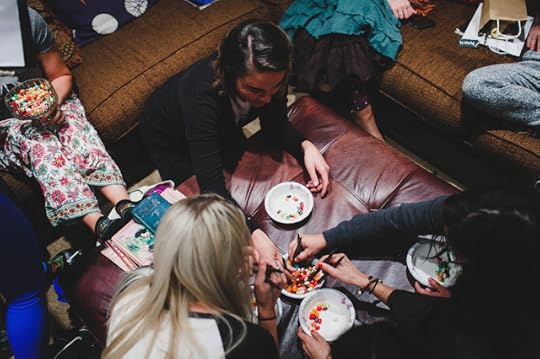
TASK #2: Move the Dinosaur Eggs (Task of Magical Ability)
The first 4 to finish the maze puzzle became the contestants for the rest of the tournament! Since the champion in HP#4 had to retrieve a dinosaur egg, I thought it would be fun to use Bertie Botts Every Flavor Beans as "eggs" and have our maze champions use wands as chopsticks to see who could move the most from one bowl to another in 1 minute. Again, we used the awesome wand pens created by our Kellie (see her tutorial here):

I then made the champions eat all of their Bertie Botts Every Flavor Beans just for fun. The top three were supposed to go on to compete in the last task.
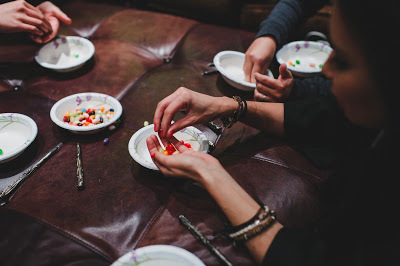 I made the girls eat all the Bertie Botts Every Flavor Beans too!
None of them died, but I'm pretty sure they wanted to kill me!
 Poor Summer had the most beans to eat. I was totally gagging with her. Bertie Botts are no good all together!
 Bryn finished eating her Bertie Botts Every Flavor Beans in record time!
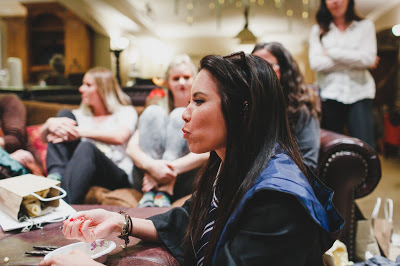
TASK #3: Hold the Plank (Task of Courage/Strength)
In HP#4 the champions have to save someone they love by swimming underwater. I decided to do a play on word (i.e. walk the plank) and have the winners up to this point hold a fitness plank (i.e. face down on ground and only forearms and toes holding up your body). Who ever held theirs the longest was given the Triwizard Cup. I let any of the other girls in book club join in too so they weren't bored. But Summer ended up holding the longest out of the champions so far. I think she held her plank for 5 minutes and probably could have kept going! She was a true champion aqnd deserved the Tri-Wizard cup.
 Summer (aka Cho) was our Tri-wizard Champion!
(she also took most of the pictures of the night - Summer Nicole Photography)
No one died during our contest, but I think several girls were sore the next day from doing a plank for over 5 minutes!
Make Your Own Tri-Wizard CupI created this simple version of the Triwizard Cup. I thought about adding getting three plastic snakes and painting them silver to add to the sides, but decided to keep it simple so the winner would actually use it afterwards as a candle holder or something.
I went to my local thrift store (DI) and bought a candlestick and a cup (I think the candlestick was actually crystal, but the cup/bowl was glass. I don't think it matters as long as it is clear and it has a similar cut to the triwizard cup from the movie).I used this glass glue (yes, it's a thing!). It dries clear and is waterproof. I actually use it all the time to create fun serving display plates and such (for another post!). Make sure your candlestick and bowl/cup is clean and dry. Apply the glue to the top of the candlestick and set the cup on top. Allow to dry overnight. It's that simple!It only cost me about $3 to make because I already had the glue, but you can get some for about $3-4, so it's still an inexpensive prize. You could add Bertie Botts to it too if you wanted.
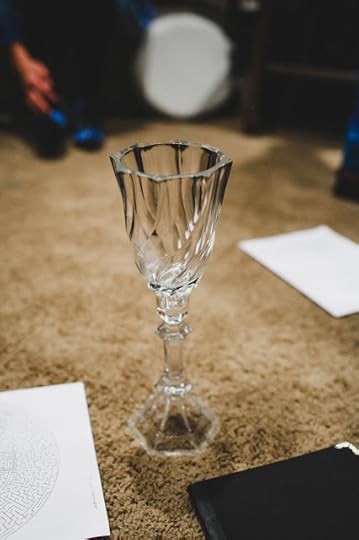 My simplistic Tri-wizard CupIf you want to go all out, you can get this Tri-wizard cup on Amazon for about $40. It lights up too.

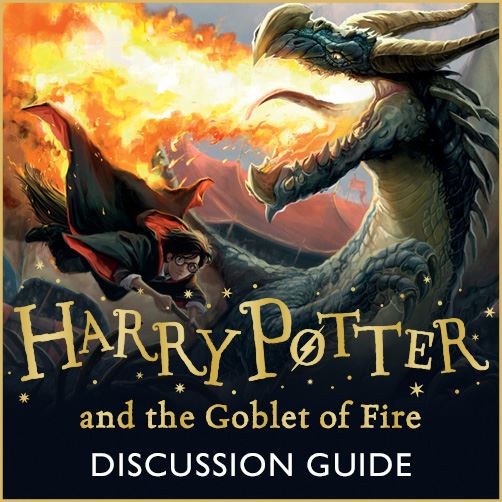
After out Triwizard Cup was won, we had some serious discussion! I got most of my questions here from Bloomsbury. They have great questions for every Harry Potter book. Here are some of my favorites.
Harry Potter and the Goblet of Fire Discussion Questions: Bloomsbury created this great 12 page PDF guide with the book summary, questions, and activity ideas.
The previous books have all opened at the Dursleys’ home, but this book starts instead in the Riddle House (Chapter 1). The pain Harry feels in his scar in Chapter 2 is an omen of what is to come. Soon after, the Quidditch World Cup is interrupted by a sinister attack (Chapter 9, ‘The Dark Mark’). Why do you think J.K. Rowling departed from the way she had started the other books?Talk about the many ways in which Harry is helped through the tasks of the Triwizard Tournament by adults and fellow pupils alike. How much of his success is down to him, and how much to others? How does Harry repay the support he receives? Why does Harry take time to free others besides Ron during the second task? How does the relationship between Harry and Cedric develop through the three tasks of the Triwizard Tournament?What do you believe causes the connection between Harry’s wand and Voldemort’s? How do the shadow figures that emerge from Voldemort’s wand during the connection help Harry escape? Why does Voldemort need Harry’s blood to regain his body? Is Harry learning to become a great wizard or is he just lucky to escape the forces that arise against him? Do you believe that Harry is living out a destiny or acting of his own free will? In what ways do we see the main characters starting to grow up in Harry Potter and the Goblet of Fire? What things are they experiencing that they haven’t in the previous books? What is Harry’s unexpected task in Chapter 22?What is the significance of Hermione’s campaign for the welfare of the house-elves? Why is she adamant about improving their conditions? Why do the house-elves resist her efforts? Discuss what Sirius Black means when he says: ‘If you want to know what a man’s like, take a good look at how he treats his inferiors, not his equals.’ (Chapter 27, ‘Padfoot Returns’, p. 443)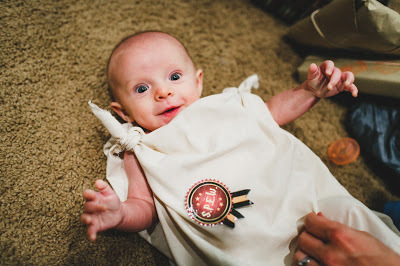 Because every Harry Potter party needs a baby Dobby!
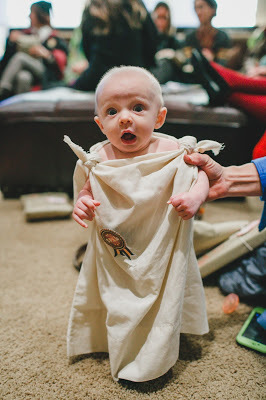 This is my little 4 month old Olive, dressed fabulously in a pillow case I found twenty minutes before I left for the party. I cut off the top to fit her body length (I could have gone shorter) and then I cut a little down the side so I could tie the shoulders together. I printed a little S.P.E.W badge and laminated it with clear tape, then hot glued a pin to the back to hook to her pillow case. (Summer Nicole Photography)If you really want to play the part of Harry Potter and the Goblet of Fire, you need to dress the part! You could go traditional as Harry Potter, but I decided to be a little more unique and be Fleur Delacour from Beauxbatons. If you want to see how I made my costume, check it out here (link coming soon!)
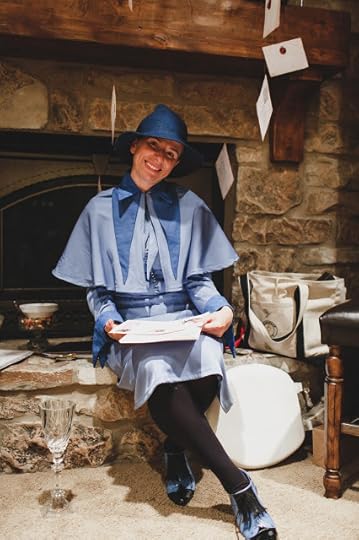 Me in my custom Fleur Delacour costume. the Triwizard cup next to me. If you're interested in adding Hogwarts flags to your party decor, check out my tutorial here (link coming soon). I also made many of the Harry Potter-inspired spell books and magazines. Here's my tutorial and links to all the images I used (coming soon).
Don't forget to check out what we did for these Harry Potter books too:
Harry Potter #1: Harry Potter and the Sorcerers Stone Book Club IdeasHarry Potter #2: Harry Potter and the Chamber of Secrets Book Club IdeasHarry Potter #3: Harry Potter and the Prisoner at Azkaban Book Club IdeasComing Soon . . . Harry Potter #5: Harry Potter and the Order of the Phoenix Book Club IdeasHarry Potter #6: Harry Potter and the Half-Blood Prince Book Club IdeasHarry Potter #7: Harry Potter and the Deathly Hallows Book Club Ideas
XoXo,Robin aka Fleur(and little Dobby too) www.AuthorRobinKing.com
 Moderating Harry Potter and the Goblet of Fire (Harry Potter #4) for Delicious Reads was EPIC. The whole weekend was perfection. Each moderator went all out with discussions, activities, decor, and costumes.
Start off with a Goblet of Fire and have each person put their name in. I created my own version of the Goblet of Fire. I just used wood glue to attach a large wooden candlestick to a ceramic popcorn bucket from DI (my local thrift store). Then I painted them a wood color. My plan was to use this recipe for blue fire. My brother also suggested getting blue cellophane, cutting it to look like fire, and putting a light and fan in the bottom of the cup, which I think is an excellent idea.
I decided to begin the discussion with our very own Harry Potter Triwizard Minute to Win It. I figured it would remind everyone of the main plot line of the book and it would be a lot of fun too!
 Harry Potter Tri-Wizard Minute to Win ItIn Harry Potter #4, the Triwizard Tournament is a contest between three schools in Europe: Hogwarts School of Witchcraft and Wizardry, Durmstrang Institute, and Beauxbatons Academy of Magic. Each school is represented by one champion, but in the case of HP #4, Harry Potter is the 4th champion chosen by the Goblet of Fire. Selected contestants compete in three tasks that test their magical ability, intelligence, and courage. I chose to do three activities as part of our book club discussion.
TASK#1: Adult Maze (Task of Intelligence)
I know, technically this should have been last (if you are following HP#4), but I wanted a task everyone could participate in and would easily whittle down our 25 book club members to 4 champions. This one took several minutes longer than one minute, and it was hard! Just print off a copy for each person and have it face down. We had these fantastic wand pens created by our amazing Kellie. We all started at the same time and the first four to complete the maze were the winners. I was only going to give one minute, but it actually took over 5 minutes for the first person to solve it!
 FREE PRINTABLE:
An "Adult" Maze
(and, no, that's not a dirty joke)
(more great mazes here)

TASK #2: Move the Dinosaur Eggs (Task of Magical Ability)
The first 4 to finish the maze puzzle became the contestants for the rest of the tournament! Since the champion in HP#4 had to retrieve a dinosaur egg, I thought it would be fun to use Bertie Botts Every Flavor Beans as "eggs" and have our maze champions use wands as chopsticks to see who could move the most from one bowl to another in 1 minute. Again, we used the awesome wand pens created by our Kellie (see her tutorial here):
I then made the champions eat all of their Bertie Botts Every Flavor Beans just for fun. The top three were supposed to go on to compete in the last task.
 I made the girls eat all the Bertie Botts Every Flavor Beans too!
None of them died, but I'm pretty sure they wanted to kill me!
 Poor Summer had the most beans to eat. I was totally gagging with her. Bertie Botts are no good all together!
 Bryn finished eating her Bertie Botts Every Flavor Beans in record time!
TASK #3: Hold the Plank (Task of Courage/Strength)
In HP#4 the champions have to save someone they love by swimming underwater. I decided to do a play on word (i.e. walk the plank) and have the winners up to this point hold a fitness plank (i.e. face down on ground and only forearms and toes holding up your body). Who ever held theirs the longest was given the Triwizard Cup. I let any of the other girls in book club join in too so they weren't bored. But Summer ended up holding the longest out of the champions so far. I think she held her plank for 5 minutes and probably could have kept going! She was a true champion aqnd deserved the Tri-Wizard cup.
 Summer (aka Cho) was our Tri-wizard Champion!
(she also took most of the pictures of the night - Summer Nicole Photography)
No one died during our contest, but I think several girls were sore the next day from doing a plank for over 5 minutes!
Make Your Own Tri-Wizard CupI created this simple version of the Triwizard Cup. I thought about adding getting three plastic snakes and painting them silver to add to the sides, but decided to keep it simple so the winner would actually use it afterwards as a candle holder or something.
I went to my local thrift store (DI) and bought a candlestick and a cup (I think the candlestick was actually crystal, but the cup/bowl was glass. I don't think it matters as long as it is clear and it has a similar cut to the triwizard cup from the movie).I used this glass glue (yes, it's a thing!). It dries clear and is waterproof. I actually use it all the time to create fun serving display plates and such (for another post!).
 Make sure your candlestick and bowl/cup is clean and dry. Apply the glue to the top of the candlestick and set the cup on top. Allow to dry overnight. It's that simple!It only cost me about $3 to make because I already had the glue, but you can get some for about $3-4, so it's still an inexpensive prize. You could add Bertie Botts to it too if you wanted.
 My simplistic Tri-wizard CupIf you want to go all out, you can get this Tri-wizard cup on Amazon for about $40. It lights up too.
After out Triwizard Cup was won, we had some serious discussion! I got most of my questions here from Bloomsbury. They have great questions for every Harry Potter book. Here are some of my favorites.
Harry Potter and the Goblet of Fire Discussion Questions:
 Bloomsbury created this great 12 page PDF guide with the book summary, questions, and activity ideas.
 The previous books have all opened at the Dursleys’ home, but this book starts instead in the Riddle House (Chapter 1). The pain Harry feels in his scar in Chapter 2 is an omen of what is to come. Soon after, the Quidditch World Cup is interrupted by a sinister attack (Chapter 9, ‘The Dark Mark’). Why do you think J.K. Rowling departed from the way she had started the other books?Talk about the many ways in which Harry is helped through the tasks of the Triwizard Tournament by adults and fellow pupils alike. How much of his success is down to him, and how much to others? How does Harry repay the support he receives? Why does Harry take time to free others besides Ron during the second task? How does the relationship between Harry and Cedric develop through the three tasks of the Triwizard Tournament?What do you believe causes the connection between Harry’s wand and Voldemort’s? How do the shadow figures that emerge from Voldemort’s wand during the connection help Harry escape? Why does Voldemort need Harry’s blood to regain his body? Is Harry learning to become a great wizard or is he just lucky to escape the forces that arise against him? Do you believe that Harry is living out a destiny or acting of his own free will? In what ways do we see the main characters starting to grow up in Harry Potter and the Goblet of Fire? What things are they experiencing that they haven’t in the previous books? What is Harry’s unexpected task in Chapter 22?What is the significance of Hermione’s campaign for the welfare of the house-elves? Why is she adamant about improving their conditions? Why do the house-elves resist her efforts? Discuss what Sirius Black means when he says: ‘If you want to know what a man’s like, take a good look at how he treats his inferiors, not his equals.’ (Chapter 27, ‘Padfoot Returns’, p. 443)
 Because every Harry Potter party needs a baby Dobby!
 This is my little 4 month old Olive, dressed fabulously in a pillow case I found twenty minutes before I left for the party. I cut off the top to fit her body length (I could have gone shorter) and then I cut a little down the side so I could tie the shoulders together. I printed a little S.P.E.W badge and laminated it with clear tape, then hot glued a pin to the back to hook to her pillow case. (Summer Nicole Photography)If you really want to play the part of Harry Potter and the Goblet of Fire, you need to dress the part! You could go traditional as Harry Potter, but I decided to be a little more unique and be Fleur Delacour from Beauxbatons. If you want to see how I made my costume, check it out here (link coming soon!)
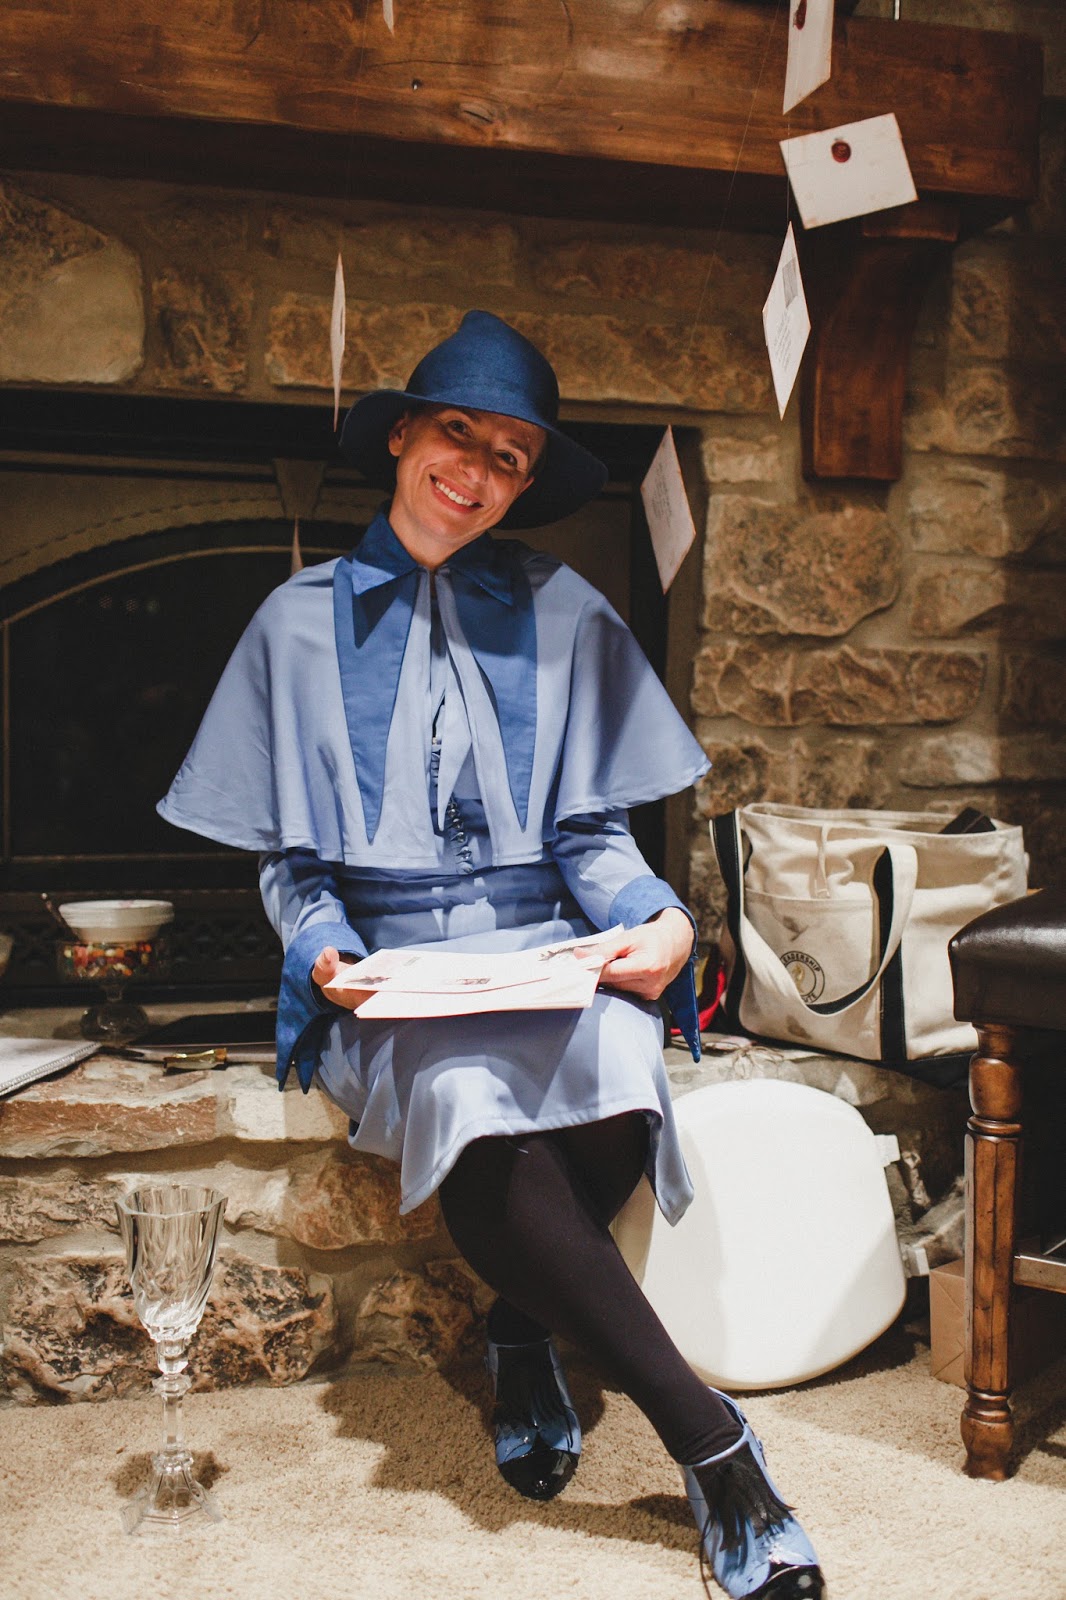 Me in my custom Fleur Delacour costume. the Triwizard cup next to me. If you're interested in adding Hogwarts flags to your party decor, check out my tutorial here (link coming soon). I also made many of the Harry Potter-inspired spell books and magazines. Here's my tutorial and links to all the images I used (coming soon).
Don't forget to check out what we did for these Harry Potter books too:
Harry Potter #1: Harry Potter and the Sorcerers Stone Book Club IdeasHarry Potter #2: Harry Potter and the Chamber of Secrets Book Club IdeasHarry Potter #3: Harry Potter and the Prisoner at Azkaban Book Club IdeasComing Soon . . . Harry Potter #5: Harry Potter and the Order of the Phoenix Book Club IdeasHarry Potter #6: Harry Potter and the Half-Blood Prince Book Club IdeasHarry Potter #7: Harry Potter and the Deathly Hallows Book Club Ideas
XoXo,Robin aka Fleur(and little Dobby too)
 www.AuthorRobinKing.com
October 2, 2016
Van Gogh Painting Recovered! {with excerpt from my book}
It's been found! It's been found!
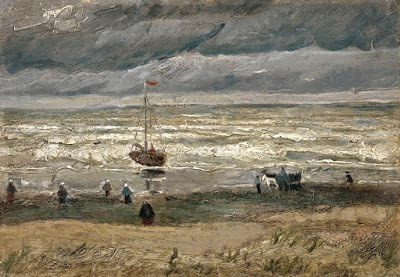 Stolen "View of the Sea at Scheveningen" by Vincent Van Gogh.
Recovered September 2016You know how I wrote this book a while back (November 2015) called Van Gogh Gone. It's the second book in the Remembrandt series, the story of 17-year-old girl, Alexandra. Because of her eidetic memory, Alex can't forget anything. When her Russian professor gives her an impossible puzzle to solve, she is catapulted into a life of cryptic codes, covert missions, and unexpected love.
Well, the title of that book was Van Gogh Gone for a reason. Alex is sent across the globe in search of a stolen work of art. One of those paintings was "View of the Sea at Scheveningen" (sometimes called "Seascape at Scheveningen"). In the book, I describe how the painting was stolen from the Van Gogh Museum in 2002 (true story). I also described (I totally made up) how the painting was being used by a European crime syndicate as a means of trade. Guess what? I was right! It was the Italian mafia. But that's not the coolest part . . . "View of the Sea at Scheveningen" has been recovered!
Here is a little excerpt from my book, describing the stolen painting:
“I don’t want you dead, Alexandra. What I want is Van Gogh,” Elijah said.
“Van Gogh?”
“Better yet, what I want is the painting View of the Sea at Scheveningen by Vincent Van Gogh.”
Elijah leaned forward in his chair. “It is a scene as viewed from the beach with a—”
“I know the painting.” I saw it in my head, along with the description below it from an art book I’d leafed through nearly five years before. It depicted a scene from the beach resort where Van Gogh apparently painted it. The wind from the day not only influenced how the artist painted the blowing flag of the ship on the sea, but it also blew grains of sand into the thick, oil-based paint, leaving some permanently embedded in the layers. “He painted it outdoors, which was nearly unheard of at the time,” I went on. “Most impressionists sketched on-site and painted at home to avoid . . .” I stopped myself from nearly reading all the words below the painting in my head.
Elijah cocked his head to one side. “I knew you were your mother’s daughter. Art is in your blood.”
Or in my mind. Elijah didn’t know about my eidetic memory and how, at that moment, it was flashing to every book, article, or website I had ever seen on Van Gogh or his paintings.
“Sea at Scheveningen was stolen in 2002 and hasn’t been recovered by any of the agencies searching for it,” I said. “Why would you think it still exists?”
“I have my reasons.”
“Even if it does exist and I actually wanted to help you, what makes you think I could find it?”
“You are forgetting how well I know The Company.”
I cringed at his tone when he said “The Company.” It was an insider’s right to refer to the organization that way, and Elijah no longer had the right. In fact, it turned out he never had it to begin
with.
“If you and that team of yours can stop a Russian terrorist organization from poisoning a water supply, you can find a minor painting.”
“If it’s so minor, why do you want it? It’s not like you can hang it up in your jail cell.”
A boisterous laugh rumbled from Elijah’s chest. A silver filling in one of his back molars caught the light. “‘There’s no art, to find a mind’s construction in the face.’” Then he winked. I knew what that quote meant, and it had nothing to do with art. Shakespeare was referring to the fact that you can’t tell what a person is thinking by looking at his or her face.
My mind recalled the last time Elijah had quoted Shakespeare to me. It had been a clue to lead me to discover that Elijah was a double agent. If he really had something he wanted to tell me, he should just come straight out and say it. I’d had enough with his games.
“You can quote MacBeth all you want” —my voice began to rise— “but it’s not going to convince me to do anything for you, let alone find a painting. You have no leverage here, Elijah. I can’t believe I’ve listened to you for this long.” I jumped up, nearly knocking over my chair, and headed for the door.
“You’ll change your mind.” Elijah sounded so sure of himself that my grip on the door handle tightened until I felt my blood pulsing against the metal. I took a deep breath to keep myself from losing it completely, then gave up. I no longer cared about the camera in the interrogation room. I marched back to the table and bent over it until my face was just a foot from Elijah’s. The only way to keep the memories of him from haunting me was to prove to myself that I didn’t need to be afraid of him.
“No, I won’t.” I glared at him.
He returned with an icy stare that didn’t scare me this time. He leaned forward a few more inches and whispered in my ear. “Talk with your father first before you make a promise you can’t keep. Ask him what really happened after the accident.”
(Excerpt taken from Van Gogh Gone by Robin M. King, Chapter 4)
I'm so happy that these works of Van Gogh were recovered. I'd like to think my fictional character had a hand in it in some way . . .
Congrats to The Van Gogh Museum for getting back what was lost. I love the excitement showed by Axel Rueger, The Van Gogh Museum director. His smile is priceless.
Writing Van Gogh Gone has been such a great experience for me, which is kind of ironic because it is just a young adult spy novel. A few months back, I was contacted by a man in the Netherlands who is curating a library filled with books and DVD's all about Vincent Van Gogh. The curator lives near the Van Gogh Museum in Nuenen c.a. in the Netherlands. I told him my book was a work of fiction, but he still wanted it a part of the library. He even invited me to come to his town and he would show me all the special Van Gogh spots. Ha! If I ever make it that way, I will for sure stop by.
If you'd like to read Van Gogh Gone, I'd suggest reading Remembrandt first. You can get copies of either book on Deseret Book, Amazon or your local bookstore. Memory of Monet, the third book in the series, comes out November 2016 and is currently available for preorder!
 Stolen "View of the Sea at Scheveningen" by Vincent Van Gogh.
Recovered September 2016You know how I wrote this book a while back (November 2015) called Van Gogh Gone. It's the second book in the Remembrandt series, the story of 17-year-old girl, Alexandra. Because of her eidetic memory, Alex can't forget anything. When her Russian professor gives her an impossible puzzle to solve, she is catapulted into a life of cryptic codes, covert missions, and unexpected love.

Well, the title of that book was Van Gogh Gone for a reason. Alex is sent across the globe in search of a stolen work of art. One of those paintings was "View of the Sea at Scheveningen" (sometimes called "Seascape at Scheveningen"). In the book, I describe how the painting was stolen from the Van Gogh Museum in 2002 (true story). I also described (I totally made up) how the painting was being used by a European crime syndicate as a means of trade. Guess what? I was right! It was the Italian mafia. But that's not the coolest part . . . "View of the Sea at Scheveningen" has been recovered!
Here is a little excerpt from my book, describing the stolen painting:
“I don’t want you dead, Alexandra. What I want is Van Gogh,” Elijah said.
“Van Gogh?”
“Better yet, what I want is the painting View of the Sea at Scheveningen by Vincent Van Gogh.”
Elijah leaned forward in his chair. “It is a scene as viewed from the beach with a—”
“I know the painting.” I saw it in my head, along with the description below it from an art book I’d leafed through nearly five years before. It depicted a scene from the beach resort where Van Gogh apparently painted it. The wind from the day not only influenced how the artist painted the blowing flag of the ship on the sea, but it also blew grains of sand into the thick, oil-based paint, leaving some permanently embedded in the layers. “He painted it outdoors, which was nearly unheard of at the time,” I went on. “Most impressionists sketched on-site and painted at home to avoid . . .” I stopped myself from nearly reading all the words below the painting in my head.
Elijah cocked his head to one side. “I knew you were your mother’s daughter. Art is in your blood.”
Or in my mind. Elijah didn’t know about my eidetic memory and how, at that moment, it was flashing to every book, article, or website I had ever seen on Van Gogh or his paintings.
“Sea at Scheveningen was stolen in 2002 and hasn’t been recovered by any of the agencies searching for it,” I said. “Why would you think it still exists?”
“I have my reasons.”
“Even if it does exist and I actually wanted to help you, what makes you think I could find it?”
“You are forgetting how well I know The Company.”
I cringed at his tone when he said “The Company.” It was an insider’s right to refer to the organization that way, and Elijah no longer had the right. In fact, it turned out he never had it to begin
with.
“If you and that team of yours can stop a Russian terrorist organization from poisoning a water supply, you can find a minor painting.”
“If it’s so minor, why do you want it? It’s not like you can hang it up in your jail cell.”
A boisterous laugh rumbled from Elijah’s chest. A silver filling in one of his back molars caught the light. “‘There’s no art, to find a mind’s construction in the face.’” Then he winked. I knew what that quote meant, and it had nothing to do with art. Shakespeare was referring to the fact that you can’t tell what a person is thinking by looking at his or her face.
My mind recalled the last time Elijah had quoted Shakespeare to me. It had been a clue to lead me to discover that Elijah was a double agent. If he really had something he wanted to tell me, he should just come straight out and say it. I’d had enough with his games.
“You can quote MacBeth all you want” —my voice began to rise— “but it’s not going to convince me to do anything for you, let alone find a painting. You have no leverage here, Elijah. I can’t believe I’ve listened to you for this long.” I jumped up, nearly knocking over my chair, and headed for the door.
“You’ll change your mind.” Elijah sounded so sure of himself that my grip on the door handle tightened until I felt my blood pulsing against the metal. I took a deep breath to keep myself from losing it completely, then gave up. I no longer cared about the camera in the interrogation room. I marched back to the table and bent over it until my face was just a foot from Elijah’s. The only way to keep the memories of him from haunting me was to prove to myself that I didn’t need to be afraid of him.
“No, I won’t.” I glared at him.
He returned with an icy stare that didn’t scare me this time. He leaned forward a few more inches and whispered in my ear. “Talk with your father first before you make a promise you can’t keep. Ask him what really happened after the accident.”
(Excerpt taken from Van Gogh Gone by Robin M. King, Chapter 4)
I'm so happy that these works of Van Gogh were recovered. I'd like to think my fictional character had a hand in it in some way . . .
Congrats to The Van Gogh Museum for getting back what was lost. I love the excitement showed by Axel Rueger, The Van Gogh Museum director. His smile is priceless.
Writing Van Gogh Gone has been such a great experience for me, which is kind of ironic because it is just a young adult spy novel. A few months back, I was contacted by a man in the Netherlands who is curating a library filled with books and DVD's all about Vincent Van Gogh. The curator lives near the Van Gogh Museum in Nuenen c.a. in the Netherlands. I told him my book was a work of fiction, but he still wanted it a part of the library. He even invited me to come to his town and he would show me all the special Van Gogh spots. Ha! If I ever make it that way, I will for sure stop by.
If you'd like to read Van Gogh Gone, I'd suggest reading Remembrandt first. You can get copies of either book on Deseret Book, Amazon or your local bookstore. Memory of Monet, the third book in the series, comes out November 2016 and is currently available for preorder!
September 1, 2016
The Remembrandt Series
 Remembrandt (Remembrandt #1)This young adult suspense novel is the first in a trilogy following the story of seventeen-year-old Alexandra Stewart. This Brown University student with an eidetic memory doesn’t walk down memory lane, she lives on it. When she solves an impossible puzzle for her Russian professor, Alex is catapulted into a life of cryptic codes, covert missions, and unexpected love.Where to Buy: Amazon, Deseret Book, or ask your local store.
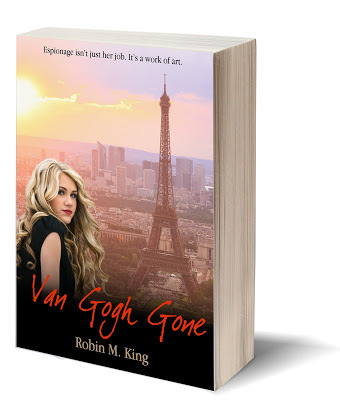
Van Gogh Gone (Remembrandt #2)Summary: Alex finally has a life worth remembering—a Spanish tutor who gives perfecto a new name, a colleague who has her back, and a special role in a spy organization with secret headquarters at Brown University. After her recent mission in Moscow, Alex discovers that a Van Gogh painting may be the key to finding someone she loves.Espionage isn’t just her job. It’s a work of art. Where to Buy: Amazon, Deseret Book, or ask your local store.
Memory of Monet (Remembrandt #3)Coming November 2016!Summary: Brown University student Alexandra Stewart has to decide if her undercover life is the one she wants to lead. When the CIA asks for assistance on a mission only she can complete, Alex agrees to travel to Mexico City as an exchange student at an elite art school, leaving behind her comatose brother and the man who loves her. This mission could be her final masterpiece.
**Audiobook coming soon!**
August 25, 2016
LET'S DISH! SIX NEW PRODUCTS YOU HAVE TO TRY (BOOK CLUB GOSSIP)
In my latest post for Delicious Reads, I round up some of the products we are gushing about right now. I know, we should be talking books at book club. And most of the time we do. Really. But you can't get a group of gals together without dishing about the latest show, what 's going on in Whitney's life, where Kellie got those fabulous shoes, and what lipstick Jen is wearing. Which brings me to the point of this post - NEW stuff you can't live without. Shhh. Only tell these to your favorite people. We wouldn't want everyone to look and feel this fab.

For more info on each product, see the full article at Delicious Reads! Ooo, and send me some of your new favorites that you wish you could "dish" about.

For more info on each product, see the full article at Delicious Reads! Ooo, and send me some of your new favorites that you wish you could "dish" about.