Beth Smith's Blog, page 17
September 22, 2015
The Great Skirt Project
If you follow me on Instagram or Facebook, you know something’s up so I thought I’d do a little blog series so you can all follow along with me in more detail if you want.
I started weaving at least 10 years ago. I thought I should learn because I was selling looms in my shop and I thought I should know how to use them if I was going to sell them. It wasn’t something I thought I would persue seriously at the time but I took a few classes.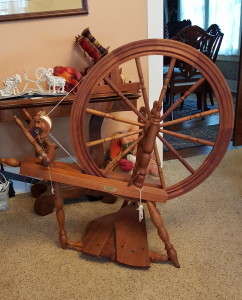 But over the last several years Ive begun to think about weaving more and more. I bought 2 floor looms. I had my friend Sara lamb come for a week for a semi private lesson. I flew to Vashon Island for a week long class. All the while I was figuring out what exactly I wanted to do with my weaving knowledge.
About 2 years ago I finally knew but I had no idea how to approach it so the idea percolated. What I really wanted to do was make faric yardage for clothing. It made sense for me. I like to spin fine yarns and I used to be a dressmaker in a previous life.
In addition to my clothing focus I was curious about how different kinds of wool act in fabric. Of course I had already looked at that a lot with knitting but only a tiny bit for weaving and not anything bigger than a 4 by 4 square.
I decided that this was the year to get to work. I often feel like I don’t have time for personal persuits because of class prep and sample spinning and article writing. But I need to carve out some time for my own projects because I feel like it will help me grow as a teacher.
In the Beginning
I started spinning the yarn for this first project back in April or May – I can’t remember. I decided to use my Schacht Reeves 30″ wheel for this spinning because it’s quick, it has the light take up that I love and I am very familiar with the wheel which is pretty important when you want to get a lot of yarn spun very quickly.
I decided 2 work with 2 ply at first although I want to see what happens to fabric if the yarn is 3 ply too. But I have to make some decisions or I’ll never get going.
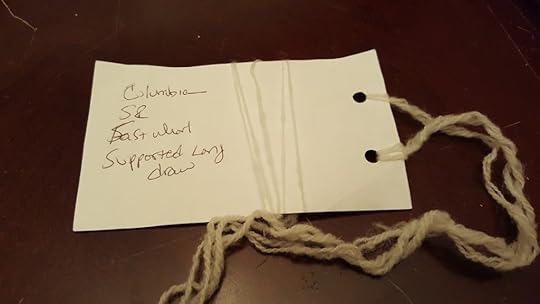
So 2 ply. And I wanted to spin it pretty fine so it would be appropriate for every day wear. I chose 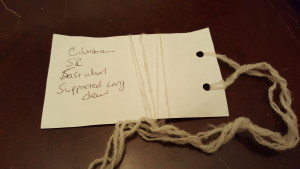 to begin with Columbia because I love that wool so much and I have enough and it is roving so I could spin it pretty quickly with a supported long draw. I made a sample card like I do every time I’m going to be doing a giant project. I like to put a 2 ply and 3 ply sample on my sample card so that if I ever want to spin the yarn again, I have a record and I know what the yarns would look like.
The 2 ply yarn is about 18 wraps per inch after finishing. Columbia is a very fluffy yarn and puffs up a lot after spinning and washing.Similar to how Cormo acts.
Schacht Project
In the middle of all of my planning and spinning, a new project came up that I’m working on with Jillian. This project will also include spinning for weaving except we’ll be using rigid heddle looms rather than floor looms. Well! I thought this would be a great opportunity to make the same skirt with the same yarn on the rigid heddle loom as I am on the floor loom and compare the fabrics.
The Schacht project will be posted two times per month for 4 months on the Schacht blog. Here’s a link to the first post in the series: http://schachtspindle.com/smith-and-moreno-take-on-weaving/
The Calculations
So, back to the floor loom. I started spinning before I really knoew what I was going to do, what the skirt would look like or how much yarn I would need. After I had about 2000 yards of 2 ply spun 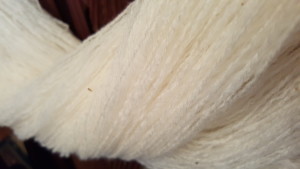 and plied, I decided I should think about it. Since I now knew I would be making 2 skirts that were exactly the same I had to make a skirt that would fit the finished width of a 15 inch rigid heddle fabric – which would be apporximately 13 inches wide. Taking my own measurements into consideration, I decided to go with a six gore skirt. This was after thinking about and discarding ideas for a half circle skirt or a wrap around skirt. both of which wuld have to be pieced with seams which would be horizontal rather than verticle.
Now having decided on a 6 gore skirt that would be about knee length I could get down to figuring out how much yarn I would need to spin.
Taking draw in into consideration on the floor loom I decided to make the warp 30 inches wide so I could fit 2 pattern pieces side by side. I wanted a sample of the washed and unwashed fabric after it was woven so I added a bit to the length so I caould keep a bit.
So, 20 ends per inch, 30 inches wide gives us 600 ends.
600 ends at 4 yards each gives us 2400 yards needed for warp.
Assuming 20 picks per inch woould mean I would need approximately 2400 yards for weft.
That’s a total of 4800 yards plus a few hundred for fudging.
Spinning
Almost all of the yarn was spun on the Schacht Reeves but some was spun on the Schacht Matchless 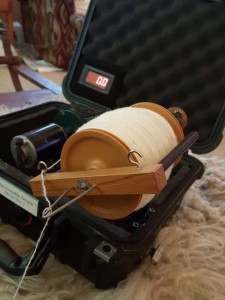 because it’s easier to carry around. I plied all of the yarn on my electric spinner that was made by Abby Franquemot’s husband. They call their company questionable origin. I used that machine to ply on because it’s crazy fast.
You can check out what they’re doing on Facebook.
Coming up
I have a lot more to talk about with this project so watch the blog for upcoming posts.
Next I’ll talk about weaving and finishing the fabric, how it work, things I learned, and questions I have.
Then the skirt construction, including making the pattern, the sample skirt and making the final skirt.
Next, I’m doing a bit of embroidery to decorate the skirt, so I’ll talk a little about that; what yarn I’m using and how I’m going about it.
And last but not least, my future plans and how to proceed from there.
Keep your eyes peeled and if there is anything you want me to talk about or questions you have, please comment and I will tell you whatever I know.
September 17, 2015
Procrastination
Yesterday 2 people I admire did blog posts about similar things that made me think about what I was doing right at the moment that I read them. First I read a post by Melanie Falick that was about risk that I came across on Facebook because Clara Parkes pointed it out. Then, soon after I read a post by my darling friend Jillian Moreno about finishing up her big project.
Both of these posts hit a nerve with me. I was sitting in my chair. See how the tv is right there and I’ve moved the
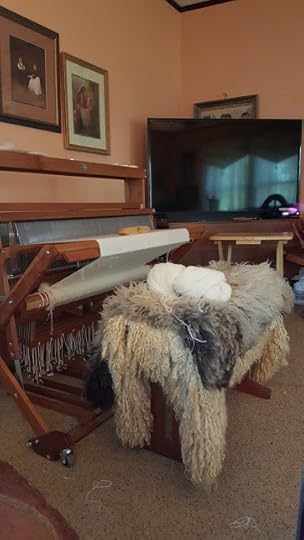 loom into the living room? See how I can’t ignore the loom very easily if I’m looking at the tv?
I’m in the early stages of a ginormous project that has been percolating in my brain for at least 2 years. I finally decided to move forward with it. I’m going to be making skirts. I am actually making yardage from handspun yarn and I’m going to make skirts from it. The current skirt is made from Columbia. I’ve spun about 6000 yards of 2 ply yarn. No problem. I put that yarn on the loom. That was ok. Took a little while to get up the nerve and past the worry that my yarn wasn’t strong enough but so far so good.
But yesterday I sat and stared at the loom for a while. There are 4 yards of warp on there and I had about one yard woven. But I couldn;t make myself move from my chair to the loom. Why? Because I don’t have a pattern for the skirt I want to make and I can’t find one so I have to make my own. I’ve never made my own pattern before.
There are tutorials on the internet for how to make a six gore skirt – which is what I want to use. I know they are there because I’ve pinned them on Pinterest on my sewing board.
I bought some muslin fabric and some interfacing to use for pattern making. I bought some chalk for drawing the pattern. I have everything I need. Except the confidence.
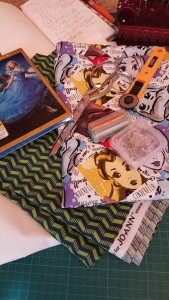 So here’s what’s going to happen because Amy King said so. Today I am going to make a pattern and I will make a muslin to see if it fits. And I will report back. Then, I’m hoping to have the fabric woven by the end of the weekend. And then by the end of the month I hope to have a skirt made from my own handspun, handwoven fabric.
While I do it I will be having a Cinderella marathon. She will be reminding me to have courage…and be kind (maybe to myself today).
If anything goes wrong, I’ll let you know. If it goes right, I’ll tell you that too. I’m not going to let fear stop me from trying. So thank you Jillian and Clara and Melanie for the kick in the pants.
September 15, 2015
Toy? Not a Toy.
I’m a fan of good tools. If you come to any of my classes I will show you the benefits of using hand cards made for wool rather than using brushes made for dogs. I will let you try my combs so you can see how they work better than combs made using hair picks. And I will expound on the benefits of having an actual flick that was made with carding cloth rather than a pet comb. Not that all of those other things won’t get you results, they just won’t get you teh best results you can get leading to better yarn in the end.
Because of my love of tools, I have a tendency to invest in them. I’m not a big buyer of dyed fiber since I love white and also raw fleeces so I put my savings toward new tools when I come across something I’m sure I can’t live without. Often I just continue to use the stuff I already had and was comfortable with. But, every once in a while I get something new that makes me relax my shoulders a bit and smile on the inside and out.
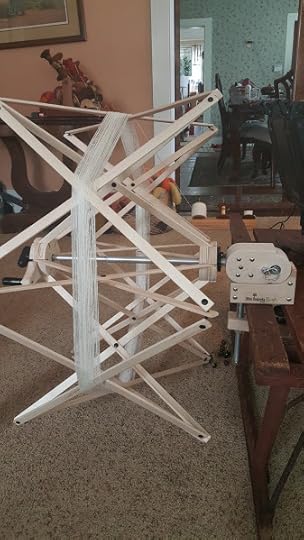
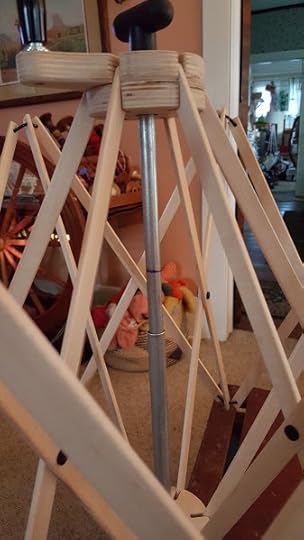
I’m telling yuo all this because in May I got a new toy. But it’s turning out to be a thing I get out and use very often. If you would have asked me last year, I would have said it wasn’t necessary. Well, today I’m saying save your pennies.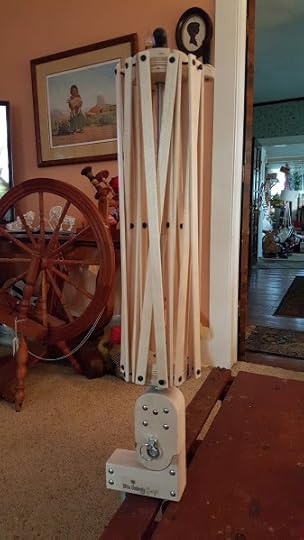 I know, it’s a swift. But here’s the thing. right now I’m winding skeins that are between 900 and 1500 yards after I ply. Winding those skeins on a niddy noddy kills my arm. This thing can lay on it’s side and it has a hande for winding. Plus it has sealed bearings that make it turn really smoothly.
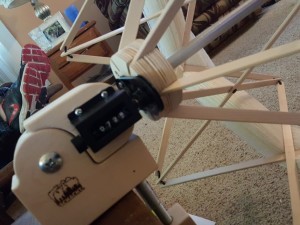
It also has a counter. You can get the swift without the counter but when you are making big skeins and don’t have to count it’s very happy making.
I put a mark on the center so I know where the the swift will make a 2 yard skein.
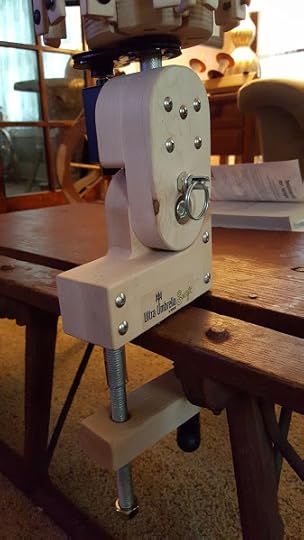
The swift is very stable because of this great clamping system that will clamp on almost any thickness of table or counter.
Yes, it’s expensive, but I have 2 other swifts that I rarely use anymore. I’ll definitely be getting my money’s worth out of this one. It’s called the Schacht Ultra Umbrella Swift. And it lives up to its name.
You can see another review of it on Knitty, here http://www.knitty.com/ISSUEdf13/FEATdf13stuff.php
And if you want to see what Schacht has to say about their own swift you can look here. http://www.schachtspindle.com/our_products/ball_winders_swifts.php#ultraswift
September 9, 2015
Consistency
When I was young…until I was around 12 or 13 I think…My dad worked at a company called Control Data/Computer Peripherals in quality control. That was back when computers were room size and you didn’t just carry the thing around in your pocket or a messenger bag. There were four kids in my family. I am the oldest. We never had much extra money but the company had a family day each summer at Dorney Park in Allentown PA. That was our family vacation and my sister (one year younger) and I loved it.
Alentown PA was about an hour away from our house. When my dad was leaving for our vacation in the morning it always seemed like it took forever to get there. Then on the way home, it always felt like the time just flew by. I learned later, when I was older and began to pay attention to my dad’s driving habits, that on the way somewhere he drove the speed limit or under but on the way home from anywhere he seemed to develope a lead foot.
I’m not talking about mom right now cause she always has a lead foot no matter what and has since the day she learned to drive – I know that because she didn;t get her driver’s license until I was a few years old.
What made me think of this was I was spinning and getting to the end of my length of fiber and my yarn started to get thicker. and then a tiny bit thicker.
Thicker yarn fills the bobbin more quickly, just as peddle to the metal gets you home more quickly. When I get to the last 1/4 of a bobbin I have to pay closer attention to the thickness of my yarn. Especially if it’s for a big project like I’m in the midst of right now.
In order to keep track of how thick the yarn should be I keep a card with my wheel with singles wrapped around and at least one plied sample attached. I’m not a giant fan of those plastic wpi cards because I have a hard time knowing which line the yarn actually matches. If I have a little wrap card it’s easier for my tiny brain.
It doesn’t have to be complicated. I make a few notes to keep me on track in case I need to change projects in the middle. With just those 4 lines and a tiny bit of yarn I can remake the yarn or continue a project any time. Even if I walk away for months. I just put the card with the fiber I’m spinning and it’s all good!
This card is actually missing one line that I usually include which is the treddle to drafting ratio which I know is about 4 treddles for every 18 inches. I should write that down. I know it and I expect to keep spinning this yarn but I have more projects coming up in which i will use a different kind of wool but try to get a similar yarn so the fabrics in the end are similar. Adding that information would be helpful since I may not start spinning that yarn until December or January.
The plied samples are just ply back samples and I’m not very worried about how pretty they are. I just need a reference for what the balanced ply looks like when I go to ply – because my yarn is not going to be fresh when I ply and so I won’t be able to tell what ball park I’m going for from the yarn that is on the bobbins. These samples were made from freshly spun singles right after the yarn was made.
So there it is. One of my secrets to consistency throughout a project and especially at the end of each bobbin as I try to rush to fill it.
August 31, 2015
Handcarding – My Method
So I posted about how I go about choosing handcards a few weeks ago. In that post I talked a lot about the way I hold the cards and how that affects my handle choices. I got some questions about how exactly I do hold my cards.
I have a video that just came out about spinning fine yarns. It’s by interweave and it’s called Spin Thin and there’s carding instruction on there if the still pictures aren’t doing it for you. But in the mean time.
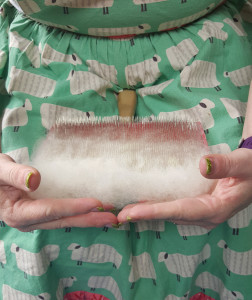
I’m going to go into detail about how I hold my cards because I think it cuts down on pain in my hands and arm and shoulder fatigue. using this method of carding I can do several pounds in a day and not feel sore at the end of the work.
We’ll start with my left hand, my non-dominant hand. Sometimes I call this the stationary hand even though it’s not actually completely stationary.
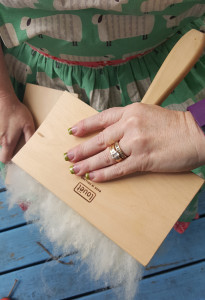
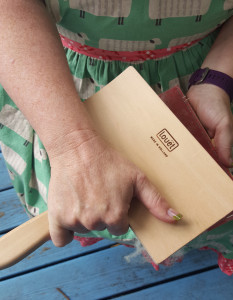
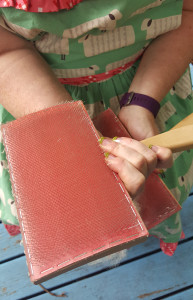
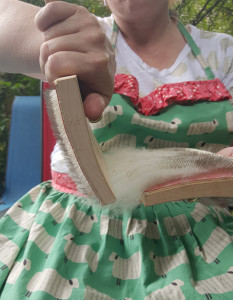
My fingers go accross the back of the main part of the hand card and my thumb is wrapped around. See why I don;t care what the shape of the handle is more than 2 inched away from the body of the card? I never touch it during carding.
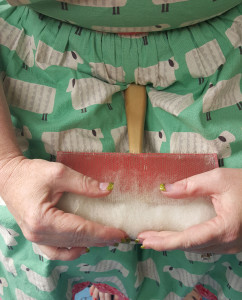
On the other side of the card you can see that the handle is up where my thumb joins my palm. I like to call this my hand pit. I don’t wrap my thumb around. It just kind of rests along the edge of the card.
My right hand, dominant hand, the moving hand has the meaty part of my thumb resting on the top of the card. My thumb sticks out as kind of a steadying brace.
On the other side, my fingers are wrapped arround the handle and the first two fingers rest on the edge of the card.
I try not to grasp the cards with a very tight grip. I hold them just tightly enough so I don’t drop them.
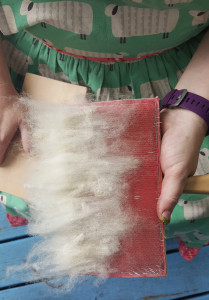
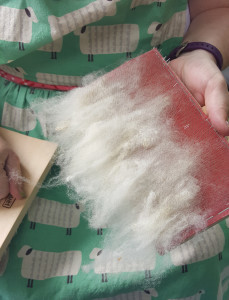
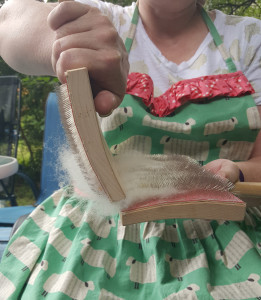
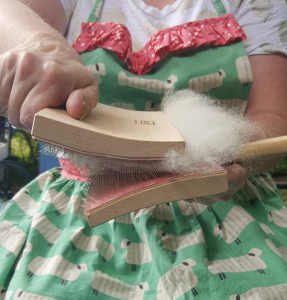
Now lets talk about how much fiber to put on the cards. It looks like there is a lot of fiber if you are looking at this photo but really, the fiber is no thicker than the length of the teeth. I add the fiber beginning about 1/3 from the handle side of the card. In fiber prep, more is never better. It ends up in more passes, messier finished preparation and yarn that isn’t as smooth as it could be. In short, too much fiber during each prep step results in more work.
The way i card is to transfer all of the fiber from the stationary card to the moving card. I then switch hands and transfer again. You can keep your cards in the same hands and not transfer if you like, but switching is easier when you are first learning this method.
This method works well with curved cards and not very well at all with flat backed cards.
So, to begin carding bring the card in your dominant hand down into the fiber on the bottom card. The teeth of the card should grab only the fromt little bit of fiber on the stationary card.
Notice how little of the fiber is grabbed in this first pass.
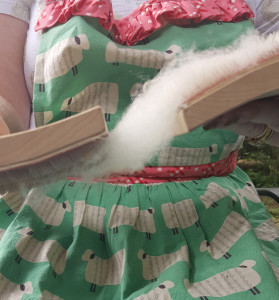
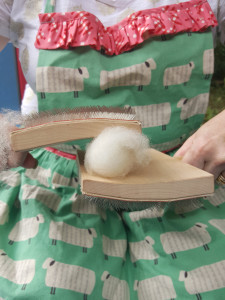
Now flip the hand card in your dominant hand up to about a 90 degree angle and move the cards away from each other.
Bring the moving card down to the stationary card again, this time moving a bit closer. Again move that card to a 90 degree angle and move the cards away from each other.
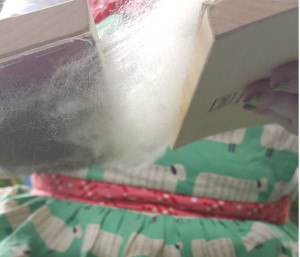
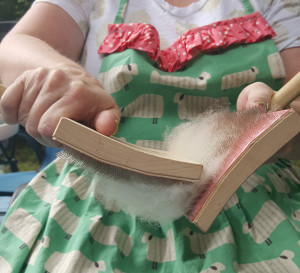
There are a couple of steps skipped here but it’s the same movement. Bring the moving card down to the stationary card, The cards should overlap at about the front inch of eahc card. The teeth should sit together. Now do not move the cards accross each other. you should never hear the teeth scratching or working agains each other.
You will again move the card in your dominant hand to a 90 degree angle but now, at the same time, the bottom card will move in a downward motion.
Do this several times, over lapping the cards more and more each time. It usually takes me about 3 meetings of the cards to work my way from the tip side to the handle side of the card and transfer all of the fiber to the moving card.
Switch hands and repeat. Generally I have to do only 2 to 3 passes if I am processing raw fleece. For blending, the number of passes depends on how blended you want your fibers.
If you have a very fine fiber like Cormo or Merino and you want to card it, fewer passes is even more important because you want to avoid neps and noils which will make your yarn more lumpy than usual.
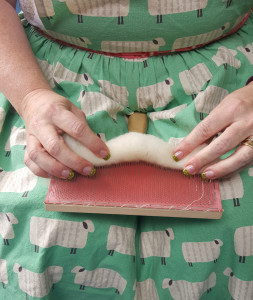
To make a rolag gather the fibers that are sticking off of the end of the hand card and begin to roll them toward you.
Roll the fibers accross the teeth of the hand card. Roling the new rolag accross the teeth will help the rolag stick together.
If I am going to card a lot of wool in a day I roll the new rolags between the backs of the hand cards to make them a tiny bit more solid so they will stay in rolag form in my basket or box.
I don’t like to card anything longer than 4 or 5 inches just because it’s a bit of a apin for me. But that’s ok because most fibers that are longer than that are lovely and shiny so I comb them to bring out the shine.
I will say that learning to use hand cards is better in person. Take a class. Take several classes. Interweave has a great video with 4 teachers teaching their hand carding technique. I took hand carding from several different teachers before I really caught on. I took a little bit from each of them and combined those little bits into a method that was good and comfortable for me.
Using the technique that I do I can hand card more wool faster than I could do it on a drum carder and I love it because I can sit down in front of the tv and get a ton of work done.
If you have questions, let me know and I’ll try to answer.
August 17, 2015
Michigan Fiber Festival Surprise
So, Jillian was going to the Michigan Fiber Festival in Allegan, Michigan. She was taking a Thursday class from Esther Rogers. I had no plans to be there because I hadn’t signed up for any classes and I didn’t think there was anything I needed. But then there was the phone call. It went something like, What are you doing next Thursday and Friday? I said, spinning. She said come with me! I have room in my car and an extra bed in my hotel room.
So, what would you do if you were me?
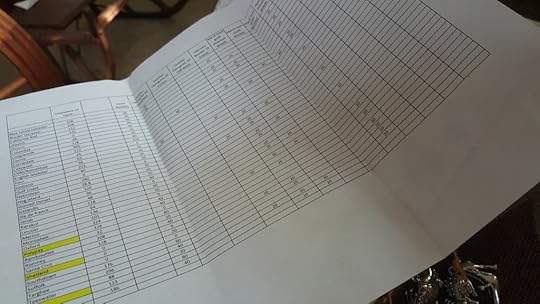
I did a fleece inventory incase you are wondering.
Every year I make a spreadsheet. This one isn’t complete yet. It only includes the raw fleeces I have. I still need to weigh all of the scoured bits that are on my shelves in the studio. Plus there are a few more columns to add which will calculate how much I need to scour to get the clean amounts I need and it will also have a column that will calculate how much clean fleece I have left after I complete a teaching weekend.
This spreadsheet includes the classes (except one I forgot to add) that I’m teaching from this coming October through November 2016. It’s really the best way for me to keep track of my fleeces and even my prepared fiber. It helps me make sure there are no surprises since my class prep needs to begin several weeks before any class due to the scouring issue.
Anyway, the three breeds that are highlighted were the ones I needed the most, plus Corriedale. I expected to come home with maybe one fleece from the Fiber Festival for three reasons. One is because the festival isn;t completely open for business until Saturday although maybe about 2/3 of the vendors are open on Friday. Also the fleece judging doesn’t happen until Saturday. And, because one breed is Tunis and one is Polypay and I’ve never seen those at this festival.
So, there may have been more than one fleece purchased.
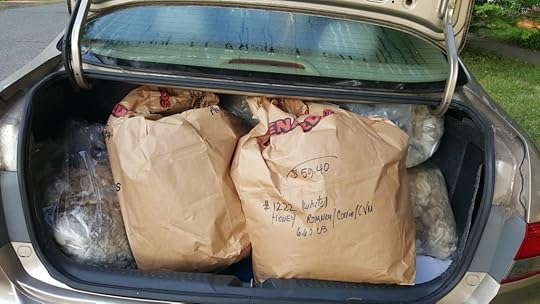
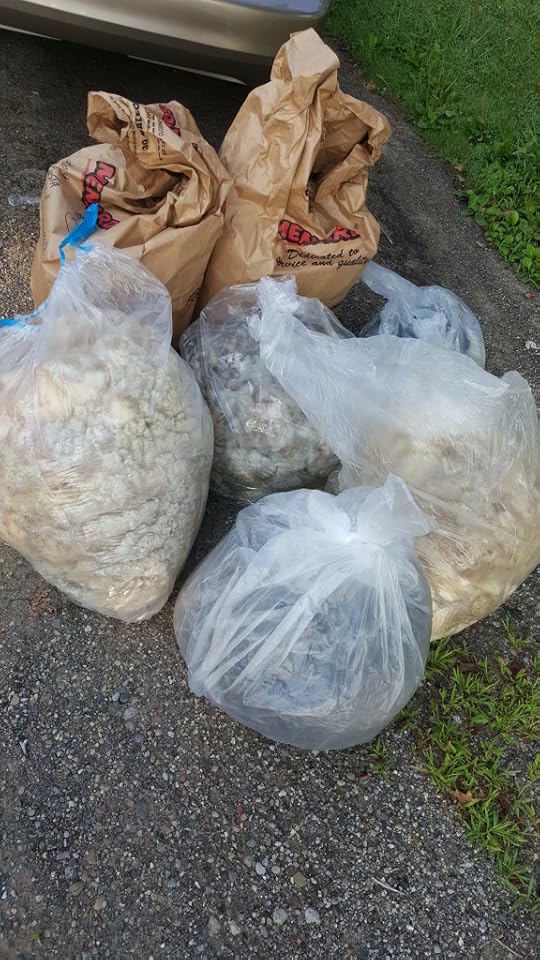
Actually, there were seven.
Only one of them was a highlighted fleece. But 5 of them were in the endangered category (in danger of not actually having enough.) I still need the Corriedale but I may be able to use a different breed in place of the Polypay.
Here’s the thing. Jillian was there for every bit of this shopping. She was an instigator. Here’s the other thing, Jillian doesn’t have any raw fleeces. She doesn’t like to hand process. She likes color. I know this. I don’t bug her about it even though I think she’s crazy. But she was choosing fleeces. She was telling me which ones were good. What this says to me is that by nex year don’t be surprised to see her carding a fleece for a sweater’s worth of yarn! I will keep working on converting her quietly.
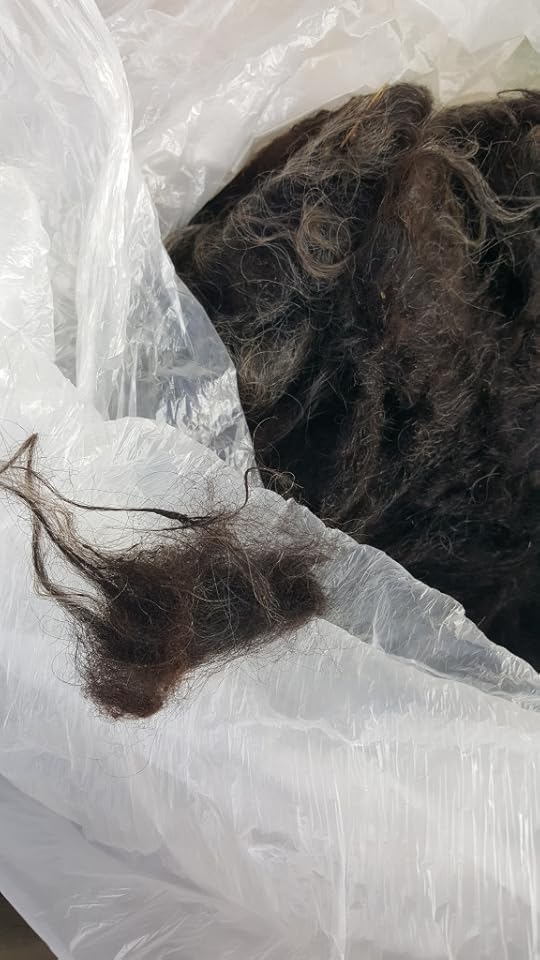
Wanna see what I got? Icelandic is above. Icelandic is a fleece that I use a lot because it’s great for an example of dual coated fleeces. The only draw back is it felts so easily. I try not to wash too much of it too far in advance. Sadly, sometimes things happen. But then I have an opportunity to talk about how some fleeces just felt in the bag without any help.
Shetland! I almost always buy multi coated Shetland fleeces because I love them! And I need them for classes. And because so many people walk by the Shetlands with obvious multi coats that I feel like I need to show them some love.
Jacob! I didn’t really need this. I may keep this one for myself. It’s very beautiful.
Coopworth! This is a breed i have a hard time passing up. I don’t even have any plans to use Coopworth in classes but I may change things around. This one has so many colors and the locks are perfect Coopworth locks. This particular fleece was on the bottom, pushed back behind some other things but I saw it. I’ve done that fleece hiding myself before so I know that often those fleeces are the most awesome.
CVM; California Variegated Mutant. My word. this fleece is pristine. Super fine and super clean.
Romeny. I know but I was down to only one Romny fleece! Two years ago I had 8! I use Romney in a lot of classses so I really needed it and I was able to control myself. I only bought one even though there were several that would have been great.
And finally, the surprise. It’s a cross of Romney/Corriedale/CVM. Jillian insisted and the crimp and lock structure is fantastic so I went for it. Then Jillian had an idea, like usual, for a new class for me using this fleece along with some other cross breed fleeces. So look for it in the future at a festival or guild near you.
PS I’m still looking for a little help with a logo if anyone is interested.
August 11, 2015
Sheepspot!
Remember that awesome podcast called The SpinDoctor? Sasha Torres did that podcast for several years with reviews and talk and fiber festival visits. It was always one of my favorites. You can still find episodes on itunes and at the Spindoctor.com website. there are 40 episodes. Sasha’s voice is almost hypnotic so be prepared to listen to all the episodes just for that.
Well, then Sasha moved on to bigger things. She called the bigger things Sheepspot. Sheepspot is a eco friendly fiber company that focuses on breed specific yarns and fibers which are hand dyed by Sasha herself.
The goal is to use wool from Canada and the United States with a special focus on rare breeds from the Livestock Conservancy list.
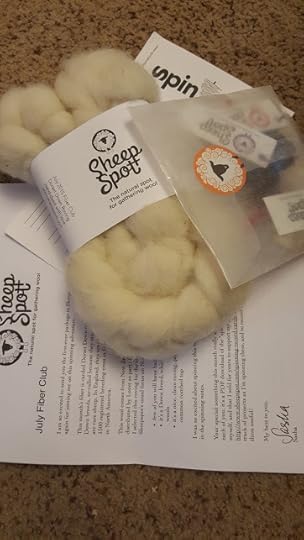
OK so all that has been going on for a while. If you haven’t checked it out then go do that. but if you already know all of that back story, maybe you don’t know about Sasha’s Sheepspot fiber club! I got my first shipment this week and I am very happy.
First, I’m happy because even though everybody got their fiber dyed in some color or other, mine is dyed natural white, just like I like all most of my wool! Yes, I got a special shipment of undyed fiber. That makes me smile.
This month’s breed is Dorset Down. Dorset Down! this is a rare breed in England and there are no flocks of this breed in the US! I’ve never gotten to touch it before.
The package includes the fiber – in this case, roving – a nice description of the breed, a card for writing down all the information you want to write when you are doing some sampling and a nice little package of sample locks so you can see what this wool looks like right off the sheep. This shipment didn’t have Dorset Down locks because it’s almost impossible to find the raw fleeces. Instead there are some Babydoll Southdown samples because they are kind of similar.
It’s a nice little package to open with a beautiful wool to spin.
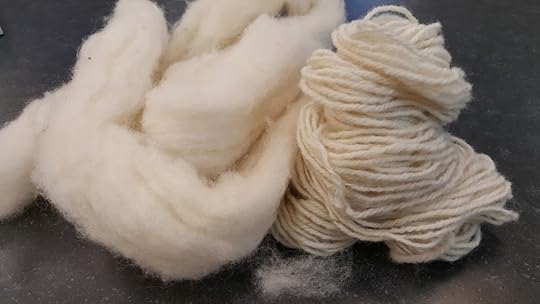
The staple length is 2 inches or less as you can see by that little tiny bit of fuzz sitting in front right there. I made a three ply yarn sample of this because that is really the yarn I would choose to spin from a wool that is this short stapled. The three ply will protect the fibers and so less pilling would happen in the finished fabric.
Here’s what I have to say about this wool, as well as most other Down Type fibers that you will find in processed form. When you touch the fiber in the braid, it’s unspun form, it will feel a bit rough or harsh. Please don’t walk away. There are several transformation points that will make this a pleasant choice. When you open up that braid, it feels softer already. Then spin it with a long draw or supported long draw. Let that air in let the crimp come back and do its thing. You want enough twist to hold it together but don’t go overboard, especially in the singles. After you ply it, soak it for at least 15 minutes with some kind of wool wash and finish it with a bit of violence to help the fibers homogenize and snuggle into each other while at the same time becoming evn more airy and light.
After all of this your yarn will feel quite lovely in your hands. Then when you use the yarn, it changes a bit again and becomes even more wonderful. I’m not saying this will ever be the fiber I would choose to make underwear out of but it can certainly become that squooshy wool sweater you naturally go to in the winter time when you are freezing.
I’m excited for my next Sheepspot fiber club shipment! this one was a ton of fun.
If you weren’t able to sign up for this year’s club, keep your eyes peeled for the next one!
And Now for Something Completely Different
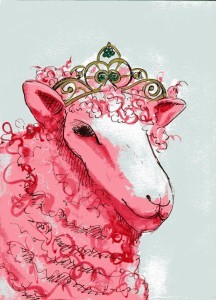
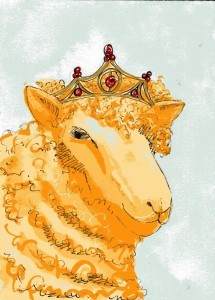
My friend, Amy King, of Spunky Eclectic fame, made me some fantastic sheep drawings that I want to use as a logo for myself. If I were computer talented I could manage this myself. What I want is one of the sheep with my name in some kind of beautiful font and some kind of word to describe what I do.
Anyway, since I don’t have the skills I was hoping that somebody who knows how to do these things might be able to help me out. I have a lot of fiber and I’m willing to trade several pounds from my personal dyed fiber stash or even several pounds of this really beautiful Cormo fleece I have.
If you are interested or know somebody who is, please contact me. I really need to start looking like a grown up professional. Please help.
August 4, 2015
Another New Start
Get ready for a very very very picture heavy post.
Two years ago I began using the Bullet Journal method of keeping track of my stuff. All of my writing assignments, spinning stuff, teaching appointments, personal stuff and all the other junk went in there. I liked it and it was working and it was keeping me mostly on track.
It’s a one book system where EVERYTHING goes in there. So if i wanted to take notes at church on Sunday it’s in the book. If I was planning a new project and math was involved, it’s in the book. My pathetic attempt at sketching? It’s in the book. Scribbling nonsense I think of while I’m spinning. It’s in the book. Pen Trials – well, you get it.
So there’s a page in the front that is a table of contents in case I want to find that stuff again.
The problem for me is it’s not working exactly as I’d like. I like to plan forward a little and there’s not a good way to plan further than the end of the month so I have my Google Calendar that takes care of that. But i’m finding me and the electronic planning doesn’t work well because I forget to look at it. I wish I would forget to look at Facebook instead but, alas…
Anyway, anotheer reason it wasn’t making me happy anymore is because I like to plan the next week on sunday morning but then if I make a page for each day of the week and then go to church and want to make notes, the Sunday notes come after the following Friday, unless I leave pages open but how do I know how many pages to leave?
Last fall I started looking for something new and thought I found it in the Midori Traveller’s Journal system but was nervous about making an investment and a fear of the unknown kept me from trying it out.
Of course, July came and I was still frustrated. But! Should I stick it out and fill the current book and change in January or just go for possible planner happiness?
I spoke to my friends Amy and Jillian. Amy gave in immediately. Jillian is stronger but I know she will cave eventually.
I went for it right away too. It only took 10 months to decide!
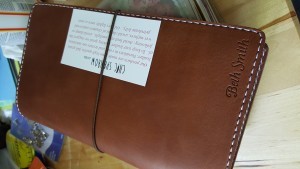
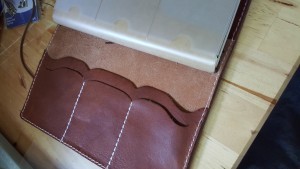
I ordered the fillers which came quickly but I had looked aorund for the planner covers. Midori makes simple and beautiful ones but I came across Chic Sparrow. The company had great reviews, the leather is made in the USA and the Journals are also made by hand in the USA. So I splurged.
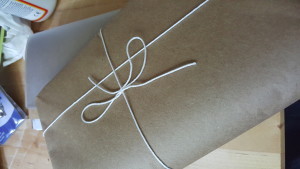
I began using the new fillers before the cover came and the mailman brought me happiness this morning.
I was ready for it.
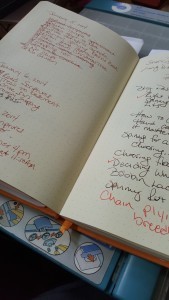
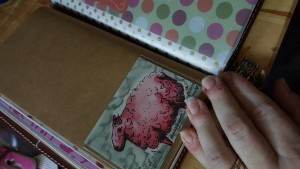
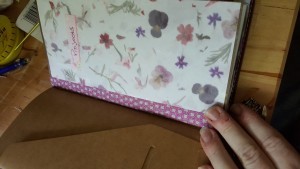
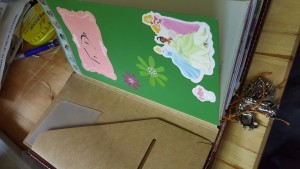
I had decorated the inserts last week since they are all kind of brown and I wanted something more…colorful.
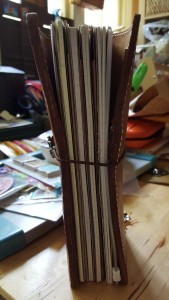
As soon as the Journal was unwrapped and sufficiently carressed I added in my inserts.
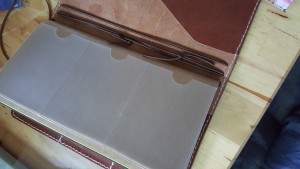
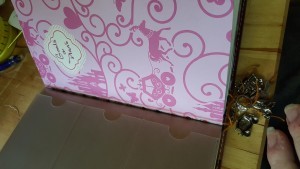
In addition to the writing paper I have a plastic zipper pouch and card holder as well as 2 pocket folders.
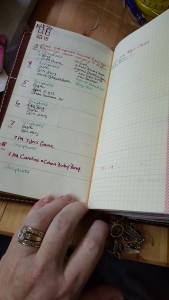
There is a grid book that will be used for project planning, a lined filler that will be for my journalling and note taking and another grid big that will be for goals and future planning.
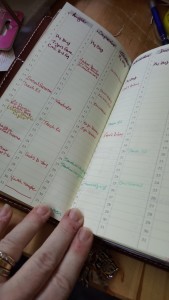
There is a week on 2 pages refill that will help me stay on track. I can make my daily lists and check things off in the bullet journal way. The first several pages allow me to write all of my scheduled appointments well in advance. I’ll also be adding deadlines to these calendar pages.
I may also have bought about 10 rolls of washi tape and I already want more.
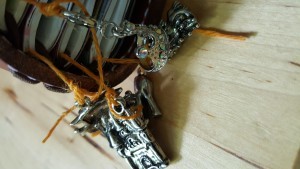
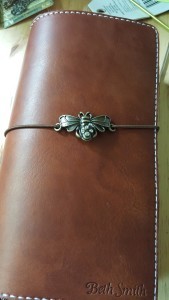
In addition to the sueful stuff I also added a lovely little sparkly bee to the elastic that holds the book together when it is closed. The bee reminds me to Bee Happy, Bee Friendly, Bee Busy. In addition I made some book marks with linen thread and some princessy type charms that jingle when I move around (which is fun).
I’m in love with this system already. I do expect that I’ll make some small adjustments to make it even more easy to use. The greates thing about it is that the personalization is unlimited so I think it could really work for anybody.
If you want to look at other people’s Journals, check out my Pinterest board for Journals.
You can be sure I’ll keep you updated.
July 20, 2015
Hand Cards!
When I teach I take a lot of tools with me. I know that everyone doesn’t own every tool so I take at least three sets of hand tools for each purpose. I like to take a minimum of three sets for two reasons.
First is the one I just said: all the people don’t own all of the tools and I want to take enough to share.
Second, I have a few tool from different manufacturers and so I like to take different ones so that people can have an opportunity to try different types. Not everyone lives near a fiber shop where they can try them so this is a good second choice even though I can’t carry them all with me everywhere I go.
Everytime I teach a class where any type of processing is involved the conversation inevitably turns to what tools are best. I like to spend a little time on the topic because, let’s face it, tools can be a big financial investment. Of course if you choose well, your tools will last a lifetime.
Let me just say this about pet grooming tools and I avoid the topic in class. I know that lots of people find that they work fine. And they do for a short time but the teeth are not made to stand up to the wear and tear they will get with wool and so they will need to be replaced on a regular basis. So if you can manage to get the money together for actual wool cards you’ll end up saving money in the end.
There are three things I think are important when choosing the right hand cards. First is handle shape. Second is how the carding cloth feels and third is weight. They are all almost equal in importance to me.
I almost always use curved back cards because of the carding technique I use. A different technique is better for flat cards. We’ll talk about carding techniques in another post.
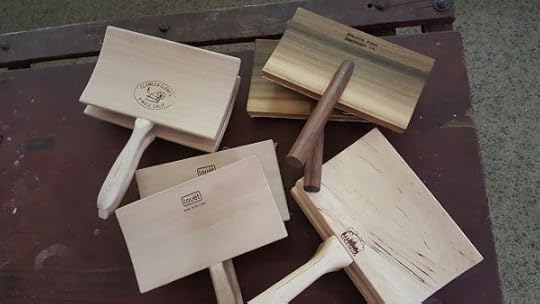
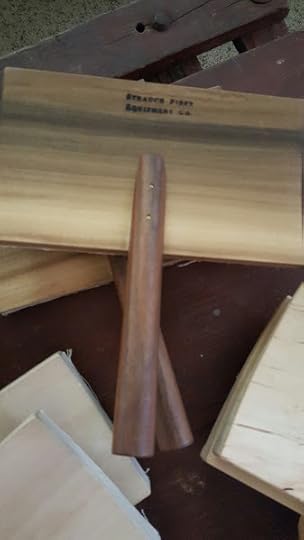
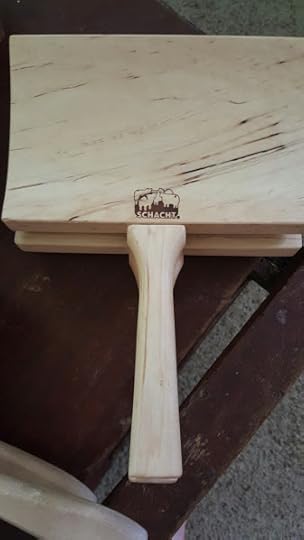
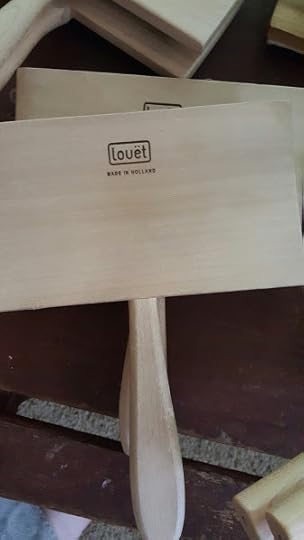
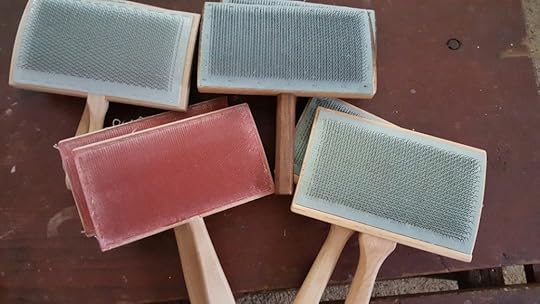
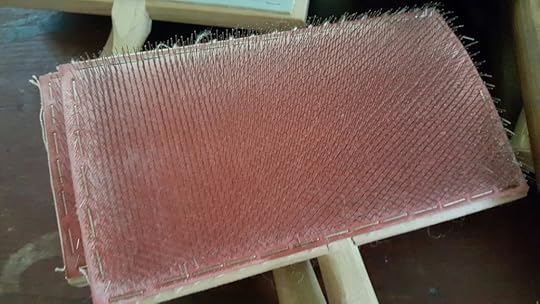
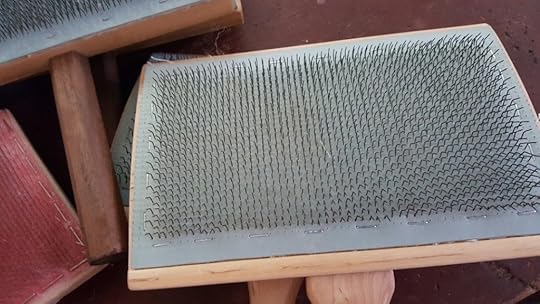
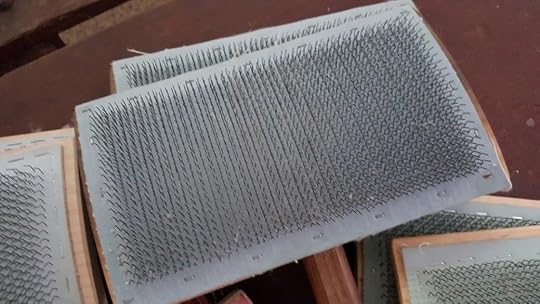
Here are the four different types I currently own.
When you are thinking about handle shape think about how you hold your hand cards. I hold my cards way up at the carding part. I spread my fingers accross the back of the card and so I’m barely holding the handle at all. For me the shape of the handle that sticks far out from the card is not important but the shape of the handle up close where it meets the main part of the card is very important.
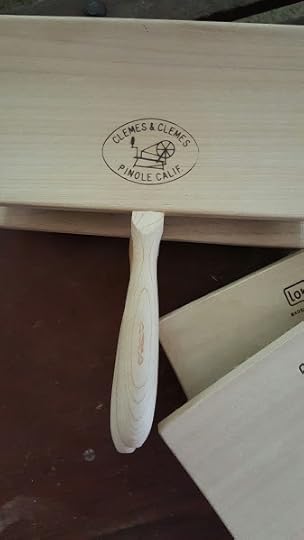
First, here are the Clemes cards. These are my least favorite for handle type. The part where my thumb bends around is very thin and also very round so these cards have a tendency to spin around in my hands if I’m not holding tightly. Holding tightly leads to fatigue quickly and so I like to avoid it. So I avoid these cards because of the techinique I use.
Next are the Strauch cards. The handles of these cards extend over the back of the business part of the card and so there is a lump there making it hard for me to hold the cards in the way that is most comfortable for me. The handles do have a flat spot on them but not in a spot that helps me with the way I hold my cards.
Now here is a handle I can get behind. Schachts handle gets wider where it attaches to the card and it is flat on both sides. I love these cards a lot because of their handle shape.
And finally Louet. These handles do not get wider at the place where they meet the body of the carder but they are flat on the top and bottom. These cards are also ones that I use all the time because of their handle shape.
The next most important thing to me is weight. Like I said earlier, I want to avoid fatigue if possible. usually when i am carding I’m going to do several pounds and I don’t want my arms, wrists or hands to be hurting during or even after I’ve finished so weight plays a big part.
I weighted one card from each set and here’s what they weighted.
Strauch 9.50 ounces
Schacht 9.05 ounces
Clemes & Clemes 8.40 ounces
Louet 6.45 ounces
Most of them weigh nearly the same but look at how light weight those Louets are!
And finally, the cloth. I like a carding cloth that moves a bit. I don’t want the teeth to feel like they are solidly in place. I like a little movement and a little bit of a bouncey feeling.
In this case, the Louets win. The Louet cards i’m showing here are the extra fines. They have 110 teeth per square inch which is my favorite for almost every carding job I’m doing. These hand cards feel right straight out of the box.
The Schacht come in second place. they usually need a tiny bit of breaking in but I can card pertty quickly with them in no time.
Of the four types, the Strauch are my least favorite. They feel the most stiff and even after owning them for 3 years I can’t seem to get the carding cloth to loosen up.
I’ve looked and the Strauch cloth on the hand cards is the same as on the drum carders. It’s a bit confusing because Strauch makes my favorite drum carder. I truly love it. Hm.
Of course, I don’t own every brand of hand cards but hopefully this will give you some idea of what to look for when you are searching for your first pair or a different pair.
Questions?
Feel free to ask:-)
June 11, 2015
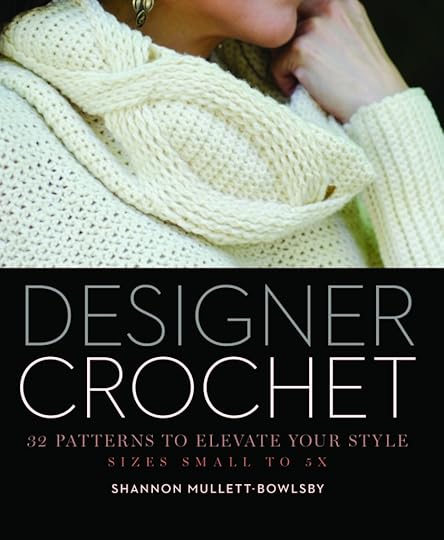
Designer Crochet
I haven’t done a lot of book reviews here…maybe I should do more…but that’s thinking for another day. Let me give you a little background first.
Several years ago I met this guy when I was teaching at the DFW Fiber Fest (which was awesome, by the way). anyway, his name was Shannon and he was in the class room right next to mine. He was one of those people that you are instant friends with. He’s kind and funny and really, really smart. He’s also a designer. I didn’t really know abut him because even though he designs some knitting stuff he is really known for crochet. I am not known in any way for my crochet.
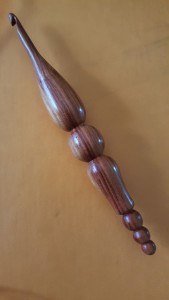
Shannon is also very persuasive. by the end of the festival I had invested in 2 new hand turned crochet hooks. They were not cheap! I was totally going back to my five year old self and start crocheting again so that I could grow up and crochet a few of his designs.
Here is one of the crochet hooks. I think I’ve used it once…
It’s still pretty and I will use it one day!
Know how I know I’ll use it? Because Shannon Mullett-Bowlsby has this new book out and it’s awesome and I want to learn to crochet just to make things from this book! I’ve always thought of crochet as granny squares and doilies but this book has lovely clothes I want to wear done with stitches that drape and look beautiful.
There are 32 patterns and all the patterns go up to a size 5x! which I love because everybody can use this book.
The patterns are written out line by line and also have the charts so again, everybody can use this book!
I’ve had the book in my hands for more than a month now and find myself flipping through it often. The photography is beautiful of course because it was all done by Jason Mullett-Bowlsby. I know, the last names are the same. Becasue this is a perfect team. It’s also because Shannon and Jason are a couple. So there’s that.
Anyway, if you crochet, I say go get this book. If you don’t crochet, well, then learn how so you can have this book.
If you are interested in more of what Shannon an Jason are doing you can check out their website which is full of how to do crochet and all kinds of things. Also, Jason and Shannon are both teaching at Rhinebeck this year. Man, I chose the wrong year to not apply.

