
Jessica Merchant's Blog, page 355
September 22, 2017
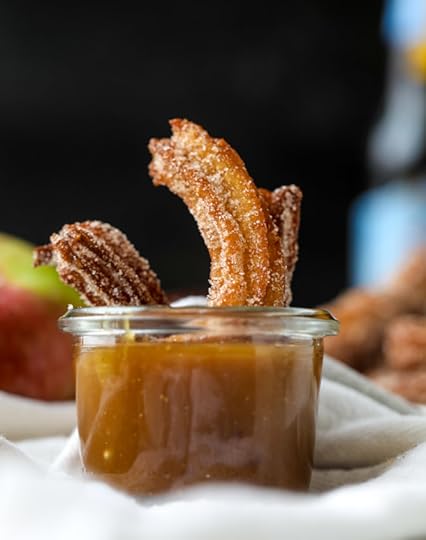
Apple Cider Churros with Cider Beer Caramel.
Probably never wanted anything more in life than an apple cider churro.
I don’t think I’ve been this excited for the first day of fall since I was maybe 18 or 19 years old. I am SO EXCITED. I feel like I’ve been in major fall mode for weeks now and it’s been the first year in a decade that I’ve actually been okay to see summer go.
Don’t get me wrong, I mean, I looooove all four seasons and really hate wishing days away from them. But right now, I’ve just been in such a crazy autumn spiral that I’m practically past Thanksgiving in my own wacky brain.
Now seriously, what better recipe can ring in fall than this?! We are talking freaking apple cider churros. Apple cider! This churro recipe! As if I didn’t already love the stuff enough.
First up, are you a hot cider or a cold cider drinker? I’m definitely a cold cider drinker, but that’s just because I prefer everything cold. I don’t go crazy over hot liquids. I even drink my coffee iced in the winter. SOMETIMES I’m into hot coffee but I’m very very rarely into hot cider. Pretty sure I burnt the ever living heck out of my taste buds on hot apple cider at a bonfire when I was in, like, seventh grade and ever since then? I’ve been over it.
ALSO. Can we discuss how magical those bonfires and hayrides were in middle school? I remember going on them whether it was for a school or church function or something or even a birthday party and just being so giddy about my tween crush and trying to get their attention and wanting them to sit next to me. The whole evening would be full of stereotypical yet perfectly nostalgic fall memories for me that it’s no wonder why I lose my ish over fall.
The chilly and cool weather, the actual hayride that started at dusk and returned us to a huge bonfire in the dark with s’mores and snacks and said cider that gave my mouth third degree burns. I seriously remember it like it was yesterday.
Last week I saw on article about how the scent and flavor of pumpkin is super nostalgic for people and triggers them to get all crazy and pumped about fall, so clearly I must fall into that category. Except I include apple cider too!
When I was growing up, my mom never made anything with pumpkin. My grandma would make a pumpkin pie or two at Thanksgiving but pumpkin in the 90s wasn’t ANYTHING like pumpkin is now. We would, however, have apple cider for a good month or two. It’s funny because I’ve never liked any sort of juice or anything like that to drink. But give me apple cider? Hello. I might drown in it. SO GOOD.
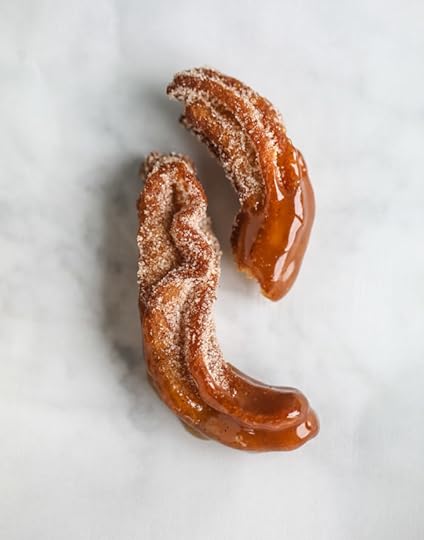
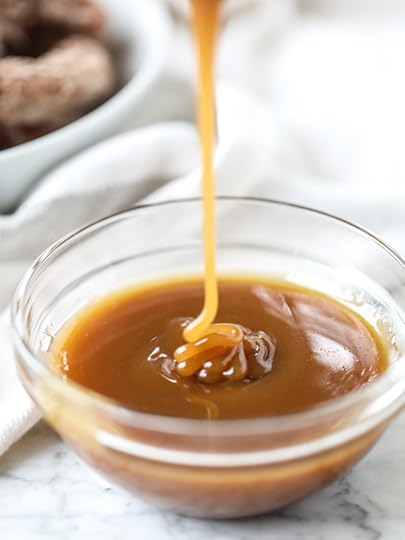
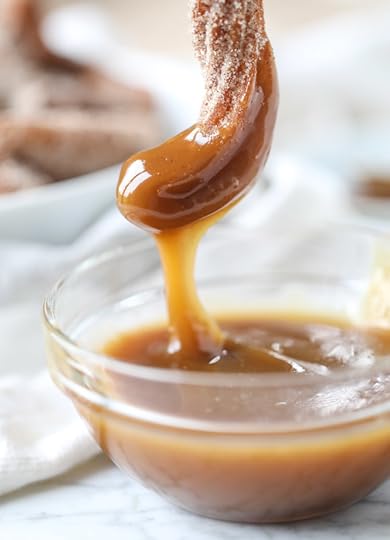
Obviously you now know why I just had to go make churros with said cider. The churro dough is made with apple cider, but I used a hard cider for the caramel sauce. AH. So freaking good. We could not stop dipping and eating and stealing churros from the plate.
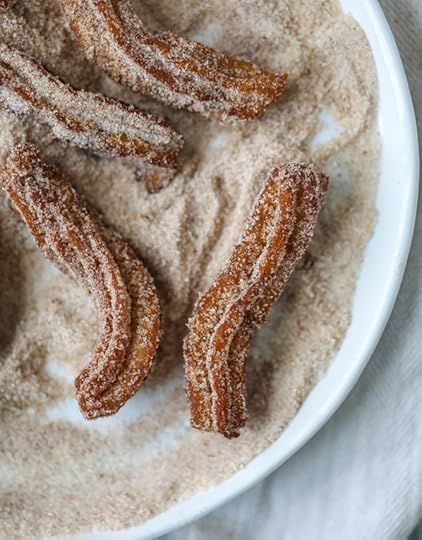
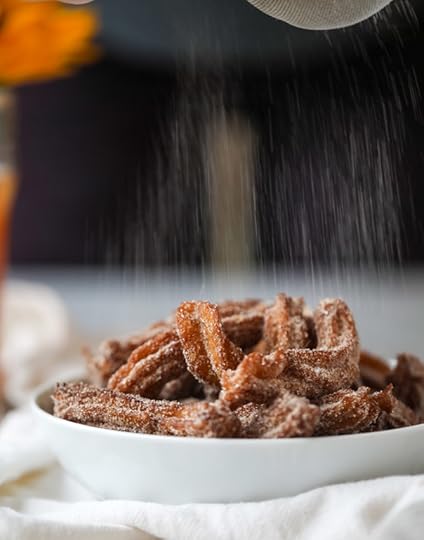
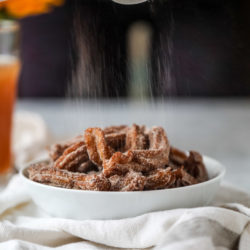
I also coated the churros in a mix of sugar + apple pie spice. My actual dream, I think. Just a bit crisp on the outside and then soft and fluffy on the inside. I mean, how does something this wonderful even exist?
And it’s not like they NEED to be dipped in the caramel. They are totally and completely insane and amazing on their own. But what good would I be if I wasn’t trashing things up and making them seem horrifyingly ridiculous?
You can always count on me!
Apple Cider Churros with Cider Beer Caramel
Yield: serves 4 to 6
Total Time: 1 hour
Ingredients:
churros
1 cup apple cider
2 tablespoons sugar
1/2 teaspoon salt
2 tablespoons vegetable oil
1 cup all-purpose flour
vegetable or canola oil for frying
sprinkling
1/2 cup sugar
1 teaspoon apple pie spice
cider beer caramel
1 1/2 cups brown sugar
1/4 cup unsalted butter
1/3 cup hard cider
1/2 cup heavy cream
1/4 teaspoon salt
2 teaspoons vanilla extract
Directions:
Fill a heavy bottomed saucepan or pot with a few inches of vegetable oil and heat over medium-low heat. Attach a candy thermometer - you want the oil to be 375 degrees F.
In a saucepan, combine the apple cider, 2 tablespoons sugar, salt and 2 tablespoons oil. Bring the mixture to a boil. Place the flour in a large bowl, then (carefully!) add the boiling cider mixture to it. Stir until a soft dough forms.
Fill a piping bag fitted with a star piping tip with the dough. Once the oil is hot, pipe 3 to 4 inch pieces of the dough into the oil, snipping the dough after each pipe. Fry for 2 to 3 minutes each, just until golden brown. Be careful to check your oil and make sure it's not getting too cool or too hot! Place the fried churros on a paper towel to drain any excess grease.
Whisk together the sugar and pie spice. Toss each churro with the sugar spice mixture and place them on a plate. Serve immediately with the caramel!
cider beer caramel
Combine the sugar, butter, cider, cream and salt in a saucepan over medium heat. Whisk until the sugar dissolves, then let the mixture come to a simmer. It will bubble up, so watch closely - but you don't want it to bubble over! Lower the heat if it threatens to do so. Let it simmer for 5 minutes. Remove it from the heat and stir in the vanilla extract. Let it sit for a few minutes to thicken.
If it gets too thick, heat it over low heat or in the microwave until it's thinner for dipping again.
[churros slightly adapted from allrecipes]
Be sure to follow howsweeteats on instagram and tag your recipes with #howsweeteats! You can also post a photo of your recipe to the howsweeteats facebook page. I appreciate you so much!

Feels super official now.
The post Apple Cider Churros with Cider Beer Caramel. appeared first on How Sweet It Is.


September 21, 2017
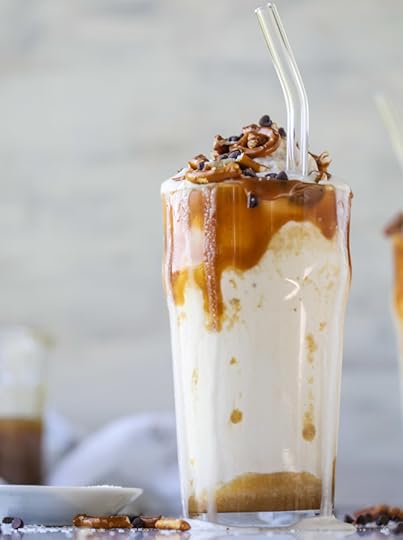
Salty Caramel Yogurt Shakes. {Video!}
[This post is sponsored by Chobani.]
I have the greatest idea for the last official day of summer.
I’m meshing the very last of summer and the start of fall right here in this drink!
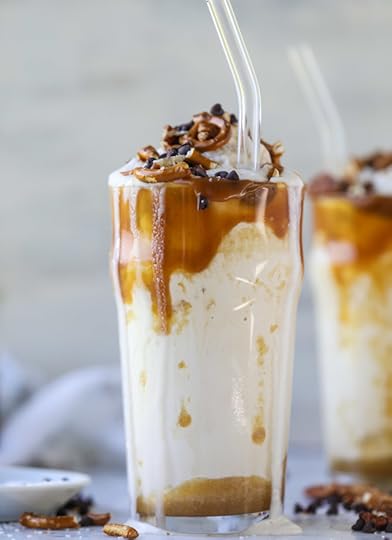
In the form of salty caramel yogurt shakes, which might be the only thing I want to drink for the rest of the year.
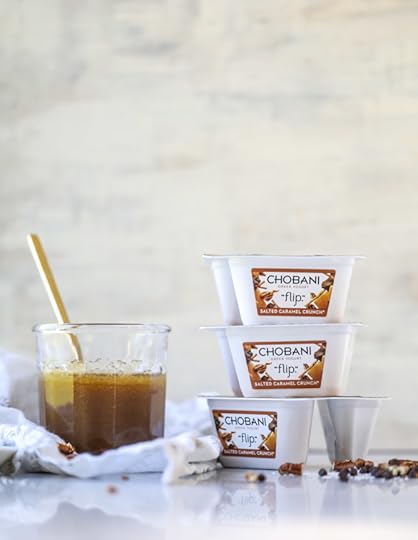
I’ve partnered with Chobani here to bring you the most incredible shake inspired by one of their Flip flavors that I love: Salted Caramel Crunch. Oh mylanta. This flavor is pure heaven and 100% feels like I’m eating dessert when I snack on one. Also – all the texture in the crunchy pieces?! Cannot handle.
Which means I had to make a perfect dessert inspired by my faux snack dessert. It was one of my better ideas, if I do say so myself.
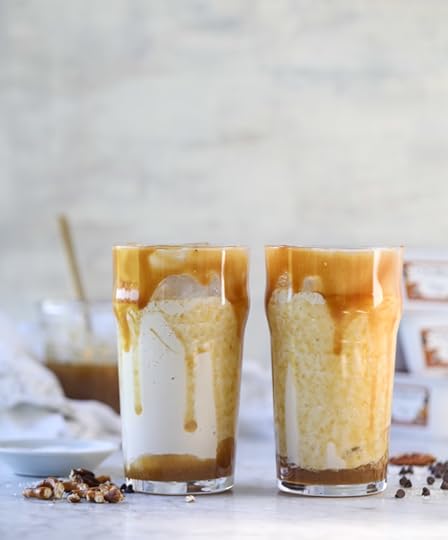
We have an icy refreshing dessert shake filled with that perfect flavor of autumn: salted caramel.
Okay, confession time. I wasn’t ALWAYS a caramel person. Well, I was and then I wasn’t. I was as a kid – perhaps I overdid it? But in the last few years I haven’t been as into salted caramel as the rest of the world.
Until!
Until last year, when I made a super delicious salted caramel sauce and wanted to drizzle it all over my entire life. Oh my WORD. I don’t know what changed but it was so perfect that I instantly wanted a jar in my fridge at all times. Not really safe, you know? I can’t be helped.
This shake starts out by using the caramel yogurt from the delicious Chobani Flip that comes with salty pretzel pieces, candied pecans and chocolate chips. It’s a sweet and salty lovers’ dream come true!
We have the yogurt, some French vanilla ice cream (the French vanilla part is totally key!), milk, salted caramel sauce and ice. Blend blend blend!
More salted caramel sauce all over the inside of a the glass, just to take things up a huuuuuge notch. We could have just done the rim, but what’s the fun in that?
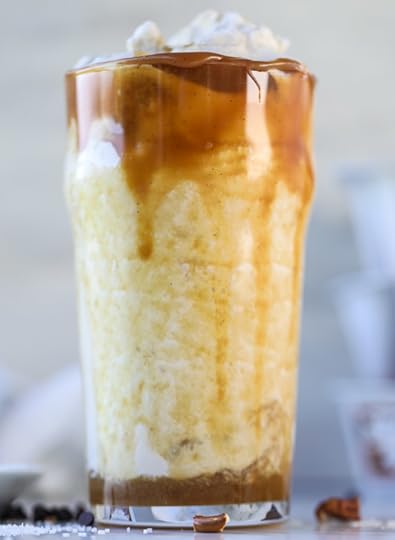
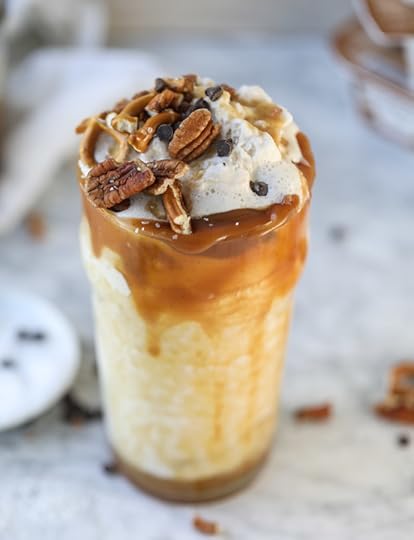
Once you pour in the shake, you want to top it off with the pretzels, pecans and chocolate. Use a spoon to start at the top of the yogurt shake and then make your way down the rest of the glass with a straw.
I CAN DIE HAPPY NOW.

Salty Caramel Yogurt Shakes
Yield: serves 2
Total Time: 25 minutes
Ingredients:
2 chobani flip Salted Caramel Crunch yogurts
1 cup french vanilla ice cream
1 cup milk
3 to 4 tablespoons salted caramel
handful of ice
crunch toppings: salted pretzels, pecans and chocolate chips
homemade salted caramel
1/2 cup brown sugar
1/3 cup heavy cream
2 tablespoons unsalted butter
1 teaspoon salt
1 teaspoon vanilla extract
Directions:
Place the yogurt from the chobani flips, the ice cream, milk, caramel and ice in a blender. Puree until smooth,
Drizzle the inside of two glasses with the salted caramel. Pour in the shake and give it an extra drizzle of caramel on top. Use the toppings from the yogurt (the pretzels, pecans and chocolate chips) to garnish the top.
homemade salted caramel
Combine the sugar, cream, butter and salt in a saucepan over medium heat. Whisk until the sugar is dissolved, then let the mixture bubble for 5 minutes. Remove the caramel from the heat and stir in the vanilla extract. Let stand at room temperature to thicken.
Be sure to follow howsweeteats on instagram and tag your recipes with #howsweeteats! You can also post a photo of your recipe to the howsweeteats facebook page. I appreciate you so much!

And that crunchy topping though…
The post Salty Caramel Yogurt Shakes. {Video!} appeared first on How Sweet It Is.
September 20, 2017
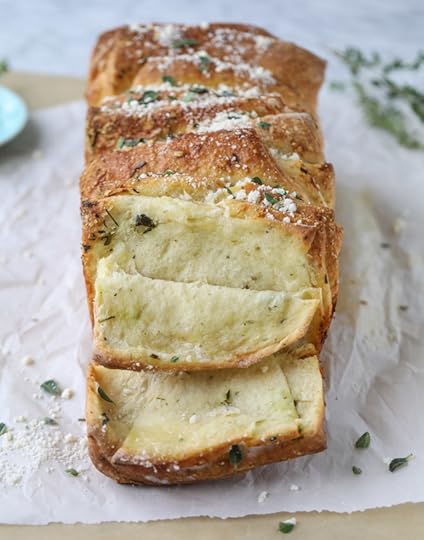
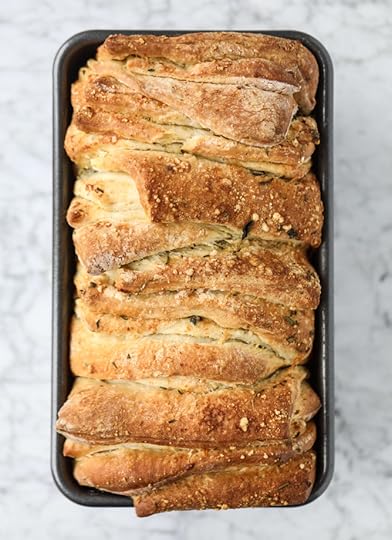
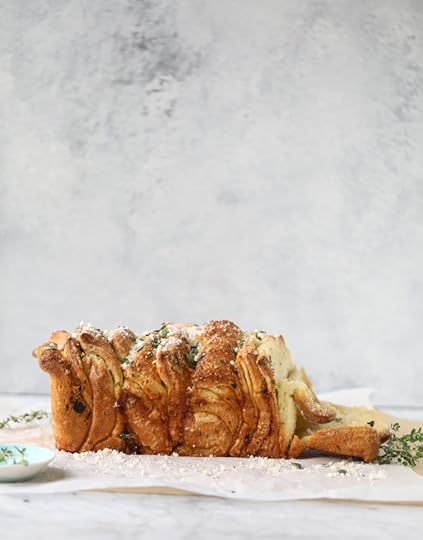
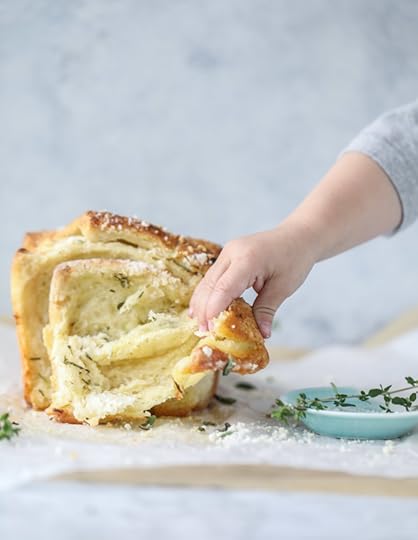
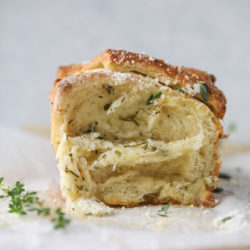
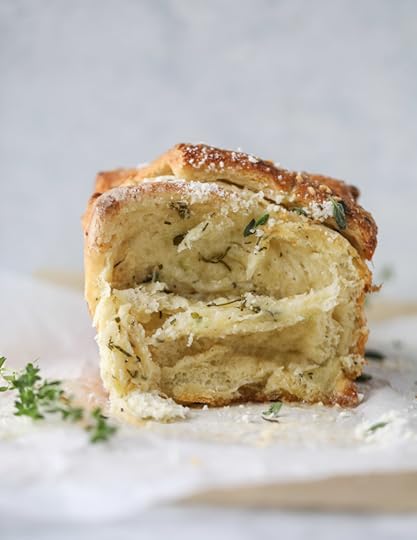
Roasted Garlic Parmesan Herb Pull-Apart Bread.
I present to you… the best way in the universe to eat garlic bread.
Oh
My
Gosh.
This is basically I-don’t-even-know-what-to-do-with-myself garlic pull apart bread. It is absolutely insane and fluffy and delicious and covered in melted butter and parmesan cheese and tons of fresh chopped herbs.
I bet we can’t find any other better way to use up the last herbs of summer, right?!
RIGHT.
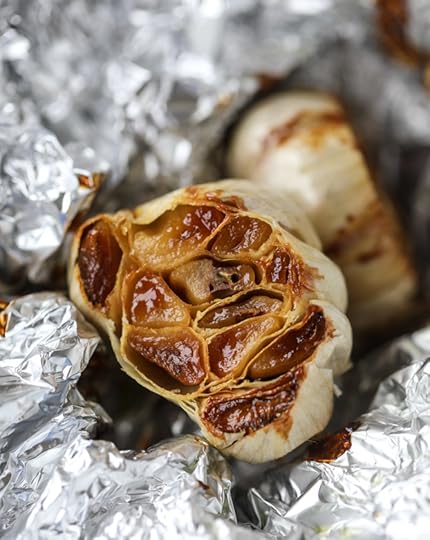
And roasted garlic? I mean, just look at this caramely-ness.
So something has come over me in the last few weeks where I’ve wanted alllllll the pull apart breads. I’ve actually already made THREE to share in the next three months which is legitimately insane but I love them all so much that I can’t not share them. This is the first and one and therefore the first warning that there is sooooo much more pull apart bread to come.
Which is odd, because pull apart bread is kind of old school. But not, like, “old” old school, like oh-hey-I-made-it-in-the-90s old school. It’s more like pinterest-popular-in-2013 old school, sort of like the neon statement necklace I wore yesterday that most surely is out of style but still just so pretty.
It’s like that. And five hundred times more delicious.
I first made this orange cinnamon pull apart bread back when I was super pregnant with max, so maybe it’s something that comes over me in the last few weeks of pregnancy? The base recipe is originally from my friend Cindy and it just makes the most perfect pull-apart bread ever. Can’t even find the words to tell you how much I love it!
Except… maybe I can because when am I not wordy and rambly? Huge question mark.
Today is a super special day because it’s Eddie’s birthday! We’re celebrating with this garlic parm pull-apart bread because if there is anything else that Eddie loves as much as chocolate chip cookies, it might be garlic bread.
Like I actually remember us making “garlic bread” in his apartment shortly after we started dating which most likely was made up of two slices of Ezekiel bread, drizzled with olive oil and sprinkled with garlic powder and toasted in the oven. Things are just a leeeeettle better now, I think we can both say that for sure.
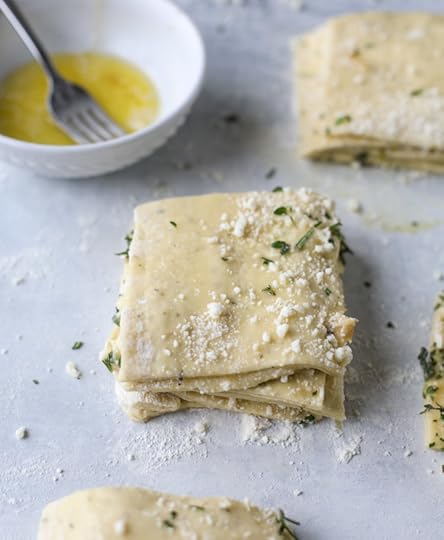
Now for this fluffy goodness? We’re covering the dough with melted butter, cheese and roasted garlic. I’ve decided that should be the new trifecta because it’s 100% insane and one of the most fabulous combos I’ve ever eaten.
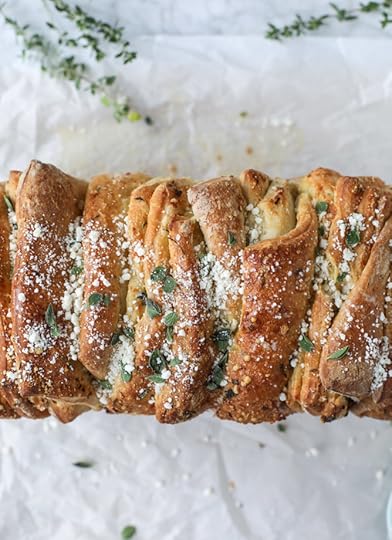
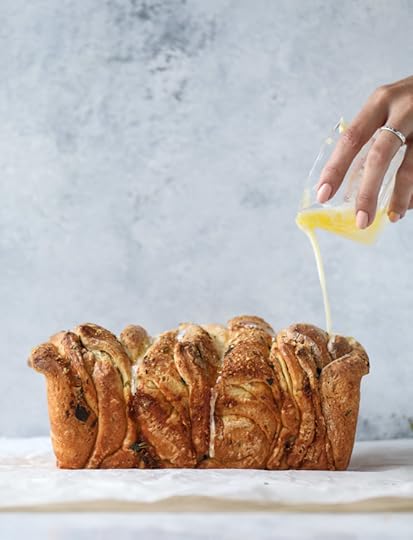
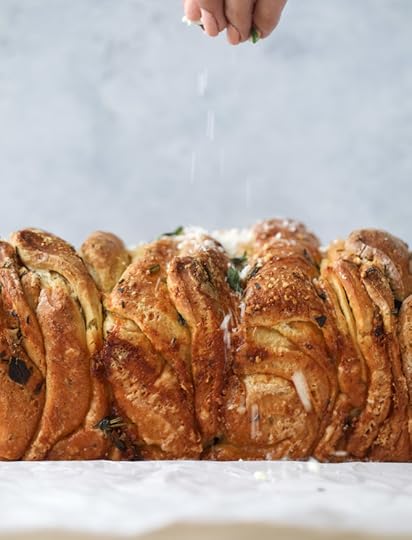
Once it’s all sliced and smashed together and rises with the yeasty goodness (the best!), it’s covered in MORE butter, extra cheese and lots of fresh herbs from the garden that are THISclose to saying sayonara to the summer.
Pretty sure we can ALL agree that no other bread needs to exist in this moment.
Roasted Garlic Parmesan Herb Pull-Apart Bread
Yield: makes one 9x5 inch loaf
Total Time: 3 hours
Ingredients:
roasted garlic
2 heads of garlic
1 tablespoon olive oil
1/4 teaspoon salt
bread
2 3/4 cups all-purpose flour
1 teaspoon sugar
2 1/4 teaspoons active dry yeast
1/3 cup milk (whole or 2%)
1/4 cup unsalted butter
1/4 cup water
1 teaspoon dried basil
1/2 teaspoon dried oregano
1/4 teaspoon dried rosemary
1 teaspoon garlic powder
1/2 teaspoon salt
2 large eggs
filling
6 tablespoons unsalted butter
1/2 cup finely grated parmesan cheese
Directions:
roasted garlic
Preheat the oven to 350 degrees F. To roast the garlic, slice off the top portion of the garlic head to reveal the cloves. Lightly rub back and forth to remove the paper and peel any excess paper off. Pour a bit of olive oil over each bulb. Wrap the bulbs tightly in foil and place in the oven. Roast for 45 to 60 minutes, until the cloves are caramely and golden. Let cool slightly.
Squeeze the cloves out into a bowl and add the salt. Mash the cloves and salt with a fork.
bread
In the bowl of your electric mixer, stir together 2 cups of the flour, sugar and yeast.
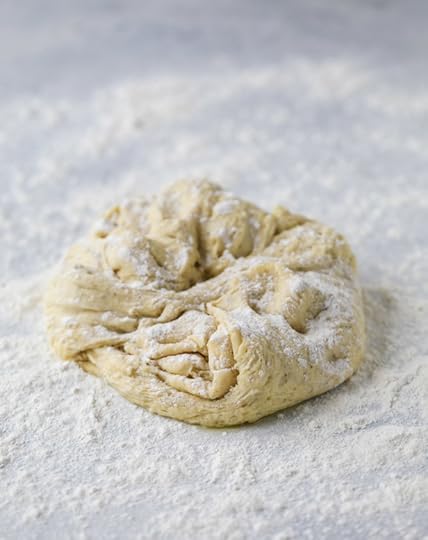
Place the milk and butter in a small saucepan and heat over low heat just until the butter melts. Remove from the stovetop and let sit for 2 to 3 minutes, then stir in the water. With the dough hook attached to your mixer, stir in the milk and butter mixture until combined. Add the basil, oregano, rosemary salt, garlic powder and the eggs - one at a time - beating well after each addition. The dough will be very sticky! Add the remaining 3/4 cup flour gradually, beating for another 2 to 3 minutes until the dough comes together again. It should still be sticky. Place it in a well oil bowl and cover with a towel. Let it rise in a warm place for 1 hour.
After one hour, punch the dough down and turn it out on a floured surface. Roll it into a large rectangle, about 12x20 inches if possible. Add the filling: brush the dough with the melted butter, gently spread the roasted garlic over the dough and sprinkle with the parmesan cheese. Use a pizza cutter to slice the dough into 5 strips from top to bottom - lengthwise. Stack the 5 strips together, then cut them into 6 sets of squares.
Brush a 9x5 loaf pan liberally with melted butter. Place the dough, cut side down, into the loaf pan, pressing it together. Cover with plastic wrap and let rise in a warm place again for 45 minutes.
Preheat the oven to 350 degrees F. Place the pan in the oven and bake the bread for 35 to 40 minutes, until the top is golden brown and set. Remove and let cool for 10 minutes, then gently turn the bread out onto a flat surface. Sprinkle with fresh herbs like basil, oregano and rosemary and give it an extra sprinkle of parmesan.
Be sure to follow howsweeteats on instagram and tag your recipes with #howsweeteats! You can also post a photo of your recipe to the howsweeteats facebook page. I appreciate you so much!
Totally going to take a nap right in there.
The post Roasted Garlic Parmesan Herb Pull-Apart Bread. appeared first on How Sweet It Is.
September 19, 2017
Tuesday Things.
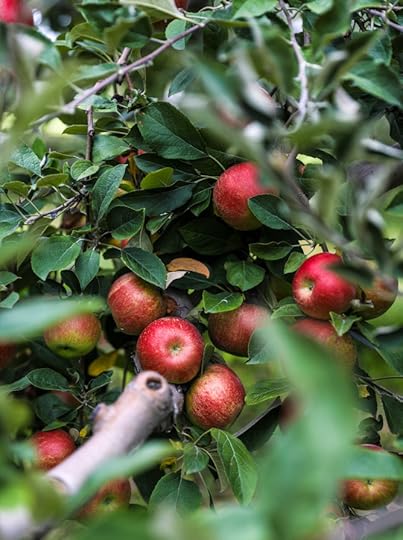
1. My obsession with apple season is out of control. We’re headed apple picking this weekend and I can’t even wait – you would think I am the child in this family.
2. Super chewy no-bake granola bars. I’m always looking for the best ones!
3. Okay so this is my 325th (!!!) Tuesday Things post and I KNOW that I’ve mentioned this before, but whyyyy does Starbucks put whipped cream on the iced pumpkin spice latte?! It’s so gross because the whipped cream curdles into the coffee. You probably saw me complaining about it on insta stories this weekend but not having enough of a backbone to ask them to remove it after I’d already asked for “no whip.” GET A BACKBONE, note to self.
4. I mean, Martha, this is pretty funny. And true.
5. Absolutely love this article about working at Trader Joes. Sounds great!
6. Remember when Friday night TGIF was on TV and it was so good? Full House, Family Matters, all that jazz? I lived for those shows as a tween. Can we get something like that now?
7. Love this. Being organized is a gift I give myself and others. Except right now I am a disorganized MESS.
8. I can’t stop going to Target and looking through the fall decor even though I’m semi-disappointed with it this year. I love decorating for fall because you can have stuff up for like three full months but when it comes to just Halloween stuff, it comes down in November.
9. Being that I know nothing about fashion (other than give me all the neon and denim things, still, in 2017), I wonder what is says about me that my favorite Emmy looks were Thandie Newton, Julia Louis-Dreyfus, Edie Falco and Robin Wright Penn. Of course I also loved Zoe Kravitz’s dress because um HELLO DID YOU SEE IT. Also the entire cast of Stranger Things. I’m either 55 years old or 12. Which is it.
The post Tuesday Things. appeared first on How Sweet It Is.
September 18, 2017
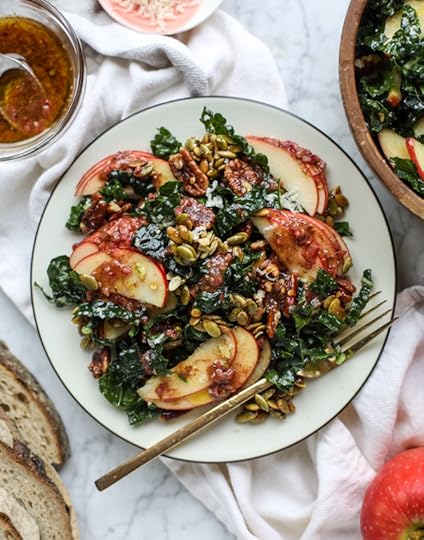
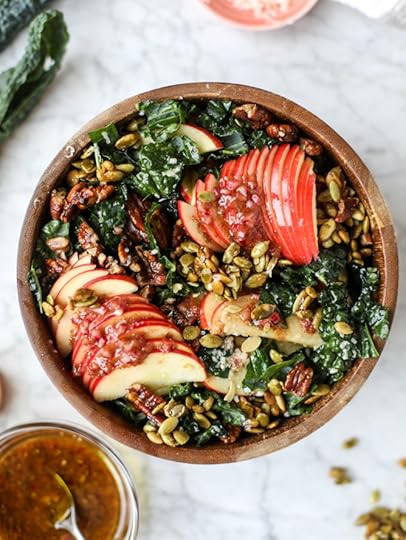
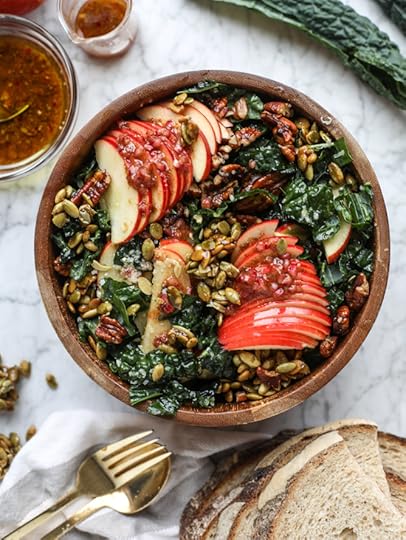
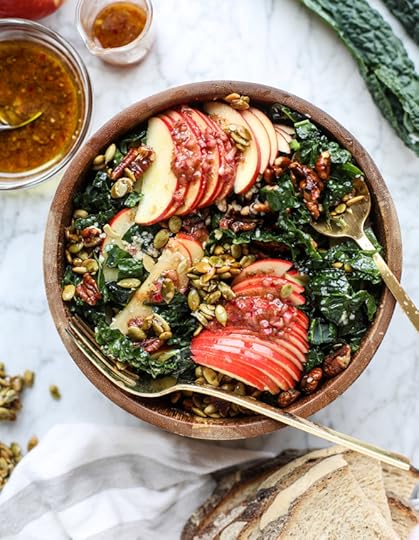
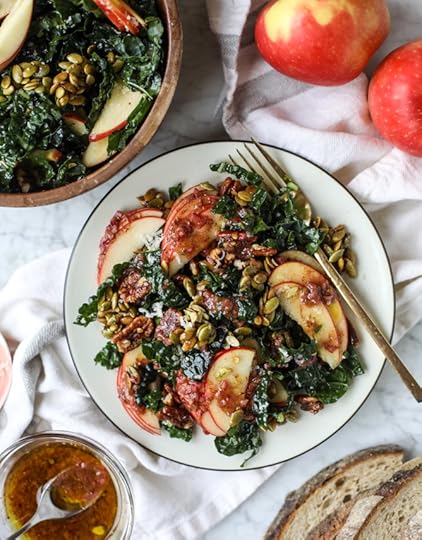
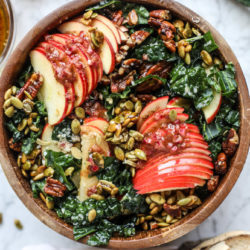
Nutty Harvest Honeycrisp Kale Salad.
Raise your hand if you’re into fall kale salads!
I wish I could raise ten hands, seriously.
This is one of those salads where I actually wanted to lick the bowl when finishing. It was THAT good. I mean, that sort of reaction tends to only happen with super fabulous pizza or mac and cheese or even eggs and toast but never… salad. UNTIL NOW.
This fall kale salad is straight out of my dreams. It is so absolutely fantastic that I have been dyyyying waiting to share it with you guys. It’s been so hard to keep it a secret because of the incredible flavor this big bowl is going to bring you. It’s unreal.
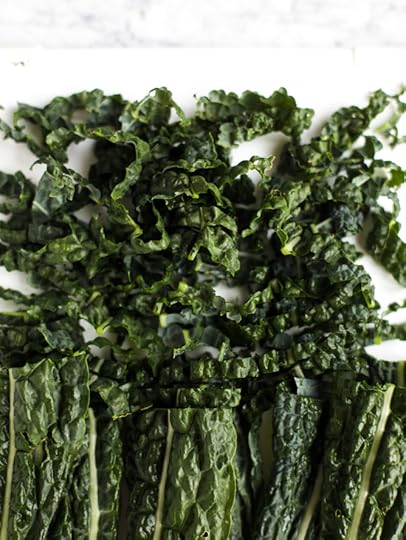
The kale! I love using the lacinato kale and shredding it up because it’s heartier than green curly kale and, like… less kale-ish. Does that make sense? Do you get me?
The moral of that story is that I really love this kind of kale. IMPORTANT.
SO.
This is a semi-high maintenance kale salad because it two (!!) different kinds of nuts on it. I don’t know what’s come over me but I am loving making different things with all the nuts even though most of my life I preferred if they stayed the heck away from me.
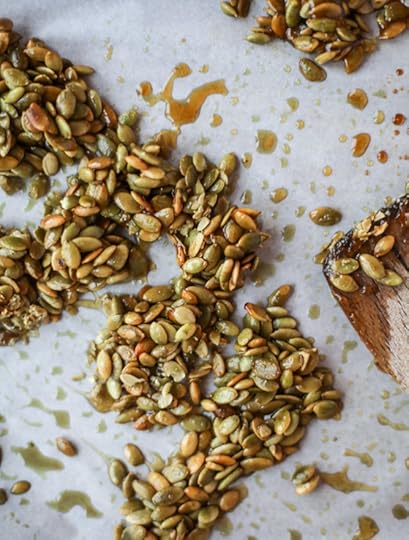
First up, we have these smoky honey pepita clusters that you make in the oven. They can totally be made ahead of time and are really delicious to snack on anytime of day – not to mention ON the salad. I love the smoky honey crunch!
Next up are some sweet and spicy pecans that I simply toasted on the stovetop and they will make your house smell amazzzzing. They also taste like heaven.
There is something about the combo of these two nuts that make this salad taste so, so freaking good. But of course, you don’t NEED both. Just like I didn’t NEED both pairs of velvet high heels that I bought in the last two weeks, both two different shades of pink, when I’m about to have two kids and probably wear heels like approximately once per month.
But I mean, I needed them. They are an investment, duh.
Think of these nuts as an investment for your salad. That you will promptly eat and be done with. Shhhhhh.
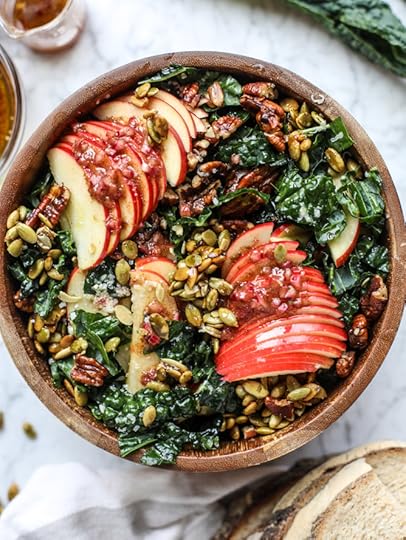
Okay okay but GUYS. The best part of this salad? Is the dressing. This cinnamon shallot vinaigrette is out of this world. The week that I planned to make this salad, I received an email from a reader named Lisa who had a cinnamon shallot vinaigrette and was just raving about it. I was fairly unsure what I was going to put on this salad before that… maybe some sort of apple cider dressing? But the moment she told me about the cinnamon shallot vinaigrette, I was hooked! She gave me the ingredients and I rolled with it.
Ohhhhh my gosh. I love it so much. The flavor is just so… FALL. It complements the apples and kale so much.
This is one of those salads that I couldn’t stop eating and it doesn’t even have bacon. Or a lot of cheese. There is a bit of white cheddar because what’s better than white cheddar and apples? Nothing.
But other than the slight handful of freshly grated cheddar, that’s it. It’s not like the cheese is the main part of the salad. In a major change for me.
Annnd now that you know what I’ll be eating for the next eight weeks straight… you can join in!
Nutty Harvest Honeycrisp Kale Salad
Ingredients:
smoky honey pepita clusters
1/2 cup pepitas
1/2 tablespoons coconut oil
2 to 3 tablespoons honey
1/4 teaspoon smoked paprika
pinch of salt
sweet and spicy toasted pecans
1/2 cup pecans
1 1/2 tablespoons honey
1/2 teaspoon red pepper flakes
1/8 teaspoon ground nutmeg
cinnamon shallot vinaigrette
2 tablespoons red wine vinegar
1 1/2 tablespoons honey
1 teaspoon dijon mustard
1 shallot, diced
1 garlic clove, minced
1/4 to 1/2 teaspoon ground cinnamon
1/4 teaspoon salt
1/4 teaspoon pepper
1/3 cup olive oil
salad
4 to 6 cups chopped tuscan kale
2 honeycrisp apples thinly sliced
3 ounces freshly grated sharp white cheddar cheese
Directions:
smoky honey pepita clusters
Preheat the oven to 350 degrees F. Line a baking sheet with parchment paper. Microwave the coconut oil and honey together until melted, about 30 seconds. Stir the pepitas in a large bowl with the honey mixture, salt and smoked paprika. Place them on the baking sheet and smooth them out with a spatula - you still want them clustered so you can break them apart after baking!
Bake for 20 to 25 minutes. Remove from the oven and toss slightly. Let cool completely before breaking apart.
sweet and spicy toasted pecans
Heat the pecans in a nonstick skillet over low heat, stirring often, until fragrant and toasty. Stir in the honey, red pepper flakes and nutmeg. Let the honey bubble and stir for a few minutes, then transfer the pecans to parchment paper and let them cool completely.
cinnamon shallot vinaigrette
Whisk together the vinegar, honey, mustard, shallot, garlic, cinnamon, salt and pepper. Whisk in the olive oil until emulsified. This keeps great in the fridge for a few days!
salad
Massage the kale with a tablespoon or so of the dressing and let it sit for 5 to 10 minutes. I like to season the kale at this point with salt and pepper too. Slice the apples and combine the apples, cheese, pecans and pepita clusters with the kale and toss well. Serve with the vinaigrette!
Be sure to follow howsweeteats on instagram and tag your recipes with #howsweeteats! You can also post a photo of your recipe to the howsweeteats facebook page. I appreciate you so much!

Literally want to eat that up!
The post Nutty Harvest Honeycrisp Kale Salad. appeared first on How Sweet It Is.
September 17, 2017
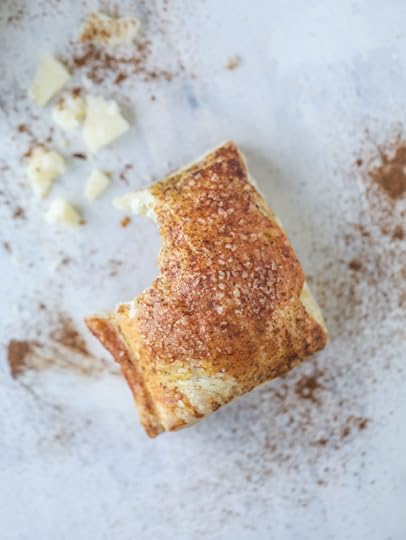
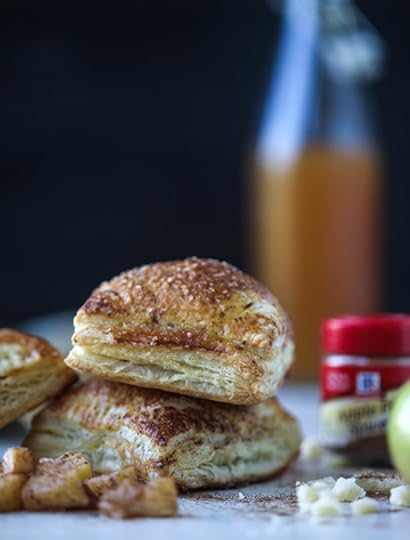
Easy Mini Apple Cheddar Pies .
[This post is sponsored by McCormick! In 2017, I’m teaming up with them to share some delicious recipes that I can’t wait to tell you about!]
I present to you, the best combo ever: apple and cheddar! Apple cheddar pies, to be exact.
Okay okay, so it might be tricky to rival something like chocolate and peanut butter. Or mint and chocolate. Or wine and cheese. But I’m telling you that apple and cheddar as a flavor combo is UP there. It’s getting higher and higher, in fact. Super simple apple cheddar pies? HAND pies?
We can do it.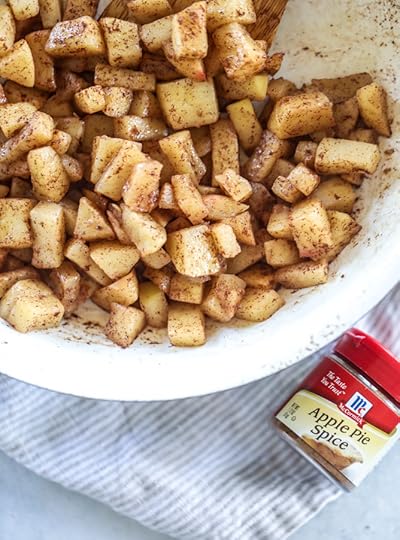
Apple season is seriously one of my favorites. Yes, it’s true, I DO say that about everything – why do you ask? But every season… I just love to immerse myself in it. I love that apple season starts in late summer and carries us into fall. It gives us something to enjoy in those few weeks where it’s weird to eat squash every day but peaches and tomatoes are also on their last leg. Today, I’m partnered with McCormick to tell you allllllll about the most amazing apple and cheddar combo using their Apple Pie Spice. I’ve used this spice for ages. Like I used to put it on oatmeal in college. It’s so good!
For a bunch of you, like me, this is probably not a new combo. I know that in the last few years, people make cheddar pie crusts for apples and serving cheese on TOP of apple pie. My obsession started as a kid, in afternoon snacks to be exact. Apples and nut butter were always a thing, but so were apples with cheese. They were in frequent rotation with things like pretzels and olives, olives and cheese or, let’s be real, peanut butter covered spoons dipped in chocolate chips. I’m quite predictable.
So what did we do here for the apple cheddar pies? You know my favorite go-to is the puff pastry mini pie. I’ve made more combinations that we can count. It’s super simple but that’s not the only reason I love to use it. It’s because the flakey deliciousness cannot be beat. If you’re pie-spooked like I am, then you know how much easier it is to use. But the thing is that it is SO much flakier and more buttery. It melts in your mouth and I’d be lying if I said I never thought of baking up a sheet of plain puff pastry… for a snack.
Hello, embarrassing much?
Our mini pies might be embarrassingly easy, but they could not be tastier.
They start out with some buttery, spiced apples that are sprinkled with McCormick Apple Pie Spice and sautéed until juicy and tender, just so we get that legit apple pie bite. Before they make their way into their little puff pastry pocket home, they get a slice of super sharp white cheddar cheese – on the top AND the bottom.
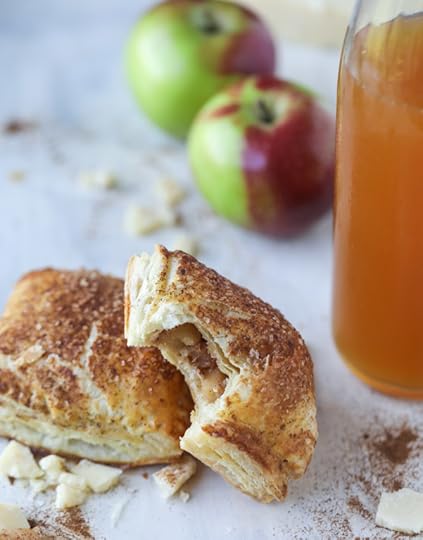
Oh my heavens. YOU GUYS! These are sweet, savory and spiced. They are slightly chewy and flakey and tender. I don’t even know how else to explain that each bite is pure heaven!

Easy Mini Apple Cheddar Pies
Yield: makes 9 pies
Ingredients:
2 sheets of puff pastry, thawed
2 large apples, peeled and chopped
3 tablespoons unsalted butter
1 tablespoon brown sugar
1 teaspoon McCormick Apple Pie Spice, plus more for sprinkling
pinch of salt
6 ounces sharp white cheddar cheese, cut into pieces
1 large egg, lightly beaten
1 tablespoon coarse raw sugar
Directions:
Heat a saucepan over medium-low heat and add the butter. Toss in the apples with the sugar, apple pie spice and salt and toss. Cook, stirring often, for about 5 to 6 minutes until the apples start to soften.
Preheat the oven to 425 degrees F.
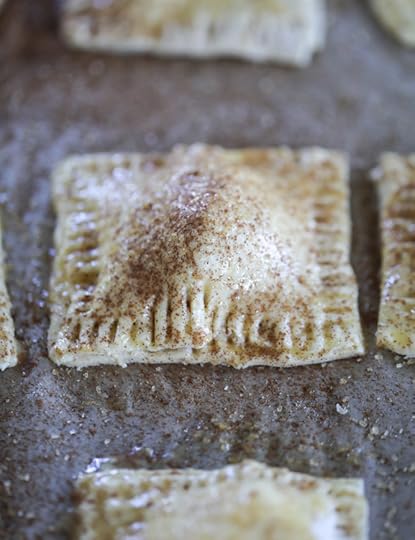
Place a sheet of parchment paper on your work surface. Place one sheet of puff pastry on top. Spoon 1 to 2 teaspoons of the apple cubes on the puff pastry - sort of like you’re working on a tic tac toe board. Place a slice or a few crumbly pieces of cheddar under and on top of the apples. Cover the entire thing with the other sheet of puff pastry. Use a large knife or pizza cutter to cut the pastry into 9 squares, just around the edges. Use a fork to press the edges together.
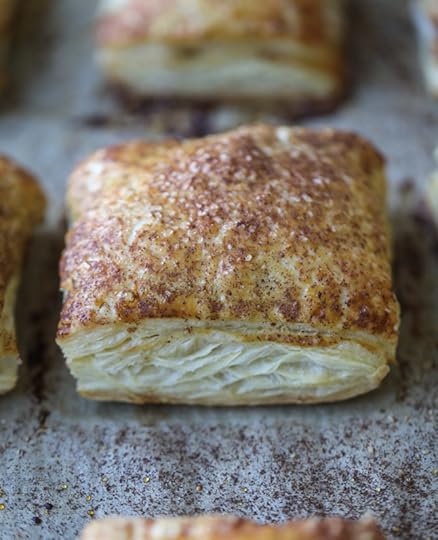
Brush the tops with the beaten egg wash. Sprinkle with the raw sugar and a touch of Apple Pie Spice. Bake for 20 to 25 minutes, or until golden brown. Let cool slightly, then serve. These are best served shortly after making.
Be sure to follow howsweeteats on instagram and tag your recipes with #howsweeteats! You can also post a photo of your recipe to the howsweeteats facebook page. I appreciate you so much!

That flakiness!
The post Easy Mini Apple Cheddar Pies . appeared first on How Sweet It Is.
September 16, 2017
Currently Crushing On.
Hey hey! Yesterday I noticed the first leaves of the season changing colors into these vibrant reds and oranges and got so super excited. Even though I’m a little whacked out with this new arrival that will be here ins 6ish weeks, I am so excited and can’t stop preparing! What are you guys up to this weekend?
This week, I shared a little summer max update. And there is a still a day left to enter my 8 year blogging giveaway!
Faves of the week!
chorizo queso dip with beer. i want to cry.
love these adorable mini taco bowls.
how adorable is this pink candied popcorn?
obsessed with these micheladas in the can!
milk and honey baklava sounds like exactly what i want to eat.
how stunning is this green noodle bowl?! the color!
how about this bananas foster shaved ice?!
love this shrimp in garlic chili oil. mmmm.
peach affogato?! oh my word.
hot pink pasta! chickpea beet ravioli.
and adoring these fresh mezcalitas.
The post Currently Crushing On. appeared first on How Sweet It Is.
September 15, 2017
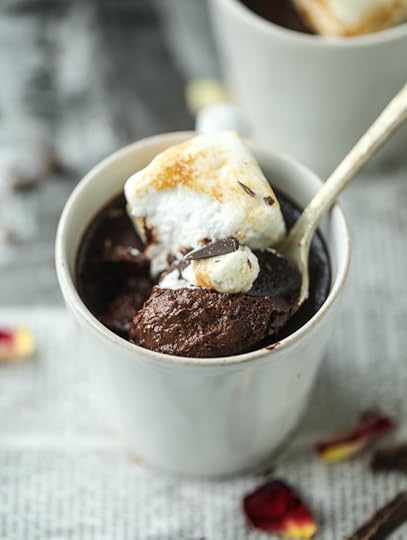
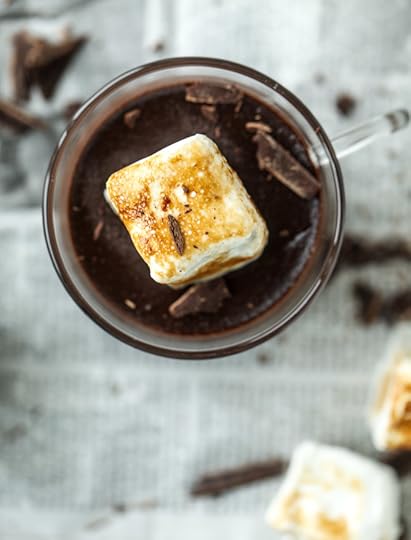
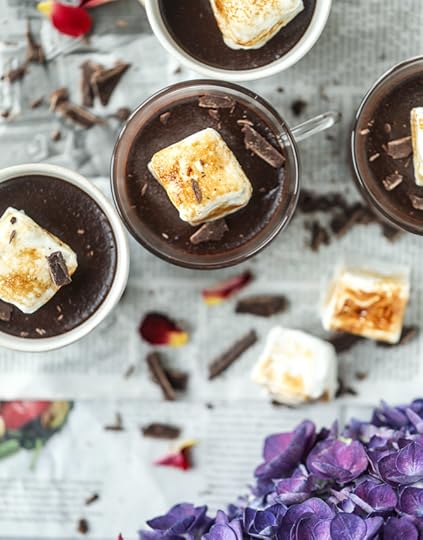
Hot Chocolate and Toasted Marshmallow Pots de Créme.
Say hello to the most beautiful little cup of love.
OH MY GOSH is right, you know?
The most decadent chocolate pots de créme, right here for you to eat!
Sounds fancy. Is really just a cup of chocolate goodness. Let’s get into it?
This combination!
We have the most delicious dark chocolate pots de creme that taste like hot chocolate and it’s all topped off with a toasty marshmallow. This little cup of dessert is RICH. It’s my favorite sort of dessert. I love super indulgent and rich desserts that might only require a few bites.
Now don’t be fooled by the title. It’s not like it’s ACTUAL hot chocolate, because we don’t really need that yet in September. We just have the flavor of hot cocoa and marshmallows, which is another dream in my book. I love this combo like I love chocolate and peanut butter. Which is saying a LOT.
This recipe comes from the new cookbook from my friend Naomi at Bakers Royale. Oh my gosh YOU GUYS! This book is unreal. I cannot even tell you how many pages have the corner folded down because I want to make that many recipes. Her creations are so incredible. Seriously some of the best on the internet.
Not to mention, her photography is insane. I’ve always admired her photography the most out of food bloggers – it is stunningly gorgeous while still relatable because the food always looks to die for. Makes me want to jump through the screen like a crazy person.
I am telling you, this book is a MUST GET.
Also! This was the first time I’ve ever made any sort of pot de creme. Pretty sure it’s a mix between a pudding and a custard. I don’t even care WHAT it is because it tastes like heaven. It’s like eating a spoonful of a silky and fluffy chocolate cloud. The texture is divine. The flavor is even better!
The last time I made any sort of pudding was probably when I was a kid and it was from the box. Yes I know – blasphemy.
Now this one takes a little bit more work. I mean, like more work than opening up a box of powdery mix and refrigerating it for an hour or even buying a four pack of plastic container pudding and peeling back that foil seal to reveal a delicious chocolate tub of love.

With this dessert, we mix it up and then bake it. And THEN refrigerate it. But I swear to you that the wait time is worth it, even if I did want to order two pizzas in the time frame I waited for this to chill and set. I couldn’t even look at it and had to remove myself from the kitchen because it looked so perfectly delish.
With the first bite though? Oh mylanta. This is the perfect party dessert. Something you can make ahead of time. A treat you can share. Something you can seriously tuck into and enjoy. 100% worth it.


Hot Chocolate and Toasted Marshmallow Pots de Creme
Yield: serves 8
Total Time: 6 hours
Ingredients:
pots de creme
1 1/2 cups chopped dark chocolate (70% cocoa)
6 large egg yolks. at room temperature
3/4 cup sugar
1 teaspoon vanilla extract
2 cups heavy cream
1 cup milk
2 tablespoons unsweetened cocoa powder
1/2 teaspoon salt
marshmallows
2 packets (5 teaspoons) of unflavored gelatin
8 tablespoons of cold water
1 1/2 cups granulated sugar
1/3 cup cold water
1 teaspoon vanilla bean paste
1/4 teaspoon salt
Directions:
pots de creme
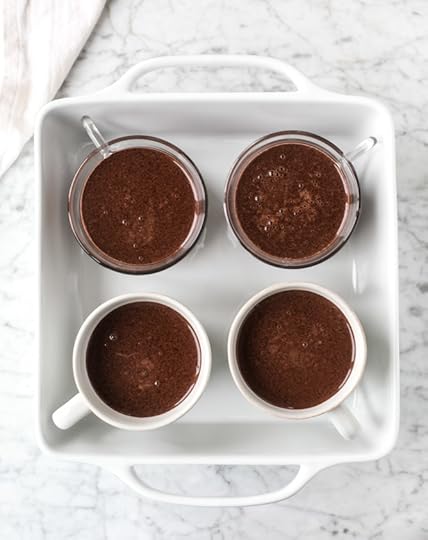
Preheat the oven to 300 degrees F. Place 8 ramekins or small heat-proof mugs in a baking dish or roasting pan.
Place the chopped chocolate in a large bowl. In another large bowl, whisk together the egg yolks, sugar and vanilla extract.
Heat the cream, milk, cocoa powder and salt in a saucepan over medium heat, whisking to combine, until it's just simmering. Very slowly pour it into the egg mixture while whisking the entire time, until combined. Pour that mixture through a fine mesh sieve over top of the chopped chocolate. Let it sit for 2 to 3 minutes, then stir and whisk until the chocolate is all melted and the mixture comes together.
Pour the chocolate into the ramekins/mugs in the baking dish, leaving a bit of room up top. Fill the baking dish halfway full with hot water. Place the dish carefully in the oven and bake for 30 to 35 minutes, just until the edges set but the center is still jiggly. Transfer the cups to a cooling rack and cool completely. Refrigerate for 4 hours before serving.
To serve, top with a marshmallow that is toasted (either over a fire or with a kitchen torch)!
marshmallows
Place the gelatin in a small bowl and stir in the 8 tablespoons of cold water. Set aside. Spray an 8x8 pan with nonstick spray, then sprinkle some powdered sugar in the pan and shake well, dispersing it all over the pan, covering the entire thing.
In a small saucepan, combine the remaining cold water and sugar. Heat over medium heat, stirring constantly until the sugar is dissolved and bubbly, about 3 to 4 minutes. Stir in the gelatin mixture, whisking, and bring it to a boil. Once boiling, immediately remove from heat. Add to the bowl of an electric mixer attached with a whisk. Let sit and slightly cool. Add in the vanilla bean paste and salt. Beat on medium-high speed for 10 to 15 minutes, until white and glossy and shiny and thick. Spread in the 8x8 pan and top with a sprinkle of powdered sugar if desired. Let sit for about 4 hours, or even overnight.
Once set, run a knife along the edges of the baking pan and dump the marshmallow square out onto a cutting board. Cut the marshmallows into squares.
[pots de creme from bakers royale, marshmallows from my favorite recipe!]
Be sure to follow howsweeteats on instagram and tag your recipes with #howsweeteats! You can also post a photo of your recipe to the howsweeteats facebook page. I appreciate you so much!
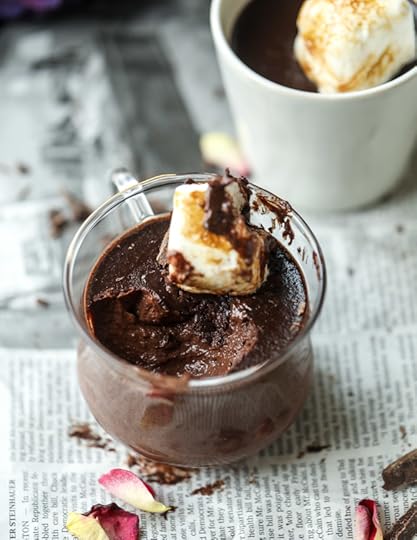
For real. Look at that bite.
The post Hot Chocolate and Toasted Marshmallow Pots de Créme. appeared first on How Sweet It Is.
September 14, 2017
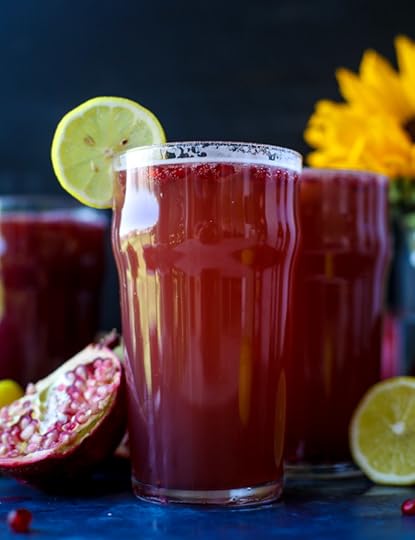
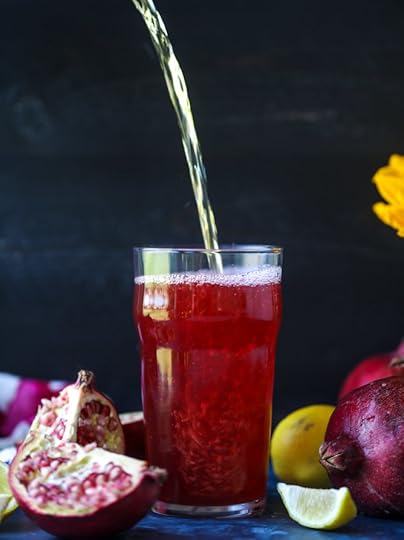
Make a Pomegranate Shandy!
Because you guys! These are so easy. And SO good.
When I realized that a pomegranate shandy was a thing, there was no turning back. I’m pretty sure that one of my favorite beer brands had pomegranate shandy bottled last year, but I haven’t seen it this year. Maybe I’m making that up. Maybe I dreamt it. Then again, at this moment in my life, I’m not necessarily cruising the beer aisles looking for beverages.
I did, however, go buy a bottle of wine while hugely pregnant last weekend so we had it for guests. THAT WAS FUN.
I am the first to admit that I am weirdly going crazy over pumpkin right now. To a point where it’s annoying me. I swear that it is a pregnancy thing. I was never this crazy about pumpkin until the fall of 2014 when I was pregnant with Max. I mean, I LIKED it but I wasn’t like OMGit’slifechanging and all that. It’s not like I waited all year for it.
Also, I’m LESS into pumpkin spice than I am pumpkin. I like pumpkin flavored things, light on the spice. Get it?
So while I’m super into that and excited for the things to come, I’m perhaps even more excited for pomegranate season. I adore pomegranate everything. Like EVERYTHING!
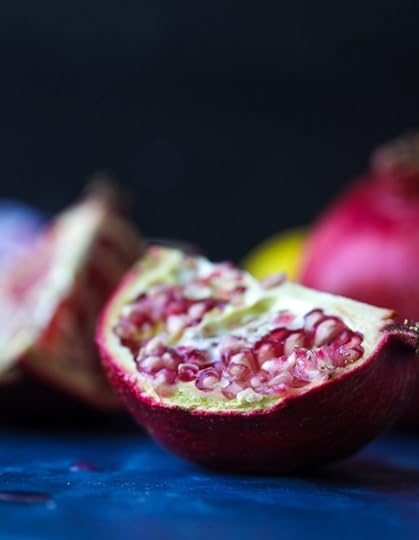
I’ve made pomegranate BBQ sauce and cobblers and tons of cocktails and eating pomegranate arils right from a bowl is my idea of heaven. They are so refreshing but tart but sweet and wonderful. I love ‘em!
Last year I made watermelon shandys and while I am all for buying these and drinking them from the bottle, they are so easy to make at home too. It’s another perfect drink for the end of summer because it combines lemonade and beer.
And pom juice, obviously.
Bridges that gap in these funny it’s-hot-out-so-why-is-everyone-into-pumpkin-pie weeks.
Over Labor Day weekend, we made this September sangria for the holiday and these pomegranate shandys for a little partay. Even though I couldn’t fully partake in this goodness, I have to say that I am so, so excited about the homemade pom shandys because come the end of October… I will be all over those.
I mean, beer is good for your milk supply soooo… it will be fiiiiine.
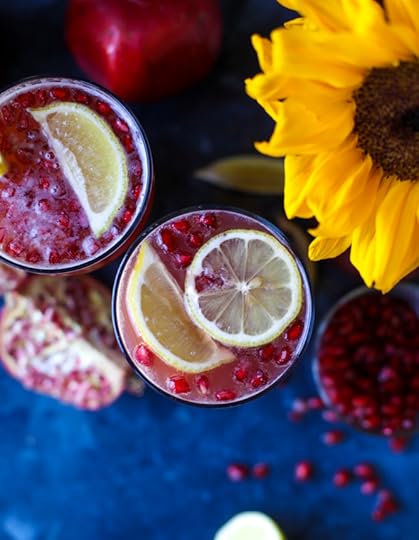
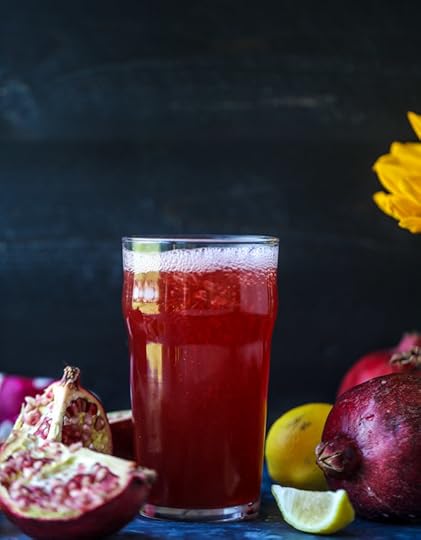
These are so refreshing, not to mention the prettiest color ever. Tart and fresh and citrusy but barely sweet too. You can even use a leftover summer shandy for this and just add pomegranate juice and maybe a squeeze or two of lemon!
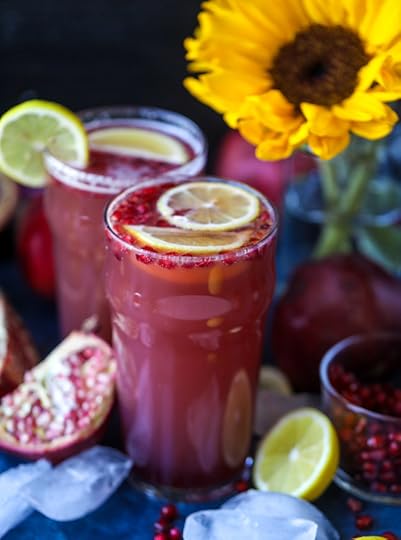
Because we all want to drink fuschia beer.
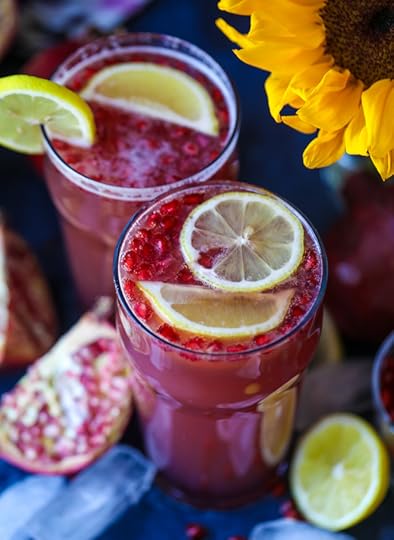

Pomegranate Shandy
Yield: makes 1 drink, is easily multiplied
Total Time: 15 minutes
Ingredients:
4 ounces cold pomegranate juice
4 ounces cold lemonade
8 to 12 ounces your favorite wheat beer - COLD
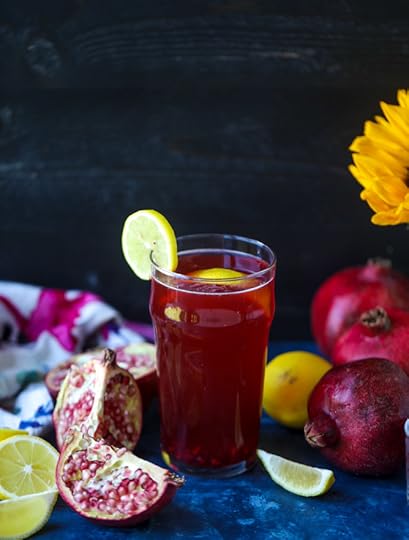
lemon wedges for garnish
pomegranate arils for fun!
Directions:
Add the pomegranate and lemonade in a frosty glass and stir. Pour the beer over top, squeeze in a lemon wedge and garnish with another. Serve with a sprinkling of pomegranate arils inside.
Be sure to follow howsweeteats on instagram and tag your recipes with #howsweeteats! You can also post a photo of your recipe to the howsweeteats facebook page. I appreciate you so much!
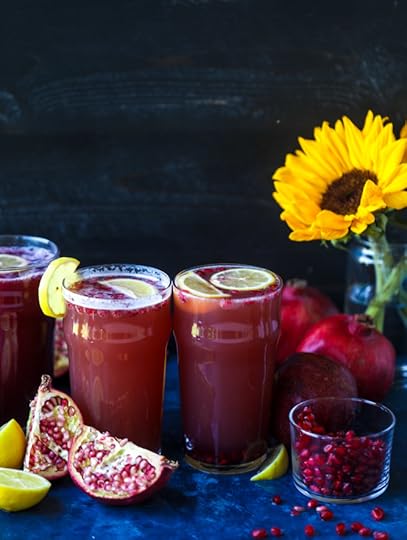
Especially beer with little jewels in it.
The post Make a Pomegranate Shandy! appeared first on How Sweet It Is.
September 13, 2017
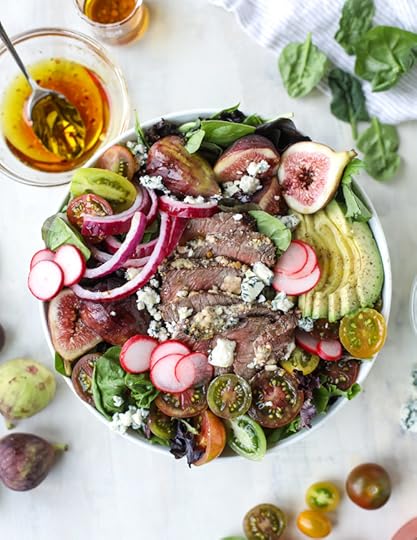
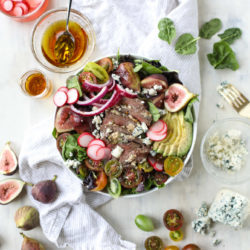
Gorgonzola Crusted Steak Salads.
I have a present for you today!
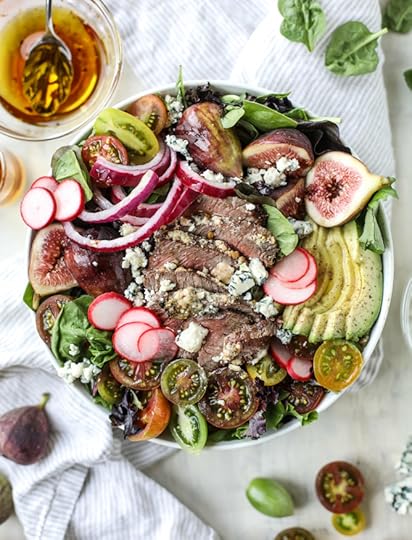
Steak salads! Gorgonzola steak salads just for our face. YES.
I’ve always been such a huge, huge fan of a good steak salad. Part of me thinks it’s probably because here in Pittsburgh they put steak or chicken on a salad with French fries and cheese (hello most perfect delicious heart attack) but I don’t think that’s REALLY why.
Growing up, we’d have grilled flank steak for dinner and there would always be enough leftovers for the next night which often became flank steak salads. They were so good: think tons of blue cheese, balsamic, all that jazz. It was one of the few times I actually WANTED to eat a salad when I was growing up!

So! I made one like that.
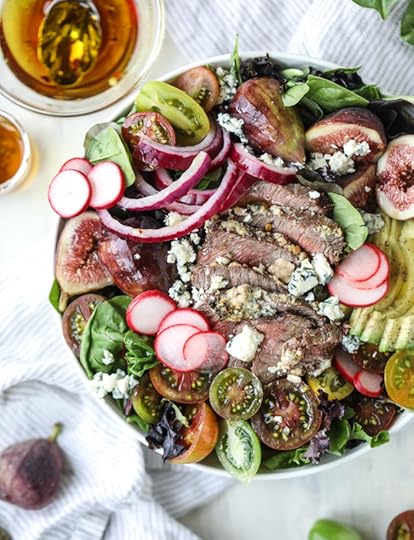
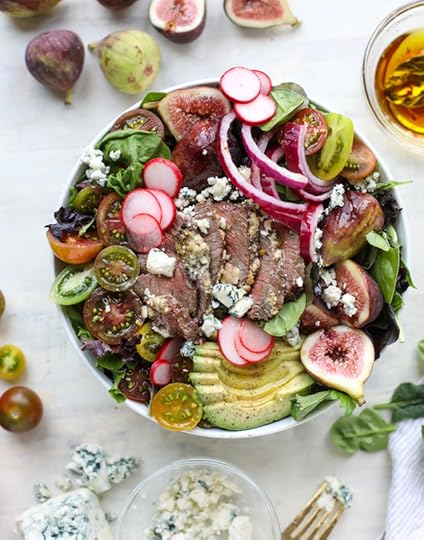
Of course, I had to take it a step further because my salads must be high maintenance in order for me to enjoy them. Pickled red onions, always. They are so sweet and briney and delicious. Also, pickled radish because I need more hot pink that normal on my salads. YOU KNOW.
And figs! They are green and pink and purple so that works for my color brain.
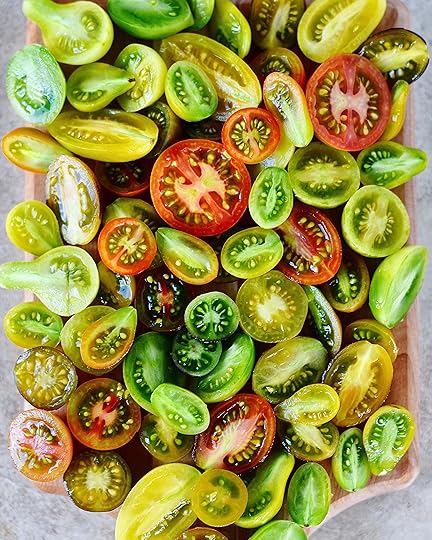
The rest is sort of boring salad stuff. Like avocado. And lettuce. And tomatoes.
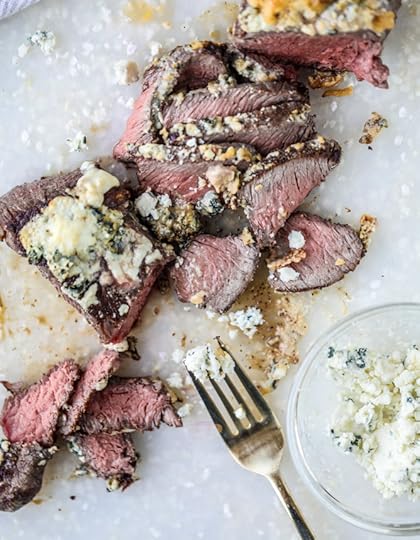
Oh oh oh! BUT THE STEAK.
It’s crusted with gorgonzola cheese. GORGONZOLA CHEESE. My lover. The best cheese ever. For today.
These steaks are seared but then finished under the broiler just until the cheese gets golden and slightly crunchy but also still melty and creamy. Sounds like a dream, I KNOW.
The steak could easily be eaten by itself. Or as a main entrée with sides and stuff, a la Eddie’s favorite. But sliced up, I love it on a salad. Especially while it’s still warm and melt-in-your-mouth and the rest of the salad ingredients are cold. Best ever.
I finished it off with my favorite red wine vinaigrette which is a serious staple in this house. You know how partial I am to oil and vinegar dressings. I often use apple cider vinegar but my first love is probably red wine vinegar. The tanginess!
Annnnd this is how you make a salad that you want to absolutely eat forever and ever.
Gorgonzola Steak Salad
Yield: serves 2
Total Time: 45 minutes
Ingredients:
gorgonzola steak
2 (3 to 4 ounce) sirloin filets
1/2 teaspoon salt
1/2 teaspoon pepper
1 to 2 tablespoons grapeseed or canola oil
2 tablespoons unsalted butter
4 ounces crumbled gorgonzola cheese
salad
6 cups spring greens
6 fresh figs, sliced
1 avocado, thinly sliced
1 cup cherry tomatoes, halved
a handful of quick pickled onions
a handful of quick pickled radish
extra gorgonzola cheese for crumbling
red wine vinaigrette
3 tablespoons red wine vinegar
2 garlic cloves, minced or pressed
1 1/2 tablespoons honey
1 teaspoon dijon mustard
1/4 teaspoon salt
1/4 teaspoon pepper
1/4 teaspoon red pepper flakes
3 tablespoons olive oil
Directions:
gorgonzola steak
Preheat the broiler to the highest setting. In a small bowl, stir together the softened butter and gorgonzola.
Heat an oven-safe skillet (like cast iron) over medium-high heat. Cover the steak with the salt and pepper. Add the oil to the skillet and once hot, add the steak. Sear it on both sides until golden - about 1 minute per side. Turn off the heat.
Place the gorgonzola butter mixture over top of the steak, pressing gently so it adheres. You want it mostly on the top so it doesn't spill down the sides in the oven (but a little bit might!). Place the skillet in the oven with the broiler on. I like to do it in the middle of the oven to prevent the cheese from burning and smoking. Broil for 2 to 3 minutes, until the cheese is golden and bubbly and also - depending on how well you like your steak done! If you have thicker filets and would like your steak to be medium, I'd broil for about 4 to 5 minutes. Let the steak rest for 15 to 20 minutes before thinly slicing it.
Once the steak is finished, assemble the salad with the greens in a bowl. Tp with the figs, avocado, tomatoes, pickled onion and radish and extra gorgonzola. Top with the steak and serve with the vinaigrette!
red wine vinaigrette
In a bowl, whisk together the vinegar, garlic, honey, mustard, salt, pepper and pepper flakes. Whisk in the olive oil until the dressing is emulsified.
Be sure to follow howsweeteats on instagram and tag your recipes with #howsweeteats! You can also post a photo of your recipe to the howsweeteats facebook page. I appreciate you so much!

Now room for cookies, right?
The post Gorgonzola Crusted Steak Salads. appeared first on How Sweet It Is.
Jessica Merchant's Blog

- Jessica Merchant's profile
- 53 followers

