
Jessica Merchant's Blog, page 352
October 21, 2017
Currently Crushing On.

Hello hello! How are you as we enter this final stretch of October? (WHAT?!) We are doing just super over here. This past week I finished up the bulk of my work for 2017 which seems like a miracle. I’m a little deep in final cookbook edits and have a few other things to do, but other than that, it’s crazy that I will finally have some time to relax!
Last week I shared what will most likely be my last baby #2 update before the babe arrives. We’re on babe watch now but in no rush. I also updated my favorites in my SHOP! And! I’m also going to share some of my favorite picks for the Sephora VIB sale over on crumbs later this week, so stay tuned!
Some other things:
You can see how I set up a cute DIY coffee cart over at Crate and Barrel. Nice little switch from the traditional bar cart!
And I made a few pear recipes for Harry and David with their amazing royal riviera pears that you can find right here!
Now, for what amazing things caught my eye this week:
this savory butternut squash pie looks unreal.
very into these masala chai chocolate chip cookies.
one bowl mini chocolate chip pumpkin pancakes! one bowl.
this orange whiskey pate de fruit sounds fabulous.
adore this pink and orange fall tablescape!
how to host a fall charcuterie party. right up my alley.
love the idea of pecan butternut squash bread.
ohhhh my. baileys coffee custard donuts.
slow cooker buffalo chicken potatoes! this is a great idea.
looks amazing: apple bacon and rosemary pizza.
creamy butternut pasta with brussels. yes yes yes!
The post Currently Crushing On. appeared first on How Sweet Eats.


October 20, 2017
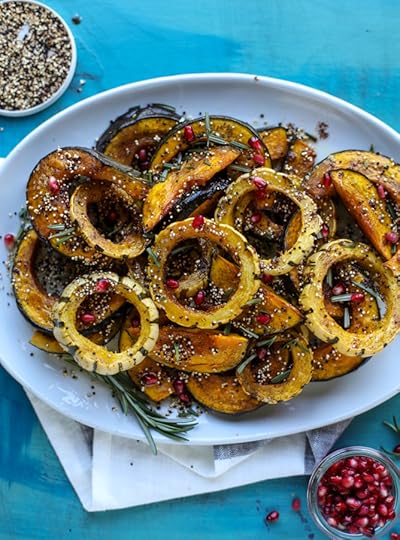
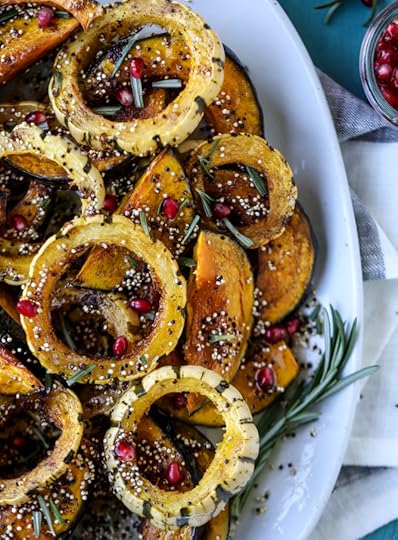
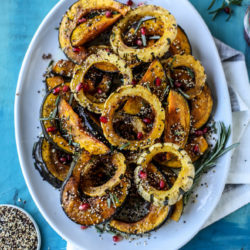
Roasted Squash with Brown Butter and Toasted Quinoa.
Who knew we could make our vegetables so delicious!
We can, we can, we can! Let’s discuss.
A few years ago I made a spicy squash with feta and herbs that is seriously one of my favorite fall side dishes ever. It is DELISH. It’s so flavorful and super simple.
But since I make it constantly, I wanted something else similar that I could make and pair with a few other dishes. Maybe minus the feta, maybe something with a little more texture.
Enter… crispy toasted quinoa! I loooove toasted quinoa. Last year I made these toasted quinoa cashew butter cups and the crunch is so satisfying and perfect. Like little pops of love. I also put it in these autumn rice krispie treats. Must make this weekend. Reminder to self.
I wanted that exact crunch on top of brown butter roasted squash. And maybe with a hint of brightness from the pomegranate arils. And that’s exactly what I got.
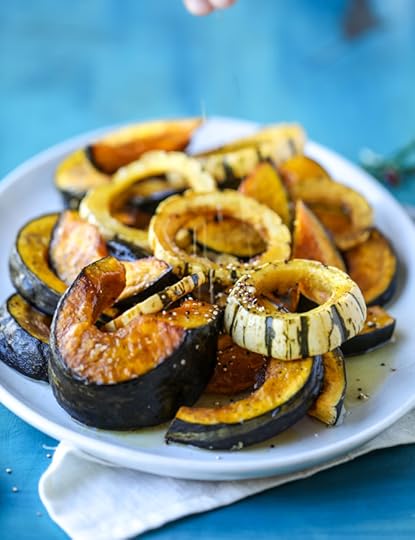
The squash is sweet and slightly caramely. Yes yes yes I leave the peel on my squash when I roast it most of the time. It’s chewy and incredible when roasted. You can absolutely peel it if you’d like. And if you have leave it on and happen to have a tough piece, just discard it!
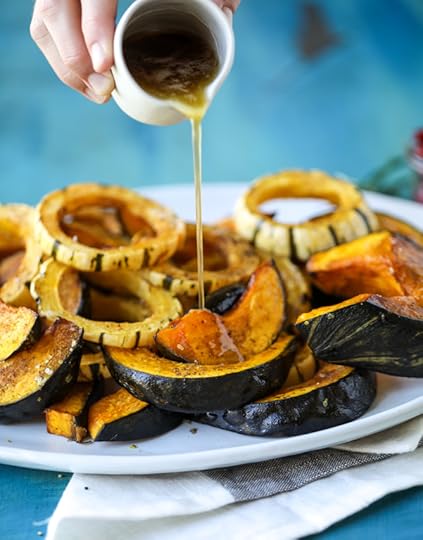
The brown butter is wonderful, as usual. I mean, it’s brown butter! Buttery and caramely and nutty. I just want to drink it. I drizzle it on top as a finishing flavor so it doesn’t burn or lose the flavor in the oven when roasting. This is my second recipe with brown butter this week and you know what? I wish it was my fourth. What DOESN’T work with brown butter? Nothing. That’s what.
Next goes on the crunchy quinoa sprinkle! You can add as much or as little as you’d like. Heck, if you’d like to switch this entire recipe around and cook the quinoa fully and serve this on a bed of cooked quinoa or toss everything together like a quinoa salad, BE MY GUEST.
(sidebar: OMG speaking of I finally got to watch Beauty and Beast because I didn’t see it when it was in theaters and I looooooove it.)
Also added a little rosemary because let’s just say that this last month, I’ve had quite the rosemary problem. For not even loving it a few years ago, I am almost full-on obsessed with it right now.
And finally, the (also crunchy) pop of pomegranate gives some juicy tartness with a slightly sweet bite.
I could actually eat this entire plate for dinner without anything else! I mean, how many times can I get away with saying “so much flavor?!?” Doesn’t that sound like perfection?!
Print Recipe
Did you make this recipe? Leave a review »
Roasted Squash with Brown Butter and Toasted Quinoa
Yield: serves 4
Total Time: 1 hour
Ingredients:
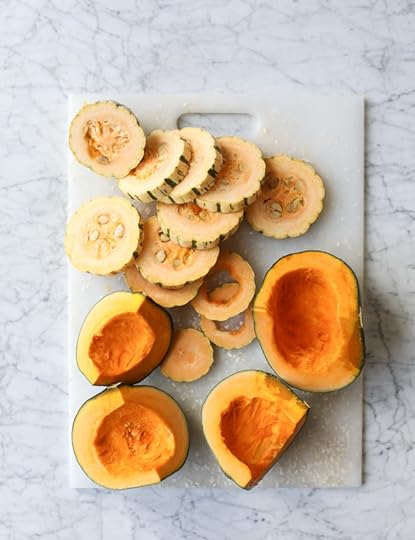
1 buttercup/kabocha squash, sliced and seeds removed
2 delicata squash, sliced and seeds removed
2 tablespoons olive oil
1/2 teaspoon salt
1/2 teaspoon pepper
1/4 teaspoon freshly ground nutmeg
1/4 cup dry, uncooked quinoa
4 tablespoons unsalted butter
3 tablespoons pomegranate arils
2 tablespoons chopped fresh rosemary
Directions:
Preheat the oven to 400 degrees F. Line a baking sheet (or 2!) with parchment paper.
Place the squash on the sheet(s) so they are not overlapping. Drizzle with olive oil. As a note, I like to keep the peel on both of these squash because they are so chewy and delicious when roasted! Sprinkle the squash with salt, pepper and nutmeg. Roast for 35 to 45 minutes, until golden and caramely.
While the squash is roasting, rinse the quinoa in a fine mesh strainer. Leave a bit of the water in with the quinoa and place the quinoa in a skillet. Heat it over medium-low heat. Cook, stirring and tossing often, until the quinoa becomes fragrant and pops – and also turns golden if you’re using white quinoa – it will take about 5 to 6 minutes.
Place the butter in another skillet over medium-low heat. Once melted, whisk constantly until brown bits appear on the bottom – about 5 to 6 minutes. Remove the butter from the heat immediately and pour it into a bowl so it doesn’t burn.
As soon as the squash is finished roasting, drizzle it with the brown butter to serve. Top with the fresh rosemary, the pomegranate arils and cover in the toasted, crunchy quinoa. Serve!
All images and text ©How Sweet Eats.
Did you make this recipe?
Be sure to follow howsweeteats on instagram and tag #howsweeteats. You can also post a photo of your recipe to the howsweeteats facebook page.
I appreciate you so much!

Don’t even want to say it but it almost tastes like dessert.
The post Roasted Squash with Brown Butter and Toasted Quinoa. appeared first on How Sweet Eats.
October 19, 2017
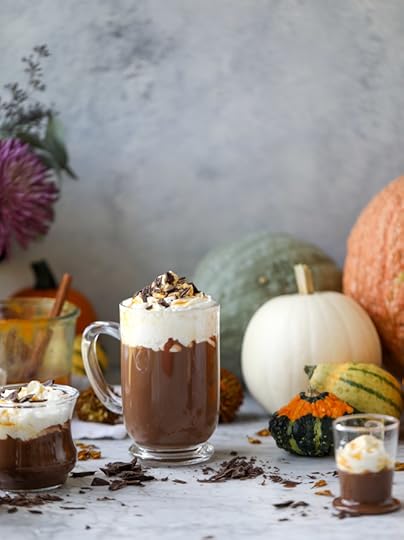
Pumpkin Coconut Hot Chocolate.
Is it even cold enough for this crazy beverage yet?!
Since I’ve been planning super far ahead so I can still share some delicious things once the baby arrives, I actually had this drink set for thirsty Thursday two weeks ago. Um, it was, like, 90 degrees here. Not only am I rarely a fan of hot beverages, I’m certainly not when I’m still sweating in October. NO THANKS.
Still though, all I’d like to drink is pumpkin hot chocolate. COCONUT pumpkin hot chocolate? Times ten. Yes.

But now! It’s cooled down a bit and is actually chilly in the morning. As in, chilly enough that yesterday I drank hot coffee which is very much unlike me since I will do anything and everything to stay Team Iced Coffee even when it’s snowing.

So this hot chocolate uses a pumpkin pie syrup that you will see more of when I share my Friendsgiving spread in a few weeks. It is SO good. I absolutely love it and you can utilize it in so many ways. And the hot chocolate alone is based off of my slow cooker coconut hot chocolate recipe, but I just used a saucepan because it’s not like I needed an entire slow cooker of hot chocolate in August.
Or did I?
Perhaps we all do.

This is one of those recipes that will be perfect on Halloween or during the holidays or on a weekend for game day. It’s something you can even keep on the stove for a few hours and just lightly heat on low before serving. It’s SUPER RICH.
I mean, it’s essentially like sipping chocolate and very very intense (it’s hot CHOCOLATE not hot COCOA) so you only need a small mug. It’s like a glass of dessert. You don’t even need dessert if you have this!
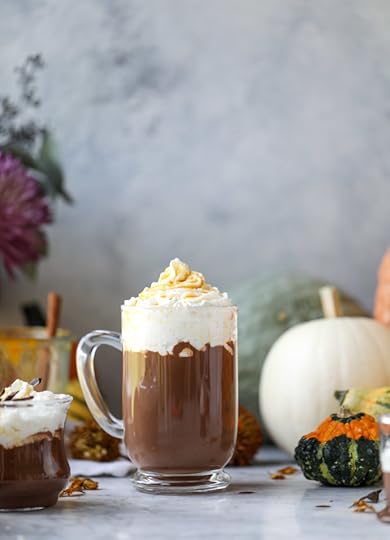
The base is made with coconut milk and for some extra coconutty flavor, you can totally stir in some coconut extract. And top it with coconut whipped cream! And then flaked toasted coconut, because we’re in coconut overload here.
It makes the pumpkin taste that much better. New favorite flavor combo, right here!


Print Recipe
Did you make this recipe? Leave a review »
Pumpkin Coconut Hot Chocolate
Yield: serves 2 to 4, is easily multiplied
Total Time: 15 minutes
Ingredients:
1 (13 ounce) can full-fat coconut milk
4 ounces high-quality semi-sweet chocolate, chopped
3 to 4 tablespoons pumpkin pie syrup
2 tablespoons dutch process cocoa powder
1/8 teaspoon salt
2 teaspoons vanilla extract
1/4 teaspoon coconut extract, if desired
whipped cream or coconut whipped cream for topping
flaked coconut for topping
pumpkin pie syrup
1 cup sugar
1 cup water
1/3 cup pumpkin puree
1/2 teaspoon pumpkin pie spice
1/2 teaspoon vanilla extract
Directions:
Heat the milk, chocolate, pumpkin syrup, cocoa and salt in a saucepan over medium-low heat. Whisk until the mixture is combined and cook until it is simmering and warm and slightly thickened. Remove from the heat and stir in the vanilla and coconut extracts.
Pour into mugs and top with toasted coconut and whipped cream.
pumpkin pie syrup
Heat the sugar, water, pumpkin puree and pie spice in a saucepan over medium-low heat. Whisk constantly until the sugar dissolves and let the mixture come to a simmer. Remove it from the heat and let it cool slightly, then add the vanilla extract. Strain it through a fine mesh strainer so you’re left with a syrup consistency. This can be kept in a sealed container in the fridge for a week or so!
All images and text ©How Sweet Eats.
Did you make this recipe?
Be sure to follow howsweeteats on instagram and tag #howsweeteats. You can also post a photo of your recipe to the howsweeteats facebook page.
I appreciate you so much!

Yesss I’m in love.
The post Pumpkin Coconut Hot Chocolate. appeared first on How Sweet Eats.
October 18, 2017
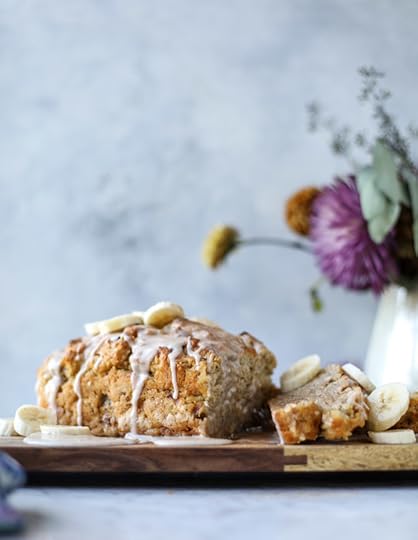
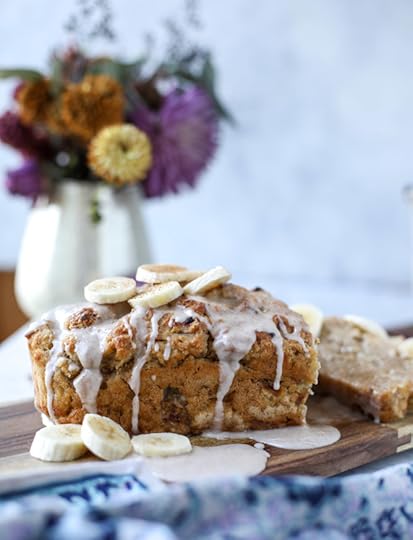
Banana Beer Bread with Brown Butter Glaze.
So this. Is interesting.
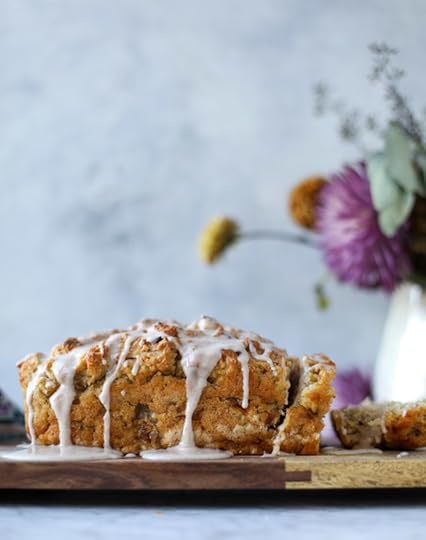
Beer bread. But made with bananas! Banana bread. But made with beer! So banana beer bread. Verrrry intriguing, right?
I want to eat this whole loaf right up, so yes!
I’m super into (very trashed up, very non-traditional) Octoberfest recipes because right now I’m currently in the midst of what is probably the only craving I’ve had this entire pregnancy and that’s homemade soft pretzels and beer cheese dip.
GAH. I want all those things for every meal right now. I’ve only had them once! I need them once more time before labor, right?
That really has nothing to do with this bread aside from the fact that it is beer bread and the pretzels are also bread and there is beer in the cheese I’m craving and and and… I’ll stop.
But really, that’s what I’m into these days.
This is what I’m into!
I’ve made a few different beer breads before on the blog and as I was contemplating one this year, I alllllmost went with another savory version. Like last year’s pumpkin cider bacon cheddar one. But then I was like WHAT IF. What if I did a sweeter one? A banana one?
Plus, I was already tempted because I had this Banana Bread beer in our fridge! It’s been there for, like, nine months at this point, but I mean… it was still okay. Right? RIGHT?
It was. We ate the bread and didn’t die. Woohoo!
The thing that I really like about beer bread is its dipping factor. It’s SO SO SO good dipped in soup and chilis, you know? I love that about it because it tends to be hearty and dense but flavorful and fluffy all at the same time. So I was nervous about that part when it came to the banana bread.
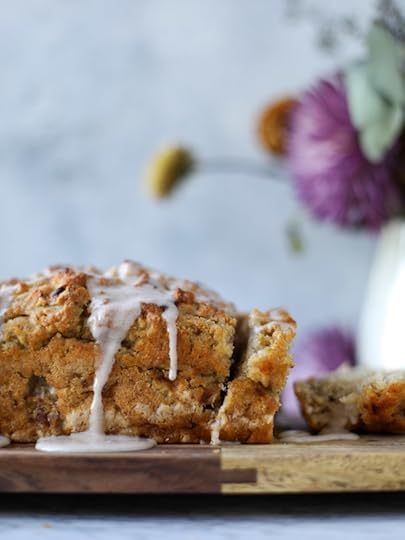
Here’s the key: brown butter glaze. The brown butter glaze makes up for any lack of dipping. I also think that a cinnamon butter would be AMAZING when spread on top, so there is that too. Sometimes beer bread is just so, well… bready, that is can almost occasionally verge on the dry side when you have a big mouthful. Hence the reason for dipping! And the glaze and butter.
YESSSS please.

Print Recipe
Did you make this recipe? Leave a review »
Banana Beer Bread
Yield: makes one 9x5 inch loaf
Ingredients:
3 cups all-purpose flour
3 teaspoons baking powder
1 teaspoon salt
1/2 teaspoon ground cinnamon
1/4 teaspoon freshly grated nutmeg
3 very ripe bananas, mashed
1 teaspoon vanilla extract
12 ounces of your favorite beer
6 tablespoons unsalted butter, melted
brown butter vanilla glaze
3 tablespoons unsalted butter
1 cup powdered sugar
2 teaspoons vanilla extract
1 tablespoon milk, if needed
pinch of salt
Directions:
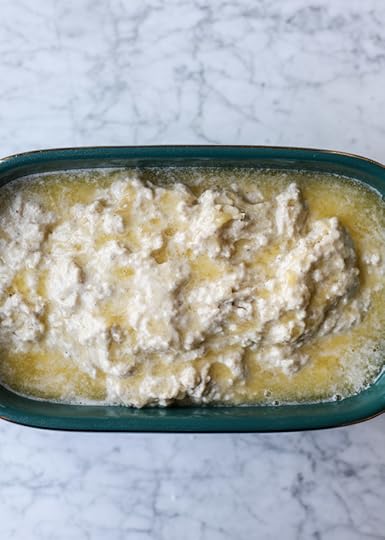
Preheat the oven to 375 degrees F. Spray a 9×5 loaf pan with nonstick spray.
Over a large bowl, sift together the all-purpose and whole wheat flours. Stir in the baking powder, cinnamon and the salt. Stir in the mashed bananas. Pour in the beer and stir until a batter forms. It will be thick. Spoon the batter in the greased loaf pan. Pour the melted butter over top. Bake for 50 to 55 minutes, or until the bread is golden brown and set in the middle. Remove the pan from the oven and let cool for about 30 minutes.
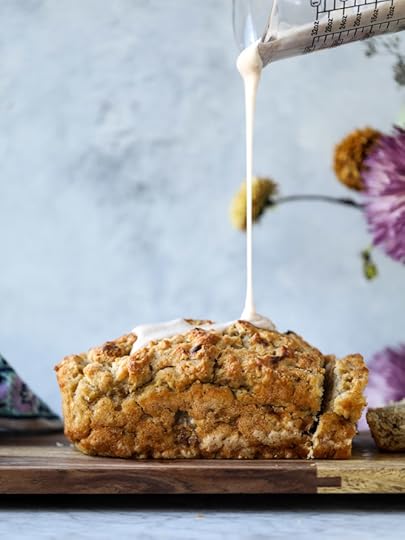
Drizzle with the brown butter vanilla glaze and slice.
brown butter vanilla glaze
Add the butter to a small saucepan over medium heat. Whisk constantly until the butter begins to bubble and as soon as brown bits start to appear in the bottom of the pan, remove it from the heat. This will take about 5 minutes. Add the brown butter to a bowl and whisk in the sugar and vanilla extract. If the mixture is too thick to drizzle, whisk in the milk if needed. Pour over the cake once it has cooled and serve!
adapted from this white cheddar beer bread
All images and text ©How Sweet Eats.
Did you make this recipe?
Be sure to follow howsweeteats on instagram and tag #howsweeteats. You can also post a photo of your recipe to the howsweeteats facebook page.
I appreciate you so much!
Totally certain you have to try it!
The post Banana Beer Bread with Brown Butter Glaze. appeared first on How Sweet Eats.
October 17, 2017
Tuesday Things.

1. How unbelievably stunning is this Bailey’s Chocolate Crunch Cake?
2. I don’t think I told you about how a few weeks ago, I went through the Starbucks drive-thru with ROLLERS IN MY HAIR (before we shot some videos and after I dropped Max off) after stressing over it and being like, who cares, just get coffee, no one will REALLY say anything to you… and the person at the window totally said something to me. She’s like “did you forget to take those out of your hair?” Face palm.
3. Annnnnnd yes I still put hot rollers in my hair because I live in the 90s forever. I guess the 80s. Even though I was, like, five.
4. I feel like it’s soooo talked down upon but um, I am actually obsessed with the idea of doing Elf on the Shelf for Max. In fact, I think that I once (or thrice) mentioned wanted to do it before I had kids so badly that I just wanted to do it for us. I’m not so much concerned with the message of it other than it just seems… super fun. Why does it get such a bad rap?
5. So right now I’m really only watching This Is Us (still killing me, and omg, what is Kevin doing?) and Grey’s Anatomy. I also sort of watch Scandal (the very end got me last week!) and How to Get Away with Murder, even though I’m majorly sucked into Grey’s again. What is this? 2006? I’m also excited but terrified for the Walking Dead to start!
6. It’s no secret that I’m the wordiest person ever and it’s really terrible when it comes to email. I just can’t cut things short. This is interesting though… 4 ways to make your painfully long email shorter. Were they speaking directly to me?
7. Speaking of long emails, I find this email exchange between Pink and Eminem to be hilarious because it’s all so true. Like basically mine and Eddie’s emails, exactly.
8. Did you see that AOL instant messenger is shutting down for good? I didn’t even realize it was still going, but some of my most humiliating memories include my away messages AND what was in my profile. OMG. Just no.
9. Every year at this time I talk about how I really hate dressing up for Halloween. I’m going to have to suck it up eventually so I can dress up for Max (and this new babe!), but I’m also curious as to what you’re dressing up as if you are dressing up! My forever go-to as a kid was Jem. And then a black cat. Reeeeeal creative. I know.
The post Tuesday Things. appeared first on How Sweet Eats.
October 16, 2017
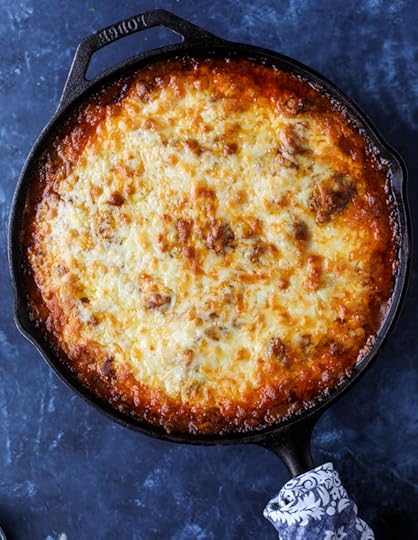
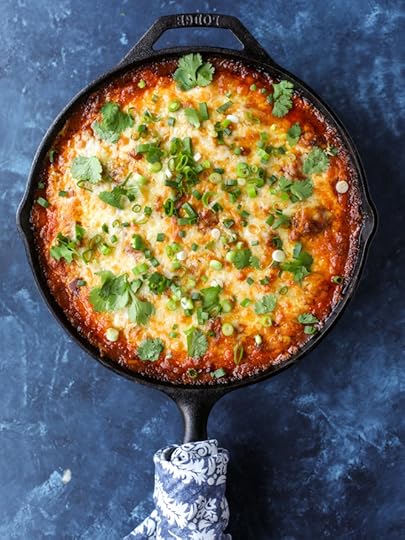
Cheesy Chicken Tamale Pie.
Let me introduce you to our new favorite meal.
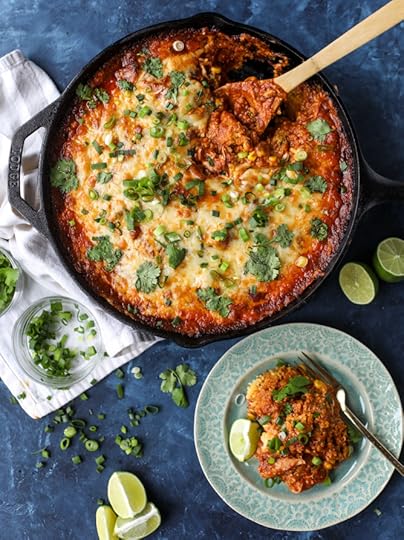
When I told Eddie that I was making chicken tamale pie, he looked at me skeptically because he had no clue what it was. The minute the words “cornbread base” came out of my mouth, he was all SOLD! before I even could tell him what else was in the dish.
Really, this skillet here is made up of every single thing that he loves and mostly of what I love too. Going to eat it forever. Okay bye.

Now, it’s not the prettiest dish when served. There is really no way to serve this warm without it appearing to be a slop-pile mess. But that doesn’t take away from the deliciousness.
Don’t judge it!
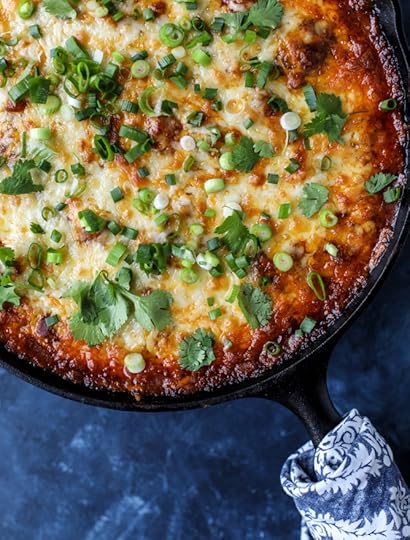
Also, can we please take a moment for the cheeeeeeeeeese.
Oh my gosh.
So here’s the thing. This tamale pie is a little on the high maintenance side. It doesn’t have to be. But this one has a homemade cornbread base AND a homemade enchilada sauce. Neither take a long time to make, but there will be multiple dishes adding up in the your sink, FYI. Most tamale pies I’ve seen in the past are made from a cheater’s version which seems completely acceptable to me if you are in a rush. Boxed cornbread, canned enchilada sauce, rotisserie chicken – and boom, you’re done.
If you’re dreading dinner and have to go to the store anyway, you can grab all of those things and throw this together as such. For me, I never have cornbread mix on hand but I do always have ground cornmeal. This homemade enchilada sauce has completely RUINED me because I can no longer use canned sauce (nor do I want to) and it really only takes 10 minutes. It is so freaking flavorful! The ingredient list looks long but it’s mostly made up of spices that go in the sauce – traditional “taco” ones that you most likely have in your pantry. If you’re missing something like smoked paprika or cayenne, leave it out! No biggie. I’d say the chili powder and cumin are the biggest game players so as long as you have those, you’re golden.
And then for the chicken? Well, rotisserie can totally work. I had some leftover shredded chicken breasts from making a Thai chicken soup a few days before (OMG was it ever good… will tell you about it soon!) so I already had that.
The only other secrets I used? Canned green chiles and the roasted corn from Trader Joe’s. Since we can’t find ears of corn anymore, the roasted corn totally took its place and it was fabulous. Sometimes that corn can almost taste like an ashtray or something, but as long as you use just a bit, it’s amazing.
This combination is seriously straight out of my dreams.
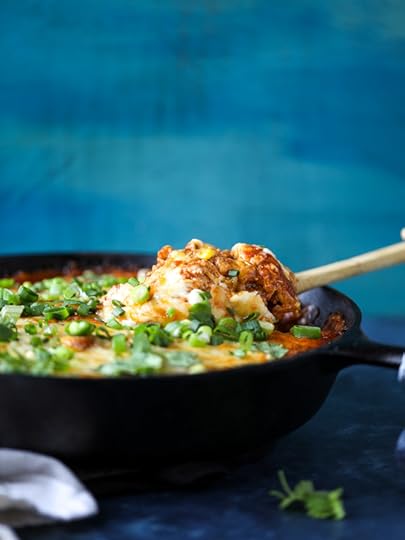
As for the rest? You can totally make it your own! Add black beans if you want and serve it with rice if you want something more, but really this is a complete meal right here in this skillet. It’s crazy filling and satisfying and total comfort food. After we ate dinner, I told Eddie that I can see this being a meal that I make once every two weeks until next Spring, because we loved it THAT much.
Bonus: it also reheats really well too. YESSSSSSSSSSSS.

Annnnd now you totally know what’s for dinner tonight!

Print Recipe
Did you make this recipe? Leave a review »
Cheesy Chicken Tamale Pie
Yield: serves 4 to 6
Total Time: 1 hour
Ingredients:
enchilada sauce
2 tablespoons olive oil
2 tablespoons flour
1 1/2 cups low-sodium chicken stock
15 ounces tomato sauce
2 tablespoons tomato paste
2 tablespoons chili powder
1 teaspoon cumin
1 teaspoon onion powder
1/2 teaspoon garlic powder
1/4 teaspoon smoked paprika
1/8 teaspoon cayenne pepper
1/4 teaspoon salt
1/4 teaspoon pepper
cornbread base
1 cup all-purpose flour
1 cup finely ground cornmeal
1 tablespoon baking powder
1 teaspoon sugar
½ teaspoon salt
1/2 cup butter, melted
3/4 cup milk
1 egg
1/2 cup cooked corn (I used the roasted corn from Trader Joe’s!)
4 ounces freshly grated sharp cheddar cheese
chicken topping
1 1/2 cups cooked, shredded chicken
1/3 cup cooked corn
1 (4-ounce) can diced green chiles
6 ounces freshly grated white cheddar cheese
sliced green onions for topping
fresh cilantro for topping
lime wedges for spritzing
Directions:
Preheat the oven to 425 degrees F.
enchilada sauce
Heat a large saucepan over medium heat and add the olive oil. Whisk in the flour and cook until it is golden brown, about 2 minutes. Add the remaining ingredients and whisk together, bringing the mixture to a simmer. Reduce the heat to low and cook for 5 more minutes before using.
cornbread base
In a large bowl, whisk together the flour, cornmeal, baking powder, sugar and salt. In a smaller bowl, whisk together the melted butter, milk and egg. Stir the wet ingredients into the dry until just combined. Fold in the corn and the cheddar cheese.
Pour the cornbread into a 10-inch cast iron skillet. Bake for 15 to 18 minutes, or until the cornbread is just set. Remove it and poke holds into the bread. Drizzle a 1/2 cup or so of the the enchilada sauce overtop of the cornbread.
chicken topping
In a bowl, stir together the chicken, green chiles and the corn. Stir in the remaining enchilada sauce (or at least a cup or so of it) and 2 ounces of the cheese. Spoon it on top of the cornbread base. Cover with any extra enchilada sauce and the remaining cheddar. Bake for 25 to 30 minutes, until golden and bubbly.
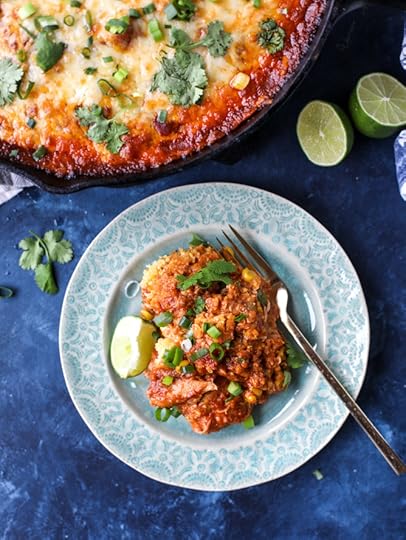
Remove from the over and cover with the green onions and cilantro.
All images and text ©How Sweet Eats.
Did you make this recipe?
Be sure to follow howsweeteats on instagram and tag #howsweeteats. You can also post a photo of your recipe to the howsweeteats facebook page.
I appreciate you so much!

Heart just skipped a beat.
The post Cheesy Chicken Tamale Pie. appeared first on How Sweet Eats.
October 15, 2017
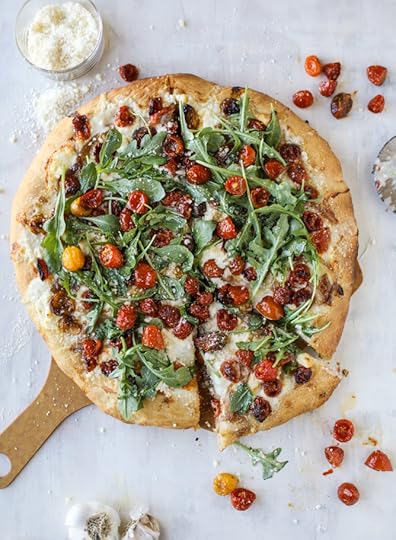
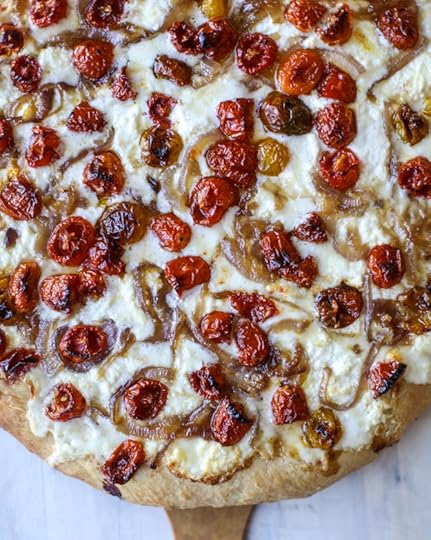
Slow Roasted Cherry Tomato Pizza with Garlic Cream and Arugula.
[This post is sponsored by KitchenAid! I’m so excited to share some of the appliances we put in with our kitchen remodel.]
This is my dream in a pizza!
If you’ve been following me for a while, then you know that tomato sauce is certainly not my BFF. I never cared for it growing up and while I’ve always really loved pizza and even the traditional tomato sauce based pizza, I’d always pick white pizza if it was on the menu. White pizza it is!
My taste buds are practically exploding just seeing this pizza again. It’s so packed with tons of my favorite flavors that I can’t even stand it. And here’s why!
The recipe is inspired by a pizza that I love so much at Ironborn in Smallman Galley. The first time I had it, my mind was blown. The base is a garlic cream sauce which is so silky and perfect. But the additions on top are what really seal the deal for me. I’ve wanted to make it at home since my first bite and have been waiting for the perfect time.
Let me tell you: the time is NOW.
This post is in partnership with KitchenAid and I am so so so excited to tell you about some of the new appliances I’ve been using in my kitchen since the remodel.
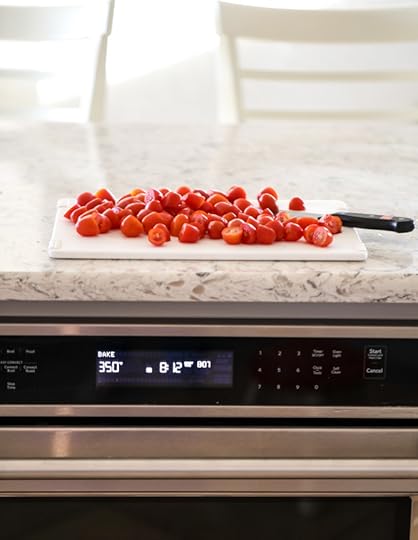
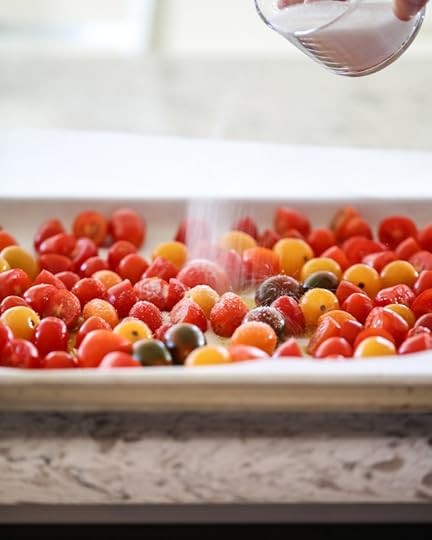
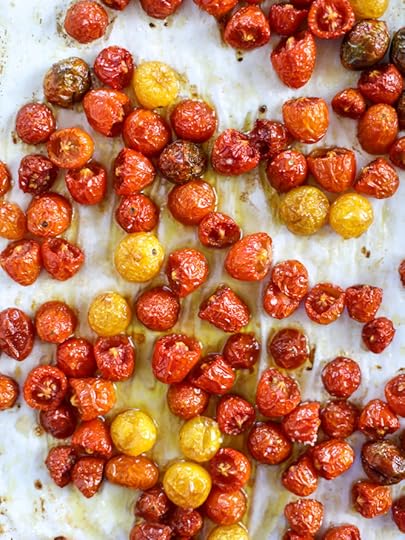
First, the slow roasted cherry tomatoes. AH! This is the best time of year for these. First, if you have some garden cherry tomatoes hanging around, you can totally use them here. But if your tomatoes are long gone and you’re buying tomatoes are the grocery store each week that are somewhat subpar, this is such an awesome way to use them up. It makes them so, so sweet and caramely and wonderful.
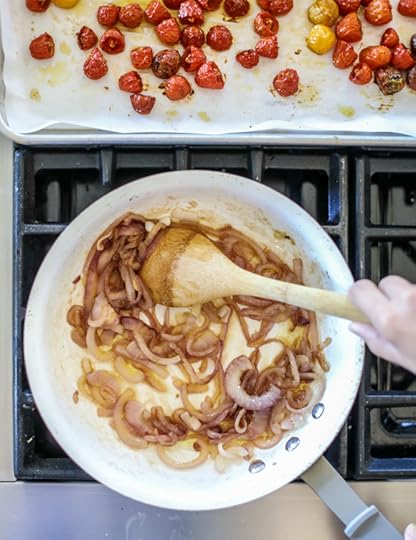
And while it does take a while and makes the pizza a little more high maintenance than regular old pizza, we’re also adding caramelized onions to the top! They take a good 45 minutes or so to prep ahead of time, so you can knock both out at once. And this can all happen while your dough is rising, so it’s perfect. I slow roast the tomatoes in my KitchenAid® Wall Oven at 300 degrees for nearly two hours which turns them into tomato candy. Divine. It was almost difficult to put them on top of the pizza because, well… I just wanted to eat them right off of the pan.
I love these wall ovens so much because I can completely trust them. They cook and bake every dish so evenly that it actually blows my mind. I never knew what a REAL oven was supposed to do, apparently. Ha! The preheating is done by their Even-Heat™ system and makes sure to remove ALL the cold spots in the oven. Which meant that every single one of my tomato babies was slow roasted to perfection!
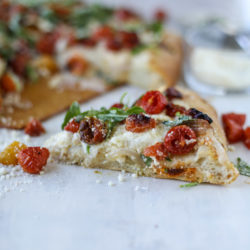
While it may not be a set-it-and-forget-it type of pizza recipe, the flavor more than makes up for it. It’s cheesy, caramely and sweet with a bite from the garlic sauce and some pepperiness from the arugula topping.
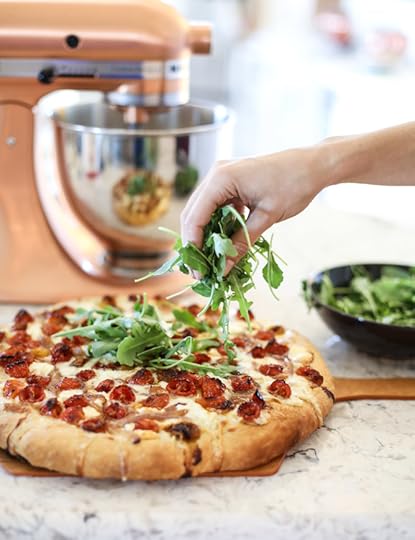
I adore an arugula topping on my pizza. So often it comes with a deli meat, like topped on pizza with prosciutto and capocollo or something, which isn’t exactly my favorite. So to have the cool, crisp and refreshing arugula on TOP of the sweet and warm tomatoes? YES. Best combo ever.
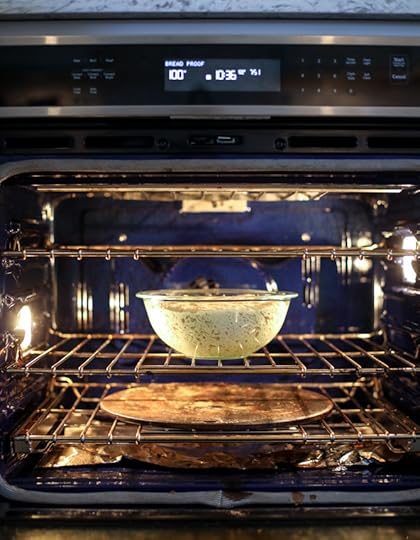
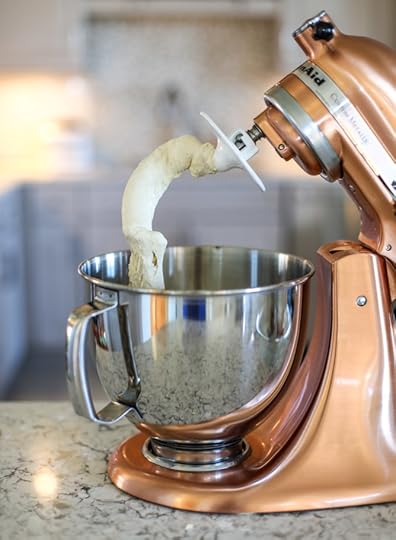
When it comes to the dough, you guys know that I’ve used my trusty pizza dough recipe for years now. I rarely ever use anything else. I use the dough hook on my KitchenAid® Stand Mixer to mix up the silky dough because it’s SO easy. I’ve always loved using the dough hook because the dough is more evenly kneaded and smooth than when I use my hands. And what’s so exciting is that I used to have to turn on my oven and set the bowl on top, but now, with my KitchenAid® Wall Oven, there is a proof setting! This was one of the main things I was looking forward to with this oven and it’s awesome. Works like a dream. I use it for pizza dough every week but have also used it for cinnamon rolls and pull apart breads and it’s so reliable. Like so much more reliable than my old trick of setting the bowl on top of the oven and waiting.
For sure. Before, I’d inevitably end up “cooking” some of the raw dough because my system was so unreliable. Now, there isn’t even a possibility of that happening. Eddie just used it last week for the first time when he made pizza dough and his mind.was.blown.
Next, we have this amazing garlic cream sauce.
With this being your base, you don’t want to make it too far ahead of time. But the good news is that it only takes a few minutes. So once everything else is ready, go for it!

A lot of you have asked about the cooktop we installed in the center island. In my kitchen remodel post I talked about how I’ve wanted one for ages because my grandma used to have one in her kitchen and I adored it. Being that I cook like a mad person (and tend to do large batch cooking days at once), I knew I wanted a BIG huge cooktop and there was never any doubt that I was straying from a gas cooktop. We installed this KitchenAid® 36-inch, 6 burner Gas Rangetop and it might have been the best decision of the entire kitchen. It’s huge and I use it every single day. It’s wonderful to be able to use four burners at once without things being crowded and crazy. The burners are large and come to temperature almost instantly, which I love since I’m an impatient millennial.
There are two 20K BTU burners, three 15K BTU burners (which still are huge and cook things quickly under control!) and one smaller 5K BTU burner that’s for melting and simmering. I use that one all the time to melt butter and bring cream to a simmer. For the garlic cream sauce, I used one of the 15K BTU burners and it was done in a few minutes. Super smooth and creamy and ready to go right on that dough.
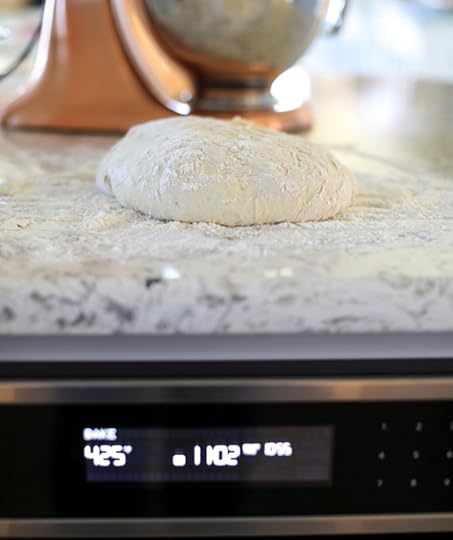
I always keep a pizza stone in my oven and this hasn’t changed since my remodel. What has changed is how quickly my wall oven can come to temperature now because I make pizzas around 425 to 450 degrees F. It no longer takes an hour to come to temperature! The pizza bakes like a dream, as you can. How can you not want to devour that?
Also, can we discuss how super easily these oven trays slide out?! I’ve dropped many a pizza on my hot hot hot oven floor (I even wrote about it in my first book!) so it’s nice to not really have to worry about THAT situation.
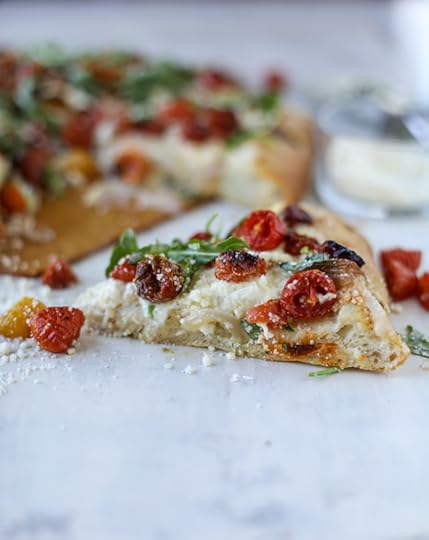
Once the pizza is baked and topped with arugula… oh my gosh. It’s such a major flavor bomb. It is so fantastic, so satisfying and really the only pizza I want to eat at the moment.
Print Recipe
Did you make this recipe? Leave a review »
Slow Roasted Cherry Tomato Pizza with Garlic Cream and Arugula
Yield: serves 4
Total Time: 2 hours
Ingredients:
dough
1 1/8 cups warm water
3 teaspoons active dry yeast
1 tablespoon honey
1 tablespoon olive oil
3 cups all-purpose flour
1 teaspoon salt
toppings
2 pints cherry tomatoes, halved
1 tablespoon olive oil
1 1/2 tablespoons sugar
1/2 teaspoon salt
3 tablespoons unsalted butter
2 sweet onions, thinly sliced
2 teaspoons light brown sugar
2 cups heavy cream
1 tablespoon unsalted butter
6 garlic cloves, minced or pressed
1 tablespoon all-purpose flour
8 ounces full-fat ricotta cheese
3 to 4 cups fresh baby arugula
Directions:
In the bowl of your KitchenAid Stand Mixer fitted with a dough hook, combine water, yeast, honey and olive oil. Mix with a spoon, then let sit until foamy, about 10 minutes. Add in 2 1/2 cups flour and salt and with the mixer on low speed, stir until the dough comes together but is still sticky. Using your hands, form the dough into a ball and work in the additional 1/2 cup flour, kneading it on a floured surface for a few minutes. Rub a bowl with olive oil then place the dough inside, turning to coat. Cover with a towel and place in a warm place to rise for about 1-1 1/2 hours.
After the dough has risen, punch it down and place it back on the floured surface. Using a rolling pin or your hands, form it into your desired shape (sometimes I use baking sheets and do rectangles or free form pizzas – this specific dough will yield one pizza large enough to feed about 3-4 people) and place on a baking sheet or pizza pan. Place the towel back over the dough and let sit in the warm place for 10 minutes.
Heat the oven to 425 degrees F. (If I use my pizza stone, I heat my oven to 475 degrees and bake for 15 minutes. If you’re just using a baking sheet, follow the directions below for baking and set to 425 degrees.)
toppings
Preheat the oven to 300 degrees F. Line a baking sheet with parchment paper. Place the cherry tomatoes on the sheet and drizzle with olive oil. Sprinkle with sugar and salt and toss well. Roast for 1.5 to 2 hours, tossing every 30 minutes, until the tomatoes are super caramely and shriveled and sweet.
While the tomatoes are roasting, heat a skillet over low heat and add the butter. Once melted, stir in the onions with a pinch of salt and the brown sugar. Cook, stirring occasionally, until the onions get caramely and soft, about 35 to 40 minutes.
To make the garlic cream sauce, heat a saucepan over medium-low heat and add 1 1/2 cups of the cream and the butter. Stir in the garlic. In a shaker bottle (or in a bowl with a whisk), shake together the remaining 1/2 cup of cream and flour. It will create a thick slurry. Pour/scoop it into the cream mixture and stir well. Cook for 2 to 3 minutes, stirring often, until the cream sauce thickens.
Place the ricotta cheese in a fine mesh strainer and press it gently with a paper towel to release some of the liquid.
Begin to make your pizza! Spread the garlic cream sauce into the pizza, leaving a 1-inch border or so around edges. Top with the ricotta cheese. Add the caramelized onions and the cherry tomatoes on top. Bake for 20 to 25 minutes (or around 15 to 20 minutes if using the pizza stone) until the cheese is golden and bubbly and the crust is golden. Remove the pizza and let is cool for 10 to 15 minutes so the center cream sauce can set. Top with the fresh arugula and slice.
All images and text ©How Sweet Eats.
Did you make this recipe?
Be sure to follow howsweeteats on instagram and tag #howsweeteats. You can also post a photo of your recipe to the howsweeteats facebook page.
I appreciate you so much!
The post Slow Roasted Cherry Tomato Pizza with Garlic Cream and Arugula. appeared first on How Sweet Eats.
October 14, 2017
Currently Crushing On.

I love that we’re right in the midst of October! Best season and one of the best months. I hope you have a wonderful FALL weekend. xoxoxo
Favorites of the week:
totally want to make this halloween candy cart!
one pot sloppy joes that look unreal.
love the idea of this apple butter pizza.
ohhhh my gosh. whipped ricotta with roasted pumpkin.
baked mozzarella sticks?! these look perfect.
a crazy stunning apple tart.
how good does this pumpkin chicken chili look?!
dulce de leche cheesecake bars. i’m dead.
perfect potato pizza with brussels!
maple baked pears with chocolate crumble and coconut cream? mmmm.
craving these homemade pork wontons. yummmm.
oooooh yes. caramelized apple brown butter baked oatmeal.
pumpkin pudding cake. i’m into it!
The post Currently Crushing On. appeared first on How Sweet Eats.
October 13, 2017
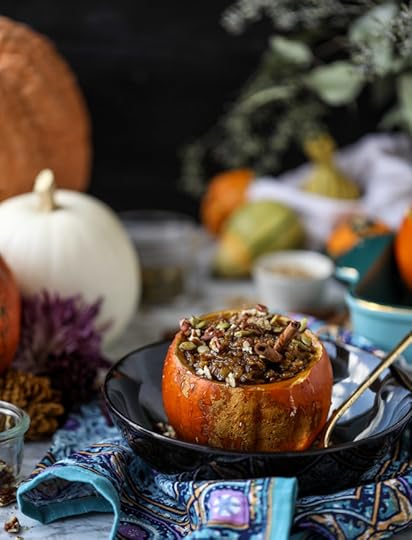
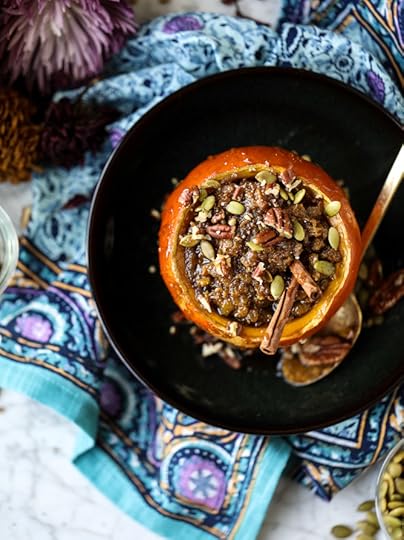
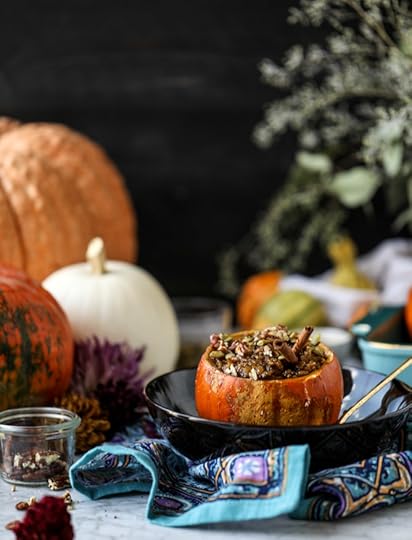
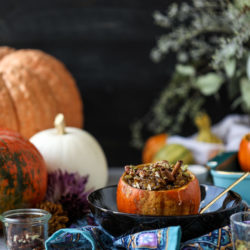
Pumpkin Pie Oatmeal Brûlée.
There might not ever be another way to eat oatmeal.
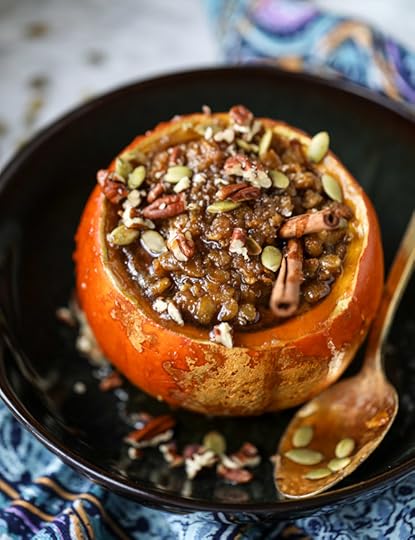
A slightly crunchy, sugary topping that is crisped up on pumpkin pie oatmeal?
WELL.
My life is over now that I’ve discovered this.
I’m also very much considering if this is a legit breakfast that can be eaten every single day. Probably not. I also really love this sort of oatmeal for dinner occasionally too though. Perhaps that is more acceptable.
For “not being an oatmeal person,” I’ve now shared two oatmeal posts in the last two weeks and I’m not hating it. I’m usually not even an oatmeal person once the weather cools down (um, not that it’s doing THAT), but I am an oatmeal person when it comes to pumpkin and apple spice and what not.
If you’ve been following me for a while then you know that one of my most embarrassing secrets is how much I loved (um, still love, present tense) the Quaker instant oatmeal packets. But that’s it. I couldn’t really get behind real oatmeal unless it was full of tons of brown sugar.
Which this one sort of is. Sort of!
But it also has a lot of pumpkin and I think that’s a vegetable so we’re good. And there is fiber and stuff. And cinnamon and spice!
This is practically kale if you ask me.
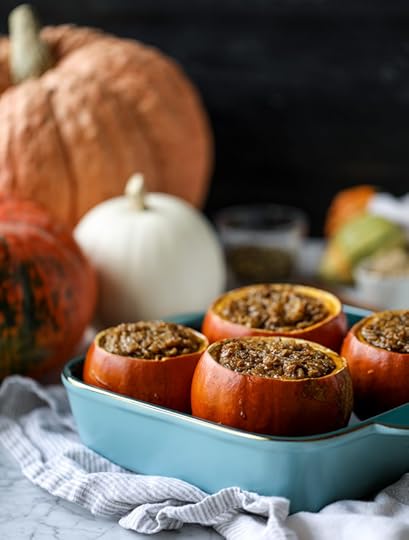
So! You totally don’t have to put the oatmeal inside of these little sugar pumpkins. I did that for fun. It’s obviously more time consuming but I do love the presentation if you wanted to serve this for some sort of brunch or what not. You could prep the pumpkins ahead of time (like maybe the night before) and it would be worth it because they are so cute.

But. The key here is to make the brûlée topping (that I first saw on serious eats) and throw it on top of the pumpkin oatmeal and let it get all crunchy and amazing and sweet. Texture perfection! I love this on top of oatmeal so, so much. It’s the star of the show here.
Now I’m wondering if we could do that bourbon oatmeal inside of these pumpkins? I’m thinking yes.
Print Recipe
Did you make this recipe? Leave a review »
Bruléed Pumpkin Pie Oatmeal
Yield: serves 4
Total Time: 20 times
Ingredients:
2 cups water
1 cup old-fashioned rolled outs
1/2 teaspoon salt
1/2 teaspoon pumpkin pie spice
1/2 cup pumpkin puree
1/4 cup dark brown sugar
1/4 cup heavy cream, plus extra for drizzling
1 teaspoon vanilla extract
roasted peptitas for topping
toasted pecans for topping
optional: hollowed out sugar/pie pumpkins for serving
brulee topping
1/2 cup packed dark brown sugar
2 tablespoons water
Directions:
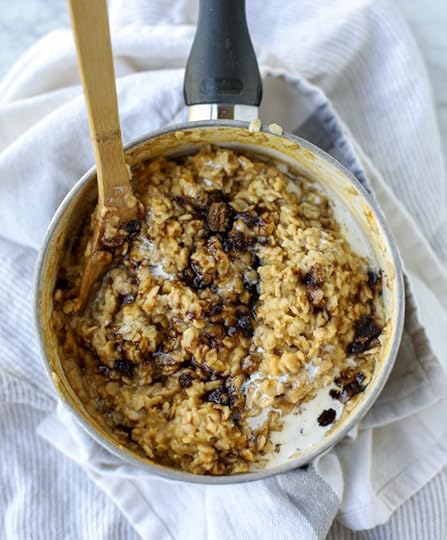
Bring the water to boil. Add the oats and the salt and reduce the heat to a simmer. Cook, stirring often, until the oats are thick and creamy, about 10 to 15 minutes. Stir in the pumpkin pie spice, pumpkin puree, heavy cream and brown sugar. Remove from the heat and stir in the vanilla extract.
Place the oatmeal in oven-safe bowls (or you can use hollowed out pie pumpkins like I did!). Top with the brown sugar brulee paste. Broil for 2 to 3 minutes (or longer, depending on your broiler), watching the entire time to make sure it doesn’t burn. Top the oatmeal with the roasted pepitas and pecans. And an extra drizzle of heavy cream if desired!
Just a note, if you want to use the pumpkins like I did, I did bake the oatmeal in the pumpkins for about 20 minutes or so and then did the broiling. Definitely not necessary, but cute if you want to take things over the top!
brulee topping
Stir together the sugar and water until a paste forms.
All images and text ©How Sweet Eats.
Did you make this recipe?
Be sure to follow howsweeteats on instagram and tag #howsweeteats. You can also post a photo of your recipe to the howsweeteats facebook page.
I appreciate you so much!

This might kind of taking breakfast for dinner over the top.
The post Pumpkin Pie Oatmeal Brûlée. appeared first on How Sweet Eats.
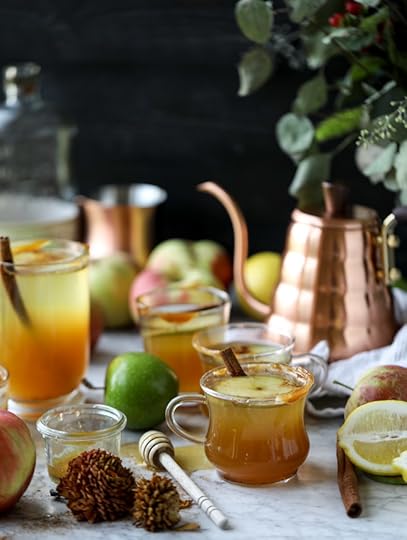
October 12, 2017
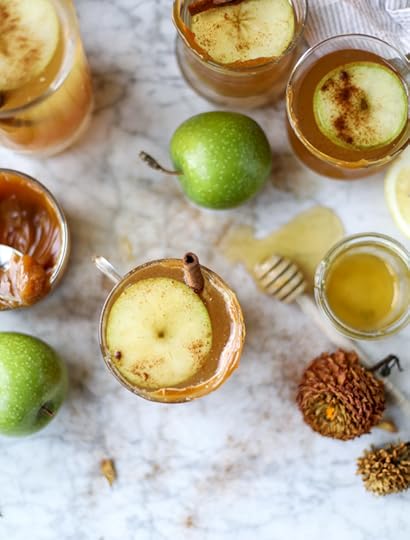
Caramel Apple Hot Toddy.
This is how you make a hot toddy your “thing.”

Add some caramel. Add some honeycrisp syrup. (Have I overused my honeycrisp syrup yet this year? Please say no.) Add a slight spritz of lemon. Make a hot and steamy caramel apple hot toddy!
Then try to tell me it’s not your thing. It will totally be your thing! I promise.

It’s like the drink version of one of those green apple, caramel-covered lollipops that you occasionally would get while trick or treating. One of those sounds so amazing to me at the moment aside from the fact that when I chipped my tooth ON A CROISSANT a few weeks ago, I figured that I shouldn’t eat something like a freaking caramel.
Oooooomph.
And no, I’m really never getting over the fact that my tooth chipped on a croissant. EVER.
If a croissant isn’t the most pillow-like food there is, I don’t know what is.

Truth be told, I don’t really looooove hot beverages. I’ve talked about this for ages, with it being most likely the reason that I didn’t love coffee back in the day and couldn’t really even bring myself to want get into it. In fact, I don’t love beverages at extreme temperature, be it hot OR cold. I’m the weird person who drinks water without ice and what not. You know.

Everyone has always talked about how warm beverages are comforting and relaxing but I never really felt that way. Until I got into coffee that is. Now, I will always prefer it iced, but the occasional hot coffee is okay. I really love hot coffee in the form of eggnog lattes and can’t WAIT for that season.

One thing that you all know I can’t get behind is tea. To me, tea tastes like dirty water. I mean, maybe if I add a ton of milk and sugar and spice or something I’d be into it. But regular tea? Meh. Whatever.
So I was pleasantly surprised a few years ago when I was really into a hot toddy. Though I guess I shouldn’t be since it contains bourbon?

This is one of theeeee best flavor combinations ever. Your favorite bourbon, a small spoonful of caramel that melts into the warm liquid, the honeycrisp syrup… ooooohhh. It’s divine. Puhlease let this recipe grace your weekend.

Print Recipe
Did you make this recipe? Leave a review »
Caramel Apple Hot Toddy
Yield: makes 1 drink, is easily multiplied
Ingredients:
2 ounces bourbon
1 tablespoon caramel sauce
1 tablespoon honeycrisp syrup
1 lemon, juiced
1/4 cup hot water
Directions:
Fill a cup or mug with the bourbon, caramel sauce, syrup and lemon juice. Pour in the hot water and stir until the caramel and honeycrisp syrup dissolves.
All images and text ©How Sweet Eats.
Did you make this recipe?
Be sure to follow howsweeteats on instagram and tag #howsweeteats. You can also post a photo of your recipe to the howsweeteats facebook page.
I appreciate you so much!
Clearly this is the answer to everything.
The post Caramel Apple Hot Toddy. appeared first on How Sweet Eats.
Jessica Merchant's Blog

- Jessica Merchant's profile
- 53 followers

