
Aventuras De Viaje's Blog, page 7
October 10, 2017
Climb Every Mountain: The Best Mountains for Beginners
Everyone has a reason why they’re getting cabin rentals in Colorado. Some might be renting one just in time for the skiing season, while others might be there for the X games. You, on the other hand, might be there to embark on a whole new experience: mountain climbing. Of course, with hundreds of mountains to choose from, it can be hard to know where to start. Here are a few of the best mountains for beginners. Perhaps with this guide, you’ll decide where to start then maybe later try to conquer the others.
The Best Mountains for Beginners
Grays and Torreys
Grays and Torreys may be a bit crowded compared to the other mountains on the list, but depending on the person, this can be either a pro or a con for you. It can be a pro if you’re seeking companionship and camaraderie during your climb. It can be a con if what you seek is solitude and to be alone in your own thoughts.
Grays is 14,270 feet while Torreys is 14,267 feet tall. There’s a good, steady, wide main trail for you to follow, so it will be pretty hard to get lost on the way to the top of these mountains. The best part is that Grays and Torreys are connected by a path akin to a saddle, making it feel like you’re getting two climbs for the trip (or price) of one. From the top, you’ll spot a few mountains around like Mt. Bierstadt, Mt. Sniktau and Mt. Parnassus. Oh, and was the lovely view mentioned? Be warned though, if you’re getting there in a car you better leave home early because there is some competition for a parking spot.

Grays Peak Trail. By Xnatedawgx (Own work) [CC BY-SA 4.0], via Wikimedia Commons
Huron Peak
Located in Buena vistas, Huron Peak stands at 14,012 feet and at that height, it ranks a mere 52nd among the 53 mountains rising above 14,000 feet. Officially named in 1956, nobody is actually sure where the name came from, but there is some speculation that it came from the Native American tribe, the Huron.
Climbing the mountain is a steady climb, although it is recommended to bring a walking or trekking poles because despite being considered one of the beginner mountains, Huron Peak is still pretty steep. At around 10,600 feet it is a basin on which you can stop at to look and admire the Three Apostles and Ice Mountain. It’s highly recommended to climb the mountain during the summer months of July and August. Since Huron Peak is located in the Rocky Mountains, better check the weather before leaving to climb as this area is well known for carrying a lightning risk.

View of West Apostle from Huron Peak. By jokermanj (Amazing View from TopUploaded by xnatedawgx) [CC BY 2.0], via Wikimedia Commons
Mount Bierstadt
Named after Albert Bierstadt, a German-born American landscape painter who is known to be the first climber to reach the mountain’s summit, Mount Bierstadt is often thought of as one of the most accessible mountains above 14,000 feet.
When climbing Mount Bierstadt, it is highly recommended to wear waterproof clothing as early on in the climb you will get wet when crossing the creek. Don’t worry, a swimsuit is not needed as the water will be only up to your knees. Once you get to the top of this 14,060-foot mammoth, you will get a view of Mount Evans as well as Grays and Torreys peak. It’s a mostly easy climb, with no need for a trekking stick, although there are some steep spots.

By David Herrera from Albuquerque, NM, Bernalillo [CC BY 2.0], via Wikimedia Commons
Quandary Peak
If you have a dog you like to take with you when you climb, then you’ll be glad to know Quandary peak allows dogs, although they must be kept on a leash at all times. Since it can be a bit rocky, it would be best to make them wear shoes so as to prevent the sharp stones from hurting their precious paws. Expect a lot of people traffic since this 14,265-foot mountain is quite popular.
The trail up to Quandary peak is class 1, meaning you’re mainly walking on well-maintained, even terrain. This is probably why as mentioned, it’s a popular mountain to climb. In addition, it’s near a ski town, so you won’t have any problems in getting any supplies you may have forgotten in your cabin. Although it is class 1, it can be steep just like Huron peak, so better bring and use hiking poles. On the way up, you might spot a few mountain goats, but don’t stop to pet them as they’re known to be quite unfriendly. Once you get to the apex, you’ll get to see Pacific Peak, Crystal Peak, and Mt. Democrat to name a few. In the winter, you might want to come back to Quandry peak since its steep slopes are ideal for skiers.

Mountain goats on Quandary Peak. Via Pixabay.
Of all the fourteeners in Colorado, only Mount Sherman has had an aircraft successfully land on its summit back in 1967. It’s 14,036 feet high and the best part is, you can drive up to 12,000 feet, a feat you won’t be able to do on most mountains. If this is your first time ascending a mountain, then Mount Sherman should be number one on your list.
Mount Sherman is so easy to climb, you’ll wish all your ascents were this pleasant and wonderful. Sherman Mine used to be on the mountain, which is why you’ll see a bit of history on your way up, mainly thanks to the rotting, old mining buildings. Don’t venture into the area near the mines since it is on private property.
No matter what mountain you’ll be climbing on, always wear a good pair of shoes, bring plenty of water, some snacks, and wear a lot of sun-block. Also, don’t forget to protect your eyes with a pair of UV repelling sunglasses and wear a cap to shield your face from the sun.

The summit of Mount Sherman. By Stargazer7121 (Own work) [Public domain], via Wikimedia Commons
Author: Unknown.
Have you got some other ideas for the best mountains for beginners? Let us know them in the comments.
The post Climb Every Mountain: The Best Mountains for Beginners appeared first on Survive Travel.


October 8, 2017
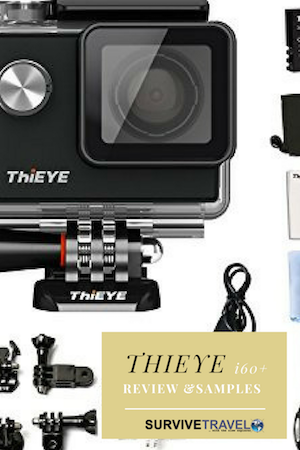
ThiEye i60+ Samples and Review
This ThiEye i60+ review takes a look at the video and photo modes of the ThiEye i60+. It includes ThiEye i60+ samples with video footage and still photo comparisons. It also gives a general review of the ThiEye i60+ features, settings, and usability.
Before purchasing the ThiEye i60+ Action Cam I did a lot of research on underwater cameras. I wanted something that could take better photos for this website. Up until now, I have been using my camera phone. I also wanted decent video capability to upload to youtube. One critical feature I wanted was the ability to take it underwater. I actually had my heart set on the Olympus Tough TG-5 but was unable to find it in Cartagena or Santa Marta. I bought the ThiEye i60+ Action Cam as a cheap alternative until I can get my hands on an Olympus TG-5.
ThiEye i60+ Samples and Review
I took all these ThiEye i60+ Action Cam samples in Taganga, where I lived whilst in Santa Marta (Colombia). Unless stated, the samples are un-edited.
Contents and Accessories
Here’s what you get with the ThiEye i60+. An * means that item does not come with the i60e. Other than that the two models seem to be identical.
Waterproof and Shockproof housing. Waterproof up to 60 meters.
ThiEye i60+ Action Cam
*Skelton Backdoor. Not waterproof, but allows for better sound recording when using the housing.
2 x Batteries
*Adapter
360º rotating quick release buckle
*360º rotating vertical release buckle
Flat adhesive mounts
2 x Adhesive stickers
*2 x Anti-fog inserts
USB Cable
Quick Start Guide
*Wiper (lens cleaner)
*Cloth bag
Optional Accessories, not included or not pictured. Bike mount, floating hand grip, chest harness, wrist strap.

Operation and Ease of Use
I found the ThiEye i60+ easy to use. There are only four buttons so remembering which does what is a piece of cake. The buttons work well. Even in the waterproof casing, it was easy to go through the modes and change settings.
Buttons
Power/Mode. On the front. Hold it down to turn the camera on/off or press and release to scroll through the different modes.
Shutter/Select. On the top. Press this to activate whatever mode your selected.
Up/Wifi. The top button on the side. Triples as a quick button for wifi, an up button for menu selection and you can hold it down to zoom in. The zoom works while recording also.
Down Button. The bottom button on the side. Doubles as a down button for menu selection and you can hold it down to zoom out.
Everything Else
Viewfinder. 2 inches. I was happy with how easy it is to see even when the sun was in it. Not much glare, unlike my phone which I have to put under my t-shirt to see.
Micro HDMI Port (D Type).
USB 2.0.
Micro SD port. Supports up to 128GB. Class 10 or UHS-I required (not included).
170º wide angle lens.
The App
You can connect your iOS and Android phones and tablets to the i60+ via wifi. It worked fine for me, although I never found a use for it other than testing. For me, it wasn’t any easier than doing things from the camera.
For those that like to take selfies, it would be good as it can turn your phone/tablet into a remote control. The other benefit is transferring from the camera to your device, no need to use a cable. If it connected to Macs and PC’s it would be great.
Video Samples
The ThiEye i60+ Action Cam can shoot video in 4K 30fps, 2.7K 30fps, 1080P 60fps or 30fps, and 720P 120fps or 60fps. You can choose whether you want to record sound or not in the settings.
The first thing I wanted to see was the difference between 4K, 2.7K, and 1080 60fps in optimal conditions. I took some samples on a nice bright day without any fast moving objects.
Bright, 4K 30fps Sample Video
Bright, 2.7K 30fps Sample Video
Bright, 1080P 60fps Sample Video
To me, there isn’t much difference in video quality between these three. I suppose comparing the 4K to 1080 there is a little difference. Not enough to warrant the doubling of file size. For me, uploading short videos to youtube, 1080P will be fine. I was happy that a fast boat came through in the 1080P sample also. I felt it handled it well with smooth movement.
720 120fps Slow Motion Sample Video
The ThiEye i60+ can shoot slow motion in 1080 60fps or 720 120fps. From what I understand, faster frames makes for better slow motion, so I only took a sample with 720 120fps.
I don’t see myself taking much slow motion video, but I was happy with the results. It’s fair to say the 4x optical zoom is not worth using in any circumstance.
1080 60fps Underwater Sample Video
The primary reason I bought an action cam was so I could take videos while snorkeling. To capture fast-moving fish it is better to use high fps so I took all underwater video with 1080 60fps. I don’t have a filter so this is straight through the lens.
720 120fps Slow Motion Underwater Sample Video
I also tested out the slow-motion underwater.
Time Lapses
The ThiEye i60+ does time lapses in either video or photo mode.
Photo Time Lapse Sample
Photo time-lapse options include 3, 10, 15, 20, and 30-second intervals. From what I read, photo time-lapse is better quality than video time-lapse. Especially for changing light such as sunset. The downsides are that you need to stitch it together yourself and the file size is larger.
When you take still photo in photo mode with the ThiEye i60+ it makes a small beeping sound. There is no option to turn this off. This is also true for the start-up and shut-down sounds. This beeping sound isn’t loud so usually, it isn’t a problem. When you take a time lapse in photo mode, it beeps every time it takes a photo. A bit annoying.
For this time lapse, I set it to take every 3 seconds and let it run for about 5 minutes. I used iMovie to put all the photos together and saved it in 720P quality. I could have saved it in 1080P but it would have doubled the file size.
Video Time Lapse Sample
Video timelapse options include 0.5, 1, 2, 5, 10, 30, or 60 second intervals. I set it to 2-second intervals and let it run for about 5 minutes. This video is direct from the ThiEye i60+. It didn’t need any editing and it was about the same file size as the photo time-lapse, despite being in 1080P.
Photo Mode
The ThiEye i60+ Action Cam can take still photos in 12MP, 8MP, or 5MP. I only used 12MP. You can set a self-timer for 3, 5, 10, or 20 seconds. It also does photo burst at 3, 5, or 10 frames.
You can adjust the exposure from -3 to +3 and it also has white balance settings. Auto, sunny, cloudy, incandescent, and fluorescent.
Sunny Exposure Sample
Here are three pictures. First is auto exposure. Second is with the sunny exposure setting. The third is auto exposure edited with a one-click auto enhance on my computer.
Auto Exposure

Sunny Explosure

Auto Explosure with Auto Enhance Editing

Cloudy Exposure Sample
I decided to test the cloudy exposure setting also. The first is auto, the second is with the cloudy setting.
Auto Explosure

Cloudy Explosure

Auto vs Cloudy Exposure Video Sample
The exposure setting is universal, so it works in video mode also.
After seeing the differences with exposure settings I decided to stick with auto. I don’t like having to change settings all the time and I usually do a quick post editing process anyway.
Still Mode vs Still from Video
The first photo is a still from the camera mode. I took the second in video mode by holding down the shutter button for a couple of seconds. You can’t take a photo while recording video. It is when you are in video mode, but not actually recording.
Still From Camera Mode

Still From Video Mode

When taking a photo in video mode you get a wider shot, but it distorts it in a way I don’t like. I guess an advantage is that you don’t have to switch modes to take a photo.
Close-up Pictures
Trying to capture anything very close with the ThiEye i60+ Action Cam is useless. The first picture is by zooming in. Same results as in all the zoom tests. The second is by bringing the camera very close. An attempt at macro. As you can see, you need to be at least 30 cm away from an object for it to be in focus.
4x Optical Zoom

Close-up (Macro Mimic)

Underwater Pictures
Underwater stills come out ok. I compressed this but it is otherwise unedited. I am happy with it considering that when I am snorkeling I will be taking video most of the time.

Other Settings and Modes
There are a few other modes you can use with the ThiEye i60+ Action Cam. I didn’t test because I will never use them, but here is a quick explanation of each.
Car Video Mode.
You can connect the ThiEye i60+ to your car (using a normal car charger) and use it as a dash cam. It automatically starts and shuts down with the car.
Looping Record Mode.
This feature allows you to record and save videos every 2, 3, or 5 minutes. The latest video will override the oldest when the Micro SD card is full. The only use I can think of for this is a security camera, but I’m sure there are many others.
Other Random Settings
180º turnover. Flips the screen upside down. Good for when you are mounting it is different positions
Power Frequency. Choose from auto, 50hz, or 60hz.
LED Indicator. Lets you know when charging, finished charging, screen off, or shut down.
Display off. Turns the LED screen off after 10, 20, or 30 seconds, or never.
Auto Shutdown. Turns the camera off after 1, 3, or 5 minutes, or never.
Date Stamp. Choose if you want to have the date showing in your footage.
Language. Change the language between English, Russian, French, Dutch, Italian, Spanish, Polish, Netherlands, Portuguese, Indonesian, Simplified and Traditional Chinese, and a couple of others I couldn’t decipher.
Date and time. Change the date and time.
Format memory. Empty the SD card.
Restore to factory settings. Restore the camera to its original settings.
Firmware information. Information about the firmware it uses.
Final Thoughts
For the price, the ThiEye i60+ Action Cam is a pretty good deal. The video quality is sufficient for what I want to do and it comes with the waterproof housing which is great. The photos aren’t great but they are still better than my phone camera.
For me, the biggest disappointment of the ThiEye i60+ sample is that anything close-up is terrible. Whether you zoom in or get physically closer to your subject, it just comes out grainy. Digitally zooming-in on a landscape shot from my computer shows that the picture is quite blurry. Though, from what I read, this is common with all action cams. They are not made for close-ups.
I will still get the Olympus Tough TG-5 once I leave Colombia, but for now, the ThiEye i60+ Action Cam does the job. Undoubtedly the quality from more expensive action cams are superior, but for the price, I can’t complain. I’m happy with it.
Pin This for Later!
Did you find these ThiEye i60+ samples and review useful? If you have any questions or comments please share them below.
The post ThiEye i60+ Samples and Review appeared first on Survive Travel.
October 6, 2017
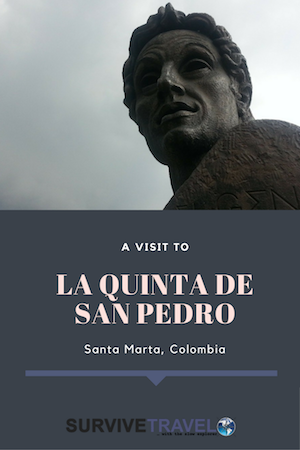
A Visit to La Quinta de San Pedro de Alejandrino, Santa Marta, Magdalena, Colombia
La Quinta de San Pedro de Alejandrino is famous for being the place of death of Simon Bolivar. Inside the compound is a hacienda, an art museum, and a botanical garden.
Simon Bolivar was a key player in the liberation of South America from the Spanish Empire. He died in La Quinta de San Pedro de Alejandro (Quinta of Saint Peter of Alexandria) on the 17th of December, 1830. At that time the Quinta (or hacienda) produced honey, rum, and panela (cane sugar). Nowadays it is a tourist attraction.
Cost(s): 19,000COP for a foreigner adult.
Address: Av. del Libertador – Sector San Pedro Alejandrino, Santa Marta, Magdalena. MuseoBolivariano.org.co.
La Quinta de San Pedro de Alejandrino
I’ve been in Santa Marta for a few weeks now and other than town and Taganga (where I live) I haven’t seen much. To make I sure I don’t run out of time here sitting in front of my computer, I made a list of things to do. I’ve promised myself to cross at least two things off a week. I decided to start close to home with a visit to La Quinta de San Pedro de Alejandrino.
I didn’t find anything spectacular in La Quinta de San Pedro de Alejandrino, but it was enough to please me.
The thing that encouraged me to go there in the first place was the botanical garden. Right next to the entry is the cactus section.

It was quite a short circular path but nice all the same. After exiting that, there is the palms display.

And beyond that the Plaza del Banderas (Plaza of the flags). The majority of visitors to La Quinta de San Pedro de Alejandrino during the week seem to be school groups. While I was there I saw one high school group and then these smaller children.

At the other end of the Plaza del Banderas is the monument to the liberator, Simon Bolivar. Inside is a statue of him.

Next, I came across the Museum of Modern Art. I’ve started to enjoy modern art more since I’ve been in Colombia. There are a couple of small indoor exhibits and also some sculptures around the outside. Many museums in Colombia have little courtyards around the place.

I thought the botanical garden was only the cactuses and palms, but there was more on the other side of the museum. It was nice for a walk around. There are lot’s of birds chirping and some little lizards running around. I did see one big lizard and a couple of larger birds.

Finally, I had circled around to the hacienda. It’s made up of several buildings and has some signs saying what they were for. Storing panela, making rum, etc.

I spent about an hour in total inside La Quinta de San Pedro de Alejandrino. I could have spent longer chilling in the gardens or looking at art but I was getting hungry.
Getting to La Quinta de San Pedro de Alejandrino
I took a bus from Taganga straight there. There’s only one bus leaving Taganga so you can’t go wrong. Get off at Buena Vista shopping complex and then walk over the roundabout to the entrance.
The bus from Taganga took one hour and cost 1,600COP. It will be 1,700COP on Sundays and holidays.
If boarding from the city center, catch any bus towards Mamatoco from along the coast road (Carrera 1c).
Pin This for Later!
Did you enjoy this post on La Quinta de San Pedro de Alejandrino? Share your thoughts in the comments.
The post A Visit to La Quinta de San Pedro de Alejandrino, Santa Marta, Magdalena, Colombia appeared first on Survive Travel.
October 3, 2017
My 5 Favorite Music Cities in the USA
This post highlights my 5 favorite music cities in the USA. I haven’t seen that much of the United States. From the cities that I have been to the ones that stick in my memory are those with a rich music history.
My 5 Favorite Music Cities in the USA
The music cities mentioned here are only the ones that I have been to. I know there are more cities in the US famous for their music. I’ll see them one day, but for now, in no particular order, here are my 5 favorite music cities in the USA.
1. Seattle
When I was a boy and first started listening to good music, a few of my favorite bands came out of Seattle. It was the era of “Seattle Grunge”. Nirvana and Pearl Jam were in my Walkman a lot of the time, as was Soundgarden and Jimi Hendrix.
I got to see the EMP museum, Kurt Cobain’s old house, and the sculpture of inspiration for the song “Black Hole Sun”. Also, the Jimi Hendrix Memorial. Although not music related, I also saw the grave of Bruce Lee. Well, that’s not 100% true. I went to the cemetery but couldn’t actually find it.

Jimi Hendrix Memorial
Discover More Things to do in Seattle.
2. L.A.
Around that same age, I started listening to another awesome band that made it big in L.A., The Doors! And later on, I discovered hip-hop and gangster rap (Easy E, NWA, Snoop, etc.). All hailing from the “City of Angels”.
I actually tried to go on the Hip Hop Gangsta Tour through Compton. Unfortunately, the guide didn’t have any other tourists to go on the days I was there. Instead, he let me go on the “Homes of the Stars” tour for free.

Via Pixabay.
Tip: It’s a good idea to rent a car in Los Angeles. It’s a huge city!
Learn More About Los Angeles.
3. Memphis
I remember arriving in Memphis and heading straight to Graceland. I didn’t even go to my accommodation first to drop off my bags. I’m not usually one for big tourist attractions, but Graceland was awesome. Being an Elvis fan helps.
“The King of Rock and Roll” is arguably the biggest thing to come out of Memphis. Other well-known musicians are Johnny Cash, B.B King, Otis Redding, and more.
For more music-related fun in Memphis check out Sun Studios, Beal Street, and the Rock and Blues Museum.

Sun Studios. An Institution of Rock and Roll
Take a Closer Look at Memphis, Tenessee.
4. New Orleans
I am not familiar with any specific bands coming out of New Orleans, but there is plenty of music on the streets. New Orleans is, in fact, my favorite city in the US!
Be sure to visit Frenchman Street and the Pat O’Brien’s Dueling Piano Bar.

A jazz band in the streets of New Orleans (via Pixabay).
There are Heaps More Things to do in New Orleans Also.
5. Chicago
This last item is a bit of a cheat one because Chicago isn’t one of my favorite music cities in the USA. I wanted to give it a special mention because I have been there and I’ve heard that Chicago has lots of good music. I do know that the Smashing Pumpkins, R Kelly, and Kanye West all started in Chicago. Also, the Chicago Symphony Orchestra.

Marching band in Chicago (via Pixabay).
Discover 20 Awesome Things to do in Chicago.
Pin This for Later!

What are your favorite music cities in the USA? Let me know in the comments.
The post My 5 Favorite Music Cities in the USA appeared first on Survive Travel.
September 29, 2017
A Walk Through Taganga, Santa Marta, Magdalena, Colombia
Come take a walk through Taganga, a beautiful little fishing village surrounded by lush green hills just outside Santa Marta in Colombia.
Taganga is small. You could walk along the beach from one end to the other in ten minutes if you wanted to. However, if you wander a little further out on either side of the main village area, and stop along the way to smell the roses, you could easily spend a few days or more there.
A Walk through Taganga
A kilometer or so before getting to Taganga from Santa Marta there is a mirador (lookout point) that offers a fantastic view overlooking the village. You can ask the bus driver to drop you there if you want, or walk up from the beach. It’s not very far.

About halfway down the hill from the mirador to the village you can take a left at Hostel Azules Techos (blue roofs). This takes you to a spot where you can swim and, although it isn’t fantastic, you can snorkel there too (the water is clearer to the left, away from the beach).

From here you could easily swim to the main beach area. Alternatively, continue walking down the hill. You can take the stairs on your left just before The Mirador bar straight to the main beach. The other option is to take the road all the way into the village and then turn left.
The beach is basically two parts. The first is a swimming area and the other is for all the small boats.

The road in front of Taganga beach is lined with small shops, street food, bars, and restaurants. There are even a couple of small supermarkets.
You can get all the basic necessities without leaving Taganga, but it is cheaper and fresher in town (centro), especially from the fresh market.

Towards the end of the beach you can buy the day’s catch straight from the fisherman.

At the very end of the beach is a path leading up the hills.

I especially enjoyed all the cactuses in the area. There’s just something about cactuses near the ocean. I feel like they should only be in the desert… haha.

There are a couple of turns that go off that path which will lead you to the ocean. I didn’t go down any of them yet, but I will check them out for snorkeling one day.
Eventually, you will arrive at Playa Grande. It’s actually not that far – maybe a 15-minute walk from the start of the path.
Playa Grande is a similar setup to Taganga Beach, only smaller.

Behind the restaurants is a small residencial area and a path which I may try hiking along one day.

Walk along Playa Grande to the end of the beach and there is another path. It may be possible to walk all the way into Tayrona National Park on it.

Looking back at Playa Grande
You can hike back to Taganga the same way you came, or take a boat. You could take a boat either way, and I think all the way to Tayrona and other places if you want.

Taganga Beach on the way back from Playa Grande.
Once back in Taganga, take a stroll through the back streets. There you will find more small (cheaper) restaurants, a drug store, a church, a football field, small hardware stores, and more.

Getting to Taganga
The bus to Taganga starts at the bus terminal in Santa Marta, goes through some neighborhoods before going through the center of Santa Marta (Carrera 5). It continues past the fresh market, and then onto Taganga. The whole journey takes over an hour. It is a blue bus with the words Taganga on the front. Just wave it down when you see it and give the driver your money on the way in. It costs 1,600cop, 1,800 on Sundays and holidays.
During the day the buses are quite frequent (less than every ten minutes) but after about 7 or 8 pm they hardly ever come. One night I was near the transport terminal around 7:30 pm and waited for about 40 minutes. I would have had to wait more but I asked the drivers and they said they would ask for permission to go to Taganga. I think if I hadn’t have asked they just would have stopped the service.
Pin This for Later!

Have you taken a walk in Taganga before? Let me know all about it in the comments
September 7, 2017
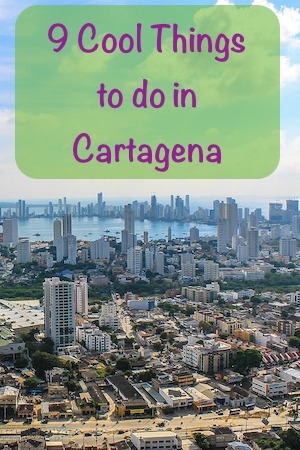
9 Cool Things to Do in Cartagena, Bolivar, Colombia
This list of 9 cool things to do in Cartagena gives a short review of each of the things to do in Cartagena, links to more detailed reviews (where applicable), advise on accommodation in Cartagena, and information on getting to Cartagena.
There are way more than just 9 cool things to do in Cartagena, but I only spent 9 days there.
Cartagena wasn’t somewhere I wanted to spend too much time. It was more like a pit-stop on my way to Santa Marta. Actually, I could just have easily gone straight to Santa Marta from Medellín but since Cartagena is the most visited city in the country I thought I had better go see what all the fuss was about.
Even more of a reason for me to go there was because it’s my mother’s favorite city in Colombia. Also, I think we are somehow related to Rafael Nuñez who was the president of Colombia (4 times!) back in the late 1800’s. Rafael Nuñez was born in Cartagena and there are a few things dedicated to him in the city, including the airport.
9 Cool Things to do in Cartagena
1. The Walled City of Cartagena
The first thing on this list of cool things to do in Cartagena is to check out the walled city. Inside you can admire the colonial architecture, chill in one of plaza’s, eat in an overpriced restaurant, buy souvenirs off the street, check out a museum, etc.

Read more about the walled city of Cartagena here.
2. Party on a Chiva Bus
Chiva’s (colorful wooden buses) actually used to be part of the Colombian public transport system, but now they are mainly used as tourist buses around the city.
HiCartagena is one company you can book a tour through and they offer two types. One is in the afternoon and the other is for the party go-ers at night.

3. Castillo de San Felipe
Castillo de San Felipe de Barajas is a Spanish Fort which, back in the day, held off the English armada! Some think that if it wasn’t for this fort, the majority of Latin America would speak English instead of Spanish.
Nowadays it is a tourist attraction. You can walk in and around it, go into the tunnels, watch an informative short film (which I thought was pretty good), and get a pretty good view of the city.
The standard entry fee is 25,000COP and you can also hire a live or audio guide if you want. I wanted an audio guide but somehow I missed it at the ticket booth.

View from Castillo de San Felipe
4. La Popa Hill
Apparently, the the best view of Cartagena can be seen from the top of the La Popa hill. I wouldn’t know because I never went there (I felt the view from Castillo de San Felipe was good enough). This is also where the convent of La Candelaria is located.

View of La Popa Hill taken from Castillo de San Felipe
5. Go to the Beach
Number 5 on this list of cool things to do in Cartagena is an activity that some tourists spend 90% of their waking time doing while here… chilling on the beach.
There are a few beaches to choose from not far from the city center, and then a couple more (prettier ones) a short boat ride away.

Playa La Boquilla.
Read more about the beaches of Cartagena here.
6. Mercado de Bazurto
Mercado de Mazurto is a fairly big traditional market a short bus ride from the city center. Inside you can find a ton of fresh produce, clothing, and lots of other stuff.
One thing I didn’t see inside Mercado de Bazurto was other tourists. In fact, I wasn’t even comfortable to whip out my phone for a picture whilst inside – which is why my picture is from across the street.
Regardless of my apprehension, Mercado de Bazurto is one of the best market places I’ve experienced in a while. It’s definitely worth a look, just be extra careful of your belongings.

7. Palace of the Inquisition – Cartagena Historical Museum
Inside the historical center of Cartagena, next to Bolivar park, is the the infamous Palace of the Inquisition. What was once a house of torture is now a pretty good museum, mostly about the (Spanish) inquisition era in Cartagena.
Although most of the information is in Spanish, there is enough English translation to keep you interested for an hour or two, and if you can read Spanish then you could be in there a long while. Even just looking at the architecture inside the old palace is worth the time.
Entry is 19,000COP and audio guides (extra) are also available. You could also hire a live guide.

8. Jardín Botánico “Guillermo Piñeres”
Jardín Botánico “Guillermo Piñeres” was a bit of a mission to get to but it was totally worth it. It is easily my favorite thing on this list of cool things to do in Cartagena. I will even go as far as saying that it is one of the best botanical gardens I have ever been to!
It’s extremely peaceful (I think I was the only one there), very well laid out, and is teeming with wildlife. I saw a massive range of birds, lizards (from very small to really big), monkeys, and more.

Read more about Jardín Botánico “Guillermo Piñeres” here.
9. Espiritu Del Manglar Park
The last thing on this list of cool things to do in Cartagena is to check out Espiritu Del Maglar Park. I initially didn’t expect much from this place but it was really quite good. Kind of like a mini version of the botanical garden, but much closer (walking distance from town) and free.
I ended up spending more than an hour in there looking at the statues of famous “Cartagenians”, trying to photograph monitor lizards, and just soaking up the wetlands scenery in general.

Lago Del Caribo from inside Espiritu Del Manglar Park.
Getting to Cartagena
Cartagena is the most visited city in Colombia and it has an international airport so you can fly in from almost anywhere (indirectly).
To get from the airport into town you can catch a taxi or even an Uber. It’s best to use the taxi voucher stand (in the baggage are) to avoid being overcharged by the touts out the front.
You could also use a colectivo (shared taxi) from the front of the airport which will take you to the city for 2,000COP. This same system of shared taxi’s works throughout the city. They generally travel along fixed routes to/from areas outside of town for 2,000COP and can be signaled by showing your index finger.
On my way out of Cartagena I took a bus to Santa Marta from the Terminal De Transportes. I took an Uber to get there from my accommodation and it took 40 minutes or so. It would have been cheaper to use the tapsi app or just haggle with a taxi on the street. I paid 25,000cop and I probably could have got it for 20,000 or even 15,000. Catching a bus is another option, which would only be 2,000cop but would probably take twice as long.
Once at the terminal de transportes I walked straight past the touts (recommended) and bought ticket from Brasilia. There’s a few companies that will go to Santa Marta. My experience with Brasilia (Expresobrasilia.com) was excellent. It cost 30,000cop and took 4 hours including one 15 minute break in Barranquilla. The seating was comfortable (I fell asleep for a while), there was a toilet on board, and they played movies.
If coming/going to Panama you could travel by boat.
There are also numourous companies offering cheap holiday packages to Cartagena and Colombia as a whole.
Accommodation in Cartagena
Whilst doing all these cool things to do in Cartagena I stayed at Apartamentos Vistas del Caribe.
Originally I booked a small apartment of a different name, but owned by the same people. They picked me up from the airport (15,000 COP, although I paid 20,000 COP and received no change) but when I got to the apartment I discovered there was no internet, despite what was in the online description. After explaining (in terrible Spanish) that I needed internet for work I was moved to a different apartment which was both better and worse at the same time.
Worse because I no longer had a place to cook, it was further from town (although still in walking distance and with lots of public transport), and in a neighborhood that I wouldn’t walk around in after 9pm. Better because it had excellent wifi, a small desk to work at, and it was on the roof which meant it was super private and had a nice view.
I paid the same price as I would have for the other apartment. I should have demanded a discount but the people were so nice that it didn’t cross my mind until after I had given up my cash. Actually, I looked up the place afterwards and it turned out to be the same cost anyway.
Cost: 480,000 for 9 nights.
Book your stay at the Apartamentos Vistas del Caribe or some other accommodation in Cartagena.
Here’s a video slideshow of all the pictures taken in Cartagena.
Pin This List of 9 Cool Things to do in Cartagena for Later!
Got anything to add to this list of cool things to do in Cartagena? Let us know them (or anything else you want to say) in the comments
September 6, 2017
A Walk in Jardín Botánico Guillermo Piñeres, Cartagena, Colombia
One day I decided to take a walk in Jardín Botánico Guillermo Piñeres. Jardín Botánico Guillermo Piñeres is an awesome botanical garden in Cartagena. It was a bit of an effort to get there, but it was definitely worth it.
I dare say that Jardín Botánico Guillermo Piñeres is one of the best botanical gardens I have been to. It may have helped that I was the only visitor there at the time. I guess its location keeps a lot of tourists away, and also I went on a Tuesday. Perhaps on the weekends locals flock there.
It’s closed on Mondays.
Cost(s): 17,500COP.
Address: Sector Matute km 9 Autopista I-90 (Turbaco), Naranjas, Turbaco, Bolívar. jbgp.org.co.
A Walk in Jardín Botánico Guillermo Piñeres
After just under a two hour bus ride (on two seperate buses) I finally started hiking up the street that lead to Jardín Botánico Guillermo Piñeres from the main road. It was only about a 15 minute walk and on the way there are some really nice properties.

The road towards Jardín Botánico Guillermo Piñeres from the main road.
At the entrance they informed me that I could take a guided tour, but it would be in Spanish. I don’t think they really wanted to do it for just one person, and I prefer to walk alone anyway. Instead they just gave me a map and a quick “run down” on the place then sent me on my way.
The place is very well laid out. It is basically just one path all the way around which takes you past the 11 points of interest on the map. I did try to stick to it but somewhere along the way I got sidetracked so you won’t get to see all 11 of the places in this post.
I’m not sure what this used to be, perhaps an education center. Whatever is was, it looks pretty cool now thats nature is starting to claim it back.

The majority of Jardín Botánico Guillermo Piñeres has a real jungle trekking feel, but with fairly well maintained paths.

This is the desert plants exhibition. It’s the only mapped point of interest I actually managed to photograph.

The whole place is teeming with wildlife. I saw lots of birds, lizards, butterfly’s, frogs, squirrels, and monkeys.
Make sure you take the path to Jacquin’s Garden. It seems to be un-maintained, and I guess that means the animals feel more at home because that is where I saw a couple of huge lizards right on the path. They were surprisingly fast to run (and climb) away from me when I tried to get a photo.
I managed to get one of this much smaller lizard.

All the frogs I saw where tiny.

Of course, there’s also lots of plants. Some of the dedicated sections included palms, medicinal, fruits, ornamental, etc.
And even a small waterfall.

In fact, a stream runs right through the middle of the place which gives it a nice ambience, and also attracts mosquitoes. There’s lots of mosquitoes.

Here’s the stream from a small bridge. It gets somewhat larger in various parts of the garden.

Getting to Jardín Botánico Guillermo Piñeres
I originally thought I could get one bus all the way there from my accommodation, and maybe I could have, but it didn’t work out that way.
Actually, it is fairly easy. Catch a bus towards Turbaco. If the bus you get goes all the way to Turbaco proper (if there even is one) then just get off at the road you have to walk up to get to the Botanical Gardens.
Most likely you will just take the first bus (2,000cop) to as far as it goes (turno de los buses de Turbaco) and then swap for a Turbaco local bus (2,000cop) to take you the last 7km to the road leading to the gardens.
Tell the driver you want to go to the Jardín Botánico and he will drop you in the right place. Or if you are like me, then just track yourself via gps and when your there say “Parada Señor” to indicate you want to get off.
From there just walk 15-20 minutes up the road until you get to Jardín Botánico Guillermo Piñeres.
Pin This for Later!

Have you taken a walk in Jardín Botánico Guillermo Piñeres before? Share your thoughts in the comments
September 3, 2017
The Beaches of Cartagena, Bolivar, Colombia
On my third day in Cartagena I woke up to bright blue skies so I decided to take a walking tour of the beaches of Cartagena. It ended up being a killer walk. Over 10km in the tropical heat, and I didn’t even go for a swim!
I do love traveling alone but one of the biggest downfalls is that there’s no-one to look after your stuff if you want to swim. Fortunately there was a beach within 15 minutes walk of my accommodation so later on I went there with nothing but a bottle of water and my room keys.
The Beaches of Cartagena
There are quite a few beaches close to the city of Cartagena, and a few more not too far away.
Playa Marbella (playa is Spanish for beach) was the closest beach to my accommodation. I had to walk through the barrio for about 15 minutes to get to it.
This is a picture from the rooftop of where I was staying. The beach is in the opposite direction, but this is what the barrio looks like.

It was pretty early for Cartagena (10am), and Marbella is one of the less popular beaches, so it was almost empty.

This guy was a bit later than the rest to set up his beach tents, but I doubt he lost any business since no-one was there anyway.

Coming close to the walled city there were lots of people flying kites. I think this is outside
Baluarte de La Merced. It must be a morning thing because on my way back it was deserted. Just the trash all the people left behind.

The “Tourist” Beaches
After walking for another long while I started to approach Playa Boca Grande. There are actually a couple more small beaches that I passed by on the way also.

Playa Boca Grande is probably the most “touristy” beach in Cartagena. There’s a lot of touts about, as well as police. I got offered almost everything while walking through. From sun-chairs, food and massages, to girls, marijuana and cocaine! I’m sure the last three wouldn’t have happened had I not been a single male.

After cooling off in the Boca Grande mall I walked another 20-30 minutes to Playa El Laguito. Playa El Laguito is less crowded than Boca Grande, but still has its share of touts.

Not far past Playa El Laguito is this lake, also named El Laguito (the little lake) – I assume the beach is named after the lake and not the other way around.

That was the end of my “little” walk. I got some lunch and caught a bus back to town from a couple of streets away from the beach. Buses go to Boca Grande and El Laguito along the coast, but back towards town on a different road.
Out of Town Beaches
A couple of days later I went to a beach I read about online, La Boquilla. I went on a Sunday so I expect much less people are there during the week. I only got approached by one tout whilst walking along which was nice. There are a decent amount of little restaurants lined along it and lots of beach tents for hire.
Despite what I had read online, Boquilla beach is quite well developed with a few fairly large hotel resorts along one end of it. Although, in the opposite direction of where this camera is pointing are small restaurants instead of tall buildings.
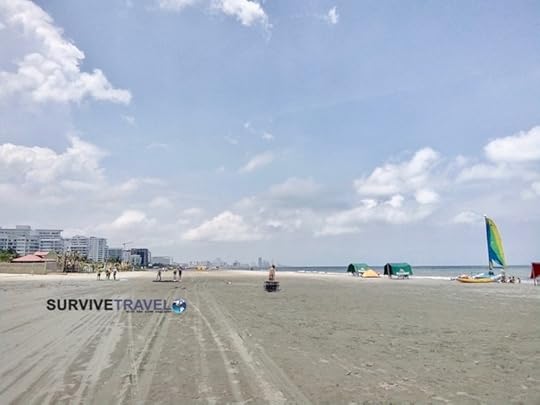
La Boquilla is located about a 20 minute bus ride from the city center in the opposite direction to La Boca Grande. The bus costs 2,100COP and has Boquilla written on the front as one of the destinations.
The prettiest of the beaches of Cartagena are the ones on the nearby islands, such as Playa Blanca. I dislike boat rides and tour groups so I didn’t bother going to them, although there is supposedly some spectacular snorkeling around Islas del Rosario.

Photo Credit: David Shankbone via Flickr.
Pin This for Later!

Which is your favorite of the beaches of Cartagena? Share your thoughts in the comments
August 31, 2017
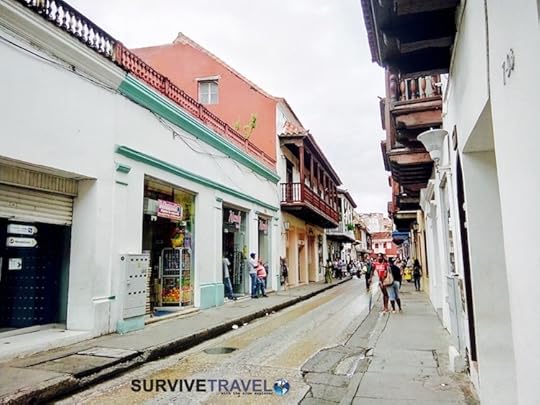
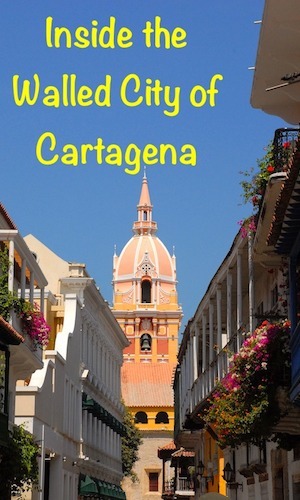
Inside the Walled City of Cartagena, Bolivar, Colombia
Inside the walled city of Cartagena you can admire the colonial architecture, chill in one of plaza’s, eat in an overpriced restaurant, buy souvenirs off the street, check out a couple of museums, and more. I only did the fist two things, but there’s enough to see just walking around so I had a good time.
Inside the Walled City of Cartagena
My accommodation was a little bit out of town but still within walking distance (less than an hour away).
I chose to take the longer route and walk along Marbella beach.

When I first arrived at the walled city of Cartagena I took a minute to go on the wall with the cannons. Actually, it was more the mural on the building that peaked my interest.

Inside the walled city of Cartagena the pretty streets are mostly full of tourists and touts, but there are also many “Cartagenians” just going about there business.
This is Plaza Santo Domingo. There are few plazas inside the walled city of Cartagena. My favorite was Plaza Bolivar as there was vegetation, music, and places to sit.

I spotted a couple of pretty impressive balcony gardens.

There are also a few old cathedrals. This one is Cathedral de Santa Catalina de Alejandría.

Technically I was outside the walled city of Cartagena when I took this, but it is one of the gateways into it. I think it is called Puerta Del Reloj, literally, Door of the Clock.

On my way home I went to the Monumento India Catalina. This is the river running nearby it. In the distance you can see Castillo de San Felipe de Barajas which is what I’ll go check out tomorrow.

Getting to the Walled City of Cartagena
Chances are you are staying really close to it, so just walk there.
If you are out of town (like I was) and you don’t want to walk, you can take a bus, a taxi, or a colectivo, which is a shared taxi. A pointed index finger from your and/or the driver indicates it is a shared taxi. Fare should be 2,000COP.
Pin This for Later!
Have you been inside the walled city of Cartagena before? Share your thoughts in the comments
August 30, 2017
25 Amazing Things to Do in Medellin, Colombia
This list of 25 amazing things to do in Medellin gives a short review of each of the things to do in Medellin, links to more detailed reviews (where applicable), advise on accommodation in Medellin, and information on getting to Medellin.
After spending 3+ weeks in Armenia, and having no luck with finding an apartment, I decided to head to Medellin to take some Spanish lessons and get a feel for what is widely thought as being the most modern city in Colombia.
A couple of days before I got there I rented a place off AirBnB for 6 weeks, so like it or lump it, I was going to settle there for a little bit. I knew Medellin was a big and busy city before even going there, and although big city living isn’t really my cup of tea I had a pretty good time while I was there.
25 Amazing Things to do in Medellin
1. Graffiti Tour Comuna 13
The first thing on this list of amazing things to do in Medellin is the Graffiti Tour Comuna 13 which is a walking tour through what used to be one of the most dangerous neighborhoods in all of Latin America. Nowadays it is safe enough to walk through (during the day) and you can check out all the local street art and take a ride up the famous outdoor escalator. There’s a great view from the top.
You could do this yourself but I highly recommend doing it with Ardilla Aventuras. It only costs 20,000 COP (+ approx 2,000COP metro fare) and they give you a wealth of information about the areas history and the meanings behind many of the murals.

Read more about the Graffiti Tour Comuna 13 here.
2. Learn Spanish
Medellin is widely thought of as being the best place in Colombia to learn Spanish. The city is modern, perfect weather (the city of eternal spring), there are plenty of schools to choose from, and the accent is much easier to understand than in other parts of the country.

Outside Colombia Immersion, where I took Spanish classes.
Read more about learning Spanish in Medellín here.
3. Botero Plaza
In the middle of the city is this plaza filled with sculptures from the famous Medellin artist Fernando Botero. Check out the sculptures, people watch, and eat ice-cream or some other snack from the many vendors.

4. Placita de Flores
A couple of kilometers east of the city center is a fresh market called Placita de Flores. Not exactly earth-shattering but worth a look if you’ve never been to a fresh market in Colombia before and have a bit of free time. To get there take the Tranvía to Pabellon de las Aguas.

5. Feria de Las Flores
Number five on this list of amazing things to do in Medellin only comes around once a year. Feria de Las Flores (Flower Festival) is a two week festival occurring every year in Medellin. I’m not sure if it happens on the same dates every year but I was lucky enough to be in the city at the time. Loads of events happen throughout Medellín during this festival. Parades, music, dancing, eating, and more.

The car parade during Feria de Las Flores.
6. Planetario De Medellin
Medellin’s planetarium… is really good!
Not huge, but enough to keep you busy for an hour or two. Lots of interactive displays and includes a dome theatre show (like IMAX). General admission is only 15,000COP and it is very easy to get to. Right next to the University metro station.
Most of the information is in Spanish and English, except the dome show which is entirely in Spanish. I didn’t understand most of it but still thought it was really good.

7. Parque Norte
A nice park with a lake to stroll around. Also contains rides and food stalls.
This is located just north of the University metro station. Free entry.

8. Sabaneta
Sabaneta is about 20-30 minutes south of Medellin’s city center by train. It’s a nice place to stroll around with some chilled bars and restaurants. I actually wanted to live here while in Medellin but the airbnb I wanted fell through


.jpg?)