
Aventuras De Viaje's Blog, page 6
November 13, 2017
7 Beaches for Snorkeling in Santa Marta, Colombia
Discover 7 beaches for snorkeling in Santa Marta, Colombia. These are places in Santa Marta where you can snorkel without having to take a boat ride. All you have to do is get to the beach via a short bus ride or hike. This is great for me because I love snorkeling, but am not a fan of boat rides or tours.
Pin It to Your Travel Board!

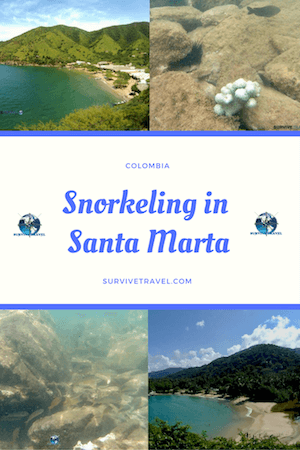
7 Beaches for Snorkeling in Santa Marta
Some of these beaches are not actually in Santa Marta, but they are close enough.
These first three beaches for snorkeling are in Taganga. They are the snorkeling spots in Santa Marta that I frequented most because I lived in Taganga.
1. Techos Azules
Snorkeling at Techos Azules was less than a 5-minute walk from my apartment. If you start from Taganga and walk up the hill towards the Mirador you will see the road to Techos Azules to your right. By Mirador I mean the lookout point, not the clubs. Techos Azules is accommodation distinguished with blue roofs. Walk down that road to the water. The beach is small and within swimming distance of the main beach in Taganga. The snorkeling isn’t that great, but it is enough to keep you busy for 30 minutes or so. The water is clearer the further away you get from Taganga, so swim to your left.

2. On the Way to Playa Grande
As you hike from Taganga to Playa Grande there are some trails leading into quiet beach coves. I didn’t try them all, but those I did try the snorkeling was better than at Techos Azules.

3. Playa Grande
Playa Grande is a short hike from Taganga. It is a bit busier than the first couple of places on this list, especially on weekends. The snorkeling here is the best in Taganga. Go on the far left of the beach (as you look at the ocean) and out 20 meters or so.

4. Playa Blanca
You can find Playa Blanca along the coast between the city center and Rodadero. The most popular way to get there is by boat from Rodadero, but you can hike there too. The snorkeling at Playa Blanca is worth checking out since there is a protected coral area there. The beach itself is pretty busy.

READ MORE ABOUT HIKING INTO PLAYA BLANCA.
5. La Piscina
La Piscina is a beach in Tayrona National Park. To get there from Santa Marta involves a one-hour bus ride followed by a hike in. I didn’t actually go snorkeling in La Piscina here but I assume it would be worthwhile.

6. Cabo San Juan del Guia
There are a few places to go snorkeling in Tyrona National Park. I spent a day there and after a 3 to 4-hour hike in I went snorkeling at Cabo San Juan del Guia. The snorkeling in Cabo San Juan del Guia is decent. The water is clear and the fish are a bit more colorful than around Taganga.

READ MORE ABOUT MY DAY IN TAYRONA NATIONAL PARK.
7. Bahia Concha
Bahia Concha is in Tayrona Park but is far away from the main entrance so you don’t need to pay the standard entrance fee. There is still a small cost because it is on private property, but it is only 5,000COP as opposed to 48,500COP. The snorkeling here was pretty good. I went to the far side of the beach and actually saw some colorful coral. I don’t think I even saw that in Cabo San Juan del Guia.

READ MORE ABOUT SNORKELING IN BAHIA CONCHA
Beaches for Snorkeling in Santa Marta Video
Did you enjoy this post on 7 beaches for snorkeling in Santa Marta? Where else have you been snorkeling in Santa Marta? Share your thoughts in the comments.
The post 7 Beaches for Snorkeling in Santa Marta, Colombia appeared first on Survive Travel.


November 11, 2017
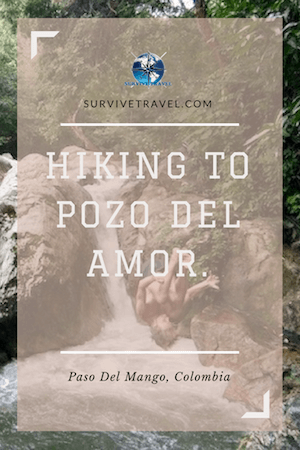
Hiking to Pozo del Amor in Paso del Mango, Colombia
Hiking to Pozo del Amor in Paso del Mango was an unexpected, but pleasant, outcome of the day. Truth is, I didn’t even know Pozo del Amor existed until I got there.
I met a Colombian friend in about mid-morning and we set off from Santa Marta on a bus to Bonda. Bonda is the gateway town to Paso Del Mango. Since I had a local with me I hadn’t done any research on how to get to Paso Del Mango, or even what it was. Turns out she had never been there either and was relying on me!
I did remember to get off at the police station so that’s what we did. From there we asked a policeman what to do next. He pointed us in the right direction and we started walking.
Pin It to Your Travel Board!
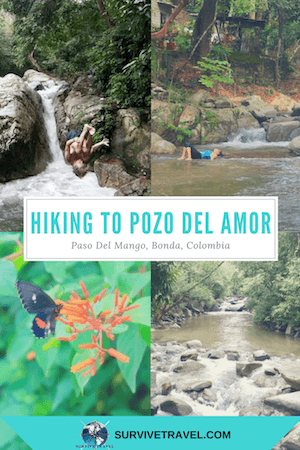
Hiking to Pozo del Amor in Paso del Mango
The hike in was nice. The path was wide enough for cars, which came through every so often, but tranquil enough to hike.

There were some nice views along the way.

And some awesome butterflies. We even saw a big blue one that I have never seen before. There is a common blue butterfly that I see in Colombia whenever I go hiking. This one was extra big and a different shade of blue. Unfortunately, I couldn’t get a picture of it in time.

For some reason, I thought Paso Del Mango was going to be like Pueblito in Tayrona National Park. I’m not sure why I thought that. I read later that it is a traditional village. We didn’t even know we had arrived and ended up walking right through it.
READ MORE About Pueblito and Tayrona National Park.
After a while, we got to La Puenta del Paso del Mango and we thought, “this might be it”.

I’m happy we decided to go further because then we came to this place. What seems to be a new resort.

We spoke to some of the gardeners and they told us we already walked through Paso Del Mango. They also told us about a waterfall only a few minutes further on.
Pozo del Amor
This picture is the path to Pozo del Amor.

When we got to Pozo del Amor there were only 4 other people there. Some of the lads showed me where it was safe to jump in. They were practicing their flips.

You can climb up the other side and have a little explore around.
LEARN MORE About Rock-Climbing.

There is another smaller waterfall on the other side also. Pity about the one bit of trash in the water.

We hiked back to the bridge and my friend went for a play in the water. She didn’t feel safe at the waterfall.
DISCOVER HOW TO SURVIVE In Any Type of Water.

After a long hike back we wanted to get something to eat but we ended up catching the bus straight back to Santa Marta. It was late in the afternoon and there isn’t much in Bonda.
Getting to Paso del Mango from Santa Marta
Get a bus from Santa Marta to Bonda. You can do that from Carrera 5, where Exito is. In Bonda, get off at the Police Station. The journey is about 40 minutes and will cost 1,600COP or 1,700COP on a Sunday or holiday.
Once at the police station in Bonda walk up the nearest cross street. It is on your left as you walk back towards Santa Marta. You will see guys with motorbikes there. You can get one of them to take you to Paso Del Mango if you want. I read somewhere that it costs 10,000COP.
If you prefer to walk, follow that road (the one the guys with motorbikes are on) up and around. Don’t get off it. From the police station, it took us about 2 hours to hike to Pozo Del Amor in Paso Del Mango.
Did you enjoy this post on hiking to Pozo del Amor in Paso del Mango? Share your thoughts in the comments.
The post Hiking to Pozo del Amor in Paso del Mango, Colombia appeared first on Survive Travel.
November 10, 2017
Have a Green Christmas Whether You’re Home or Away
The holiday season is a wonderful time of year, full of giving and togetherness. For the more green-minded of us, it can feel like a time of huge waste, as we fill bin bag after bin bag with plastic packaging (why is there so much packaging on tiny toys?!), wasted food and wrapping paper. If you’re looking for some ways to minimise the amount of rubbish you’re producing this year, take a look at these ideas for a less wasteful Christmas (it might even save you some money, too!)
Hold on to Wrapping Paper
Maybe you should take back that time when you laughed at your Grandma for folding up wrapping paper to reuse it! If you’ve received some wrapping paper that will last for another round of gift-giving, why not fold it up and keep it for another time, or use it on a crafty project. If it’s Christmassy paper you’ll need somewhere to store it for a year, but if the design is more generic, you can use it for an upcoming birthday present. If it ends up getting ripped and isn’t really salvageable, of course just recycle it!
Buy Second Hand
If it’s something specific you’re after – see if you can find it in a second-hand store or thrift store – it’ll cost you a fraction of the price of a new one, and if you find exactly what you’re looking for, top points for you! Do you really need to buy a brand new copy of ‘A Tale of Two Cities’ when you can get one for 50p? You could even buy several for the price of a brand new one. If you’re unlikely to find what you’re after on the local high street, give eBay a try – just make sure you watch out for delivery costs and factor these into your budget.
Make Presents
If you like crafts and have a bit of a talent, whether it’s for sewing, cooking or painting, why not make your presents this year? (maybe not all of them if you’re time constrained!) The receivers will be super-impressed and it’ll also add a personal touch. If you’re a bit of a whizz in the kitchen you could offer to cook instead of buying presents!
Don’t Overbuy
Whoever you spend Christmas with, try not to get sucked into a battle of presents. It’s easy to end up trying to top everyone else’s efforts at gift-giving but you’ll only end up skint and feeling bad for producing more waste. Remember that your loved ones wouldn’t want you to be stressed over buying gifts and just want you to be happy. You don’t need to blow your budget just to fit in – if you’re really strapped for cash, think about contributing something else to the day, like games ideas or your cooking skills.
Share the Load
Don’t be afraid to ask for help. If you’re hosting this year and are worried about coughing up for the price of food as well as gifts and decorations, why not ask attendees to bring a dish each? Many parts of the meal can be made in advance, like sprouts, or a dessert. This’ll take away some of the stress for you and will mean all the elements of the meal don’t have to fight for what is often limited oven space. Your guests will also feel pleased to have contributed to the delicious meal.
Turn Leftovers into Different Meals
We all love a Christmas sandwich so why not make one for yourself? Leftover food is delicious on boxing day, which you can eat cold in a sandwich or reheat to have a second Christmas dinner! If you’ve got surplus vegetables, try making bubble and squeak for breakfast the next day, or if you’re still drowning in turkey, make it into a turkey curry for something a bit different.
Author: Unknown
The post Have a Green Christmas Whether You’re Home or Away appeared first on Survive Travel.
October 28, 2017
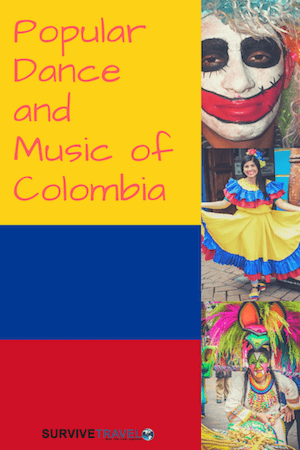
Popular Dance and Music of Colombia
The dance and music of Colombia is the most varied in South America. It is the home to over 1,000 different folk rhythms.
I don’t like parties or nightclubs very much. I am not much of a dancer either, but I do have a big love of music. While in Colombia I tuned in daily to the local radio while working. Even if I didn’t play it at home I wouldn’t have been able to escape it, it’s everywhere. On the bus, in the shops, on the streets, in restaurants. Music and dance is a HUGE part of Colombian culture, and it’s good. Very good.
Popular Dance and Music of Colombia
This post highlights popular dance and music of Colombia that I became familiar with. It is what you hear in the streets and/or on the mainstream radio during the day.
Cumbia
The Cumbia is my favorite type of Colombian music. Whenever I hear it I get nostalgic because my mother used to play it when I was young. It is a mixture of Spanish, African, and indigenous music. The Cumbia is percussion and vocals, although modern bands include other instruments. Cumbia as a dance mimics the shackled ankles of slaves. Here is a video of some children doing the Cumbia in Santa Marta.
And here’s one of the most famous Colombians in the world doing it.
Champeta
From the best to the worst. Champeta is my least favorite style of Colombian music, but I still like it. It is very popular in the Carribean Coast, especially in Cartagena. It has a heavy African beat and provocative dancing.
Reggaeton
Reggaeton is thought to be from Panama and mixes meringue, reggae, ragga, and rapping. Despacito is a very famous reggaeton song by Luis Fonsi who is from Puerto Rico.
Here’s a popular one by a Colombian, Manuel Turizo.
Colombian Salsa
Colombian Salsa originated in Cali, which is also one of the best-known cities in the world for Salsa. The basic Colombian salsa step is like a fast Cumbia. It is easy to learn until you incorporate extra steps and turns. With Colombian salsa, most of the movement is in the lower body with the upper body stating rigid.
Bambuco
Bambuco is traditional music and dance originating in the Andean Zone of Colombia. It isn’t popular in the “top charts” these days but is very influential in other dance and music of Colombia.
Vallenatos
Vallenato music is from the city of Valledupar, otherwise known as the “forest city”. The main instrument used in Vallenato music is the accordion.
Merengue
Merengue music is often heard in the clubs of Colombia and it is my favorite Colombian dance… because it is so damn simple! Unless salsa is playing, it is my go to on a dance-floor.
The Lambada
This last one isn’t even Colombian, but I love it so I’m including it. The Lambada was a very famous Brazillian song in the 80’s. They even made a movie out of it called “The Forbidden Dance”, but the true forbidden dance of Brazil is the Maxixe.
Pin This to Your Travel Inspiration Board!
Did you enjoy this post on the popular dance and music of Colombia? Do you have some favorite Colombian music and dances you want to add? Share your thoughts in the comments.
The post Popular Dance and Music of Colombia appeared first on Survive Travel.
October 26, 2017
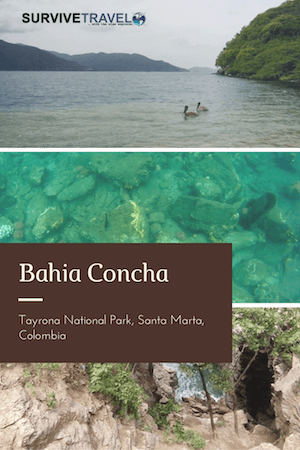
Snorkeling in Bahia Concha, Tayrona Park, Santa Marta, Colombia
Snorkeling in Bahia Concha is a great alternative way to see Tayrona Park in Santa Marta. It is like a shrunken version of it. You can hike, swim, snorkel, and even camp there.
Bahia Concha is in Tayrona National Park, but it is far from the main entry. This means you do not have to pay the standard entry fee. To get to Bahia Concha is a 20-minute bus ride from Santa Marta, followed by a 15-minute motorbike ride to the beach. You could hike instead of taking the motorbike, but it is a long, boring road. I recommend paying the 5,000COP for the motorbike.
Cost(s): 5,000COP entry fee + 5,000COP for the motorbike (optional).
Exploring Bahia Concha
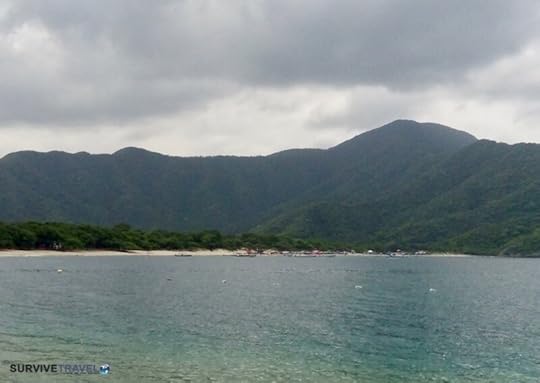
Most of the beaches in Santa Marta have the same general set-up. A beach lined with shade shelters, people on one end and small boats on the other. A few restaurants, some street vendors, and surrounded by beautiful mountains. I was happy it wasn’t crowded when I arrived, unlike Playa Blanca was.

I heard the snorkeling in Bahia Concha was good, but before doing that I decided to go for a little explore around.

There are dirt trails around the place. I decided to follow this “river-run” track up the hill near the beach.
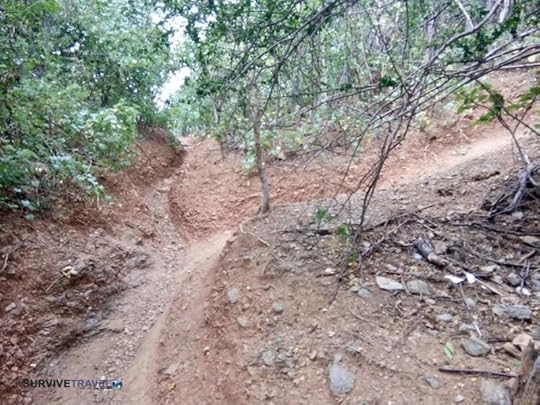
It got a bit hairy at times, but I stayed away from the cliff edge.

There weren’t any awesome views up there, and quite a bit of trash. This was the best I got.

After my short explore I was ready to check out the snorkeling in Bahia Concha. Near the cliff edge close to the main entrance looked good. I took a walk around it to see what I could see, which wasn’t much. I am sure the snorkeling would have been okay there but I went to check out the other end of the beach before jumping in.
This is looking back at the beach from under the cliff edge.

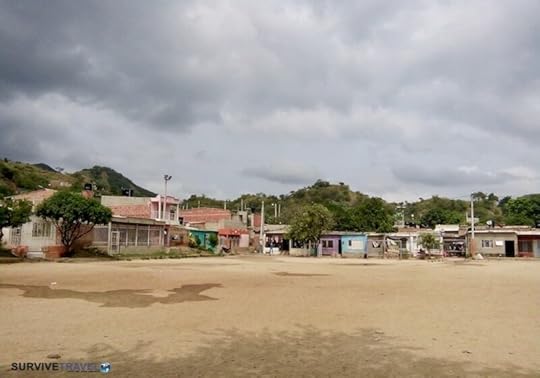
Walking along the beach there was this inlet. There are also some camping grounds.

I only saw a couple of boats taking people out during my time in Bahia Concha. I’m not sure where they took them.

There are a few pelicans around. They gather near the fisherman at the far end of the beach.

Snorkeling in Bahia Concha
Up until now, I hadn’t seen anyone else snorkeling, but at the very end of the beach, there was one person. I later discovered he was a fisherman checking the nets. I found a quiet spot to organize myself and went in.
Looking back to the beach from my snorkeling spot.
Snorkeling in Bahia Concha might be the best I’ve done in Santa Marta. The water was clear and there was a bit more of a variety of fish.

I even saw some colorful coral.
After about 30 minutes of snorkeling, I got the motorbike back to Bastidas. I had a quick look around before jumping on the bus back to town. There wasn’t much to see there.
Bastidas football field.
Snorkeling in Bahia Concha, Video
Getting to Bahia Concha
From the center of Santa Marta, catch any bus to Bastidas. It will cost 1,600COP, or 1,700COP on Sundays and holidays. Take it to the last stop. Get off and walk back to the corner where there are guys with motorbikes. Ask the bus driver if you are unsure.
The motorbike will cost you 5,000COP. Confirm it before jumping on.
Pin This for Later!
Did you enjoy this post on snorkeling in Bahia Concha, Tayrona Park? Share your thoughts in the comments.
The post Snorkeling in Bahia Concha, Tayrona Park, Santa Marta, Colombia appeared first on Survive Travel.
October 24, 2017
Hiking from Santa Marta to Playa Blanca, Colombia
Hiking from Santa Marta to Playa Blanca was the most “off the beaten path” thing I did while in Santa Marta. My intention that day was to go to Bahia Concha. When I arrived in town I realized that I didn’t bring enough money, so I hiked to Playa Blanca instead.
The normal way to get to Playa Blanca is to catch a boat from Rodadero. From looking at the map I thought it might be possible to hike from Santa Marta to Playa Blanca along the coast. This would allow me to go to some of the more secluded beaches on the way also. I soon found that to be incorrect, along with a few more things on the map.
Hiking from Santa Marta to Playa Blanca
I got off the bus from Taganga at the foreshore, right out the front of the beach in the city.

This was my first time walking past the main part of the foreshore. It was nice to see the mariner beyond the jetty.

A bit further on is a much quieter beach. I still wouldn’t swim in it, but the locals didn’t seem to mind.

Under the beachfront resorts, there is some cool street art, and some street people to go with it.

Soon I came across the first hitch in my plan. A small estuary. I guess I didn’t look at the map close enough because it was on there.

I felt it wasn’t worth getting wet so I detoured inland and crossed over the bridge.

On the map, there was a road leading from the other side of the bridge to the coast. When I got there was a locked door blocking it off. I’m not sure what the compound was, but I definitely was not allowed in.

Sendero Pertonal
I continued to walk to the next road that would lead to the coast, but that was off limits also. This time by a military compound. I ended up on Sendero Pertonal, which I wanted to do at some stage anyway so that was a win.

It was a long, hot, walk. Not one bit of shade for a few kilometers, but some nice views on the way. There was even free binoculars to look through at one of the viewpoints.

Finally, I got to the end and some shade. I was glad I took a liter of water instead of my usual 300ml bottle.
Continuing in the same direction towards Rodedero I came across these “ruins”. I’m not sure what they were, but I doubt anything that old.

It was nice to get off the tarmac so I cut through along a random path into the suburbs of Rodadero. The houses there were much nicer than the neighborhood closer to the city. I found Carrera 5 and began walking into nature.

Cerro Ziruma
The climb wasn’t too bad, and as I approached the coast there were some great views of the coast and some side tracks. One went to Mirador Inca-Inca, and others down to the secluded beaches. Although tempting, I decided to stick to my plan and not follow any side-tracks.
In this picture, you can see the aquarium in the distance.

The path I was on (the main path) led me down into one of the beaches. There was one house on the beach and a single shade shelter set up with a family chilling under it. Also, a motorboat waiting until the family wanted to leave. I imagine there are more people on the weekend, but at that moment it was peaceful.

I did think that might be as far as I could go, but on my way out of that beach, I saw a path leading up through the hills. This path was definitely not used very much. I remember thinking, “if anything happens to me here I’d not get discovered for a while”.
The path led me to the aquarium. I arrived at the end of the dolphin show. While trying to figure out how to walk through to Playa Blanca I managed to “sneak” into the aquarium. No way I’d ever pay for it. Not only was it under heavy construction, but I’m against the captivity of animals. I hope they at least have a bigger enclosure for this poor dolphin.

Playa Blanca
After asking a few of the workers I got pointed in the right direction. You have to walk along the rock edges. It was my favorite part hiking from Santa Marta to Playa Blanca.

When I got to Playa Blanca I took a walk up and down the beach. It was a disappointment for me. Even on a weekday, there were a lot of people. It looked like some good snorkeling though because it was a protected coral area. I saw some people out there but they had guides. I felt bad to swim there without one. Also, I didn’t want to get salty for my long journey home.

I decided to hike back to Rodadero and get something to eat. It was about 3:00 pm by now. I started walking at 10:00 am and had not eaten. When I got to Rodadero I remembered my lack of money, so I got an empanada and some mango biche from the street vendors.

Rodadero Beach.
Getting to Playa Blanca
If I was to do this again I would start the hike from Rodadero. Catch a bus from the city to Rodadero and get off as you enter the area. Walk down Carera 5 into the hills. It turns to gravel. Keep following the main path until it leads you to the beach. Just before the house on the beach, there is a path to lead you to the aquarium. Go down to the aquarium and walk behind it to the coast. Ask people if you can’t figure it out. Follow the rocks around to Playa Blanca. Be careful.
This map shows Carrera 5.
Pin This for Later!

Featured Image Credit: By David Shankbone (Own work) [CC BY-SA 3.0], via Wikimedia Commons
Did you enjoy this post on hiking from Santa Marta to Playa Blanca? Share your thoughts in the comments.
The post Hiking from Santa Marta to Playa Blanca, Colombia appeared first on Survive Travel.
October 20, 2017
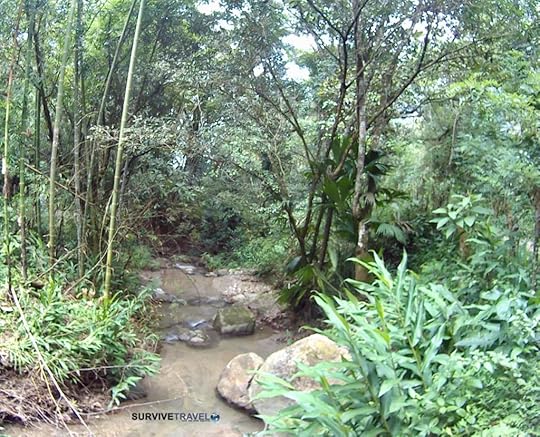
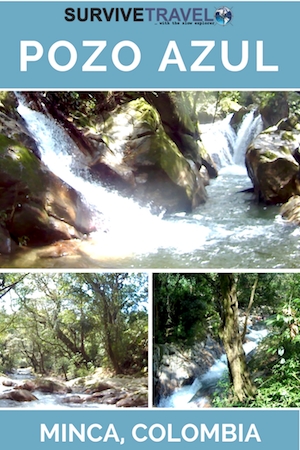
Hiking to Minca’s Pozo Azul, Santa Marta, Colombia
Whilst living in Santa Marta I went hiking to Minca’s Pozo Azul. Pozo Azul is a waterfall in Minca within an hours hike from the town. If you don’t want to hike you can get transport there also.
Minca is a mountain town less than an hours drive from Santa Marta in Colombia. It’s not a big town but if you enjoy the outdoors then you can stay there a few nights without getting bored. There’s hiking, waterfalls, a mountain to climb, a coffee plantation, and more. One thing I noticed about the town itself was that it was well-catered for vegetarians and vegans.
Hiking to Minca’s Pozo Azul
After a not so nice drive in I started hiking straight to Pozo Azul. The paved road soon turns into a dirt one.
Find detailed instructions on getting to Pozo Azul in Minca at the end of this post.

There are houses along the way and dotted in the mountains. I even saw a few for sale.

I got some good views from where they had poured foundation but not started building yet.

As you get closer to Pozo Azul you cross a few streams. You don’t need to get your feet wet though.
When I arrived at Minca’s Pozo Azul I was surprised by how many people were there. I make a point not to go places on the weekend so I can avoid the crowds. Turns out it was a public holiday – El Dia de Cristobal Colon.

For some reason, I didn’t take a photo of the main swimming area. Oh well, it was too crowded anyway. Instead, I walked along a path to go further downstream. It is on the right of the river as you enter.

It was a nice little path. There are a few places along the way where you can go down to the river.

After 10 minutes or so it gets a little muddy and overrun by vegetation.

It is possible to continue, but I chose to walk towards the river instead.

It was a nice spot with much fewer people around.

I waded upstream for about 5 minutes and came to this set of little waterfalls. It was a nice place for a swim.

Getting to Minca’s Pozo Azul
From Santa Marta, get a mini-bus from the central market. It is near where you can catch the bus to Tayrona, but on the adjacent side of the market building. Calle 12, Carrera 9. Ask someone and they will point you in the right direction.
You have to buy a ticket from inside the “Cootraminca” office. You can see the drivers with Minca shirts out the front. It is 8,000COP one way per person, or 15,000COP for a return ticket (ir y vuelta). I’m not sure if that return ticket is valid for more than one day. They don’t leave until the van is full so you may have to wait a while.
The drive to Minca is not very comfortable because you sit sideways. For a better view during the drive, on the way there sit on the right-hand side. The journey is about 40 minutes to an hour, depending on traffic.
Once in Minca, to get to Pozo Azul, follow the road that leads into Minca. The road you get dropped of in. Don’t turn right into the town, go straight. Soon it will turn into dirt. If you see the Church, you are going the wrong way.
Follow the dirt road until you get to the main carpark of Pozo Azul. There is a gate to your left. Cars can’t pass but pedestrians and bikes can go in. Follow it to get to Pozo Azul.
The entire walk from Minca town to Pozo Azul is about 40 minutes.
If you don’t want to hike you can get a lift in. I read that it was 40,000COP for the car, 10,000COP per person. The car can only take you to the gate so you’ll still have to hike in the last bit.
A motorbike can take you the entire way. I’m not sure how much it costs, but 5,000COP from town would be what I bargain for. 7,000COP at the most and in my mind that’s generous.
Pin This for Later!
Did you enjoy this post about hiking to Minca’s Pozo Azul? Share your thoughts in the comments.
The post Hiking to Minca’s Pozo Azul, Santa Marta, Colombia appeared first on Survive Travel.
October 15, 2017
Transferwise vs Tranzfers – 7 Reasons Why I Made the Switch
This is a comparison of Transferwise vs Tranzfers for online international currency transfer. There are many different options for transferring money between countries. The one you choose will depend on your personal circumstance. You must consider things such as:
Which countries you are transferring between.
How much you are transferring.
How fast you need to transfer the money.
Your preferred payment method.
Transferwise vs Tranzfers
I was a loyal user of Tranzfers for close to 5 years, then the other day I switched to Transferwise. Here are my 7 reasons for switching from Tranzfers to Transferwise.
1. More Transfer Options
Transferwise allows me to deposit money using a debit card and ACH Bank Debit. There are more methods also but I wouldn’t use them. With Tranzfers I could only do it via bank transfer. Only allowing bank transfer gave me three problems.
Note: My US bank account is with Bank of America (BOA). Different banks have different terms for transfer, so check yours.
BOA charges $3USD to transfer to a non-BOA bank account within the US. It’s free to another BOA account, but Tranzfers doesn’t use BOA.
It takes 3 working days to make the transfer. You can do it faster but the fees are much higher.
I have a bank transfer limit of $1,000usd per transaction. This means that if I have to transfer more than this, I have to pay the fees again. I could transfer more if I got a security pin sent to me, but I don’t have a US phone number.
Being able to deposit the money to Transferwise using ACH Bank Debit or Debit card is faster and cheaper. Both are fee-free. ACH takes between 1-4 days (usually within 2) to get into Transferwise and has a $10,000 maximum transfer limit.
Using a debit card is instant (to get into Transferwise) but the limit is only $1,000usd per day. Also, you can only transfer a maximum of $4,000 per week.
2. Regulations
This is the thing that pushed me to make the swap. I was using Tranzfers fine for a few years, then one day the transfer didn’t complete. The computer flagged me because I was not in Australia while making the transfer. This was particularly frustrating because I was never in Australia before either. The computer decided that now was the time to flag me. They said that I would have to update my address every-time I lived somewhere new. A bit impractical for a traveler.
I asked them if I could use my Australian address on the computers record and leave it at that. They said it was okay, but if I did that I would have to make the transfers by phone. This is even more inconvenient than changing my address.
In hindsight, I could have said that I lived in Australia and don’t travel and that would have been that. I did try to back-peddle but the girl said they record the phone calls so it was too late.
In the end, I told the lady that it was too much hassle and that I would use a different service. Immediately after that, I made the transfer with Transferwise instead. It took under ten minutes, including new customer sign up and connecting my BOA account via ACH. It was a very smooth process and the transfer was complete the next day!
3. Transparent Fees and Rates
Tranzfers is a flat fee. The fee is $5USD, but it is different for different currencies, e.g., Transfering from AUD is 15AUD. Transferwise fees are a bit more complicated. They have a minimum fee for smaller transfers or a percentage of the transfer amount for larger ones. Also, it differs depending on the currency.
Transferwise works on a percentage and Tranzfers is a flat fee. This means that when you transfer larger amounts, Tranzfers is cheaper. This doesn’t take into account exchange fees though. Tranzfers also charges a margin (fee) by adjusting the exchange rate. Transferwise does not.
When it comes to figuring out your actual cost, Transferwise has a handy calculator. You enter the amount you want to transfer and they will tell you how much you will receive on the other end. This amount is GUARANTEED for 24 hours.
Tranzfers can give you an initial quote but they don’t guarantee it. The amount you actually receive depends on market fluctuation. This means you could get less or more than expected, but you will not know until it is complete. Don’t forget to take into account Tranzfers exchange margin and your banks transfer fees.
One advantage Tranzfers has is that you can choose when to make the transfer depending on the rate quote. I was often able to get an extra few dollars on my $800 – $1000USD transfers by waiting for a better rate. Is this final amount better than I would have got from Transferwise? It’s possible, but if it was, then it would only be a couple of dollars and not worth the extra hassle.
Ready to try out Transferwise? Click here for your FREE transfer.
4. Speed
Between BOA’s transfer time and the time it took for Tranzfers to put my money into Australia, it took about 5-7 days.
Transferwise has never taken more than 2 days for me, and this is with ACH. With a debit card, 2 working days would be the longest.
5. Minimum Transfer
Tranzfers has a higher minimum transfer. A$100, NZ$100 and £50.
The Transferwise minimum is $1.
6. Borderless Banking
Transferwise offers a service called Borderless Banking. Borderless Banking can give you a virtual bank account in different countries. It means you can get paid, or pay others, in the local currency. It saves you bank fees, and you can transfer more money between currencies with fewer limits.
Unfortunately for me, I receive a lot of USD. It means there are more restrictions.
The other thing is that there is no debit card. You can only pay out money with bank transfer or by withdrawing it to your bank account, which has a small fee. This means that, for me, it is more expensive. If I didn’t have a fee-free US Bank account then I would use Borderless Banking.
I imagine you can connect Paypal and similar services to it so that’s good. Soon they will introduce a debit card. When that happens I will give it another look.
7. Referral and Affiliate Rewards
The last reason I switched from Transferwise to Tranzfers is their referral program. With Tranzfers, if I referred a friend I would earn 1 point. 4 points would get me an iPod Nano and 25 points would get me a Mac Air. There is a range of things in-between also.
Transferwise on the other-hand pays your reward in cash. Also, they give your friends their first transfer free.
Claim Your FREE Transferwise Transfer Today!
Pin & Share It!

Did you find this Transferwise vs Tranzfers comparison useful? How do you usually transfer money overseas? Share your thoughts in the comments.
The post Transferwise vs Tranzfers – 7 Reasons Why I Made the Switch appeared first on Survive Travel.
October 13, 2017
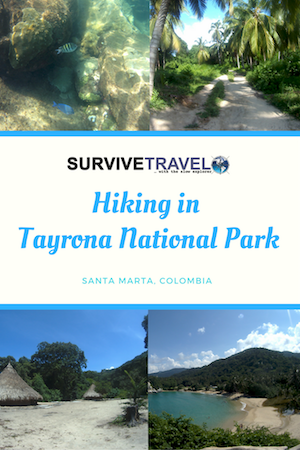
Hiking in Tayrona National Park, Santa Marta, Colombia
I had planned with a friend to rent hammocks on the beach in Tayrona for a night. After thinking about how much I would hate that I decided against it. I went hiking in Tayrona National Park for the day instead.
A few years ago I would have jumped at the idea of sleeping in a Tayrona National Park hammock. It is why I agreed to it in the first place. Now I know myself better. Convenience and comfort prevail! My main gripe is that I get sea-sick, so sleeping in a hammock is not ideal. The other thing is the “community” of it all. Most people picture a lone hammock on a deserted beach. I guarantee that if you’re hiring the hammock (as opposed to bringing your own) then there are others doing it too. This is awesome for many people, but not me.
Cost(s): 42,000COP for a foreign adult. They ask you for picture ID.
Address: Not far from Santa Marta, Colombia. ParquesNacionales.gov.co.
Hiking in Tayrona National Park
There where a couple of things I wanted to do while hiking in Tayrona National Park. Visit Pueblito archeological site and go snorkeling. Hiking would be unavoidable and appreciated. To prevent backtracking I started from Calabazo and made my way to the main entrance.
I got the bus driver to point me in the right direction to enter Tayrona from Calabazo. It was a nice walk to getting El Pueblito, the traditional village site. I didn’t see many other hikers along the way, but I did see indigenous families living out there. Their houses were pretty much the same as the ones in Pueblito.

After a couple of hours, I got to El Pueblito. It is worth walking around a little, including on the other side of the stream, as opposed to passing through.

I enjoyed the hike from Calabazo to El Pueblito, but the hike from El Pueblito to Cabo San Juan del Guia was better. The path was a bit more adventurous with some rock-hopping.

Hiking in Tayrona National Park is well marked, but I still managed to get lost. I hit this river and for some reason decided to follow it. I figured it would end at the ocean. Along the way, I saw a small group of hippies skinny dipping in a small section of it. They pointed me back to the real path.

An hour after leaving El Pueblito I arrived at Playa Cabo (Cabo San Juan del Guia), greeted by a campsite.

Cabo San Juan del Guia is pretty. I can see why people would want to sleep there. Some of the hammocks were in a lookout tower. It looked very communal but had a great view.

I had read of two places to go snorkeling in Tayrona National Park. Cabo San Juan del Guia and La Piscina. I didn’t want to leave my stuff on the beach so I stuffed it all in my dry-sack and attached it around my waist with a belt. It was a good floatation device but made it impossible to dive. In hindsight, I should have tied it with a short tether to my ankle.
The water in Tayrona National Park was much clearer than in Taganga, and the fish were more colorful too.

After snorkeling at Playa Cabo I made my way to the next beach, La Piscina. I didn’t bother snorkeling here but did see others giving it a go.

Next, I headed to Playa Cañaveral. I’m pretty sure there is a path along the beach, but I guess I took the one inland. It gets pretty muddy sometimes thanks to the horses that people can hire to ride in.

There is a few other Tayrona National Park accommodation options along the way. I saw some more hammocks and a few bungalows. There are also places to eat, but they are very over-priced, for Colombia.
Playa Carñaveral was nice. Quieter than the other beaches.

Somehow I missed Playa Arrecifes. It could be in front of the Tayrona National Park eco-habs you can rent to sleep in.
Before I knew it I was hiking towards the exit. There was a lot more foot traffic in this section, but it was a nice hike with lots of varied terrains.
This boardwalk over the mangrove swamp.

And this coastal shrubland.

At the entrance of Tayrona National Park, I got on the mini-van to the main road. It cost 3,000COP.
Hiking in Tayrona National Park Video
Here’s my first attempt at putting together a video other than a photo slideshow. I expect I will get better at this.
Tayrona National Park Map
I estimate that I hiked close to 10km. I realized on the bus home that I did it all in my minimalist Xero sandals, and not one blister! Awesome sandals.
I also realized that I lost my goggles and belt somewhere along the way.
Here’s a map with my route.

Getting to Tayrona National Park
From Taganga I took the bus to near the market and then walked to the corner of Calle 11 and Carrera 11. It’s well marked with “Tayrona National Park” on it and also goes to Palomino. No need to pay as you board. They take the money off you later.
I asked to get off in Calabazo. It cost 6,000COP and took about 30 minutes. If you go to the main entrance (Tayrona) it will cost 7,000COP and takes another 10 minutes or so.
In Calabazo the bus drops you along the road. Cross it and enter the path to Tayrona National Park behind the shop. The guy collecting the money will point you in the right direction if you tell him you are going into Tayrona.
If you go to the main entrance you can get a mini-van to take you in for about the first 3km. It costs 3,000COP. Other than this, to get anywhere you have to hike or hire a horse. I don’t know how much the horse will cost. Exploiting captured animals isn’t my thing.
Pin This for Later!
Did you enjoy this post on hiking in Tayrona National Park? Share your thoughts in the comments.
The post Hiking in Tayrona National Park, Santa Marta, Colombia appeared first on Survive Travel.
October 10, 2017
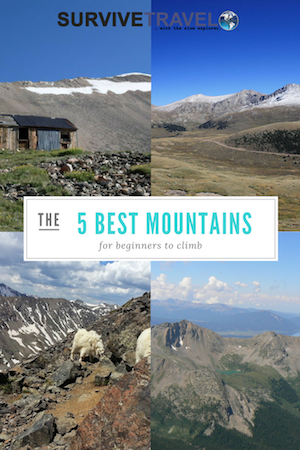
Climb Every Mountain: The 5 Best Mountains for Beginners
Everyone has a reason why they’re getting cabin rentals in Colorado. Some might be renting one just in time for the skiing season, while others might be there for the X games. You, on the other hand, might be there to embark on a whole new experience: mountain climbing. Of course, with hundreds of mountains to choose from, it can be hard to know where to start. Here are a few of the best mountains for beginners. Perhaps with this guide, you’ll decide where to start then maybe later try to conquer the others.
The 5 Best Mountains for Beginners
1. Grays and Torreys
Grays and Torreys may be a bit crowded compared to the other mountains on the list, but depending on the person, this can be either a pro or a con for you. It can be a pro if you’re seeking companionship and camaraderie during your climb. It can be a con if what you seek is solitude and to be alone in your own thoughts.
Grays is 14,270 feet while Torreys is 14,267 feet tall. There’s a good, steady, wide main trail for you to follow, so it will be pretty hard to get lost on the way to the top of these mountains. The best part is that Grays and Torreys are connected by a path akin to a saddle, making it feel like you’re getting two climbs for the trip (or price) of one. From the top, you’ll spot a few mountains around like Mt. Bierstadt, Mt. Sniktau and Mt. Parnassus. Oh, and was the lovely view mentioned? Be warned though, if you’re getting there in a car you better leave home early because there is some competition for a parking spot.

Grays Peak Trail. By Xnatedawgx (Own work) [CC BY-SA 4.0], via Wikimedia Commons
2. Huron Peak
Located in Buena vistas, Huron Peak stands at 14,012 feet and at that height, it ranks a mere 52nd among the 53 mountains rising above 14,000 feet. Officially named in 1956, nobody is actually sure where the name came from, but there is some speculation that it came from the Native American tribe, the Huron.
Climbing the mountain is a steady climb, although it is recommended to bring a walking or trekking poles because despite being considered one of the beginner mountains, Huron Peak is still pretty steep. At around 10,600 feet it is a basin on which you can stop at to look and admire the Three Apostles and Ice Mountain. It’s highly recommended to climb the mountain during the summer months of July and August. Since Huron Peak is located in the Rocky Mountains, better check the weather before leaving to climb as this area is well known for carrying a lightning risk.

View of West Apostle from Huron Peak. By jokermanj (Amazing View from TopUploaded by xnatedawgx) [CC BY 2.0], via Wikimedia Commons
3. Mount Bierstadt
Named after Albert Bierstadt, a German-born American landscape painter who is known to be the first climber to reach the mountain’s summit, Mount Bierstadt is often thought of as one of the most accessible mountains above 14,000 feet.
When climbing Mount Bierstadt, it is highly recommended to wear waterproof clothing as early on in the climb you will get wet when crossing the creek. Don’t worry, a swimsuit is not needed as the water will be only up to your knees. Once you get to the top of this 14,060-foot mammoth, you will get a view of Mount Evans as well as Grays and Torreys peak. It’s a mostly easy climb, with no need for a trekking stick, although there are some steep spots.

By David Herrera from Albuquerque, NM, Bernalillo [CC BY 2.0], via Wikimedia Commons
4. Quandary Peak
If you have a dog you like to take with you when you climb, then you’ll be glad to know Quandary peak allows dogs, although they must be kept on a leash at all times. Since it can be a bit rocky, it would be best to make them wear shoes so as to prevent the sharp stones from hurting their precious paws. Expect a lot of people traffic since this 14,265-foot mountain is quite popular.
The trail up to Quandary peak is class 1, meaning you’re mainly walking on well-maintained, even terrain. This is probably why as mentioned, it’s a popular mountain to climb. In addition, it’s near a ski town, so you won’t have any problems in getting any supplies you may have forgotten in your cabin. Although it is class 1, it can be steep just like Huron peak, so better bring and use hiking poles. On the way up, you might spot a few mountain goats, but don’t stop to pet them as they’re known to be quite unfriendly. Once you get to the apex, you’ll get to see Pacific Peak, Crystal Peak, and Mt. Democrat to name a few. In the winter, you might want to come back to Quandry peak since its steep slopes are ideal for skiers.

Mountain goats on Quandary Peak. Via Pixabay.
5. Mount Sherman
Of all the fourteeners in Colorado, only Mount Sherman has had an aircraft successfully land on its summit back in 1967. It’s 14,036 feet high and the best part is, you can drive up to 12,000 feet, a feat you won’t be able to do on most mountains. If this is your first time ascending a mountain, then Mount Sherman should be number one on your list.
Mount Sherman is so easy to climb, you’ll wish all your ascents were this pleasant and wonderful. Sherman Mine used to be on the mountain, which is why you’ll see a bit of history on your way up, mainly thanks to the rotting, old mining buildings. Don’t venture into the area near the mines since it is on private property.
No matter what mountain you’ll be climbing on, always wear a good pair of shoes, bring plenty of water, some snacks, and wear a lot of sun-block. Also, don’t forget to protect your eyes with a pair of UV repelling sunglasses and wear a cap to shield your face from the sun.

The summit of Mount Sherman. By Stargazer7121 (Own work) [Public domain], via Wikimedia Commons
Pin & Share It!
Article Author: Unknown.
Have you got some other ideas for the best mountains for beginners? Let us know them in the comments.
The post Climb Every Mountain: The 5 Best Mountains for Beginners appeared first on Survive Travel.


.jpg?)