Aventuras De Viaje's Blog, page 33
November 29, 2015
Cangkalanog Falls Review, Moalboal, Philippines – Survive Travel
This post is a Cangkalanog Falls review in Moalboal, Philippines. It includes directions, pictures, other useful information and my own personal biased opinions.
Cost: Free.
Address: About 4 km SE of Madridejos along Alegria Diversion Road.
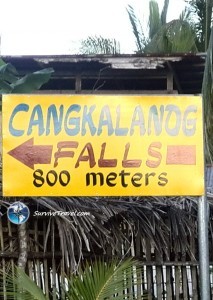
I had gone to Kawasan Falls and was a bit disappointed that I didn’t actually go in but as I was riding I saw this sign for Cangkalanog Fall so I decided to check it out.
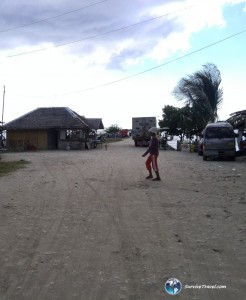
Picture right: Getting to Cangkalanog falls was not as easy as going a further 800 meters.
Cangkalanog Falls Review, Philippines
It was a fun motorbike ride… pretty much trail riding.

This was the easiest part of the trail on the way in.
I had to ask directions off locals then one guy decided to just guide me on.
I did see a group on the way in but when I got there I had it to myself.

Approaching Cangkalanog falls
It was lovely.
Beautiful clear water and you can easily jump from the bridge.

Jump into the lush water from the bamboo bridge.
Actually, i was a bit worried about not being able to get out, but I figured the guy that led me in would help me if I needed.. either that or steal my sh*t and leave me to drown.
I gave him a tip on the way out, which he refused at the start but I insisted. I hope I did not offend him. It wasn’t much.
Get all the information on the Philippines you need with Lonely Planet Guide Books.
Getting to Cangkalanog Falls
Like most places in and around Moalboal, I went there by motorbike. I suppose you could catch a tricycle or taxi but it would probably end up costing you much more than hiring a moto for the day.
Get all the information on the Philippines you need with Lonely Planet Guide Books.
Have you been to Cangkalanog Falls near Moalboal before? Help out other readers and leave your Cangkalanog Falls review below, and if you know of more or updated information or even if you just want to say hi then please leave a comment  .
.
The post Cangkalanog Falls Review, Moalboal, Philippines – Survive Travel appeared first on Survive Travel.
November 28, 2015
Lambug Beach Review, Moalboal, Philippines – Survive Travel
This post is a Lambug Beach Review review which is just out of Moalboal in the Philippines.
Cost: Free
Address: About 15km or so South of Moalboal. The closest “big town” is probably Badian.
I only went there because it was on the way to other things I wanted to see.
I didn’t stay there long but it was nice to “pop in” to.
Actually I didn’t even go swimming there.
Right picture: Riding into Lambug Beach.
Lambug Beach Review, Moalboal, Philippines
To me Lambug Beach was just another quiet beach.
I think it was about as picturesque as White Beach.
I went there on a Sunday and it wasn’t that crowded. I think going there during the week would be very nice.
I didn’t go in the water but I do not think it is known for snorkelling or anything.
You can sing karaoke there and there is a few local style restaurants about.
The drive there was quite nice.

Lambug beach is a nice beach to visit if you are going that way.
Get all the information on the Philippines you need with Lonely Planet Guide Books.
Getting to Lambug Beach
I jut hired a motorbike for the day and went there amongst many other places. Just drive south along the coast (from Moalboal). It is a little bit past Badian. You will pass a golf course on the way in. Ask the locals, or better still, put a GPS app on your smart-phone.
A tricycle would probably set you back more than the daily rental of the motorbike.
You could catch a bus to Badian from outside the market in Moalboal. It would probably only cost 20 php or so. Then from Badian get a tricycle which would probably cost another 20php.. but I am just guessing these prices.
Get all the information on the Philippines you need with Lonely Planet Guide Books.
Have you been to Lambug Beach in Moalboal, Philippines before? Help out other readers and leave your Lambug Beach review below, and if you know of more or updated information or even if you just want to say hi then please leave a comment  .
.
The post Lambug Beach Review, Moalboal, Philippines – Survive Travel appeared first on Survive Travel.
November 27, 2015
Kawasan Waterfalls Review, Moalboal, Philippines – Survive Travel
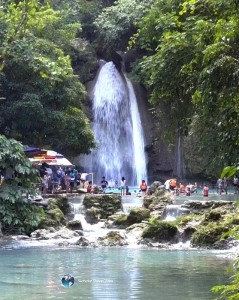
Kawasan Waterfalls
This post is a Kawasan Waterfalls review in Moalboal, Philippines.
Cost: 40php (for foreigners) + 50php if you want to park your motorbike there.
Address: Kawasan Watefalls is about 20 km south of MoalBoal.
Kawasan falls is somewhere that everyone says to go visit when in Moalboal. I went there on a weekend which I think was a bit of a mistake, it was pretty crowded.
Also, I missed out on going a bit further on where I was told was much quieter and nicer also, so if you do go be sure to seek out that. Details further on in this post.
Still, it was worth going due to the ease of getting there (in comparison to some of the other waterfalls I visited whilst in the Philippines.
Kawasan Waterfalls Review, Moalboal, Philippines
The ride there is along the coast on a very well maintained road and some awesome scenery.
Upon arrival you need to walk in about one km or so.
Entry is 40php for foreigners. If you have a bike it costs 50php to park it, although you could avoid that by parking outside a little.
The walk in is pleasant and you can get some Boho Juice on the way for 5php (coconut milk).

There’s more than just the waterfalls to see.
I went on a Sunday which was a mistake. It was pretty crowded and I didn’t even end up going in, partly because I didn’t want to leave my stuff around while I went in.
You can just swim if you want but there are also rafts, food, tables for rent and even accommodation.
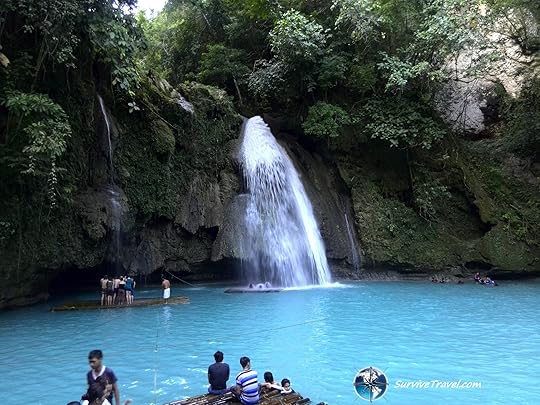
I didn’t even go in, but I did at the next one I went to later in the day (next post).
I missed it but you can go past the main part and find the better, quieter falls. According to the guy that taught me “Arniss” you follow the path to the falls as normal. Walk on the left of the falls, whcih is where the apth goes) and go past everything. At the back is a trail up to the other falls. I think this is where you would pay to go canyoning but very self-guidable.
It is not advertised because I guess they want you to pay for a guide, but you can go there no problems.
It’s a few km walk.

I went on a Sunday. It was very crowded
Get all the information on the Philippines you need with Lonely Planet Guide Books.
Getting To Kawasan Waterfalls
I rode a motor bike there. I stopped a lot because the scenery was awesome but if you just went straight down the coast it would probably only take 30 minutes or so.
Another option is to take a bus. Go to the public market across the road from teh 360 pharmacy and catch teh yellow bus. Tell the bus driver you want to go to Kawasan Falls. It should cost 19php. Note that I did not actually do this. I got the information from WikiTravel.org/en/Moalboal.
You could also take a Canyoning tour which would include transport. That would set you back about 2500php.
MAP
Get all the information on the Philippines you need with Lonely Planet Guide Books.
Have you been to Kawasan Waterfalls in Moalboal before? Help out other readers and leave your Kawasan Waterfalls review below, and if you know of more or updated information or even if you just want to say hi then please leave a comment  .
.
The post Kawasan Waterfalls Review, Moalboal, Philippines – Survive Travel appeared first on Survive Travel.
November 26, 2015
Lion Dive Centre Review, Moalboal, Philippines – Survive Travel
INSERT FIRST IMAGE, PREFERABLY PORTRAIT – right align – medium
This post is a Lion Dive Centre review which is a dive training center in Pangasama beach, Moalboal, Philippines.
Lion Dive Centre Review, Moalboal
Cost: Depends on the certificate you do. A two-three day open water dive certificate is 16,000 php.
Address: Pangasama Beach, Moalboal, Philippines.
I had not planned on doing any diving whilst in Moalboal, in fact I had no idea it was a dive town until I got here. I did a little research and in comparison to most parts of the world diving here is cheap and decent quality spots, so i decided to do an Open Water Certificate. The guy that taught me Arniss recommended the Lion Dive Centre. I think it is probably the cheapest place in this little town and he gave me discount since his mate referred me.
For my open water dive certificate with Lion Dive Centre it cost me 13, 200php with the discount. I think it is normally 16, 000php. He does non-cert diving as well as certs all the way up to 10 day instructor training, but I think the majority of Dive Centres here do the same, and there are plenty of choices.
The Lion Dive Centre is owned and run by a Korean guy. His English is not great but was good enough to get me through the course. Actually, I think I prefer it that way because it means he doesn’t ramble on like I know other instructors would.
The course is standard three days but I was the only student so we smashed it back in two. Lion (the guys name, hence Lion Dive Centre) did offer to give a third but i still had a day left of Arniss I wanted to get through.
One the first day we started at 0900. We did a small amount of administration and within half and hour we were in the pool where he went through basic procedures such as preparation and emergency.
After lunch we went for two separate dives in the open water. The first one we practised procedures and the second we basically just swam around and I got used to hovering. (trying to stay at one level) which was harder than i thought it would be, but I’m not great in water. When I go swimming if I stop I generally just sink.
By the end of the day I got a bit of a headache, probably from descending and ascending to fast.
On the second day we went to Pescador Island in the morning which was about a 15 minute boat ride away. By the end of my first dive I was getting used to the whole thing, but then halfway through my second I go stung on the face by a line jellyfish (at least that is what the locals called it). Upon surfacing they smashed vinegar on me and then what I think was deep heat. I think my reaction wasn’t very bad because by the afternoon I was back to normal.
In the afternoon we did theory and a test which was a funny experience because Lion’s English isn’t that great and I think he just translated the questions from a Korean test into his broken English, but somehow I managed to pass anyway.
I’m glad i did the course but I am not a massive fan of diving. I don’t like the feeling of being restricted. I can’t breath through my nose if I want, I have to wait to go up or down due to pressure etc. It is the same reason I don’t really like Kayaking since I cant move my legs. Also, I don’t really like salt water.
On the flip side, you do get to see heaps of cool sh*t. It’s a whole other world down there.
I think I will go maybe once or twice a year if I happen to be in a good place for it, but will probably not “search out” dive spots.
Get all the information on the Philippines you need with Lonely Planet Guide Books or learn more about diving here.
Getting to Lions Dive Centre in Moalboal
Get to Moalboal, probably by bus from Cebu or any other town along that route.
Once in Moalboal you can catch a Tricycle or Motorbike to Pangasama beach. A tricycle is 50php MAX.
Once in Pangasama beach walk North along the road that all the bars are on. Lions Dive Centre will be close to the end (before it veers away from the beach) on your left.
MAP
Get all the information on the Philippines you need with Lonely Planet Guide Books or learn more about diving here.
Have you been to Lion Dive Centre in Moalboal before? Help out other readers and leave your Lion Dive Centre review below, and if you know of more or updated information or even if you just want to say hi then please leave a comment  .
.
The post Lion Dive Centre Review, Moalboal, Philippines – Survive Travel appeared first on Survive Travel.
November 24, 2015
Vivians Nipa Huts Review, MoalBoal, Philippines – Survive Travel
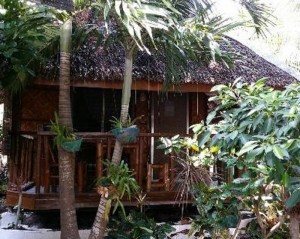
A bungalow.
This post is a Vivians Nipa Huts Review, MoalBoal, Philippines. I stayed at Vicky’s Nippa Hut because it was recommended to me by the guy who taught me Filipino Martial Arts, and I am glad I did.
Unfortunately for the last couple of weeks I have been having major problems with this website so I lost a lot of the pictures, many of them of Vivians Nipa Huts.
Featured image was taken from Moalboalguide.com.
First image in teh post was taken from TripAdvisor.com
If you are a moderator of any of these sites and wish me to take them down please contact me.
Vivians Nipa Huts Review, MoalBoal, Philippines
Cost: 500php/night for shared bathroom. 700-800php/night for private bathroom with aircon, “kitchen”, fridge etc.
Address: Panagsama Beach, Moalboal, Philippines. Once in Panagsama Beach area just ask any local and they will point you in the right direction.
On my first night they didn’t have room in the main part, which is fine but I could not get internet. 500php/night for a basic room with a non-working TV and a fan. It had a shared bathroom with no hot water, but you don’t really need hot water in the Philippines. There is an air-con in the room. Using it will cost an extra couple of hundred php.
It was noisy in the morning. First with the roosters at the crack of dawn, and then a little later with people talking outside. I wake up early anyway but if you like to sleep in then you will not be impressed.
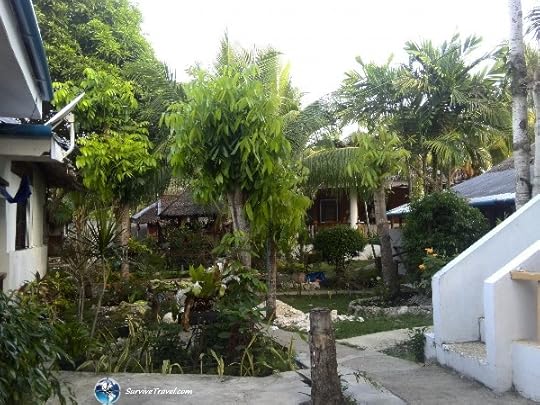
Backyard
The staff are really good… It’s amazing how good staff can make up for everything. It is owned by a Filipino lady (Nina I guess) who married a German guy. Not surprisingly, she can speak German, English and Filipino.
On my second night I moved to the main area and for an extra 200php a night (700php/night in total) I was in a private room with private bathroom, air con, cable TV (with bad reception), working internet (most of the time), a fridge, gas stove and everything needed to cook and eat off.
I still got the roosters in the morning, but the following night I moved into the room next door and surprisingly it cut out a lot of the noise.
For another 50php I got a full water drum with dispenser. Well worth it.

This is the front of my room. It has a “kitchen” meaning a fridge, kettle and gas stove iwth cooking/eating utensils outside.
They also hire out motorbikes but I ended up getting one somewhere else. Everyone says 300php/day but ask for a discount and they will give it for 250php. No-one wears helmets here (I think I am the only one) but ask for one if you want it. I get some funny looks wearing it but I’d rather that than a smashed skull.
The location is good. It is in Pangasama Beach which is basically where all the dive centres and bars are. It is outside the main part which is nice, but not too far away. Everything there is pretty close… walking distance.
Getting to Vicky’s Nippa Hut
From town you can catch a lift on a tricycle to anywhere in Pangasama for less than 70php.
Cheaper than that is to go on the back of a motorbike which will be at least half the price but does not allow for luggage.
Here’s a map.

Vivians Nipa Huts in Pangasama Beach
Unfortunately Vivians Nipa Huts is not on any accommodation booking site (that I could find) so you just have to rock up and hope they have room. Alternatively you can book your accommodation at another place.
Have you been to Vivians Nipa Huts in Moalboal before? Help out other readers and leave your review below, and if you know of more or updated information or even if you just want to say hi then please leave a comment  .
.
The post Vivians Nipa Huts Review, MoalBoal, Philippines – Survive Travel appeared first on Survive Travel.
November 23, 2015
Filipino Martial Arts Training in Cebu Review
This post is a Filipino Martial Arts Training in Cebu Review. It has a ridiculously long name because the training is a unique and highly practical fighting system created by Peter with its bases in (amongst others) Lawrence Lee’s Tong Kune Do Kung fu, wing chun, Balintawak Arnis, Escrima & Panatukan. Basically it doesn’t really have a name so I’ve just used what he calls it on his website.
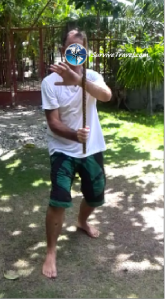
Right Picture: Peter demonstrating the “go to” defense in his stick fighting. This picture also gives a more accurate look at the training ground unlike the others which where made for recording purposes.
Filipino Martial Arts Training in Cebu Review
Cost: Depends on how long you want to train for but works out roughly to $10usd per hour of focused training. No more than 4 people per group.
Address: The guy moves around a bit. He will be in Moalboal (Cebu, Philippines) until February 2016. It is probably best to visit his website for the latest details.
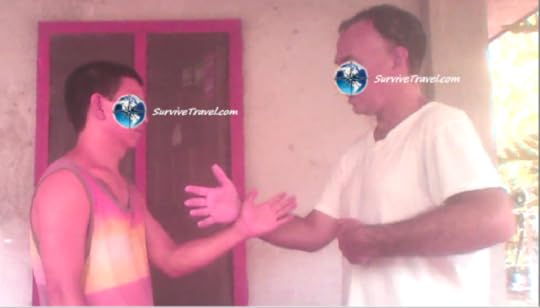
Demonstrating Chi Sao.
First Impressions
Peter is a really nice guy, and an Australian which was very unexpected. Prior to arriving I had been emailing and texting him thinking he was Filipino. I wonder if I knew he was not Filipino beforehand would I have still gone to train with him… probably. Actually it was my mistake because i didnt look at his website properly.
I think he was just as surprised as me when we first met. I bet he wasn’t expecting that I pretty much look Filipino (thanks to my parents almost everywhere I go I blend in as a local… until I speak).
He has a lot of recommendations of where to stay, eat and companies to use, which I am pretty sure is genuine. Maybe he gets a kickback from the accommodation or free dives and things like that. Either way, I ended up getting small discounts on most places he recommended such as diving and motorcycle hire.

Hand to hand combat. This is a “slap entry”.
Much Better than I Expected
Since Peter is not Filipino I had a bit of a reservation about whether this was going to be worth my time or not and the effectiveness of his skills. As it turns out what he teaches is not a pure form of Arniss or Kali, but in my opinion something much more practical and right up my alley.
The whole reason I wanted to learn Filipino Martial Arts was for my lack of weapon skills (not that my hand to hand is very good either). Then I was going to go around learning other stuff from other people, such as Krav Maga etc for the purpose of putting together a relatively easy to learn but very street effective fighting system for the Survival Fitness Plan fight training. After learning Peter’s system I think I might not bother with other training camps and just refine his system to my needs.

The lock flow drill teaches a variety of arm and wrist locks.
About Peter’s Filipino Martial Arts Training
Peter’s Escrima Arnis Martial Arts Training encompass hand to hand, stick fighting and knife defense and all three of these meld together. He did a lot of research and more importantly a lot of thinking about what are the most effective techniques and principles to use. It is far too much to go into detail here but believe me, it is VERY will thought out.
This is self defense / street fight training. It is very street applicable, so much so that it is not practical to spar. You can do partnered flow drills and he uses Chi Sao (a modified version) but I think if you were to spar properly with this someone would get seriously hurt. Of course you can soft spar but it is not like Muay Thai or Boxing where you can score a point and keep going. With this if you were to “score” properly then your mate is probably not going to want to keep going.

Using a “self kill” knife defence.
Teaching Style
Peter has a very good teaching style. He is patient and has well thought out lesson plans which he adapts to the student. His aim is to teach you as much as possible in as short time as possible. This means that it is all skills training with no focused conditioning or fitness, although you do get some (especially conditioning) during the normality of training.
He does cram ALOT of information in but he uses a progressive step method of teaching so you revise stuff as you continue to learn, e.g. ABCD, ABCDE, BCDEF, ABCDEF, CDEFGH etc.

Demonstrating Stick Fighting.
I only stayed for two weeks (4 hours a day 5 days a week) and I think I got a pretty good grasp of it, although if you wanted to learn the full system and leave very good then you probably want to stay for two or three months. Peter says if you spent two months then you’d know the whole system. Even just after two weeks I feel I know the core ideas fairly well. I can practice them on my own / with a friend and continue to improve and refine it to my needs.
On my fifth day I decided I wanted to focus more on Knife and Hand and Peter adapted instantly. Even though I originally came for stick and knife I felt I wanted to concentrate more on knife and hand for a couple of reasons:
1. Hand to hand is a much more common occurrence.
2. Knife is dangerous so you best know what your doing. It is also applicable to many things, not just disarming a knife.
3. In comparison to Hand and Knife, stick is a much bigger subject but I feel like all that is needed to be effective on the general population, even if they do know some other style of stick, is not very much.
In retaliation to my request he said we would do the following within the two weeks;
All the knife techniques, A B C and D. This is how he grouped them, I won’t go into details.
All the formulas for hand. Again, he created a very logical system which I wont go into detail on, but it is formulaic.
Everything for stick up until the techniques where you would only use them against someone else that practices the same type of stick, and getting into a stick fight on the street with someone that knows this is pretty much not-possible unless you arrange it.

A “more friendly’ knife disarm.
Training Ground
As I mentioned before he moves around a lot so the training grounds will change. I just trained in is backyard which suited me fine. He could also come to your hotel or for longer term students they go to locations in the surrounding area to train, e.g., waterfalls.
Well that’s it for my Cebu Philippines Escrima Arnis Martial Arts Training Holiday Camp Review. I suspect in a few months he might be out of Cebu so it might be called something else. In any case, if you want an effective street-based martial art that relatively easy to learn then this is it.

Peter’s back yard is the main training ground.
Getting to Peter’s Cebu Philippines Escrima Arnis Martial Arts Training Holiday Camp
Catch a bus from Cebu to Moalboal. This ride takes about two-and-a half to three hours.
Peter and George met me at Gaisano (a shopping complex) in Moalboal. Make sure you let the bus ticket guy on the bus know you want to get off there otherwise you will go straight by it (like I did).
If you do do a course with Peter then he will no doubt give you instructions so I wouldn’t worry about it too much.
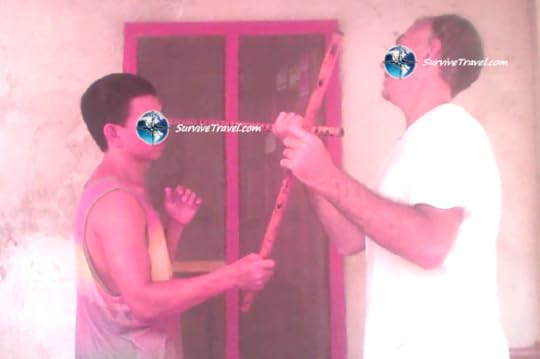
Peter’s stick system is unique and more practical than most because he applies the grabbing of the stick, which many other systems do not.
Learn more about Peter’s Filipino Martial Arts Training at Survival Fitness Plan Fight Training.
Have You Been to Peter’s Filipino Martial Arts Training in Cebu? Help out other readers and leave your Cebu Philippines Escrima Arniss Martial Arts Training Holiday Camp review below, and if you know of more or updated information or even if you just want to say hi then please leave a comment  .
.
The post Filipino Martial Arts Training in Cebu Review appeared first on Survive Travel.
November 10, 2015
Minimalist Packing List for World Travel – Updated
This post describes what I carry when traveling anywhere in the world and I consider it a minimalist packing list for world Travel. I do have stuff at my mum’s house in Australia but if it all got thrown out I wouldn’t miss any of it.
I update my packing list a couple of times a year, but I think I am getting pretty close to perfecting it. Actually, not much of what I carry has changed from the last time I updated this packing list for world travel, just how I organize it and that I bought a new bag… well two actually.
Links will either take you to posts with more information or places where you can get hold of the stuff.
It is probably good to note that this entire minimalist packing list for world travel is air-plane safe, meaning I can get it on as a carry on. Also, the first things I buy when I land anywhere is a cheap folding knife and a lighter.
Minimalist Packing List for World Travel
Note: I stay away from the cold, but this packing list for world travel is good enough to get me through an English winter.
Shoulder Bag
This is like my everyday “bug out bag”. It stays packed with the things I take with me whenever I go. When I need to go out I do not have to think about what I need, I just pick up this bag and I’m out. This is a new edition and the biggest change since my last packing list update. I like it so much that I did a whole post on why my shoulder bag is the best travel bag ever. Anyway, here is what is in it.
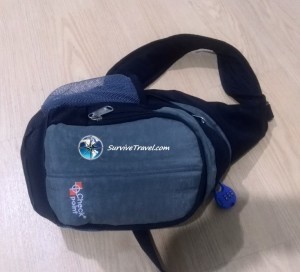
F*k’n LOVE my shoulder bag – Sometimes I even exercise with it on.
Main Compartment
The main compartment of my Shoulder Bag locks so if I am carrying anything especially valuable I make sure it is either in this part, or in my money belt around my waste if I feel necessary to wear it.
Umbrella
A compact umbrella but with as big a top as possible. Protects you from the rain and the sun. Also makes a good weapon.
Small Water Bottle
Water is a lifesaver – ‘Nuff said.
Poncho
A poncho is extremely useful. It provides emergency shelter, protects from the rain, can be used for extra warmth and makes a great groundsheet which is probably what I use it for most. It is also good to hide under if needed… seriously.
Small Micro-Fibre Towel
Being micro-fibre is important. It holds lots of water, cleans well and dries fast. I use it as a sweat rag or and to wash my face etc. It can also clean surfaces if needed, become emergency toilet paper, be used as a bandage etc. This towel is about 30×30 cm.
Smart Phone
I use my smart phone a lot! I learn languages, take lots of pictures, navigate with its gps, as an alarm clock, exercise timer, I even edit photos and write blogs on it sometimes… the list goes on.
Money
Money… it’s important. Also has some ID and a bankcard.
These last two items are often in my pocket, or in the front compartment, but by default I put them in the main compartment because it locks.
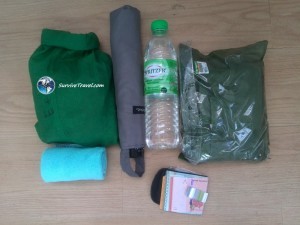
Everything that lives in the main compartment o fmy shoulder bag. Phone is not pictured because I used it to take the picture  .
.
Inside the Green Bag
My green bag is like my urban survival kit.
Lavender Oil
Lavender oil is one of two essential oils that I use. It can be used for many things, and unlike most other essential oils, it does not need to be diluted.
When you buy oils make sure the bottle has a stopper, other wise it will probably leak. I still give it its own plastic bag just in case.
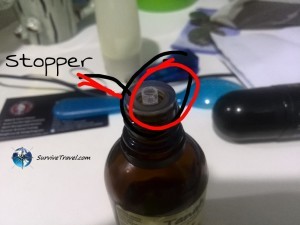
You need a stopper otherwise it will leak. Even when I taped the lid on! Luckily Lavender oil smells nice.
Survival Keyring
If I could only take one thing with me it would be my It has paracord, a small flashlight, a compass and a whistle.
Portable Battery Charger
I use my phone’s GPS a lot (I rely on it way too much) so I carry a small portable battery charger just in case it runs out. It is also good for my MP3 player and even my computer. I have noticed that airlines are getting more strict with them so make sure the one you get is not too big (electricity wise). Mine is 5200 mAh with 5V/2A and I’ve never had it taken off me. It can charge my phone twice.
MP3 Player
An MP3 player is great for any journey. It keeps me from getting motion sickness and stops people from trying to talk to me.
Water Purification Tablets
Purely for emergency situations. I have only ever had to use water purification tablets once, but they are so lightweight it makes sense to carry them.
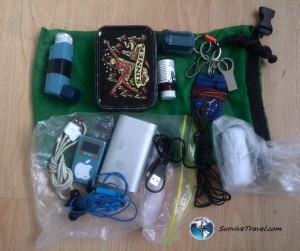
My Urban Survival Kit.
Black Tin
My black tin lives inside the green bag. If my survival keyring is the #1 thing I would take, then my black tin is definitely #2.
Lip balm
Having sore, dry lips sucks. Get lip balm with UV protection, preferably made from natural products.
Gaffer Tape
Gaffer tape is great for repairs and has many other uses.
American Dollars
American money is the most widely accepted currency around the world. You should always carry a minimum of $50 and preferably in $20 bills or smaller. Also an emergency Visa or Mastercard as they are most widely accepted.
Paper and Pencil
For writing and also for fire starting. Also, a pencil is more reliable than a pen.
Small Flint Stick
Once my flint stick got taken off by TSA but I think that was because I had it on my keyring. The one I carry now is so small they never notice it. Even one a bit bigger than the one I have would get through. You can bury it in your bag if you are worried. I’m doubtful it would get picked up.
Tick Removal Kit
A tick removal kit contains tweezers and a small magnifying glass. I lost the magnifying glass somewhere so it is not pictured. The tweezers have never been questioned by airport security. Apart from removing ticks it is use full for splinters and other wound cleaning. The magnifying glass can also be used to start a fire.
Condom
Apart from doing the wild thing, a single condom can be used to hold water and that condom filled water could also be used as a improvised magnifying glass to start a fire.
Safety Pins
Good for emergency temporary repairs and also to drain blisters (after being sterilized, like with a flame).
Band-aids
Band-aids are useful for small wound care and also can be used for emergency repairs (improvised sticky tape).
Benadryl
Benadryl is a potential lifesaver in the case of anaphylactic shock. It can also be used as a sedative which means it is also good for motion sickness and insomnia. Like all pharmaceuticals, only use as directed and only take when really needed.
Ibuprofen
Ibuprofen is a mild to medium painkiller with anti-inflammatory properties. Not pictured because I ran out… will top up soon.
Activated Charcoal
This is something I am surprised is not in every travelers bag, along with lavender and clove oil. In fact, I even wrote a dedicated post to these three items entitled Three Must Have Travel First Aid Items That You Probably Don’t Have. The most useful use of activated charcoal is as a sh*t stopper when you get a bad belly, but it has loads of other uses so read that post I just mentioned.
Refer to Survivetravel.com/wilderness-travel-medicine for appropriate use of pharmaceuticals and other medical knowledge.
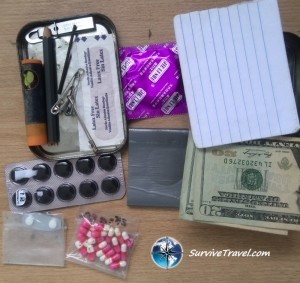
If you polish the inside of the lid it can also be used to signal or perhaps as a shaving mirror.
Front Compartment
Sunglasses
I buy cheap but tough sunglasses if I can find them. Otherwise I just get cheapo’s from street markets. The important thing is that they provide UV protection.
I try to be as inconspicuous as possible and in many places wearing sunglasses is unusual, but it is something I do anyway because your eyes are extremely important.
Toilet Paper and Sanitary Wipes
Being caught without toilet paper is never a good thing. Sanitary wipes are good to wash if there is no water about.
Lighter/Knife
A knife (not pictured) and a lighter are very useful survival tools. Unfortunately neither can be taken on a plane, but I make it a point to acquire them as soon as possible.
Emergency food
Dried fruit and nuts with honey is my personal favorite. Snickers bars are good (nuts and chocolate). The idea is protein and sugars, preferably more protein and less sugars… and long lasting.
Plastic bags
In case I need to carry wet/dirty stuff or just extra stuff in general. I always carry two because they can also be used to water-proof the whole bag in case I have to cross a river or something. I also use them as rubbish bags. Fold them up as a triangle and you won’t even know you are carrying them.
Notebook and Pens
To write stuff. Paper can also be used to start fires.
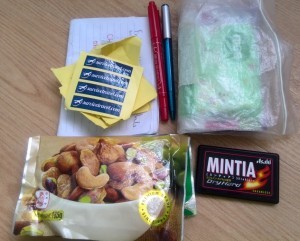
Also have some stickers in there.. blog promotion.
No sunglasses, knife or lighter in this picture. All went missing in Phuket and I haven’t replaced them yet (and I probably wont until I get to the Philippines). The plastic bags are in with the tp and sanitary wipes.
Laptop
My Asus T100 is a pretty good travel laptop. It is not as good as a Mac but it loads cheaper so if it goes missing or gets damaged during my travels I’m not too sad. It has a long battery life and doubles as a tablet so it is also good for entertainment. I did a lot of research when purchasing this. You can’t get better value for money. I highly recommend it as a travel computer.
When I have to transport my laptop I strap it to my shoulder bag, otherwise it stays where I sleep (my accommodation).
Mouse
The increase in productivity that a small computer mouse brings (in comparison with using my computers track-pad) makes it worth carrying.
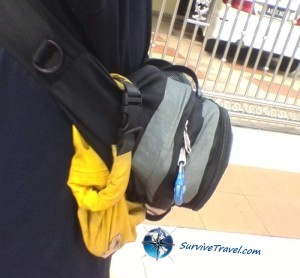
My laptop strapped to the back of my shoulder bad. I just need a different color for the dry-sack.
Main Pack
Everything else I own lives in this pack. This one is a different pack from my last packing list update. I have been a bit bag obsessed lately but I think I’m happy with what I have got now – it seems to tick all the boxes for my requirements.
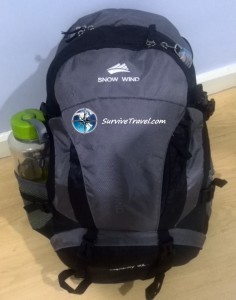
My main pack fully packed.
Compared to all the bags I have had for the past 5 years, this one is very comfortable to carry. It has a proper waist strap and a mesh netting at the back which separates it from your back which is great since I spend most of my time in the tropics.
Also, it has a rain cover, mesh netting pocket on the sides and is lockable. It seems to be pretty good quality also and since I picked it up in Malaysia it wasn’t very expensive. I am certain you could get the same thing with some North Face or other brand name badge sowed into it and pay five times the amount.
When I first got it I had the problem that although I could squeeze everything into it, it was pushing it, but now with my shoulder bag it is easy to carry both at the same time, and also means when I board vehicles I just put my pack in storage and keep my shoulder bag with me. It’s a good arrangement for me.
Anyway, here is what is in my main pack.
Main Compartment
This is the bulk of my stuff. Apart from the few items at the start of this list I group and separate. It helps with organisation and quick access.
Sandals
My sandals are barefoot technology and have a strap so they are secure on my feet. I can run in them if needed. They are not pictured. I keep them in a plastic bag so stuff doesn’t get dirty. Not pictured.
Casualty Blanket
It’s a groundsheet, shelter, blanket, signalling device (foil back) etc. My casualty blanket in combination with my poncho is enough to keep me dry and warm in emergency situations.
Cotton Sheet
I am currently using a single bed sized cotton sheet instead of a sarong. I use it mainly as a towel but it can also be used in all the same ways a sarong can. Emergency clothing, towel, sun protector, ground sheet, blanket, bandages etc. I prefer the bed-sheet to sarong because it is just a tad more suitable as a towel, slightly bigger and cheaper to replace. The downside is that it doesn’t pack down as small.
Rain Jacket
Since I carry an umbrella and a poncho and I keep mainly to warm places I rarely use this, but when I do need to pull it out there is no substitute. It is completely waterproof (including torrential rain and snow) and provides valuable warmth since I don’t carry a fleece. It is Mine is not a Gortex jacket, which I feel is grossly overpriced, but it is basically the same.
Two Thin Cotton T-shirts
I have two loose-fitting, fairly thin cotton t-shirts. Oversized yoga t-shirts seem to work well since a lot of the fashion these days is short-sleeve and I’m not into it.
Slacks
Slacks/thin dress pants are great. They are light weight, fast drying have deep pockets and relatively cheap to replace.
Day Pack
Thanks to my shoulder bag my long time friend 30L outlander day pack does not get anywhere near as much use as it used to, but I still keep it for times when I need more than what is in my bum bag (such as more water) but do not want to take my main bag, which stays wherever I sleep. Usually Ill just put the extra stuff in there and then put my shoulder bag in there as well, or carry it on my front.
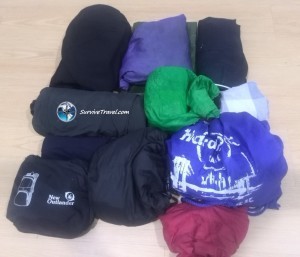
All the contents in the main compartment of my main pack.
Training Gear
I now keep everything I need to train in Survival Fitness in my draw-string tote bag, so in the morning, or whenever, I can just grab it and go.
Running Shorts
Two pairs which I also use for everyday use. Running shorts can also be used for swimming as they dry pretty quick.
I choose those that have built in underwear, a hidden pocket (which most do), are longer rather than super short and with pockets. Also, a drawstring is important.
Two Singlets (Tank Tops)
I exercise every day so a singlet is necessary if going in public to do so. It can also be used as a t-shirt replacement if needed.
Small Micro-fibre Towel
Being micro-fibre is important. It holds lots of water, cleans well and dries fast. I use it as a sweat rag, to wipe down surfaces, clean spills and as a towel when I do not want to use my big towel (like if I am traveling on the same day) and to wash myself if I haven’t encountered a shower in a while. It would also come in handy as a bandage. I clean it regularly.
Actually, now I keep two so I can do towel pull-ups.
Swimming Goggles
I also keep my swimming goggles in it.
Socks
A couple of pairs of thin, short socks for training.
Skipping Rope
My skipping rope is a new edition. I use it for Survival Fitness Training. It’s light weight and can also be used for emergency rope.
Plastic Bags
Two plastic bags to put wet clothes when I go swimming. Also just useful in general.
Waterproof Watch Timer
Mainly so I can time when swimming. This one doesn’t have a countdown but when I come across a small one that does I’ll get a watch that does.
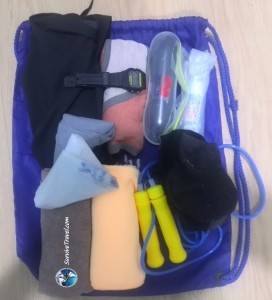
Everything I need for Survival Fitness Training
Journey Clothes
These is what I wear for long haul travel e.g. a plane or long distance bus, or, any-time where I am uncertain of the temperature.
Zip-Off Pants
Many people despise zip-off pants but I think they are very useful. They are lightweight and since I only carry one pair of pants and one pair of shorts, if either are being washed these can double as either. Make sure you get ones that use comfortable materials. Some of the “high-tech” stuff does not feel very good on the skin.
Shoes
I love barefoot style shoes. They are relatively light weight, quick drying and good for your spine. I used to wear Lems but they changed the style (by putting a logo on them) so now I use Softstars.
Socks
Well, they are socks.
Thermal Top
I use a looser thermal (as opposed to skin type version) so that I can wear it as a light jumper. I find it a pain in the ass to put on/take off thermals underneath.
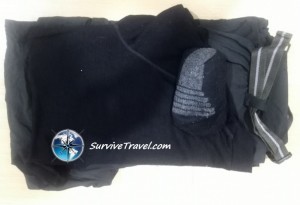
Shoes are not pictured, but they are never in the pack anyway. I am either wearing them or they stay in my accommodation while I wear my sandals.
Electronics Bag
All my electronic stuff that isn’t with my shoulder bag, housed in a dry sack.
Universal Converter
My universal converter cost me $5 and I have had it for years.
Random Small Electronics
A 128gb flash drive, a usb hub (not pictured), cords, usb charger etc.
Steripen
A Steripen purifies water with UV light. It is literally a life-saver.
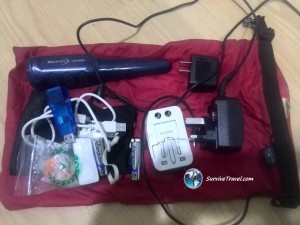
All my random electronics.
Spares
This bag just contains random spare stuff an the contents changes. Two things that do really change is paperwork and zip lick bags which always come in handy.
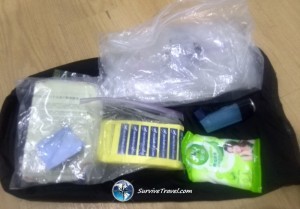
Random spares – the contents of which changes periodically.
Warm Clothes
I keep these clothes in their own dry sack so they have another layer of waterproofing. Perhaps when I do need additional warm clothes it might be because everything else is wet… these won’t be.
Gloves
I am hardly ever in conditions cold enough to use my gloves but when I am then keeping the extremities warm is crucial.
Thermal Pants
All the long pants I carry are fairly thin so if it gets cold I layer first with my thermal pants. If needed I wear these under my shorts. Thermal Bottoms
Thick Socks
Just like gloves, keeping the extremities warm is crucial.
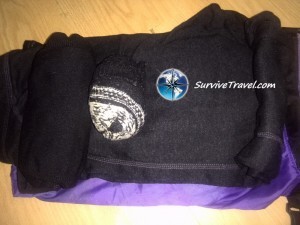
Warm clothes have there own waterproofing so if everything else gets wet, at least I have these.
Mess Tin
What I keep in here has changed a bit since my last packing list.
My mess tin is an important survival item but I also use it every-day to make my tea in. It is fairly lightweight and I can boil water/cook in it if needed. It can hold fragile items if needed e.g. eggs. It can be used for signalling or a mirror if polished. They edges could be sharpened to make a knife.
To save space I put the following items in it.
Super Glue
A small tube of super glue is great for repairs and also can be used to help start a fire (super glue is pretty flammable).
Measuring Tape
A sewing kit style measuring tape is actually more handy than most people think. It has cm, meters, inches and feet. It can also be used to tie stuff.
Tape
Gaffer or electrical tape. Good for repairs and emergency first aid.
Hi Vis Velcro Band
I hold my tin closed with a high vis velcro-strap. This is invaluable for signaling or if exercising/walking at night and you want to make sure cars can see you.
Paracord
There’s actually quite a bit of paracord in here so if I need to hook up a shelter I can.
Band-aids
Band-aids are useful for small wound care and also as improvised sticky tape.
Compass
A spare compass compass which is also slightly bigger. I’ve had this one since college!
Sewing Kit
Not really a kit – just a couple of needles and some thread.
Condoms
Condoms are needed for safe sex, and safe sex is better than barefoot… because you can’t run from AIDS!
Also contains spare stuff such as random tablets, lip balm, super glue etc.
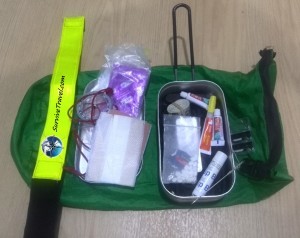
My mess tin used to be a full on survival kit, but now it is more like a random stuff, spares and repairs kit.
Middle Compartment
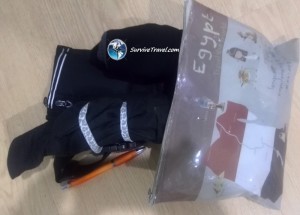
The contents of the middle compartment of my main pack.
Bucket hat
A small bucket hat which I rarely use now that I carry an umbrella but keep it since it takes up very little space and weighs hardly anything. It comes in handy when I need to have my hands free such as when exercising. It also makes for a good small towel replacement if my micro-fibre one is dirty or being washed.
Money Belt
My money belt is not pictured but inside it I carry my passport, passport photos, extra cash, a credit card and other identification. When in “if-y” places I use it as a money belt, otherwise I just keep it in my bag and often in my main bag which is left in my accommodation, assuming I feel that my accommodation is secure.
Sometimes I put my lock-pick set in it but not when boarding a plane.
Waterproof Socks
Waterproof socks are great or keeping your feet dry and/or warm, especially since my minimalist, barefoot shoes are most certainly not waterproof.
Pen
It’s a pen… for writing stuff, like on an immigration card.
Toiletries
Anything that raises a flag in airport security goes in my toiletries, so it is easy for them to confiscate without having to search my whole bag.
I put all my toiletries in a mesh bag. It is mesh so the water can drain.
Nail Clippers
If my scissors get taken away then my nail clippers can be used to cut stuff. Of course I also use them to cut my nails.
Small Scissors
I have been able to get my small pair of folding scissors aboard most flights, and they are cheap and common enough to replace if they do get taken off me. Incredibly handy.
I know that the scissors should not be allowed, and even the nail-clippers in some places, but I take the chance anyway. South East Asia and South America often just don’t give a f*ck, although Thailand did take my scissors off me.
When/if they get taken off me no big loss. I just buy them again when I land. I take budget airlines most of the time so it is cheaper than checking in a bag and even if I get hassled it is faster than waiting for my baggage at the other end.
Clove oil
A 50-100ml bottle of 50% diluted clove oil. I use it daily as a mouth wash and immune system booster. It is also extremely useful for many other things.
Tea
I try to drink green tea daily for health reasons.
Spirulina and Chlorela
Spirulina and Chorela are my “multi-vitamins” of choice. They are not really multi-vitamins but are (in my mind) the super-est of super-foods making them extremely useful for keeping healthy whilst traveling.
Dental floss
Can also be used as string, fishing line and sewing thread.
Toothbrush and Toothpaste
A travel toothbrush that folds up, although finding them can be hard sometimes. Any normal toothbrush with a case works well.
Moisturizer
For moisturizing. No more than 100mls so it can board planes.
Deodorant
Roll on style.
Cue tips
For ear cleaning and also first aid.
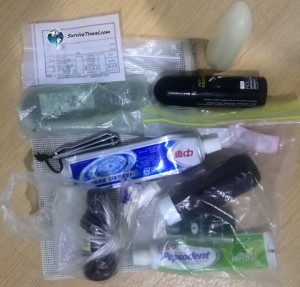
My toiletries bag has everything that may raise a flag in airport security.
Front Pocket
Snacks. I also have a small pocket on the waist strap which comes in handy sometimes.
Well that’s everything. I hope I don’t change it too much cause updating this takes AGES! There isn’t much room to spare, but I could fit a travel pillow in there, which I plan on getting. Also, lots of places to strap to the outside.
What do You Pack For World Travel?
The post Minimalist Packing List for World Travel – Updated appeared first on Survive Travel.
Best Travel Bag… Ever!
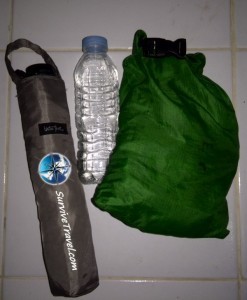 Contents of the main compartment.
I recently acquired a shoulder bag in Thailand, and I love it. This post explains why I think my shoulder bag is the best travel bag ever, as well as some of the down-sides and how I over-came them.
Before getting my shoulder bag in Patong Beach, Thailand I was carrying my 35L packaway day-pack everywhere. I wanted to switch because I was finding the 35L cumbersome, and since the creation of the Survival Fitness Plan I realised that training with that on was not very good. My Uncles in Malaysia carry around bum bags (fanny packs) as do many people (including one of my best friends in oz). I figured that one of them would fit everything I carry in my day pack (with some slight modifications) and be loads easier to train in. I was right.
My Requirements for the Best Travel Bag Ever
Like most things I seek out to purchase I have certain requirements that must be met. For someone like me who dislikes shopping, having a set of requirements makes it easy. If the item meets the requirements I buy it, if not then I walk away – of course sometimes compromises have to be made if I can not find exactly what I want but need something to do the job.
Anyway, onto my requirements for the best travel bag ever.
 Front pocket contents
Fits Everything I Need Inside It
Yes and no. It fits everything I carried in my 35L (later in this post I detail what I carry around.) except my Asus T100 (laptop) which I carry occasionally, however, I have found a good work-around for this which I will explain later on in this post.
It also does not fit my 1.5 litre water bottle and instead I have swapped it for a much smaller one (no more than 700mls), but to be fair, when cruising the streets of an urban area I never need more than that and if I do, I’ll just buy another bottle of water.
Lockable
My shoulder bag has two compartments and the main one has two zips so I can lock them together. Like all my bag locks, the lock is small and probably not to hard to break, but it is better than nothing. If the thief really wants my stuff he/she could just cut it with a knife, but if my bag is sitting next to someone else’s and mine has a lock, even if it is a pissy little one, then the one next to it without a lock is a much better target.
Also, I would never really leave it just lying around in public. The lock is more for if I am in a crowded area.
To me a bag lock is just a deterrent, so any cheap thing will do
I Can Carry it on My Front
Another good security thing is it is very easy to just swing my shoulder bag around to my front. This is also extremely convenient for getting stuff out of it. No longer do I have to take by bag of my shoulder to open it.
Also, when I do have to carry my bigger bag it is much faster to just swing it onto the front and put my other bag on my back. I suppose I could have put the day pack on my front also but I never did. Instead I used to take all the non-pliable stuff out of it, roll it up and put it in my bag, or attach it to the bottom if there was not enough room. It only took me a couple of minutes but on the plane – off the plane – on the bus – off the bus etc. It was a little annoying.
Able to do Survival Fitness Training In It
One of the big things in the Survival Fitness Plan is training for reality. Part of that means that if you habitually carry a bag around, then you should train with it on. Unless, of course, you are willing to discard the bag, which I am not.
It is way easier to train with my shoulder bag than my 35L. Other than the fact that I am carrying much less weight in water, the snug fit and compactness means that when I jump around there is much less weight displacement.
 F*in love my shoulder bag… sometimes I even train with it on.
Disadvantages of My Shoulder Bag
Here are some of the downsides I found with my new best travel bag in comparison with my 35L packable and how I justify them.
It is Another Thing I Have to Carry
This is not a replacement item. I still see the value in keeping my 35L daypack – it has served me well and will continue to do so. Since it is not a replacement it means it is an extra item, which is a big disadvantage for a minimalist, but I feel the benefits overcome this.
It Doesn’t Fit as Much
In the picture above the Shoulder Bag contains everything I would usually carry but there isn’t much room leftover. I overcome this though by including two plastic bags, which also act as good water-proofing if I need to cross a river or something. Also, I have those side netting pockets if I need them.
The one big thing is that my 35L easily fit my laptop and my shoulder bag definitely does not… but I solved that – two fold.
My first solution is that I installed a bunch of apps so I can basically do everything with my phone (now I am considering getting a better phone). It is not as fast as on my computer, but very convenient.
My second solution, for those times when I do want my laptop, I just fasten it on using a plastic belt and the clip on the dry-sack I keep it in. This makes it even better than my day pack because if I needed I could run or fight with this on. I think I will get a new dry-sack though, one that is not beacon – bright yellow, because if I am running from someone then that might kind of make me stand out.
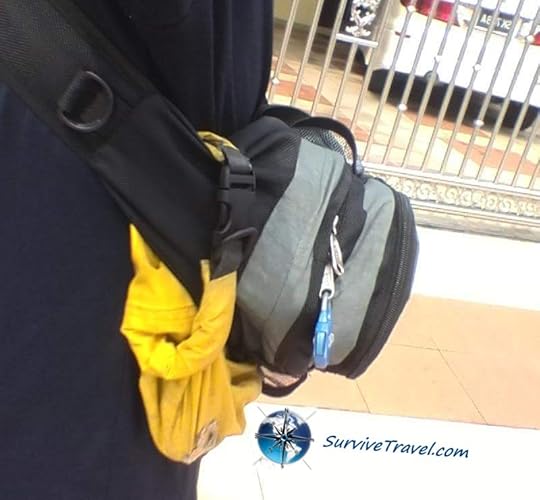 My laptop strapped to the back of my shoulder bag. I just need a different color for the dry-sack.
It Takes Longer to Deploy my Umbrella
This is actually quite a big deal for me because my umbrella is also my go to weapon. With my 35L the umbrella fit in the side netting. I could also buckle it secure with the side straps of the bag if needed. Unfortunately the netting on my shoulder bag is not quite as deep and it has no buckle. I could still put the umbrella in it but if I had to run it would probably fall out.
Not to mention that now I have a new umbrella which my friend in Thailand gave me. It is lighter and bigger than my other one, but also a tad longer. Another thing is now I keep the cover since my friend pointed out that when it stops raining you put the dry cover on so when you put it back in your bag it doesn’t wet everything else.
I have found though that keeping the cover on it makes it better for its use as a weapon, and if I ever feel at risk then I will get the umbrella out and just walk with it in my hand, ready to go.
Do You Have a Bag That You Consider The Best Travel Bag Ever?
The post Best Travel Bag… Ever! appeared first on Survive Travel.
November 8, 2015
La Maria Pension Hotel Review, Cebu City, Phillipines – Survive Travel
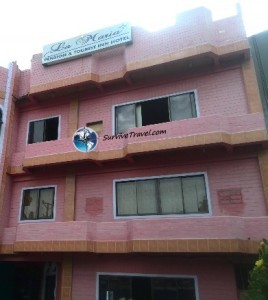
Front of the La Maria Pension Hotel
I knew the La Maria Pension Hotel was not going to be great when I booked it but I wanted something cheap near the airport and this fit the bill. Turned out it was as expected, not too bad. Anyway, here is my La Maria Pension Hotel review.
For the quick version of this La Maria Pension House Review you can scroll to the bottom of this post and look in the reviews. Mine is the first one  .
.
Cost: 12usd/night for a single private room with on suite, TV and air-conditioner. Breakfast included.
Address: M.L. Quezon Street, Mandaue, PH, 6014
For the location and price the Santa Maria Pension Hotel was as expected, especially since I opted for the cheapest room they had – a single.

Bathroom
They do have a security guard out the front but I still locked my stuff in my bag whenever I went out, but then again, I do this everywhere.

Small room but good enough for one night.
There was a window in the room but it didn’t open so there was no fresh air. Also, the internet was bad but it was because they put me in the room the furthest possible away from the modem. I think if I pushed it I could have got a better one, but it was only for one night so was not really bothered.

Dining Room
Free breakfast was cooked to order and not bad. I had a beef curry with rice and an egg. The other option was to have a hot-dog (American… so a sausage) instead of the beef. Also, a cup of tea, but no fruit.

Breakfast. Beef curry, rice and an egg… and a cup of tea, but no fruit :(
It did not seem like the best neighbourhood but walking around before 2300 was fine. Not sure about after that, probably still okay.

The main road just out side
On the night I arrived I made the mistake of getting fast food because I never heard of the place before. There was some local stuff going across the road, I should have eaten that. This was the worst fast food I have ever had. I also ate Burger King and some wierd ass sausage roll in the airprt. Bad day for food for me.

Jollibee – worst fast food I have ever tasted.
The meal was only 75 pesos (that’s less than $2) but it tasted like sh*t, and I am not a fussy eater.

Spaghetti and spring rolls.
The La Maria Pension Hotel is no-where near the Cebu city centre, but is fairly close to the airport which is why I chose it. There isn’t even much to see around there but it does have a decent sized shopping center within 10 minutes walk.

Has a big supermarket inside also.
Book your stay at the La Maria Pension Hotel.
Getting to the La Maria HotelI landed at night so I causght a taxi from the airport. Actually, even if I had landed in the morning I still would have done this. I purposfully picked the Santa Maria Pension Hotel because of the close proximity to the airport.
I walked out of the airport and followed the signs to the metered taxi. Some guy helps me to flag one down and then I have to tip him. Pretty sure I could have flagged on down myself, but he was friendly enough so no harm done. Apparently (according to him) he works a 16 hour day.
Although the taxi clearly stated metered taxi the guy tried to over charge me. I demanded (politely) for the meter, but I am pretty sure it was not reset when he picked me up. Anyway, he wanted 375, the meter was 195, and it probably should not have been more than 120psp.
The next day I caught a taxi from the Santa Maria Hotel to the south bus station (to get to Moalboal) and it only cost 180php, and I am pretty sure it is a longer distance. Perhaps the flagfall at night is higher, or maybe it was a different company, or most likely I just got jipped.
In any case, lesson learned. Double check before the driver starts driving that he/she is using and has reset the meter.
Book your stay at the La Maria Pension Hotel.
Have you stayed at the La Maria Pension Hotel before? Help out other readers and leave your review below, and if you know of more or updated information or even if you just want to say hi then please leave a comment :).
The post La Maria Pension Hotel Review, Cebu City, Phillipines – Survive Travel appeared first on Survive Travel.
November 5, 2015
The Survival Fitness Plan – A Free Training Program Like No Other!
In collaboration with Sam Fury, SurviveTravel.com has launched a new website to spread the idea of the Survival Fitness Plan. The Survival Fitness Plan is a self-training program like no other, and it is free to use!
If you are a regular reader then you probably know of my passion for all things to do with Survival Fitness such as parkour, martial arts etc., as well as escape, evasion and survival. You may also have read my bucket list and seen my plans for training as well as perhaps even building a Survival Fitness Training Center.
A Bolt of InspritationWell a couple of weeks ago I got a bolt of inspiration and I decided to create a training program (in collaboration with Sam Fury) to run in the Survival Fitness Training Center. It seems that every-time I create something new like this the end result is not what the original intention was – it always evolves into something much better!
We decided to call this training program the Survival Fitness Plan, not surprisingly the website is SurvivalFitnessPlan.com (check it out!). However, instead of being a training schedule for the Survival Fitness Center the Survival Fitness Plan has turned into a free to use self-training programme in Survival Fitness and everything it involves.
The Survival Fitness Plan is Free to Use!We decided to make it free because for us the spreading of the Survival Fitness Plan and promotion of living a healthy lifestyle trumps making money – you can thank Sam Fury for that, bloody philanthropist. Of course, if people find value in it they can buy books or donate to the cause.
I won’t go into the details of the Survival Fitness Plan here (you can visit the website) for that, but I will say this… the Survival Fitness Plan is a self-training program like no other!

SurvivalFitnessPlan.com is made in collaboration with Sam Fury and is a SurviveTravel.com initiative.
Check it out and Start Getting Survival FitToday!The post The Survival Fitness Plan – A Free Training Program Like No Other! appeared first on Survive Travel.

