
Angela Liddon's Blog, page 8
November 10, 2017
Cheesy Lentil Bolognese Casserole + Celebrating 9 years!!


Oh She Glows just celebrated her 9th birthday! Can you believe it? (I know, I know, where is the cake? I didn’t plan this very well, did I? I promise you today’s recipe is a keeper even if it’s not covered in frosting. Do you think cheese-covered will do the trick?!)
Many moons ago, in October 2008, Eric looked at me and said, “Ange, you need a hobby!” I was hunched in front of my computer poring over research. We’d just returned from our honeymoon, and I was already stressed out over all the catch-up work that was waiting for me at home.
At the time, I was a master’s student wrapping up my thesis, and also working full-time as a researcher. To say I was feeling burned out is an understatement. I definitely hadn’t been making time for fun. When Eric asked me what hobbies I had, I honestly couldn’t think of anything outside my daily gym sessions. “I’m not sure if working out counts….” he’d say. My only downtime was a weekly night out at a local bar—hardly restorative, though it did feel that way briefly! So I took Eric’s advice (a rare occurrence, he says), and that same week hit publish on my very first Oh She Glows blog post!
This blog became a place for me to have fun, explore, write my heart out, try new things, and just get out of “research mode” for a bit. Still, I expected that I would blog for a couple weeks and grow tired of it, but I tapped into something that had been hiding deep below the surface for many, many years…my creativity! OH, HELLO. I couldn’t recall the last time I had really allowed my creative self to flourish. Once I’d awoken the creative beast inside, there was no stopping me. (Eric, did you have any idea what you’d be getting yourself into?!)
Soon it became clear that this unsuspecting hobby had grown into a full-fledged passion. I found the courage to write about my journey with disordered eating and how I was working on a positive relationship with food. By practicing every day, I taught myself how to cook and photograph my food (so I could inspire you to make it too!), and eventually became confident enough to experiment with my own recipes. Nine years later, one of my favourite things to do is cook and try new things in the kitchen. I always joke that I rarely follow my own recipes because I have too much fun playing around with them, and so they’ll often turn out differently each time. To me, that’s when it gets really fun! That said, there are some recipes I like to follow to a T…like my favourite cookies. I take my treats very seriously. Bahaha.
So, thanks Eric, for seeing all those years ago that I needed to give myself some time for creativity. I can’t imagine my life without this space, and all of you. The connections and friendships I’ve made through Oh She Glows have been the happiest surprise of all.
Last week, I had the pleasure of attending Taste Canada’s annual Awards Gala, where I was honoured to receive two gold awards for food writing (one for Health and Special Diets Cookbook of the year for my latest cookbook, Oh She Glows Every Day, and a second recognizing Oh She Glows as best Health and Special Diets Food Blog 2017). Thinking back over the past 9 years, it all feels surreal. I had so many inspiring conversations and left that evening even more grateful for this community and what I do.
Thank you for coming on this journey with me. Here’s to discovering new hobbies, chasing dreams, and, hopefully, another 9 years!!


Cheesy Lentil Bolognese Casserole
Vegan, soy-free
Our family is in love with this cheesy, creamy, and hearty casserole! Traditional bolognese is made with a meat-based sauce, but my version uses lentils and mushrooms for a high fibre, immune-boosting twist. It’s great served with a simple salad of marinated greens (for a quick homemade dressing, try my Shake-and-Go Balsamic Vinaigrette from Oh She Glows Every Day), sautéed kale, or my Crowd-Pleasing Vegan Caesar Salad and some crusty fresh bread. Divine! Here are some time-saving tips: if you’re looking for a head-start on meal prep, the cheese sauce can be made a couple days in advance and refrigerated in an airtight container. You can also prepare the entire casserole in advance: simply follow the recipe through step #9 (stop before baking!), wrap it up, refrigerate, and then cook as-is one to two days later as directed in step #10. Imagine coming home to this casserole ready to bake at the end of a long day! Nothing is better. This recipe is adapted from my Fusilli Lentil-Mushroom Bolognese in Oh She Glows Every Day.
Yield
8 servings
Prep Time
35 Minutes
Cook time
20 Minutes
Total Time
55 Minutes
Ingredients:
1 batch All-Purpose Cheese Sauce14 ounces (400 g) fusilli or rotini pasta (about 4 1/2 cups dry pasta)2 tablespoons (30 mL) extra-virgin olive oil1 medium sweet onion, diced (about 2 cups/280 g)3 large garlic cloves, minced1 (8-ounce/255 g) package sliced cremini mushrooms*1 teaspoon dried oregano**1 teaspoon dried basil**1 teaspoon dried thyme**3 cups (750 mL) chunky marinara sauce***One (14-ounce/398 mL) can lentils, drained and rinsed (about 1 1/2 cups)2 tablespoons (30 mL) runny tahini1/4 to 3/4 teaspoon fine sea salt, to taste1/2 teaspoon freshly ground black pepper1/2 teaspoon red pepper flakes (optional)1 to 2 cups (40 to 80 g) stemmed and finely chopped kale (optional)Paprika, for garnishCashew-Garlic Parmesan, for garnish
Directions:
Oil a very large casserole dish (approx. 10" x 14") and set aside. Preheat the oven to 400°F (200°C). Prepare the cheese sauce. While the potatoes and carrots simmer for the cheese sauce, start on steps 3 and 4. Bring a large pot of water to a boil and cook the pasta according to package instructions. Be sure not to overcook it. Drain and set aside. Meanwhile, in a large dutch oven or pot (about 5 quarts), add the oil, onion, and garlic. Stir and add a pinch of salt. Sauté over medium heat for about 3 to 5 minutes, until the onion is softened and translucent. Stir in the mushrooms, oregano, basil, and thyme, and cook for another 7 to 9 minutes over medium-high heat until the water cooks off. Add the marinara sauce, drained lentils, and tahini. Stir until combined. Now add the cooked pasta and continue stirring until it’s coated in the lentil-veggie mixture. Taste and season with salt, pepper, and red pepper flakes (if using). Stir in the kale, if desired. Turn off the heat. Spoon all of the pasta mixture into the prepared casserole dish and spread it out evenly. Pour the cheese sauce over top and spread it out with the back of a spoon until it covers the entire surface. Garnish with paprika (it adds a beautiful pop of red), more herbs, and black pepper, if desired. Bake the casserole uncovered for 15 to 20 minutes, until heated through. (If you’re baking the casserole straight from the fridge, bake it for 25 to 30 minutes as it’ll take longer to heat up). Serve immediately with a generous sprinkle of Cashew-Garlic Parmesan on top of each portion. Leftovers can be refrigerated in an airtight container for up to 5 days. The leftovers are just as delicious chilled!
Tips:
* If your sliced mushrooms are on the thicker side, dice them up before adding to the pot—they’ll cook faster. The same is true if you’re using whole mushrooms: the smaller you slice them the quicker they’ll cook. If you are a big mushroom fan like I am, you may want to consider doubling the amount listed above.
** If using fresh herbs, measure 2 teaspoons (10 g) of each.
*** If the casserole is going to sit in the fridge for a couple days before you cook it, feel free to stir in an extra 1/2 (125 mL) to 3/4 cup (180 mL) of marinara sauce. This isn’t absolutely necessary, but helps counteract any moisture loss while sitting in the fridge.
Make it gluten-free: use gluten-free pasta and cook as directed.
Make it kid-friendly: process the mushrooms in a food processor until minced. The mushrooms will be virtually undetectable, but your meal will still retain their immune boosting benefits!


You can also find this casserole recipe (including the cheese sauce and vegan parmesan) in The Oh She Glows Recipe App (iOS and Android). Happy cooking!
Comments (12) | Share on Facebook | Tweet | Pin It | Snapchat | Google+© copyright 2017 Oh She Glows. All Rights Reserved.


October 27, 2017
Make-Ahead Roasted Butternut Squash Casserole

I posted this story and make-ahead technique to my Instagram account recently, only to be cut off part-way through when I exceeded the word limit. As Stephanie Tanner would say: How rude, lol. Did you even know that Instagram has a word limit? I guess it wasn’t designed for Chatty Cathy’s like me. That’s when it hit me: I should post this on the blog so I can go a bit more in-depth! So read on, my friends….
The other weekend I decided it had been way too long since I had made my beloved roasted butternut squash dish, complete with vegan parmesan…kale…and lots of garlic. Have you made it? Oh my, it’s a show-stealing side I tell ya. (This dish makes all its other dinner companions give the side-eye, heh. #BUTTERNUTPLEASE!)
Here’s a little summary of comments I received when I served it to the fam:
Eric: *Burns mouth.* “Holy sh*t, that’s hot!!!” (He never learns.) Then: “Butternut squash is so much better than pumpkin.” (Lol…so random…I die.)
Adriana, three years old: “NO THANK YOUUUUUUU” (as she skips away with Arlo’s favourite toy in her grasp). Spotted 10 minutes earlier: downing a box of “circle crackers” (sigh).
Arlo, one year old: *Screams and beats his hands in protest because he has to wait for the squash to cool* then proceeds to inhale it. He was nice enough to smash the leftover squash into his hair, and even tossed some over his shoulder for good luck.
Me: *Scream and beat my hands in protest because I have to wait for it to cool* then enjoys two big servings.
You know the saying…as far as anyone knows, we’re a nice, normal family. Bahaha.


MAKE IT AHEAD!
You may have noticed lately that I’ve been on a crusade to create as many time-saving recipes and make-ahead tips as I can. In recent posts, I shared Adriana’s Favourite 10-Minute Pasta, 8-Minute Pantry Dal, and Make-Ahead Thanksgiving Panzanella, to name a few. Last week, I came up with a make-ahead version for one of my favourite side dishes: Roasted Butternut Squash with Pecan Parmesan and Kale! I’m so excited to share how I tweaked the original recipe to minimize day-of prep time. Now that we’re getting into all kinds of holiday celebration meals, my goal is to share as many time-saving tricks with you as I can. It’s making life much less hectic in the Liddon household.
I discovered that this dish can be prepped and stored in the fridge two to three days in advance—and no one will be the wiser! This is a fun trick for holiday meal prep when sanity reaches an all-time low (or is that just me?).

Here’s what you do:
1) Combine the chopped squash, minced garlic, parsley (not shown in the photo!), oil, and salt in an extra-large casserole dish. Pro tip: if I’m really short on time, I’ll occasionally buy fresh pre-chopped squash to save the hassle of peeling and dicing a large one! Sometimes you just gotta live your best life, ya know?
2) Stem and chop the kale, then place it into a zip bag or container.
3) Make the vegan parmesan, and place that into a separate fridge-friendly container.
PREP WORK DONEZO.
When you’re ready to roast this beauty either later that day or as many as two to three days later, proceed with the recipe as usual…maybe while giving an evil cackle about how you outsmarted the original instructions. I won’t mind.
One thing’s for sure, I’ll be using this trick for all of my future holiday meals, and even busy weeknights! It’s so handy to have everything prepped and ready to go. I hope this tip helps streamline your own holiday meal planning as well. If you’re looking for more crunch-time holiday inspiration, don’t forget to check out my Make-Ahead Thanksgiving Panzanella recipe—it has had some great feedback so far. Oh, and let me know in the comments if you have any make-ahead recipe requests! I’d love to hear them.

Make-Ahead Roasted Butternut Squash Casserole
Vegan, gluten-free, grain-free, soy-free
This is a handy make-ahead version of one of my all-time favourite fall and winter side dishes showcasing the best of cold weather produce. See my tips below on how you can prep the casserole ingredients a couple days beforehand, so they’re ready to come together effortlessly at meal-time (just be sure to leave yourself about an hour to cook it, though). Sometimes, when I’m feeling wild, I like to double the vegan parmesan because it’s just so good! This recipe is adapted from the original in 2012—back when I had a little more time in the kitchen, pre-kiddos!
Yield
6 side servings
Prep Time
20 Minutes
Cook time
55 Minutes
Total Time
1 Hour, 15 Minutes
Ingredients:
For the roasted squash:1 medium/large (2 to 2 1/2 pounds) butternut squash2 large cloves garlic, minced3 tablespoons finely chopped fresh parsley1 tablespoon (15 mL) extra-virgin olive oil1/2 teaspoon fine sea salt2 cups (75 g) stemmed and finely chopped kale*For the Almond-Pepita Parmesan:1/4 cup (40 g) whole almonds**1/4 cup (40 g) roasted pepita seeds**1 tablespoon (15 mL) nutritional yeast1/8 teaspoon fine sea salt1 teaspoon (5 mL) extra-virgin olive oil
Directions:
Grease an extra-large casserole dish with oil and set aside. Peel the squash. Thinly slice off the bottom and top and then slice through the middle lengthwise to make two halves. Remove seeds with a spoon. Chop the two halves into 1-inch chunks and place into the oiled casserole dish. (Time-saving tip: buy a couple pounds of pre-chopped fresh butternut squash from the produce section of the grocery store. This was a major game-changer in the Liddon household, let me tell ya!.) Add the minced garlic, parsley, oil, and salt into the casserole dish and toss with squash until combined (hands or a spoon both work well for this step!). Do not add the kale yet. Cover the casserole dish with tinfoil and pop it into the fridge. Place the chopped kale into a tightly sealed zip bag (being sure to squeeze any air out beforehand) or a small airtight container and refrigerate. For the parmesan: Place all of the Almond-Pepita Parmesan ingredients into a mini food processor and pulse together until coarsely ground. Transfer the mixture into a zip bag or small container before placing it in the fridge. All three casserole components can be stored in the fridge for 2 to 3 days. When ready to cook the casserole, remove all prepped ingredients from the fridge. Poke a few air holes into the tinfoil covering the casserole dish. Preheat oven to 400°F (200°C). Place the covered casserole dish in the oven and bake for about 45 to 50 minutes, until the squash is fork tender. Carefully remove the squash from the oven and reduce heat to 350°F (180°C). Remove the tinfoil (be careful as some steam might escape from the dish as you do). Stir the chopped kale into the squash until combined. Sprinkle all of the parmesan over top of the squash. Bake for another 6 to 10 minutes, uncovered, until the nuts are lightly toasted and the kale has wilted. Watch closely so you don’t burn either the nuts or kale. Serve warm, seasoning with salt and pepper to taste. Leftovers will keep refrigerated in an airtight container for about 5 days. To reheat, simply scoop the squash into an oiled skillet and heat over medium, stirring frequently, until heated through. Season to taste, and enjoy!
Tips:
* I doubled the original amount of kale for extra green power!
** Feel free to swap in any nuts or seeds you prefer! There are endless possibilities. Pecans (which are used in the original version) are lovely, too.

Comments (2) | Share on Facebook | Tweet | Pin It | Snapchat | Google+© copyright 2017 Oh She Glows. All Rights Reserved.
October 19, 2017
Ultimate flourless brownies for two + Cookbook news!

Several months ago, my publishing team let me know about an exciting idea that Indigo had proposed for my two cookbooks. They’ve been so thrilled with your response to the books (as have I!) that they’ve created a special-edition OSG boxed set, available just before the holiday season kicks off. When they asked me I was like, hmm…let me think about it….YES!! Lol.
Shortly after, the mock-up arrived on my doorstep. It was like Christmas morning!
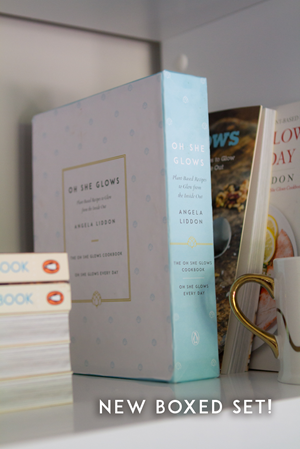
This one above is just the mock-up version…the pages are literally glued to the box by hand. The real thing will look even better, but I wanted to give you an idea. It makes such a gorgeous gift!
To celebrate, Indigo is having a pre-order SALE on the boxed set this week! It’s 40% off (until Oct. 22nd), and also qualifies for free shipping within Canada.
To keep this celebration going with FOOD (cuz you know that’s what we do), I’m happy to share today’s recipe— a rendition of my Ultimate Flourless Brownies with Magic No-Cook Caramel from Oh She Glows Every Day. I’ve had a lot of requests for one- or two-serving desserts, and many of you have told me that you love these brownies. Soooooo…it seemed like a no-brainer to start with this dessert. The brownies are vegan, grain-free, and oil-free, and they turn out wonderfully chewy, dense, and chocolaty. You can also make them soy-free simply by using a soy-free chocolate, such as Enjoy Life brand.
If you’re planning a quiet Halloween in with a pal, it would be a wonderful option. Heck, if you’re planning a wild night out, just make this earlier in the day. Actually, make them now….yes, make them right this second.


You can make one big brownie as I’ve done here using a 4-inch ramekin, or you can use two smaller 3-inch ramekins. A cupcake tin (with liners) also works! If you’re going to make smaller portions, I recommend baking them for less time as they’ll bake much faster.


5 from 1 reviews
Ultimate Flourless Brownies for Two
Vegan, gluten-free, grain-free
This two-serving brownie is fudgy and dense with a firm edge, and thanks to the almond butter base, there isn’t a stitch of flour! The nuttiness of the almonds and chopped dark chocolate enhance its rich chocolate flavour. This is a fantastic dessert when you want a decadent treat without being taunted by a pan of leftover brownies in the kitchen. (But if you do, see the full-sized brownie and caramel recipes in my second cookbook, Oh She Glows Every Day.)
Yield
2 servings
Prep Time
15 Minutes
Cook time
23 Minutes
Total Time
38 Minutes
Ingredients:
For the brownies:1 1/2 teaspoons (4 g) ground flax1 tablespoon (15 mL) water1/4 teaspoon (1 mL) fine sea saltScant 1/8 teaspoon (0.5 mL) baking soda1 tablespoon plus 1 teaspoon (20 mL) pure maple syrup1/2 teaspoon (2.5 mL) pure vanilla extract2 teaspoons (5 g) arrowroot starch2 tablespoons plus 2 teaspoons (17 g) unsweetened cocoa powder2 tablespoons (28 g) natural cane sugar1/4 cup (60 mL) natural smooth almond butter2 tablespoons (20 g) chopped dark chocolate or choc. chipsFor the Magic No-Cook Caramel:1 tablespoon plus 1 teaspoon (20 mL) coconut oil, melted2 tablespoons (30 mL) pure maple syrup1 tablespoon (15 mL) raw cashew butter1 teaspoon (5 mL) coconut nectar or pure maple syrup*A good pinch of fine sea salt
Directions:
Preheat the oven to 350°F (180°C) and place the oven rack in the middle position. Lightly grease a 4-inch ramekin (or two small, 3-inch ramekins) with oil. In a medium mixing bowl, whisk together the ground flax and water. Let it sit for a couple of minutes. To the flax mixture, add the salt, baking soda, maple syrup, vanilla, and arrowroot starch; whisk vigorously until smooth. Add the cocoa powder and sugar; stir with a spoon until combined. The batter will be very thick. Stir in the almond butter and chopped chocolate until thoroughly combined. Mix the dough for 30 to 60 seconds, until you can’t see any “ribbons” of almond butter in the dough. Scoop the dough into the prepared ramekin(s). Press down on the dough with your fingers until even and smooth. Place the ramekin(s) directly onto the rack, and bake for about 22 to 25 minutes, until the brownie has risen nicely, but is still soft to the touch. When it’s ready, the middle will still look a bit underdone. A toothpick inserted into the middle won’t come out clean. Shortly after removing from the oven, the middle will sink, but this is all normal. Pinky swear! Place the ramekin(s) on a cooling rack for about 25 to 30 minutes. Meanwhile, prepare the Magic No-Cook Caramel Sauce. Add all of the caramel sauce ingredients into a mini food processor, and process until smooth. Or you can simply add it to a small bowl and beat it with an electric mixer. Transfer to a small jar. You can serve the brownie in the ramekin, or you can slide a knife around the edge and carefully pop it onto a plate. Serve it with a scoop of ice cream (totally optional), a drizzle of caramel sauce, and a small pinch of coarse sea salt. I like to scatter on some toasted walnuts for a little crunch, too. Any leftover brownie (I doubt you’ll have any, though!) can be stored in an airtight container in the fridge for a few days. You can also wrap the cooled brownie individually in tin foil and place it into an airtight container or bag in the freezer for 3 to 4 weeks. If you have leftover caramel sauce, it’ll keep in an airtight container in the fridge for a week or so.
Tips:
* The coconut nectar has a slightly tangy flavour which is why it works well in this caramel sauce, but if you don’t have any on hand feel free to use maple syrup in its place. It’ll work just fine!
The caramel sauce makes 1/4 cup (60 mL). If you don't want that much, you can cut the recipe in half and whisk everything by hand in a small bowl.

As always, you can find this recipe in The Oh She Glows Recipe App (on iOS and Android). Happy baking!

Comments (10) | Share on Facebook | Tweet | Pin It | Snapchat | Google+© copyright 2017 Oh She Glows. All Rights Reserved.
October 6, 2017
Make-Ahead Thanksgiving Panzanella


We now have a three- and a one-year-old in the house as of a week ago. Two toddlers…OMG, save me. It’s loud, and crazy, and some nights cereal or smoothies for dinner feels like a major culinary accomplishment.
But, oh, do I adore my little monsters and this crazy family.
Lately, these are some of the questions I ask when I attempt to cook:
Can I cut out an ingredient (or four) while still enjoying the dish? Is this step absolutely necessary to the overall dish? Why is there so much screaming going on? If I do something the night before, will it save time the next day? Adriana, can you please stop tackling your brother like a football!? Lol.
And probably one of the questions I ask the most: Why is there no OSG delivery service yet, damnit!?
Goals ;)
I’m learning more often than not that the answer to my “can I save time” question is a resounding YES. I’m learning tricks along the way. I’m cutting corners. And you know what? Almost always, the food still tastes great. (And if it doesn’t, Arlo will eat anything.)

If you follow me on Insta Stories, you may have seen how excited I was to dig into Laura’s beautiful plant-based cookbook, The First Mess Cookbook, this past spring. I’ve been following Laura for years (#TFMfangurrrrrl); she’s a seriously talented writer, photographer, and cook. I’m constantly amazed by the beauty she captures in her food, and the warmth and passion with which she shares it. Laura is one of those cooks who seems to truly adore the process of cooking. I personally don’t always enjoy the process (real talk: sometimes I loathe cooking), and often don’t slow down enough to find it uber-relaxing, but Laura has a way of inspiring a certain intention and gratitude for the process. I love that. Her plant-based recipes and photographs are truly works of art, and I’m so glad she shares them with us all. Her cookbook would be a delicious addition to your collection if you don’t have it already!
Months ago, I made a mental note to make the Thanksgiving Panzanella, and I couldn’t wait to make it once the cooler temperatures had set in. Because the recipe has quite a few steps, I started it the day before, and ended up creating a fun, make-ahead version. As you can tell, I’m all about make-ahead situations these days! By doing most of the prep work in advance, it became a practical option for our Thanksgiving meal. The prep work the day before is a half hour (and it’s a bit kitchen-destroying, tbh), but the next day, the effortless prep will only set you back a mere 10 minutes. Pretty sweet, huh?!
Oh, and it’s a looker. And tasty…duh. As my hilarious recipe tester, Nicole, wrote, “Yield: 6 side servings or one big serving for me ha ha ha!” LOL! Love her.

5 from 1 reviews
Make-Ahead Thanksgiving Panzanella
Vegan, nut-free, refined sugar-free, soy-free
Since this is quite an involved recipe, I like to prepare a few aspects of this panzanella the day before to save time and mess on the day of a special event, such as Thanksgiving. By doing a bit of advance prep (about 30 minutes the day before), all you have to do on the day is bake the squash and bread, then toss it all together just before serving. I like to serve this recipe warm, so I time the cooking so that the squash and bread come out of the oven just before our planned mealtime. This recipe is adapted from The First Mess Cookbook (2017) by Laura Wright. Reprinted by permission of Penguin Canada, a division of Penguin Random House Canada Limited.
Yield
6 side servings
Prep Time
40 Minutes
Cook time
35 Minutes
Total Time
1 Hour, 15 Minutes
Ingredients:
For the dressing:2 tablespoons (30 mL) balsamic vinegar1 small garlic clove, minced2 teaspoons (10 mL) pure maple syrup1 teaspoon (5 mL) Dijon mustard1/4 cup (60 mL) extra-virgin olive oilGenerous pinch of fine sea saltFreshly ground black pepper, to tasteFor the salad:4 cups (175 grams) cubed sourdough bread (about 1/2 a loaf)2 medium (800 g) delicata squash1 tablespoon (15 mL) minced fresh rosemary2 teaspoons (10 mL) minced fresh thyme leaves2 cups (40 g) stemmed and sliced lacinato kale2 medium/large celery stalks (210 g), thinly sliced (1 1/4 cups)1/3 cup (80 mL) pomegranate seeds1 tablespoon plus 2 teaspoons (25 mL) extra-virgin olive oil, dividedHandful of celery leaves or fresh parsley leaves, for garnish
Directions:
The day before (steps 1-4): Make the dressing: In a small jar, place the balsamic vinegar, minced garlic, maple syrup, Dijon mustard, olive oil, salt, and pepper. Screw on the lid and shake to combine. Chill in the fridge. Slice the sourdough bread into 1-inch cubes until you have 4 cups. Place into a large bag or container and leave it on the counter. Slice each squash down the middle, lengthwise. With a spoon, scrape out all of the seeds and discard them. Slice the squash into 1/4-inch “half-moon” slices, and place them into a large zip bag, bowl, or container. Mince the rosemary and thyme and add it to the squash. Chill the squash and herbs in the fridge (covering, if necessary). In a separate zip bag or container, place the sliced kale, chopped celery, and pomegranate seeds. Chill in the fridge (covering, if necessary). The next day (steps 5-8): About 15 minutes before you begin, remove the dressing and squash from the fridge and place them on the counter so that they can come to room temperature. Position two racks near the centre of the oven. Preheat the oven to 400°F (200°C), and line two extra-large baking sheets with parchment paper. Spoon the squash and herbs onto one of the baking sheets. Add a tablespoon of oil and toss until the squash is thoroughly coated. Sprinkle generously with salt and pepper. Roast the squash for about 30 to 38 minutes, until nicely brown on the bottoms. (There’s no need to flip halfway through baking unless you want them evenly browned.) While the squash is roasting, spread the cubed sourdough onto the remaining baking sheet and toss it in a couple teaspoons of oil. When you have 10 to 15 minutes left of the squash’s roasting time, place the sourdough in the oven with the squash and continue roasting for 10 to 15 minutes. The bread should feel lightly toasted when it’s ready, but it shouldn’t look brown. While the squash and sourdough are roasting, place the kale, celery, pomegranate seeds, and dressing into a large serving bowl. When the squash and bread are finished cooking, add them into the bowl, and toss well, until combined. Season the panzanella with more salt, to taste, if desired. Serve warm with a garnish of celery or parsley leaves scattered on top. This recipe is best enjoyed immediately, or within a couple of hours of preparing.


Below is a photo of what the prep looks like the day before! On day 2, all you do is roast the squash and bread, and then mix it all together. *slow clap*

On the cusp of our Canadian Thanksgiving weekend, THANK YOU for your amazing love and support, even when this blog is a virtual ghost town. I’ve been chipping away at some big behind-the-scenes blog changes and can’t wait to share more. Also, Eric recently started a new career venture, which has been wild. I’m thrilled for him, and grateful to be able to return the support and encouragement that he’s given me all these years. But, holy hell have we been struggling to stay afloat. The juggle of parenthood and “careerhood” is no easy feat. I’ve been trying to make it work with a lot more on my plate. Some days I feel like I’m doing a crappy job at everything, and other days, I feel like I’m killing it. We’ll get into a groove…it just takes some trial and error. Just know that I love and appreciate your support more than you know.
I hope my fellow Canadians have a relaxing and delicious Thanksgiving weekend with loved ones, and if you try out this recipe, I hope you enjoy it—and my make-ahead tricks—as much as we do. I’ve also added this recipe to The Oh She Glows Recipe App, so keep your eyes peeled for it on there.

Last but not least, I’d like to pass along Arlo’s nursery tour over on HGTV! It was so much fun (and such an honour) to be featured. (Just know that the nursery never looks this put together in real life….it actually looks like a tornado blew through it most days.) A special thanks to the lovely Brittany Devenyi for the feature!
Comments (4) | Share on Facebook | Tweet | Pin It | Snapchat | Google+© copyright 2017 Oh She Glows. All Rights Reserved.
July 21, 2017
8-Minute Pantry Dal: Two Ways

I know, I know, just what you’re craving in the middle of summer…a dish that brings the heat! Did I nail it on the head or what? Well, maybe you can entertain this as an idea for a rainy, cool-ish summer evening. We enjoyed it on a night like that just recently! We’ve had a lot of rain and clouds around these parts.
I’ve been trying to come up with the fastest of fast dinner recipes, since cooking with two kids underfoot is getting more and more challenging. If it takes me more than 10 minutes of prep during the witching hour, it’s usually not happening. (I don’t know, maybe I should try batch cooking and freezing meals on the weekends, but I haven’t yet come up with a plan for that.) Admittedly, I’ve also been feeling a bit defeated in the cooking department because Adriana is going through an “I’m not hungry” phase (after going through a really good eating phase in the spring that, in retrospect, could’ve been a growth spurt!). Most of the things we offer her get a few nibbles taken out of them. Or she just exclaims, “POPSICLE, PLEASE!” *facepalm* So, my mood lately has been basically PLEASE DON’T MAKE ME COOK ANOTHER REJECTED MEAL. The silver lining is that Arlo will eat anything that isn’t nailed down (for now!), as will Eric (lol), so my cooking confidence isn’t totally shattered. I’m like, “SEE, NORMAL PEOPLE LOVE MY FOOD!” (I may be losing it.)

One day I just started throwing things into a pot and didn’t actually expect this recipe to be a winner, but it turned out to be really tasty, especially after a couple more trials. I love that it’s extremely fast to prep. My goal was 10 minutes prep, and I usually clock in at around 7 or 8 minutes (when I have my cooking game face on!). I also wanted the dish to rely on pantry ingredients, such as dried spices rather than fresh aromatics. Don’t get me wrong, fresh garlic, onion, ginger, chillis, etc. are typically my first choice, but they aren’t always practical for those rushed nights. Another benefit of this recipe is that you can use whatever veggies you have on hand, so it can work for all the seasons. I, Eric, and Arlo are really enjoying it…and I’ve even convinced Adriana to eat a bit (it was a sweet potato version, and I ended up mashing her sweet potatoes into the dal and stirring in the rice).

5 from 1 reviews
8-Minute Pantry Dal
Vegan, gluten-free, grain-free, nut-free, refined sugar-free, soy-free
This satisfying pantry dal is lightning fast and will only set you back around 8 minutes of prep time. While not an authentic dal, I created this version out of a desperate need to come up with more speedy pantry dinner options. You can change it up so many ways by simply varying the veggies you use, and in my tips I've provided an alternative spice option, too—I still can't decide which one I like better! Before you begin, I recommend setting out all the spices on the counter so they’re ready to go when you’re cooking. Also, if you have some on hand, this dish is great with baby spinach stirred in during the last couple minutes of cooking. In the photographed dish, I used 2 cups each of chopped zucchini and broccoli florets, but of course, feel free to use any veggies you prefer.
Yield
4 (with accompaniments)
Prep Time
8 Minutes
Cook time
25 Minutes
Total Time
33 Minutes
Ingredients:
For the dal: 1 heaping tablespoon (20 mL) virgin coconut oil4 cups peeled (if necessary) and diced veggies*1/2 cup (100 g) uncooked red lentils1/2 cup (125 mL) water, plus more if needed1 (14-ounce/398 mL) can diced tomatoes1 (14-ounce/398 mL) can light coconut milk1 1/2 teaspoons (7.5 mL) garlic powder1 1/2 teaspoons (7.5 mL) minced onion**1 tablespoon (15 mL) good curry powder, or to taste***¾ to 1 teaspoon fine sea salt, to tasteFreshly ground black pepper, to tasteServing suggestions:Cooked basmati rice or grain of choiceFresh chopped cilantro leavesFresh lime juice
Directions:
In a large pot, melt the coconut oil over low-medium heat. Peel (if necessary) and dice the veggies into 1/2-inch pieces. Add them into the pot and stir until combined. Increase heat to medium. Add in the rest of the ingredients (lentils, water, diced tomatoes [with juices], coconut milk, all the spices, salt, and pepper). Stir until combined. Increase heat to high and bring to a low boil. Reduce heat to medium and cook, uncovered, for 18 to 30 minutes, until the veggies and lentils are tender; the cook time will depend on the types of veggies you use, and their size. Stir the dal frequently while cooking, and reduce the heat if necessary to prevent it from sticking to the pot. (If you’re using potatoes, I suggest covering the pot while cooking since they don’t contain as much water to “cook off”. You may need to add more water to thin the mixture.) If desired, serve over rice, and garnish with cilantro and lime (it’s still great without these additions, though!).
Tips:
* You can use any veggies you like here! Whatever is lurking in your kitchen, feel free to try it out. A few ideas for combos include the following: carrot and zucchini, potato and peas, sweet potato and red pepper, broccoli and zucchini, cauliflower and/or broccoli.
** Minced (or flaked) onion is less concentrated than onion powder. Onion powder will work as a substitute if that's what you have on hand, but I would suggest starting with a small amount and adding it to taste in ¼-teaspoon increments to avoid it overpowering the dish.
*** I use Simply Organic brand of curry powder. If you don’t have a favourite curry powder blend on hand, you can substitute the following: 1 1/2 teaspoons ground turmeric, 1 1/2 teaspoons ground coriander, 1 teaspoon ground cumin, 1/2 teaspoon ground ginger (or more to taste), and 1/4 teaspoon cayenne pepper (optional). Don’t forget to use the 1 1/2 teaspoons of both garlic powder and minced onion, as well.

Comments (8) | Share on Facebook | Tweet | Pin It | Snapchat | Google+© copyright 2017 Oh She Glows. All Rights Reserved.
May 9, 2017
Vegan Cinnamon Rolls (with make-ahead option!)


Wow, it was not my intention to disappear from the blog for so long! I tell you, this parenting gig isn’t easy. It just swallows me up at times.
March and April were a couple of the hardest months we’ve had since becoming parents of two. We were struggling to stay afloat and not sleeping much. I started to feel depressed/anxious on and off (which worried me a bit, given my past struggles), and was at a loss for how to write about what I was going through. For a while, I lost the motivation to do many of the things I normally enjoy. The past few years have been amazing and intense and emotional and exhilarating and exhausting. The phrase “burning a candle at both ends” comes to mind. My kids are my world and being a mother is my favourite role in life, but it’s so damn hard sometimes. That’s just the honest truth. Some days you just survive. But then there are those daily moments that take my breath away…make my heart burst with love and my eyes well with tears, and it’s like…oh yeah. THIS. This is it. This is what makes it all worth it a million times over. Grateful doesn’t even begin to describe how I feel.
Thankfully, we seem to be in a better phase right now: we’re all getting more sleep, and the kids have been much happier. I’m soaking it up! My motivation has also returned and inspiration seems to be everywhere lately. Despite the incessant rain of late, things are feeling fresh and new again. My birthday is coming up in a week, so the timing couldn’t be better.
If you’ve been following me on Insta Stories, you may have seen the development of these cinnamon rolls over the past couple weeks. Cinnamon rolls for DAYS, you guys!! Working off my Pumpkin Pie Cinnamon Rolls recipe from way back in 2010, I made a classic cinnamon roll—vegan styles, of course. Why the heck didn’t I have one already? I do not know. My goal was to make the recipe foolproof without sacrificing that amazing cinnamon roll experience we all know and love, and based on my taste testers’ reactions I’d say it’s a big crowd-pleaser. (One of my pals said they remind her of her grandmother’s cinnamon rolls!) Don’t be put off by the number of steps; I wanted to provide a lot of detail so you wouldn’t be left hanging (that’s the worst). Also, be sure to see my notes on how to prep these the day before (you know I tested that, too), so you can wake up and bake fresh cinnamon rolls with minimal bleary-eyed fiddling in the kitchen. I know what we’ll be enjoying on Mother’s Day, and I can’t wait to celebrate with our crazy little fam…

5 from 2 reviews


Classic Cinnamon Rolls
Fluffy cinnamon rolls topped with a sweet and tangy cream cheese frosting; these are great to whip up for special occasions or laid-back weekend mornings. There are quite a few steps, but don’t panic! I promise, as long as you read everything over before you begin, you'll be fine—they're actually quite easy to make. Even though this recipe technically requires about 2 hours and 45 minutes total time, only 30 to 40 minutes of that are active. The remainder is rest and bake time, during which I encourage you to kick up your feet and relax! See my tips below for how to make these the night before, too. I adapted this recipe from my Pumpkin Pie Cinnamon Rolls (2010).
Yield
10 to 12 rolls
Prep Time
35 Minutes
Rest time
1 Hour, 45 Minutes
Cook time
24 Minutes
Total Time
2 Hours, 44 Minutes
Ingredients:
For the yeast:1/2 cup (125 mL) warm water1 teaspoon (5 g) sugar1 packet (8 g) quick-rise instant dry yeastFor the dough:2 1/2 cups + 3 tablespoons (430 g) all-purpose white flour, plus more for kneading1/3 cup (67 g) vegan butter1/2 cup (125 mL) unsweetened almond milk1/3 cup (73 g) cane sugar1 teaspoon (6 g) fine sea saltFor the cinnamon sugar filling:1/2 cup (110 g) cane sugar1 1/2 tablespoons (10 g) cinnamon1/4 cup (50 g) vegan butter, meltedFor the pan sauce and frosting:1/4 cup (50 g) vegan butter, melted2 1/2 tablespoons (25 g) unpacked brown sugar or cane sugarVegan Cream Cheese Frosting
Directions:
Set aside a 9- by 13-inch casserole dish. For the yeast: In a small bowl, add the warm water. Make sure it’s not too hot; it should feel like warm bath water (approximately 110°F/45°C). Stir in the sugar until mostly dissolved. Now, stir in the yeast until dissolved. Set aside for about 6 to 7 minutes so the yeast can activate (it’ll look foamy when ready). For the dough: Flour a working surface for later. Add 2 cups of flour into a large mixing bowl. Melt 1/3 cup butter in a small saucepan over low heat. Remove the pot from the burner and stir in the almond milk, 1/3 cup sugar, and salt. The mixture should be lukewarm—if it’s any hotter let it cool off for a minute. Stir in all of the yeast mixture until just combined. Pour the wet yeast mixture over the flour and stir with a large wooden spoon. Stop mixing once all of the flour is incorporated and it looks a bit like muffin batter, about 15 seconds. Add in the remaining 1/2 cup and 3 tablespoons flour. Mix with a spoon for several seconds. Lightly oil your hands and roughly knead the mixture until it comes together into a shaggy, sticky dough. It’ll probably stick to your fingers (even with the oil), but that’s normal. Turn the dough out onto the floured surface. Knead the dough for about 3 to 4 minutes until it’s no longer sticky to the touch; it should be smooth and elastic. While kneading, sprinkle on a small handful of flour whenever the dough becomes sticky to the touch. Don’t be afraid to add some flour; I probably use between 1/2 and 3/4 cup while kneading. Shape the dough into a ball. Wash out the mixing bowl and dry it. Oil the bowl (I love to use a spray oil for ease) and place the ball of dough inside. Flip the dough around so it gets lightly coated in the oil. Tightly cover the bowl with plastic wrap and place it in the oven with the light on (or simply in a warm, draft-free area). Let the dough rise for 60 minutes. Meanwhile, make the cinnamon sugar filling. In a small bowl, mix 1/2 cup sugar and the cinnamon and set aside. Make the pan sauce: In a small pot, melt 1/2 cup butter (you can use the unwashed pot from before). Remove half of the melted butter (eyeballing it is fine) and put it in another small bowl (this will be spread onto the rolled-out dough before adding the cinnamon sugar). With the scant 1/4 cup melted butter remaining in the pot, stir in the 2 1/2 tablespoons of brown sugar until combined (this is the pan sauce). Pour the pan sauce into a 9- by 13-inch casserole dish and spread it out. After the first dough rise, re-flour your working surface and grab a rolling pin. Roll the dough into a large rectangle, approximately 20 by 14 inches. With a pastry brush, spread the remaining melted butter onto the dough, covering the entire surface. Sprinkle on all of the cinnamon sugar filling, leaving a 1/2 inch around the edges without any sugar. Grab the end of the dough (short side of rectangle) and roll it up, rolling as tightly as possible. Place it seam-side down once it’s rolled up. Use a serrated knife to slice 1 1/2 inch–thick rolls. You should have 10 to 12. Grab your cut rolls and place into the prepared pan, cut-side down, a few inches apart from one another. Cover the pan with plastic wrap, place into the oven with the light on, and allow them to rise for 45 minutes. Meanwhile, prepare the Vegan Cream Cheese Frosting. After the second rise, remove the rolls from the oven and preheat the oven to 350°F (180°C). Remove the plastic wrap. Bake the rolls for 23 to 26 minutes at 350°F (180°C), until lightly golden in a few spots. Remove from oven and allow the rolls to cool for about 10 minutes. Frost the rolls with the cream cheese frosting. Slide a butter knife around each cinnamon roll and lift it out. (Alternatively, you can pop them out first and frost each roll individually.) Serve immediately and enjoy! If you have leftovers, you can wrap them up and chill them in the fridge for up to 48 hours. I like to reheat unfrosted rolls in the oven on a baking sheet for 5 minutes at 350°F (180°C). The oven returns them to their amazing gooey-soft state! Alternatively, you can freeze the cooled unfrosted rolls (wrap them in a layer of plastic wrap, followed by tinfoil) for a week or two. To reheat, simply unwrap and pop them frozen onto a baking sheet and into the oven for 10 to 12 minutes at 350°F (180°C) until warmed throughout. The edges get a bit crispy, and it’s oh so good!
Tips:
Want cinnamon rolls prepped for breakfast the next day? Simply follow the recipe until you complete the second rise. Place the wrapped dish in the fridge overnight. In the morning, remove the dish from the fridge and let the rolls sit in the oven with the light on for about 20 minutes. After that, remove the dish from the oven and preheat the oven to 350°F (180°C). Remove the plastic wrap, and bake as directed. They can be prepped up to 18 hours in advance. Just be sure to cover the dish tightly with plastic wrap while in the fridge.

Keep your eyes peeled for a step-by-step cinnamon roll video coming soon! Be sure to subscribe to our YouTube channel so you don’t miss it.
And as an aside, to anyone out there battling the bad flooding happening throughout Eastern Canada, our hearts go out to you!
Comments (30) | Share on Facebook | Tweet | Pin It | Snapchat | Google+© copyright 2017 Oh She Glows. All Rights Reserved.
February 23, 2017
Adriana’s Fave 10-Minute Pasta (toddler-friendly)

At long last, I’m sharing the recipe I’ve probably made the most since Adriana started eating solids (which somehow feels like forever ago and just yesterday at the same time). I’ve had so many requests for this recipe, but never got around to sharing it because it would always be devoured right away, leaving no time for photos. Last week, I finally made it in the morning so I’d have a bit of time to snap a few shots.
I use the term “recipe” lightly here because I never measure the ingredients for this pasta; not having to measure anything is part of its beauty and ease. I measured it here so you can get a feel for it, but once you do, I encourage you to throw caution to the wind and wing it! It’s really hard to mess up. You can often find me glugging marinara, spooning hummus, and dumping hemp hearts with abandon into the cooked pasta. The quicker the better, especially when there’s a hangry toddler screaming “Paaaaaaaasta!” at your feet.
Not only is this pasta fast and delicious, it packs in tons of protein, fibre, and healthy fats. You can also change it up and customize it so many different ways—I’ve provided a few ideas in the recipe, but I’d love to hear what you come up with, too!

I’ve been hesitant to share “toddler-friendly” recipes on here because I’ve learned a few things about feeding a toddler: 1) what they claim to love and hate changes by the day (or minute), 2) toddler likes and dislikes are not one size fits all, and 3) the food my daughter loved at one year old (virtually everything!) is certainly not what she loves at two years old (this age is much more hot and cold, as she loves to assert her independence). It’s not uncommon for me to think I’ve found a foolproof toddler-friendly recipe to share with you, only for it to then be rejected for a month straight. (And I once read that a little one often needs 20 exposures to the same food before they take to it, too.) Luckily, my dear recipe tester, Nicole, runs a daycare and she shares most of my recipes with her daycare children, which gives me a much better idea whether a recipe will be, generally speaking, a winner. I’m happy to say this one was enjoyed!
Anyway, I’m sure we’ll have a mix of “my baby/toddler/kid loved this” and “my kiddo only ate one bite” in the comments—that’s just the nature of the beast. (And by “beast” I mean toddler, in a sometimes cute/sometimes scary kinda way…am I right?) But my hope is that some of you will be able to fall back on this recipe as often as we do. I don’t know what I’d do without it as it’s just so easy. Oh, and yes, us adults like it too, so even if you don’t have kids you may want to give it a try on those busy, too-tired-to-cook weeknights. It’s great paired with a simple side salad and Lemon-Tahini Dressing, which can be thrown together while the pasta cooks.

Adriana's Fave 10-Minute Pasta
Vegan, nut-free, refined sugar-free, soy-free
I’ve made this pasta countless times for our family; it’s hard to beat how fast and nutritious it is, and it can be changed up so many ways. It packs in around 20 grams of protein and 11 grams of fibre per (adult-size) serving (depending on which kind of pasta you use, of course—see my notes), not to mention healthy fats from the hemp hearts. My advice if you’re in a rush is to start heating up the water first, before you gather any other ingredients, as it can take some time for the water to come to a boil. If you happen to have a batch of my Fail-Proof Marinara Sauce from Oh She Glows Every Day (p. 175) on hand, it works wonderfully in this dish. Of course, store-bought marinara works just as well, too.
Yield
4 (adult-size) servings
Prep Time
2 Minutes
Cook time
8 Minutes
Total Time
10 Minutes
Ingredients:
For the pasta:1 box (340 g/12 ounces) rotini or fusilli pasta*2 cups (500 mL) marinara sauce1/3 to 1/2 cup (80 mL to 125 mL) hummus1/4 cup (35 g) hemp heartsOptional add-ins:Fine sea salt, to tasteGarlic powder, to tasteFrozen peas or other veggies**Cooked lentils or beansFresh spinach or basil, minced in food processorPuréed cooked carrots or cauliflower***
Directions:
Add water into a large pot and bring to a boil over high heat. While you are waiting for it to boil, gather the rest of the ingredients. Once boiling, reduce the heat to medium, add the pasta, and stir with a wooden spoon. Cook the pasta according to the package directions, stirring every now and then to prevent the pasta sticking. Drain the cooked pasta well and place it back into the pot. Stir in the marinara, hummus, and hemp hearts until combined. Taste and add a bit of salt or other mix-ins if desired. Heat over low until warmed throughout. If serving this pasta to a little one, spread a scoop of pasta out on a plate to gently cool it before serving. Leftovers can be stored in an airtight container in the fridge for a couple days. To reheat, add the pasta into a pot along with a bit of extra marinara sauce (this adds moisture back) and stir to combine. Heat over medium-low heat until warmed throughout.
Tips:
* I typically use whole-grain kamut pasta. And sometimes, I mix in a bit of red lentil pasta for a protein boost. Feel free to use any kind of pasta you and your family enjoy!
** To quickly thaw frozen peas, add them to the pot during the last minute or two of cooking the pasta.
*** When I have time, I love to steam or boil carrots (or cauliflower) and then purée them until smooth. Then I stir the puréed veggies directly into the pasta. It’s an easy way to add even more nutrition without impacting the flavour too much.
This pasta goes lovely with a simple side salad and garlic bread. If your little one isn't a salad fan, try giving them small lettuce leaves for dipping into the dressing.

Last but not least, be sure to follow me on Instagram if you aren’t already! I have an exciting Vitamix and OSG cookbook giveaway coming up!
Comments (11) | Share on Facebook | Tweet | Pin It | Snapchat© copyright 2017 Oh She Glows. All Rights Reserved.
February 13, 2017
Hunky Heartbeet Cabbage Soup

If you’ve been following my Insta Stories this year, you might’ve seen that one of my smaller goals for 2017 is to use reusable produce bags. It’s something I’ve tried in the past but never stuck with, so when I told Eric about the goal he wasn’t sure that I would actually do it. Especially since I’ve had a pretty bad case of new-mama brain lately. “This is going to last a week!” he chuckled. But here I am 6 weeks into 2017 and it’s going great…mainly because proving him wrong is one of my greatest joys in life.
These are the bags I purchased on Amazon. I love that there are various sizes, and so far they’re holding up well! Adriana has also claimed one and likes it when I add a few light groceries into her “grocery bag” while she sits in the cart. Just remind me not to put a clementine in there again; she thinks it’s pretty funny when she bites through the skin. 
[image error]
You may suspect we’re living off of soup these days due to how many soup recipes I’ve shared over the past few months, and you might be right! Soup has been our go-to solution during the hectic postpartum season because I can make a big batch and the leftovers only get better as the days go by.
My aunt recently had us over for lunch, and she made this incredible borscht-inspired soup that I immediately knew I had to try to make at home. I couldn’t believe how few ingredients she used for a soup that blew us all away. Her secret? A jar of marinara sauce forms the soup’s base. My jaw dropped! I recreated the soup at home the very next day, and my jaw dropped again when Adriana ate 3 bowls of it in a row. She was covered in beet stains by the end, but it was worth it because I never thought she’d eat this kind of soup. Heck, I never thought I would enjoy beets in soup either, but it’s our new obsession. So if you’re worried about a beet and cabbage soup being a bit too earthy-tasting, I encourage you to give this one a try. It’s surprisingly sweet, and really satisfying. I’m also convinced the healthy ingredients helped me fight off a cold that was going through our household, too. It’s bursting with Vitamin C, iron, and B vitamins, making it a great immune-booster this time of the year!

Hunky Heartbeet Cabbage Soup
Vegan, gluten-free, grain-free, refined sugar-free, soy-free
You won’t believe the gorgeous colours in this incredibly healthy, borscht-inspired soup, from the prep stage (gorgeous shades of plum and violet) to the final end result (a bold crimson red). It's the perfect soup to celebrate Valentine's Day (or really, to brighten up any chilly winter day). This soup takes an hour and a half to cook thanks to the raw beets, so be sure to give yourself enough time; the bonus is that you can cover it and walk away as it simmers. To avoid a longer cook time, chopping the beets very small (think pea- or almond-size) is key. A big thank-you to my Aunt Elizabeth for inspiring this soup.
Yield
9 cups (2.1 litres)
Prep Time
20 Minutes
Cook time
1 Hour, 30 Minutes
Total Time
1 Hour, 50 Minutes
Ingredients:
2 tablespoons (30 mL) coconut oil2 cups (280 g) diced red onion (about 1 medium/large)5 cups (540 g) diced red cabbage (about 1/2 medium)4 cups (500 g) peeled and diced raw beets (about 2 large/3 medium)*5 cups (1.2 L) marinara sauce**3 cups (750 mL) waterFine sea salt or Herbamare, to tasteCashew Sour Cream, for serving (optional)Fresh dill, for garnish (optional)
Directions:
Add the coconut oil into a large pot. Over medium heat, sauté the onion for about 3 to 5 minutes, stirring once or twice. Add the diced cabbage and beets. Stir again. Continue sautéeing for another few minutes. Add all of the marinara sauce and the water. Stir to combine. Simmer the soup, covered, over low to medium heat for 1 hour and 30 minutes to 1 hour and 45 minutes, or until the beets are fork-tender. Your cook time may vary depending on how fresh your beets are and how small you chopped them. (If it’s your first time cooking the soup, you may want to check on it a few times and stir to to make sure it’s not sticking to the bottom of the pot.) Taste and season with salt to taste. Ladle into a bowl and serve with a spoonful or swirl of Cashew Sour Cream and chopped dill if desired, but it's great all on its own, too. This soup will keep in the fridge in an airtight container for up to 1 week. It freezes beautifully, too: Simply cool the soup and place it into a freezer-safe container, leaving an inch of space at the top for expansion. Freeze for up to 2 months.
Tips:
* To prevent staining your hands, wear disposable gloves while peeling and dicing the beets.
** If you can find it, I highly recommend using White Linen Collection Marinara Sauce from Costco in this recipe. I use 1 full bottle, which works out perfectly to about 5 cups. It’s my favourite store-bought marinara sauce (I have no affiliation with them, by the way, just passing along my personal recommendation!). My Fail-Proof Marinara Sauce from Oh She Glows Every Day is also lovely in this soup!

Blessings in a Backpack update:
If you remember, we committed to donating the January revenue from our paid Get Glowing app bundle (for both Android and iOS) to Blessings in a Backpack Canada. I’m thrilled to let you know that we raised enough money to feed 19 children, providing them with a backpack of food to take home every Friday, for an entire school year! A BIG thank-you to everyone who downloaded the bundle of recipes. We couldn’t have done this without you!
Comments (5) | Share on Facebook | Tweet | Pin It | Snapchat© copyright 2017 Oh She Glows. All Rights Reserved.
February 6, 2017
In the Buff Smoothie Bowl

There’s no turning back: we’ve officially shifted from the sleepy newborn stage into a whole other beast. It was good while it lasted, I have to say. Arlo’s development is steaming ahead, and with that has come his first sleep regression (or “progression”, if we’re seeing the glass half full), and his desire to never miss a cool thing in his new world. Things have gotten really stinkin’ cute, a bit ugly (mainly, the circles under my eyes), and kinda scary. He basically turned into the wide-eyed “deer in headlights” emoji overnight. Actually, I think someone should make a new emoji just for babies going through sleep regressions; how about a wide-eyed baby who is simultaneously laughing and crying? With devil horns too, of course…but I digress.
We’ve been through countless sleep setbacks before, with big sis, but for some reason I thought we might cruise past them this time. We’ve paid our dues! I protest to the Sleep Gods. LMAO, say the Sleep Gods. It’s okay, though—we will survive.
On the bright side, this crazy time has given me the nudge to start something I’ve wanted to do for a while now: shorter, more easygoing blog posts. I’ve been thinking about this for a long time (and even tried it out a while back if you recall, but eventually my inner Chatty Cathy got the best of me…oops). I’m trying it today and popping in with a quick recipe and a few photos. I just added this smoothie bowl to the app a week ago, and it’s my current obsession. I devour a bowl every single morning lately (and chase it with a coffee or matcha to warm up…the best.).
A few things to note. The recipe calls for dates, but I don’t tend to use them because I don’t mind a smoothie that’s just mildly sweet. However, my lovely tester, Nicole, thinks it’s a bit bland without the dates added in, so I’ll leave it up to you whether to include them or not. (Granted, it does taste ah-mazing with the dates.) You can always taste the smoothie before adding them in and then make the call to suit your own taste buds. Also, a word to the wise: Some blenders have a hard time blending hemp hearts and dates smooth enough, so I recommend using a high-speed blender for the best results. Lastly, I always use a stevia-free protein powder as I don’t like the taste of stevia (and find it can overpower some smoothie flavours), but whatever you use, just know that the protein powder will greatly impact the overall flavour. I use Sunwarrior Warrior Blend in Natural in this particular recipe. Some people love it and some don’t; use what you love and you can’t go wrong!
Well, I just clocked in at 500 words for what was supposed to be a quickie blog post. Chatty Cathy strikes again. (Eric just said, “Must be the Maritimer in you.”) Maybe this is going to be harder than I thought.

In the Buff Smoothie Bowl
Vegan, gluten-free, grain-free, no bake/raw, oil-free, refined sugar-free, soy-free
I just can't get enough of this creamy, monochrome smoothie bowl! Packed with protein and healthy fats, it keeps me going all morning long, and its subtle, earthy flavours and thick texture are the perfect base for loading on all kinds of toppings.
Yield
2 to 2 1/2 cups (500 to 625 mL)
Prep Time
10 Minutes
Cook time
0 Minutes
Total Time
10 Minutes
Ingredients:
For the smoothie bowl:1 to 1 1/4 cups (250 to 310 mL) almond milk, as needed1/4 cup (40 g) packed avocado1 large frozen banana, broken into chunks*1 tablespoon (12 g) chia seeds1 heaping tablespoon (12 g) hemp hearts1 scoop (25 g or 1/4 cup) unflavoured protein powder (optional)**2 teaspoons (10 mL) almond butter1 to 2 pitted Medjool dates, to taste1/2 teaspoon cinnamon, or to taste1/4 teaspoon pure vanilla extract2 ice cubes, or as desiredTopping suggestions:The Perfect Granola, Grain-Free Pumpkin Spice Granola Clusters, or granola of choiceFresh fruit (sliced banana, berries, etc.)CinnamonHemp hearts and/or toasted sliced almondsShredded coconut
Directions:
Add 1 cup (250 mL) of almond milk into a high-speed blender, followed by the rest of the ingredients. Blend until smooth. If necessary, add more milk to get the blender going. Pour into a bowl, and add your desired toppings. Serve immediately and enjoy with a spoon!
Tips:
* Be sure to use a large frozen banana or the texture of the smoothie bowl won't be thick enough.
** If you are omitting the protein powder, you can reduce the almond milk to 1 cup (250 mL), and add more from there if needed. I use Sunwarrior Warrior Blend protein powder in "Natural". It's important to use a neutral-flavoured protein powder so it doesn't overwhelm the delicate flavours of the smoothie bowl.
If you want a bit of a kick flavour-wise, try adding some fresh ginger (to taste) to heighten the flavours.


Also, just a heads up that I’ll be sharing this new recipe for nut-free freezer fudge in the next issue of In the Glow! Be sure you are signed up (and don’t forget to confirm your subscription). It’ll be going out before Valentine’s Day.
Comments (10) | Share on Facebook | Tweet | Pin It | Snapchat© copyright 2017 Oh She Glows. All Rights Reserved.
January 30, 2017
Power Biscotti from Blissful Basil


“…I’ve finally learned to greet anxiety with gratitude, because it is not my enemy but my teacher. And it’s taught me one of the greatest lessons of all: When faced with a problem, you can choose to avoid it, you can walk around it, and you can pretend that it doesn’t exist, but you will repeatedly run into its pain until you open your heart to its purpose.” Ashley Melillo, Blissful Basil
It’s no secret I’m a quote fan (and I love to include one in each issue of In the Glow), but lately I’ve been looking to them more and more for inspiration. I don’t know if it’s the dreary, sunless winter days of late or simply the phase that I seem to be in, but I’m craving new perspectives, some external sources of wisdom to reframe my thought patterns. The above quote from Ashley really spoke to me, so I thought I’d share it with you today!
I’ve been talking a lot with friends lately about how labels—both those we are given and those we give ourselves—can hold us back. We all have them, don’t we? Ways of thinking about ourselves can become an invisible boundary (conscious or subconscious) we never attempt to grow beyond because we actually believe that we can’t. It’s when you tell yourself NOPE before even giving yourself a chance. It’s a self-imposed personal growth ceiling. It’s thinking, I’m too this, or not enough that. Or how about, I don’t have that skill set; I’m not that type of person. Before long, a single label can start to represent our whole selves, rather than just a PART of what makes us who we are (and who we are is pretty awesome, by the way).
I often use the anxiety label as a reason for why I can’t do something. But what if I viewed my struggles with anxiety as something that makes me stronger? Something that if talked about openly could lift me (and maybe others) up, and take away its power to hold me back? Having shame about something and burying it deep below the surface seems to only give it more leverage. Our struggles are what make us human and relatable and we shouldn’t be embarrassed by them, ya know?
Think about something you have long thought of as a personal disadvantage or weakness. Now, try to picture yourself taking small steps to overcome it, and imagine that feeling of personal strength that you’d get from doing so. It feels good, right? Scary too, perhaps, but good. It won’t be an overnight success story, but the fight will be worth it.

For many of you, the author of the lovely quote at the top of this post needs no introduction; Ashley, the author, photographer, and recipe creator of Blissful Basil, has been blogging for a little over 6 years now. Her quest for inner peace led her to discover the benefits of a plant-based lifestyle, and she never looked back. The quote is an excerpt from the introduction of her beautiful new cookbook, Blissful Basil. Just like on her blog, Ashley’s voice and vulnerability are so beautifully intertwined throughout this book. Her passion for creating feel-good recipes just leaps from the pages, and I think it’ll inspire you, too.
A few recipes you’ll find within these pages are: Simple Sweet Potato Cinnamon Rolls with Maple Glaze, Roasted Cauliflower Salad with Tahini-Cilantro Vinaigrette, Sloppy Shiitakes with Tangy Rainbow Slaw, and Baked Yellow Split Pea Burgers with Tzatziki Sauce. I’m thrilled to share Ashley’s Power Biscotti recipe with you today. (Many of you asked for this recipe when Ashley did an OSG Instagram Takeover last year, so it’s coming full circle!) Made with a base of ground sunflower seeds (grain-free biscotti, what!?) and very lightly sweetened with maple syrup, it’s about as healthy as biscotti gets. Upon first bite, I wasn’t too sure about the subtle flavour, but as my taste buds adjusted for the reduced sweetness (compared to traditional biscotti) I came to love this healthified version and found myself reaching for it non-stop.


Power Biscotti
Vegan, gluten-free, grain-free, nut-free, refined sugar-free, soy-free
These crunchy snacks were specially designed to be nutrient-rich down to their last grain-free bite. Rather than grain-based flour, these biscotti are made with homemade sunflower seed flour. Dried fruit, pepitas, and cacao nibs are folded in to offer pops of texture, while pure maple syrup provides subtle sweetness. These biscotti make a fantastic energizing snack or breakfast that you can grab on your way out the door. Don't forget to decrease the oven temperature to 275°F (135°C) after the first bake time or you'll risk burning the biscotti during the second and third baking rounds. Shared from Blissful Basil by arrangement with BenBella Books. Copyright © 2016, Ashley Melillo. The recipe below is lightly edited to reflect my own testing process.
Yield
12 to 14 biscotti
Prep Time
15 Minutes
Cook time
55 Minutes
Total Time
1 Hour, 10 Minutes
Ingredients:
1 tablespoon (7 g) ground flaxseed2 tablespoons (30 mL) filtered water2 cups (300 g) raw shelled sunflower seeds1 tablespoon (8 g) arrowroot starch1/4 teaspoon fine sea salt1/2 cup (60 g) dried cherries, cranberries, or blueberries, roughly chopped1/3 cup (53 g) raw pepitas2 tablespoons (18 g) cacao nibs (optional)1/4 cup (60 mL) pure maple syrup1 teaspoon (5 mL) pure vanilla extract
Directions:
Preheat the oven to 350°F (180°C). Line a large baking sheet with parchment paper. In a small mixing bowl, whisk together the ground flaxseed and water. Set aside for 5 minutes to thicken. Meanwhile, add the sunflower seeds to a food processor and process for 45–60 seconds, or until you have a coarse flour or fine meal, stopping to pulse several times to ensure even processing. The texture should be flour-like; be careful not to overprocess or you’ll end up with sunflower butter. Transfer the sunflower flour to a large mixing bowl and whisk in the arrowroot and sea salt. Stir in the dried fruit, pepitas, and cacao nibs (if using). Add the maple syrup and vanilla extract to the small mixing bowl with the flaxseed mixture and vigorously whisk to combine. Pour over the dry sunflower mixture, and use a large wooden spoon to mix well for about 30 seconds. At first it will seem like there isn’t enough liquid, but keep stirring until the liquid is evenly dispersed and you have a damp dough. Turn the dough out onto the lined baking sheet, and divide it into 2 equal pieces. Use lightly wet hands to shape and compact the dough into 2 tightly packed rectangles. Each rectangle should be approximately 4 × 6 inches, and just shy of 1 inch thick. Bake for 18–22 minutes, or until the edges are light golden brown and each rectangle feels well set, yet retains a soft indentation when gently pressed. Remove from the oven and cool for about 20 minutes. Meanwhile, decrease the oven temperature to 275°F (135°C). Once the biscotti rectangles are mostly cool, use a sharp knife to cut them widthwise into 1-inch-thick slices, pressing straight down and rocking the knife back and forth to slice rather than using a sawing motion. You should have a total of 12–14 biscotti, 6–7 from each rectangle. Carefully return the biscotti to the lined baking sheet, sliced-side down. Bake for 16–18 minutes. Then, carefully flip each biscotti, and bake for another 16–18 minutes, or until a light golden brown and crisp to the touch. They’ll continue to crisp as they cool, so keep that in mind when testing for doneness. Carefully transfer the biscotti to a wire cooling rack. Cool completely. Store in an airtight glass container to maintain crispness. They’ll keep for up to 1 week at room temperature, or you can store them in the freezer for a bit longer.
Tips:
Oven temperatures may vary greatly, so be sure to keep an eye on the biscotti during all three stages of baking to avoid burning it.

Before I go, I want to let you know about a fun interview I did with Anna and Nia from Vegan Creative. They’ve shared their review of Oh She Glows Every Day, too, so be sure to check out their post!
Comments (2) | Share on Facebook | Tweet | Pin It | Snapchat© copyright 2017 Oh She Glows. All Rights Reserved.
Angela Liddon's Blog

- Angela Liddon's profile
- 134 followers

