
Angela Liddon's Blog, page 6
March 2, 2018
Ask Angela: Savoury toddler snack ideas, nut-free flourless muffins, and more

We’re baa-aaack! Thanks for your patience last Friday as I escaped the flu’s chokehold, lol. I’m happy that we’re into the swing of things again with some fun questions today! How nerdy am I that I get excited to test these things out? I’m basically just relieved that I can taste food again.
In case you missed it, yesterday I posted my recipe for the flourless muffins that have been in our breakfast and snack time rotation lately. We received so many questions about these muffins that I thought I’d include a couple in today’s roundup as well—see the last two for my notes on a nut-free version and ingredient swap. Also be sure to check out the comments in the post itself as I’ve answered a slew of other muffin questions there. I can’t wait to hear what you think about them!
Q1. Great toddler snack ideas! I’m wondering if you can create some more ideas for savoury snacks? I have a two year old who is clearly a vegan foodie. I give him a daily snack at 4pm and once a week try to provide a savoury snack too. Daiya Plain Cream Cheeze Style Spread on top of very small celery sticks has been a hit.
Hi Laurie, I love this challenge! It’s definitely easy to default to snacks that are naturally sweet because they tend to be instant hits with kids. Here is a list of savoury snack ideas your little one may enjoy. I hope my suggestions help! And if any other readers would like to chime in below, please do. A big thanks to my recipe tester Nicole for helping me drum up some ideas!
Avocado “fingers”: avocado slices tossed in crunchy breadcrumbs or almond meal and garlic powder. Adriana really likes this one and it’s super easy to prepare on the fly.
Carrot sticks (either raw or steamed) dipped in Cashew Sour Cream, hummus, or mashed avocado/guacamole.
Cooked chickpeas that have been rinsed, drained and dried. Toddlers love a finger food!
Dill Pickle Smoothie from the app (iOS/Android). This savoury smoothie comes together in a few minutes and I find kids love its tangy flavour too! If serving it the first time you may want to scale back on the lemon a bit until they get used to the flavour.
Avocado Hummus Toast from Oh She Glows Every Day . You can leave the 9-Spice Mix off if you choose, but I recommend letting toddlers try it first. You never know what they are going to like!
Pickles! Pickled cucumber, cauliflower, carrots and beets. Pickles may not be a hit on the first try, but keep offering them.
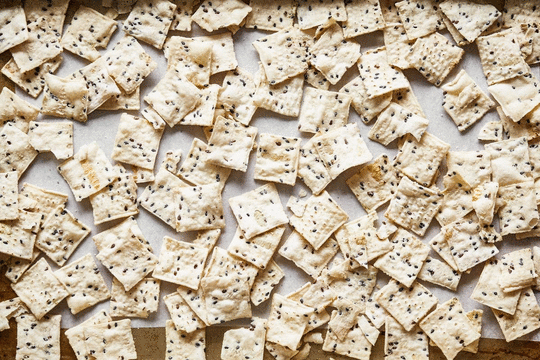
Sun-dried Tomato and Garlic Super Seed Crackers (Oh She Glows Every Day, p. 81). You can give the larger seeds several pulses in the food processor if your toddler isn’t able to chew them yet.
Seasoned kale chips. Try my Flawless Kale Chips, or if you have a dehydrator my Sun-dried Tomato Cheezy Kale Chips are out of this world!
Sneaky Shamrock Crackers. These spinach, dill and whole grain crackers can be cut into any shape you (or your kids) like.
Super Power Chia Bread ( The Oh She Glows Cookbook , p. 229 and on the blog) This is a dense, hearty bread that packs a nutritional punch. Try it spread with hummus or mashed avocado.
Cast-Iron Tofu (Oh She Glows Everyday, p. 137) cooked in rectangles and cut into thin sticks for dipping in ketchup or mild barbecue sauce. My Crispy Breaded Tofu Strips are also a huge hits with kids.
My Homemade Wheat Thins crackers taste just like the real thing, and they can be frozen too.
My Jumbo Chickpea Pancake cut into small pieces or fun shapes.
Q2. What can I use as a substitute for carrots in your Perfect Veggie Burger recipe? I can’t eat carrots for health reasons.
Hey Jelena, Grated sweet potato will work just fine in place of the grated carrot. Grated beet could be a fun twist, but I haven’t tried it yet so I’m not entirely certain. I’d love to hear if you do, though!

Q3. Hi Angela, I’m loving the return of Friday FAQs/Ask Angela. I love unwinding on my lunch break at work reading the weekly post. I have a question about your Nut-Free Dream Bars from Oh She Glows Every Day (p. 211)—do you have any swaps for brown rice syrup in the crust? Every grocery store in my city is out of stock, and I want to make the bars for my mom’s birthday.
Hey Amanda, I’m so happy you look forward to the series every Friday…picturing you reading over lunch makes me smile! I used brown rice syrup in this crust because it’s the stickiest type of liquid sweetener and tends to bind ingredients very well. But your question made me curious, so I tested out a maple syrup option for you as well! Instead of using 2 1/2 tablespoons brown rice syrup, I used an equal amount of pure maple syrup and followed the crust directions as written. I found that the maple syrup crust was softer and crumbled a bit when sliced, but overall it didn’t break apart quite as much as I expected it would with that swap. It still tastes great, so I’d say it’s an option as long as you don’t mind some of the crust breaking off here and there!
Q4. What model coffee grinder do you have?
Hey Lauren! I’ve used this KitchenAid BCG111OB Blade Coffee Grinder for the past several years, but I do have a couple qualms with the grinder overall. You have to be pushing the lid down for the grinder to run, and I’d much prefer being able to press a button and walk away while I prep my coffee things. You also can’t specify the grind level (e.g. course, fine, etc.) on this model, so it can be difficult to achieve a precise grind. Other than that, the grinder works just fine. But would I buy it again? I would probably look for one that suits my needs a bit better. If anyone has a coffee grinder they LOVE, please do share below!

Q5. Is there anything I could substitute for the almonds and almond butter in your new Flourless Bite-Sized Breakfast Muffin recipe? I bake for a lunchbox program for kids and I’m always looking for good nut-free recipes. We use SunButter and Wowbutter in place of nut butters. Do you have any thoughts or suggestions?
Hey Alana, Good news! I just tested a nut-free version of these muffins and it worked great. I used 1/2 cup raw sunflower seeds instead of the whole almonds and substituted the almond butter for 1/2 cup of SunButter Organic Sunflower Seed Butter (make sure there is only sunflower seeds on the label). I also upped the cinnamon to 1 teaspoon to balance the sunflower flavour. This nut-free version does have a distinct sunflower flavour (not exactly surprising, haha!), but I still find it pleasant even if it isn’t as sweet as the almond version. Arlo approved of them, but Adriana wasn’t as sold on this version. ;) Mine also turned out a bit darker and more dense than the almond version. All in all, I do think it’s a decent option. I hope this helps and I would love to hear what you and your students think if you try it.
Q6. I’d like to make your Flourless Bite-Sized Breakfast Muffins. Is there anything I can use instead of arrowroot starch?
Hey Tara, For sure! An equal amount of cornstarch tends to work well as a swap for arrowroot in baked goods, so you could try it out. I haven’t tested it myself as I don’t tend to keep cornstarch in my pantry. Please let me know how it goes if you try it!

“Your 3-Layer Nut-Free Dream Cups are the best thing ever. I made half my batch with peanut butter and the other with almond butter. So good. As much as I love peanut butter and chocolate together, the almond butter was amazing. (Though I understand nut-free is great for people who can’t have nuts at all.) MAKE THESE. DO NOT hesitate. I actually cut each cup into quarters as I thought a whole cup was way too much. At times I would have half, but mostly ate a quarter at a time and that was enough. What a treat. I will make these over and over and over and over…. :)”
Hey Trish, Haha…your review was so fun to read. Thank you so much for trying the dream cups! You’ve reminded me that I need to make a batch of these beauties soon because it’s been WAY too long. So many recipes…so little time!
Comments (2) | Share on Facebook | Tweet | Pin It | Snapchat | Google+© copyright 2018 Oh She Glows. All Rights Reserved.


March 1, 2018
Flourless Bite-Sized Breakfast Muffins

Boy am I ever glad to be on the the other side of that flu! Last Thursday, when I posted my Triple Almond Energy Balls recipe, I thought that after five long days of bedrest I was starting to feel a bit better. Unfortunately, I wound up taking a turn for the worse Thursday evening with some scary flu complications cropping up overnight. My temperature skyrocketed (despite being on fever meds) and my cough became much worse. Luckily I’d already done quite a bit of reading on this year’s flu season because I was so worried about the kids getting it and wanted to know which high-risk symptoms to look for. Based on what I’d read and what my doctor told me, having symptoms improve and then come back even worse than before was bad news (it’s actually one of CDC’s “emergency warning signs” of flu complications). Gulp!
On Friday morning I couldn’t even get out of bed to see the kids. I was nauseous, sweating profusely, and had major chills despite feeling super hot. Adriana came into my room looking concerned and said “Mommy, why you don’t wake up today?” That just broke my heart. I knew I had to get medical treatment right away.
I think it’s been about 15 years since I’ve needed to take antibiotics, but I can’t tell you how grateful I was to have them for this virus, which had turned into bacterial pneumonia. The medicine brought my fever down quickly and I’ve been feeling a bit better each day since—although I still don’t feel like myself. I’m currently operating at about 36%, maybe, lol! I think the flu was extra hard on me because I was already run down from taking care of the kids the week before (I’m so thankful their flu symptoms weren’t as severe as mine…I’ll take one for the team!), and of course nursing through the flu takes its toll on the body. It was a stroke of luck that Eric got by with mild body aches (consider me impressed as he was living off unhealthy food all week!), so he held down the fort while I slept, and slept…and slept some more. Each night, I would collapse into bed at 7pm as soon as Arlo was down (and this early bedtime was in addition to an afternoon nap each day). I’ve never slept that much in my life. (And now I know what it’s like to be a baby/toddler!)
Needless to say, we’re all ready to start a new fresh month and hopefully keep as healthy as we can through the spring. So far March is shaping up to be great—I’m alive, after all. ;) Take care of yourselves everyone…I’m sending you all healthy wishes for a happy month ahead!!
Update: Sooo many great questions are coming in about these muffins! I’m answering them in the comments below, so be sure to check them out. Thanks everyone! And if I do any more trials of this recipe I will be sure to update the recipe notes. My next test is going to be a sunflower seed and sunflower seed butter version.
Update #2: I added a nut-free version in the recipe tips! :)


Flourless Bite-Sized Breakfast Muffins
Vegan, gluten-free, grain-free, oil-free, refined sugar-free, soy-free
These grain-free, kid-friendly muffins are packed with fibre-rich chia seeds and contain only a couple tablespoons of natural sweetener! The almond butter base gives them a deliciously nutty flavour, and overripe bananas lend an extra sweetness. We love serving these mini muffins at breakfast and snack time. Best of all, this recipe is made entirely in a food processor (a blender should work too)—so there’s only one dish to clean when you’re done! I’ve provided optional instructions for preparing larger muffins as well as a nut-free version so be sure to read through the tips. This recipe is inspired by Paleo with Mrs P.
Yield
24 mini muffins plus a few ramekins
Prep time
15 Minutes
Cook time
20 Minutes
Total time
35 Minutes
Ingredients:
1/2 cup (80 g) whole raw almonds*2 3/4 cup (400 g) chopped overripe bananas (about 3 to 4 large)1/2 cup (120 g) natural smooth almond butter1/4 cup (33 g) arrowroot starch2 tablespoons (20 g) chia seeds2 tablespoons (30 mL) pure maple syrup2 teaspoons baking powder1/2 teaspoon cinnamon1/2 teaspoon apple cider vinegar1/4 teaspoon baking soda1/4 teaspoon fine sea salt
Directions:
Preheat the oven to 350°F (180°C) and set aside two 12-cup silicone mini muffin pans or one 24-cup silicone mini muffin pan. There’s no need to grease silicone pans, but if you’re using metal muffin pans, line them with mini paper liners. This recipe makes enough for more than 24 mini muffins, so line an additional 2 to 3 small ramekins with standard-sized paper liners to use up the remaining batter. Add the almonds to the food processor and process to a fine crumb. Be sure not to overprocess the almonds into butter. If the ground almonds start getting sticky, they can negatively impact the texture of the muffins once baked. Add the chopped banana to the ground almonds along with the almond butter, arrowroot starch, chia seeds, maple syrup, baking powder, cinnamon, apple cider vinegar, baking soda, and salt. Process the mixture until smooth. Use a small cookie dough scoop to portion the batter into the muffin pans, filling each until about three-quarters full. Use the remaining batter to fill the ramekins until about two-thirds full. Bake the mini muffins for about 18 to 22 minutes (I bake for 20 minutes), allowing an additional 6 to 9 minutes for the ramekins to bake through. To test doneness, gently touch the top of one muffin. When ready, they will spring back very slowly. Finished muffins should also have visibly golden edges. Cool the muffins in the pans/ramekins for 30 minutes before attempting to remove. Carefully slide a knife around each muffin and gently pop it out of the silicone pan. (If using paper liners, the muffins must be cooled completely before removing, or the liners will stick to the muffins when peeled.) I love spreading these muffins with a little coconut oil before serving, but they’re also fantastic topped with chia seed jam. And thanks to the nutty taste and natural sweetness, you can enjoy them plain too. Leftovers can be stored in the fridge in an airtight container for 3 to 4 days, or in the freezer for up to 1 month.
Tips:
* If you don’t have any almonds on hand, feel free to swap them for walnuts or pecans instead.
To make a dozen regular-sized muffins, use a 12-cup silicone muffin pan. Fill each mold to two-thirds full and bake for 24 to 26 minutes. If using a metal pan, be sure to line each with paper liners, filling and baking as directed, until they have golden edges and very slowly spring back when touched on the top.
For a NUT-FREE version: Swap the almonds for 1/2 cup raw sunflower seeds and the almond butter for 1/2 cup smooth sunflower seed butter (I use SunButter Organic Sunflower Seed Butter...make sure it only has sunflower seeds on the ingredient list), and increase the cinnamon to 1 teaspoon. The muffins have a distinct sunflower seed flavour, but I find it quite pleasant even though they aren't as sweet as the almond version. The muffins are also a bit darker, but still need just as much bake time, if not a minute or two longer, and they are more dense.
If you’d like to make these muffins more decadent, try stirring some chocolate chips into the batter! For a crunch, add a couple handfuls of chopped walnuts or pecans.


Comments (33) | Share on Facebook | Tweet | Pin It | Snapchat | Google+© copyright 2018 Oh She Glows. All Rights Reserved.
February 22, 2018
Triple Almond Energy Balls (vegan, grain-free, naturally sweetened)

One of my biggest challenges when photographing beige- or blah-coloured recipes is making them look as appealing as they taste…the struggle is real! Dishes like curries, brownies, oatmeal, energy balls, etc. tend to look a bit sad through the camera’s lens. If you want a giggle, check out one of the very first beige/brown recipe photos I ever took on the blog. I posted this Pumpkin Banana Bran & Oatmeal Muffin recipe way back in 2008 (holy cow, I’m a blogging DINOSAUR! lol).
A good trick I’ve learned through countless trial and error (mostly error…and a few curse words) is that I need to add a lot of colour to photos even if the food itself isn’t colourful. It probably seems obvious, but with so many other things going on for a photo shoot (cooking, food styling, camera settings, lighting, etc.) it can be easy to forget the importance of planning for colour. If I’m shooting oatmeal or plain Jane muffins, I try to add some enticing fruit on top and more pops of colour on the table itself—a bright green Matcha tea, fresh flowers, a glass of OJ, or a colourful cloth napkin (without being too busy) can all create a gorgeous photo when the food itself looks pretty blah. This approach helped me photograph these flourless breakfast muffins (recipe to come!) and I’m pleased with how the app photo turned out!

I wasn’t quite as happy with the photo shoot of these energy balls because I had to rush (when naptime’s over, it’s OVA), but they’ll just have to do! I love how the colourful garnishes I added made the energy balls go from blah and beige to vibrant and enticing. I rolled them in fun pops of colour and a variety of textures: beet-coloured shredded coconut, ground pistachios (so pretty and chewy!), hemp hearts, and cocoa powder. I loved them all. I also tried rolling some in Matcha green tea powder, but they were soooo bitter. That one was a big NOPE! Cutting the Matcha with powdered icing sugar might’ve worked better, but I wanted to keep these bad boys naturally sweetened, so I opted to skip the Matcha altogether. To make the pink-hued shredded coconut, I added some beet juice (prepared the same way as my Vegan Sugar Cookies’ Pink Frosting) to the shredded coconut in a bowl. I put a plastic bag over my hand so it wouldn’t get stained in the process (#fancy) and then I “massaged” the beet juice into the shredded coconut until it was dispersed. It worked wonderfully and the result was so pretty! I sprinkled my leftover coconut on oatmeal.
Rest assured though, these nutty energy bites are just as good eaten as-is! I love keeping a stash in the freezer for quick snacking, and find the texture gets even better when they’ve been frozen too.
Also a quick note that I won’t be posting this Friday’s Ask Angela as I’ve come down with the flu (luckily today’s blog post was created last week so I could still share it). It was bound to happen as I’ve been taking care of two sick little ones, while up a lot at night and nursing to boot. I hope everyone has a very happy weekend and that you’re feeling well. I know where I’ll be…curled up with a big bowl of soup (hopefully my Golden Spiced Lentil Soup!) and warm lemon water. I’ll be a bit delayed replying to your reviews, questions, and comments this week, but please know that I will reply as soon as I’m feeling better!


Triple Almond Energy Balls
Vegan, gluten-free, grain-free, no bake/raw, oil-free, refined sugar-free, soy-free
I love energy balls because they’re infinitely customizable and so easy to take on the go. I like to grab a couple straight from the freezer and pop them into a small glass jar to throw in my purse on busy days. They’re perfect for for tiding you over until mealtime, and this Triple Almond Energy Ball recipe is toddler-approved, too—just be sure to cut them up into small pieces as ball shapes are a choking hazard. Their rich, nutty flavour comes from using whole almonds, roasted almond butter, and almond extract. A true triple threat!! You may recognize the flavour from my Triple Almond Thumbprint Cookies in Oh She Glows Every Day. I just can’t get enough of almond extract—I find it really heightens the flavour in almond-based recipes!
Yield
11 to 12 balls
Prep time
15 Minutes
Cook time
0 Minutes
Chill time
60 Minutes (optional)
Total time
15 Minutes
Ingredients:
1 cup (155 g) raw almonds1/2 cup (75 g) raw cashews1/2 cup (115 g) tightly packed pitted Medjool dates*2 tablespoons (30 mL) roasted almond butter or raw cashew butter1/2 teaspoon cinnamon1/4 teaspoon fine sea salt, or to taste1/4 teaspoon almond extract, or to taste5 teaspoons (25 mL) water, or as needed**Shredded coconut, hemp hearts, ground shelled pistachios, or cocoa powder, for rolling
Directions:
Add the almonds and cashews to a food processor and process into a coarse crumb. Be sure not to overprocess the nuts into butter. To the nut mixture, add the pitted dates. Process again until the dates are finely chopped. Next, add the roasted almond butter (or raw cashew butter, if using), cinnamon, salt, almond extract, and water (starting with a couple teaspoons) to the processor bowl and process again until the mixture comes together into a dough. You should be able to easily roll the dough into balls without them feeling dry or crumbly. If the dough is too dry, add more water one teaspoon at a time and continue processing until the mixture moistens to desired consistency. Roll the dough into 11 to 12 golf ball-sized balls. If using, roll each ball in your garnish of choice: shredded coconut, hemp hearts, ground shelled pistachios (or other nuts), or cocoa powder. Chill the balls in the freezer for about an hour to firm up, or feel free to eat them at room temperature if you can’t wait that long! Leftover balls will keep in an airtight container in the freezer for a few weeks. You can also store them in the fridge in an airtight container for several days if you prefer.
Tips:
* You’ll want to make sure the dates are very well packed into the measuring cup. If your dates are very firm and dry, I also recommend soaking them in hot water for about half an hour, and then draining well before using as directed.
** The amount of water you will need will depend on how fresh and sticky your Medjool dates are.
These energy balls have a soft texture. If you prefer a crunchier consistency, you can roll the balls in ground nuts or stir some chopped nuts or chocolate into the dough itself.
To make the pink shredded coconut, I mixed unsweetened shredded coconut with a bit of beet juice.

Comments (2) | Share on Facebook | Tweet | Pin It | Snapchat | Google+© copyright 2018 Oh She Glows. All Rights Reserved.
February 16, 2018
Ask Angela: My morning coffee recipes, Instant Pot reader poll, and more!

I have to say, this blog series is so much fun to put together each week. Even though I reply to your comments and questions a couple of times each day on the blog, making this round-up inspires me to dig a bit deeper and try new things to help troubleshoot. I also learn so many interesting things from you all, and absolutely love sharing your tips for others to read! Let’s dive in, shall we?!

Q1. Hey Angela! With how popular superfood powders are, I’m curious if you consume any on a regular basis?
Hi Monika, I can’t say that I use many superfood powders! They tend to be expensive and I’d personally rather spend that money on quality produce. I also want my recipes to be accessible. That said, there are a couple I like to use: DoMatcha Organic Green Tea Powder (I make green tea lattes with it and add it to smoothies) and Sprout Living Broccoli & Kale Sprout Mix. The latter is a powder made from broccoli and kale sprouts that have been gently dried and milled—I also add this to smoothies for a plant-powered boost!
Q2. Your coffee always looks so delicious on Insta Stories! Do you mind sharing exactly how you make it (including the proportions used)? My track record isn’t that good when I “wing” a recipe!
That’s too funny, Susan—I’ve definitely had my own fair share of “winging it” disasters! I love to start my day with French press coffee, and have a couple different ways of making it. I’m not a coffee expert by any means, but I’m happy to share both ways that I prepare it!
Basic French press coffee:
I start by grinding coffee beans—I like the “Mug Shot” organic coffee from Toronto-based brand 23 Degrees Roastery, and find grinding the beans morning-of makes them extra fresh and flavourful. I scoop two heaping tablespoons of ground coffee into my small (2-cup/500 mL) French press (from Ikea). Next, I bring a small pot of water to a boil before turning off the heat to let the water sit for 15 seconds or so. Then I pour just enough water into the French press to saturate my coffee grounds before giving the mixture a stir. After this pre-soak, I add the rest of the hot water to the French press, filling to about a 1/2-inch below the top of the vessel. I secure the lid of the French press and set my timer for 3 minutes. After 3 minutes, I press the coffee with the plunger and pour it into my mug before stirring in a mix of Nutpods French Vanilla Creamer and Califia Unsweetened Vanilla Almond Milk.
Blender coffee:
I follow all of the basic French press coffee-making steps above except for adding the creamer, and instead I pour the steeped coffee into my blender. Then I add 1/2 tablespoon of Nutiva’s MCT (Medium-chain triglyceride) oil along with a tablespoon of Nutpods French vanilla creamer. Finally, I secure the lid and blend the coffee for about 20 to 30 seconds (tip: make sure your blender lid is vented as it can explode if it’s not!). After blending, I pour into a mug and enjoy!
Full disclosure: When I need coffee yesterday (which is pretty much 98% of the time), I skip both the 15-second water resting and pre-soak periods, simply filling the French press with boiled water (this is technically a “no-no” as you can burn the coffee, but trust me when I say I’ve compared both methods and my sleepy taste buds tell me they’re virtually the same, lol). Then I follow the rest of the procedure as listed. On the average day, I like to have one of these in the morning, one in the afternoon (my caffeine cut-off is 3pm!), and a mild Matcha green tea thrown in between. #dontjudge ;)

Q3. Hi Angela, I want to make your new Easy Vegan Sugar Cookies as a surprise for my vegan husband. :) Instead of electric beaters, do you think I can blend the pink frosting in a food processor? Thanks!
Hi Nathalie, what a cute surprise for your husband! I wouldn’t have thought to make frosting in the food processor…such a fun idea! Your question made me super curious, so I just had to test it out in my food processor to see. I’m happy to report that the frosting came together quite well with this method. I tried adding the vegan butter first to “whip” it, but I found the butter just stuck to the sides of the processor bowl, so I’d recommend adding all of the ingredients into the processor at the same time. I also found that I needed to add a bit more almond milk than usual and had to stop to scrape the bowl down a few times throughout. I hope this helps you have pink frosting success!
Q4. Hi, is tomato paste the same as tomato purée?
Hey cb, Great question! Tomato purée and tomato paste are made using different methods, which accounts for their distinct flavours and textures. Tomato paste is made by cooking tomatoes slowly until they become thick and pasty, resulting in tomato paste’s sweet, rich, and intense flavour (similar to sundried tomatoes). Tomato paste tends to be sold in small cans or jars, whereas I find tomato purée is mostly sold in larger quantities. Tomato purée is made more quickly, cooking tomatoes briefly to soften before processing into purée, resulting in a thinner consistency and flavour more like that of fresh tomatoes. In the photo above, tomato paste is on the left and tomato purée is on the right. (A special thanks to Livestrong for the distinction.) With all this talk of tomato sauce, I’m now craving spaghetti squash with marinara! lol.

Q5. Hi! Your Roasted Carrot and Dill Hummus recipe sounds amazing!! Just wondering if it’s best made the day you want to eat it or just as good made the night before?
Hey Larissa, My recipe tester and I found the flavours were a bit better the day of, but it’ll still keep well in the fridge for 3 to 5 days. Homemade hummus thickens when chilling, so it’s probably best to let it come to room temperature before serving so your dip can soften (if you can wait that long!). :)
Q6. Hi Angela! I love the rebranding of the Friday FAQs series to “Ask Angela”—I think that’s a great idea! I’ve wanted to ask you for ages whether you have an Instant Pot and whether any of your recipes would be suited for it? What with this Instant Pot craze going on now, I’d love to be able to make your delicious recipes quickly in this new gadget!
Hey Sandra, ohh you know what? I’ve been asked this question a lot lately and it’s making me super curious about Instant Pots! I don’t have one as I’ve been trying to avoid purchasing another small appliance, but I have considered it. I’d love to hear about your own experience, though!
I’m also curious how many OSG readers use an Instant Pot these days, and would love to hear from you all in the comments!
Do you have one and would you recommend it (if so, which version/model do you have)? Have you tried any of my recipes in the Instant Pot successfully, and if so, which ones worked best? Would you like to see new Oh She Glows recipes developed specifically for use in an Instant Pot? Thank you so much for chiming in! I’ve been wanting to ask about this for a while. I may also do a poll on Insta Stories soon too. :)

“I love your 10-Spice Vegetable Soup! I found this recipe a year ago and make it about twice a month. It is so versatile. I can make it very spicy for our family or less spicy for those who do not love spicy food. I shared it with some co-workers and they love it too! Thanks so much for the amazing work you put into your site and recipes. We are paying attention and the world is getting healthier one recipe at a time thanks to you Angela! Keep up the great work!”
Hey Lyne, It really means the world to me to read this! I agree about how easy it is to customize the spice level in the 10-Spice Soup. I always add a lot more to my own portion (I’ve been known to dump it on!) because I can’t get enough of that intense flavour. Getting healthier one recipe at a time…I LOVE that!! Thank you.
Comments (35) | Share on Facebook | Tweet | Pin It | Snapchat | Google+© copyright 2018 Oh She Glows. All Rights Reserved.
February 14, 2018
Introducing Glow Getter: Entrepreneurs making waves!

Happy Valentine’s Day! Whether you’re celebrating with friends, family, or a special someone today, I hope you have a great one. And if all else fails, I have a feeling my Easy Vegan Sugar Cookies, Pink Power Detox Smoothie, or Cheerful Vegan Nachos will give your taste buds the lovin’ they’re looking for. ;)
This morning I woke up with a bit of nervous energy washing over me! We’ve been working hard on a brand new Oh She Glows series these past few months and today is the day I get to finally share it with you all. It wasn’t easy keeping things secret, I tell ya! The Glow Getter series is our way of spreading the love to fellow wellness entrepreneurs: inspiring, plant-powered business owners who share their daily rituals and secret recipes for success. I can’t think of a better duo to kick off our Glow Getter series than Pippa and Neige Blair, founders of Canadian natural deodorant brand routine. Over the years I’ve tried countless all-natural deodorants, and I was honestly starting to lose hope until I found routine. Now it’s all I use! (A special shout-out to my sister Kristi for introducing me to the brand!)


Pippa and Neige Blair are sisters-in-law from Calgary, Alberta who “believe armpits are lovely and deserve the best.” From the first moment I checked out routine’s website, the pair’s playful personalities jumped off the page. Each routine product name features a fun nod to pop culture favourites—Sexy Sadie, Blackberry Betty and Johnny’s Cash, to list a few—and product descriptions with pizzazz: “A vegan formula (no beeswax) with top notes of cedar, pine and lumberjack, with bass notes of rock n’ roll” (Johnny’s Cash). Who knew shopping for deodorant could be so much fun?!
After her first daughter was born, Neige became passionate about ensuring her growing family had only the best all-natural products in their home and began developing essential oil-based products for baby, home and body. She soon realized the product most lacking in mainstream retail was all-natural deodorant, and set to work creating her very own to sell. For six years Neige worked to perfect her product, sharing results with family and friends all along the way. She created one base recipe that she would make from memory, gradually tweaking ingredients until the overall consistency felt just right. Over 30 variations of routine cream later, Neige’s devoted legion of guinea pigs (the human kind, that is—routine doesn’t test on any animals!) finally convinced her to share routine with the world, and in 2011 Neige brought routine cream to Calgary’s Market Collective for the first time. Getting ready for the big day, Neige enlisted her sister-in-law Pippa, a marketing expert who’d previously worked with brands like Nike, Rogers, and Hudson’s Bay before rerouting careers to enroll in nursing school. The two stayed up until 2am printing and pasting labels onto each beloved jar of routine, and from there a dream team was born! Are you inspired? I sure am!!!
Their hard work certainly paid off: routine was an instant hit at Market Collective. Available in sleek and stylish bathroom-counter-ready tubs, routine cream’s packaging is fully eco-conscious to boot! Full-size jars are made of glass and filled to last 3-6 months, and both those tubs and the box they’re wrapped in is entirely recyclable. In 2015 the pair’s all-natural product became available to ingredient-conscious shoppers across Canada at Whole Foods; in 2017, the deodorant won Cert Clean’s “Best Natural Deodorant Award” and just this November, Neige and Pippa were listed in Avenue Magazine’s Top 40 Under 40 segment. To say that Pippa and Neige are two Canadian entrepreneurs absolutely killin’ it is an understatement, and I’m so proud to kick off this series with them today.
One of my favourite things about this new series is the fun rapid fire survey we developed to get to know our featured entrepreneurs. Below, Pippa and Neige chime in on their 2018 goals, go-to exercise, favourite munchies and more. Take it away, Glow Getters!


I hope you’ve loved getting to know our first Glow Getters as much as we have—we’d love to hear what you think of the new series in a comment below! Thank you so much to Neige and Pippa for sharing their lives and path to success. It’s been so inspiring getting to know you two!
Comments (2) | Share on Facebook | Tweet | Pin It | Snapchat | Google+© copyright 2018 Oh She Glows. All Rights Reserved.
February 10, 2018
Easy Vegan Sugar Cookies with Pink Frosting

Happy Saturday, friends! It’s been a while since I posted a recipe on the weekend, but many of you seemed eager for these festive cookies after I gave a few sneak peeks on Insta Stories. I figured since I had the recipe all tested and ready, why wait until Monday to share? No one should have to wait for Valentine’s (or Galentine’s) Day dessert, I say! Plus, if snow is keeping you at home this weekend, these are a fun treat to whip up with the family indoors. My kiddos love cutting shapes into the dough and piping frosting into their mouths onto the cookies—they also know how to have a hoot with those sprinkles, as you might notice in the very last photo below!
I first started testing vegan sugar cookies several years ago, but I never quite landed on a final recipe that I was perfectly happy with. I recently had a couple requests for cut-out cookies leading up to Valentine’s Day, so I dug up my previous trials (thank you, Google Docs!!), and started again. Well, as it turned out, I didn’t end up using my old notes one bit. I did a complete 180, using my trusted Gluten-Free Vegan Graham Cracker recipe as a base. After some major recipe tweaking, I’m excited to finally have a go-to vegan sugar cookie recipe in my repertoire. This version is so much more wholesome than my previous attempts, too! #winning
I like to use a combination of almond flour and light spelt flour in this recipe—almond flour yields a tender crumb and lends the cookies a boost of moisture and buttery flavour, while light spelt flour gives a nutty, wholesome taste overall. You can swap the light spelt flour for regular all-purpose flour if you’d prefer, just be sure to see my tip in the recipe beforehand as you’ll need to adjust the measurements slightly. I’ve also provided a tip for using whole-grain spelt flour instead of light. If you try any other swaps, please be sure to let me know in a review below! I love hearing from you, and your comments are so helpful for others who might have similar questions.
PS: A shout-out to these heart-shaped cookie cutters…I’m seriously in love with them!! You can find them on Amazon. Happy baking :)


5 from 1 reviews
Easy Vegan Sugar Cookies
Vegan, soy-free
These wholesome vegan sugar cookies come together in a snap—there’s no waiting for the dough to chill before you roll it out, so you can have a batch of tender cookies out of the oven in less than 30 minutes! With lightly golden bottoms, crisp outer edges, and soft, delicate centres, these cookies are a perfect light-tasting base for my festive, naturally coloured pink frosting. If you aren’t planning to frost your cookies, you may want to add a touch more cane sugar to sweeten the dough. The cookies aren’t overly sweet as-is, but the frosting really makes them pop!
Yield
25 to 35 cookies
Prep time
30 Minutes
Cook time
8 Minutes
Total time
38 Minutes
Ingredients:
For the wet ingredients:3 tablespoons (45 mL) grapeseed oil or other light-tasting oil3 tablespoons (45 mL) pure maple syrup3 tablespoons (45 mL) almond milk2 tablespoons (30 mL) brown rice syrup1 1/2 teaspoons ground flaxseed1/2 teaspoon pure vanilla extractFor the dry ingredients:3/4 cup plus 2 tablespoons (82 g) almond flour1 cup plus 2 tablespoons (160 g) light all-purpose spelt flour*5 tablespoons (40 g) arrowroot starch**2 tablespoons (30 g) natural cane sugar1/2 teaspoon fine sea salt1/2 teaspoon baking sodaFor the Pink Frosting:1/2 teaspoon beet powder/crystals***1 teaspoon (5 mL) hot water1/4 cup (50 g) vegan butter1 1/4 cups (165 g) powdered icing sugar, sifted if necessary1 1/2 to 2 teaspoons (7.5 to 10 mL) almond milk, or as neededPinch fine sea saltSprinkles for decorating (optional)
Directions:
Preheat the oven to 350°F (180°C) and line one very large baking sheet (or two medium-sized sheets) with parchment paper. To a small bowl, add the wet ingredients: grapeseed oil, maple syrup, almond milk, brown rice syrup, ground flaxseed, and vanilla. Whisk until combined. To a large bowl, add the dry ingredients: almond flour, spelt flour, arrowroot starch, cane sugar, salt, and baking soda. Whisk until combined. Pour the wet mixture over the dry mixture and stir until it comes together as a heavy dough. Knead the dough a few times with your hands until no patches of flour remain on the bottom of the bowl. Be careful not to overwork the dough. If the dough is too dry, add almond milk one teaspoon at a time and knead until the desired consistency is reached. If the dough is too wet, add more spelt flour and knead again. Shape the dough into a large ball, then break it so you are left with two even halves. Place a nonstick mat or large piece of parchment paper on the counter. Place one ball of dough in the middle and cover the ball with a second piece of parchment paper. Using a rolling pin, roll out the dough until it is 1/8- to 1/4-inch thick. Be careful not to roll the dough too thinly or the cut-out shapes will break as you transfer them to the baking sheet. Cut the rolled-out dough into shapes using your desired cookie cutters. Carefully transfer each cookie onto the prepared baking sheet(s), placing each an inch apart. Repeat this process until you’ve used up all of the remaining dough. Bake the cookies for 7 to 9 minutes until their bottoms are very lightly goldened (the cookies should not bake to golden brown or they’ll become too crisp after cooling). Cool the cookies completely on the baking sheet. Meanwhile, prepare the Pink Frosting: In a small bowl or mug, combine the beet powder along with 1 teaspoon of very hot water. Whisk until the beet powder is dissolved. Set aside. Add the vegan butter to a large bowl. With electric beaters, beat the butter until smooth, then add the powdered sugar, milk, and salt as well as 1/2 teaspoon of the prepared beet juice. Starting on low speed, beat until smooth, gradually increasing the speed as the ingredients combine. If the frosting is too thick, you can thin it with a bit more almond milk and continue beating until smooth. If it’s too thin, you can add a little more powdered sugar and beat again until smooth. Spread or pipe the frosting onto the cooled cookies and top with sprinkles (if using). Serve and enjoy! Leftover cookies can be stored in an airtight container in the fridge for 1 to 2 days, or tightly wrapped and frozen for up to 4 weeks.
Tips:
* Instead of light spelt flour, you can use 3/4 cup plus 2 tablespoons (150 g) white all-purpose flour. The flavour won’t be as complex or nutty as the spelt version, but it’ll work in a pinch. Alternatively, you can use 1 1/4 cups (200 g) whole-grain spelt flour. If using whole-grain spelt flour, I suggest shaving a minute off the bake time. This version produces the most wholesome and earthy flavour of the bunch, and yields a denser cookie, too. Another option is to sift the whole-grain spelt flour before using to refine its texture. In order, my preferred flour variations would be: light all-purpose spelt flour, regular all-purpose flour, and whole-grain spelt flour last.
** You can probably sub the arrowroot starch with cornstarch, but I haven’t tested it.
*** If you don't have beet powder on hand feel free to use your desired red food colouring. Beet juice may work, too!
To keep this recipe soy-free, be sure to use a soy-free vegan butter in the frosting.


Any guesses who decorated this one above? ;) Cookie goals!
Comments (6) | Share on Facebook | Tweet | Pin It | Snapchat | Google+© copyright 2018 Oh She Glows. All Rights Reserved.
February 9, 2018
Ask Angela: 12 foods I eat every day, freezing cupcakes, and more!

I know what you’re thinking: Ask Angela? What happened to my Friday FAQs?! I decided to do a little name change for this series. My alternate title contender was “Ask Angela and I’ll try my very best not to steer you toward an epic cooking fail”. Lol. But that title proved to be a little long. ;) Semantics aside, it’s business as usual over here! Although I gotta say the above photo has always made me chuckle…I don’t think there’s ever been a time outside of that photoshoot when you would’ve caught me casually lounging in bed with breakfast while working away on my computer. It seemed like a fun idea at the time, though!
Anyway, there were some great questions that came in over the last week and I’m excited to share them with you below. Have a wonderful weekend, everyone!

Q1. Hi Angela! One of my goals for 2018 is to eat more plant-based foods as part of my daily routine. That got me thinking…can you share the plant-based foods that you tend to eat every single day? I think this would help me since I’m low on time as a new mom and would also help me to include more “plant-based regulars” on my grocery list each week.
Hi Kayla, what a fun idea! I’d love to share. There are many foods that I eat every single day, and you’re so right about it saving time when things are busy. Some of the foods I tend to reach for every day are:
Leafy greens: I try to eat leafy greens in some form every day, whether they’re thrown into a smoothie or sautéed with garlic, pink salt, and olive oil as a savoury snack or side.
Raw walnuts: I love grabbing a couple handfuls of walnuts when I’m rushing out the door! They’re a great, filling go-to snack on the run.
Grapefruit: The immune-boosting benefits of grapefruit make them a daily go-to for me in the wintertime.
Avocado: I enjoy at least one large avocado every single day…#obsessed. But with three avocado-loving family members in the house these days, our supply tends to run out quickly!
Flax wraps: I eat one of Wrap it Up Raw’s raw flax wraps every day for lunch. I’ll roll one up with mashed avocado, sauerkraut, pink salt, hemp hearts, and any leftover roasted veggies I have on hand. It takes 2 minutes to make, and I love how rich in fibre, healthy fats, and protein these wraps are.
Sauerkraut: I love to add sauerkraut to my wraps or salads for a crunchy, tangy boost. It’s also great for the digestive system.
Seasonal produce: We try our best to eat with the seasons, so in the winter I stock up on winter squash, citrus, kale, sweet potatoes, brussels sprouts, parsnips, beets, etc.
Almond butter: I’d love to say that I always have a supply of my favourite homemade almond butter on hand, but I try to stock a few quick store-bought alternatives in the pantry since life is so busy these days. My go-to brand is Whole Foods 365 roasted almond butter. If my blood sugar is running low and I have no time to prepare food, I’ll often grab a big spoonful of it for a quick boost. Arlo seems to take after me because now when he sees the jar come out of the pantry, he’ll scream until I give him some too. (And then proceeds to use it mostly as a face and body butter instead!)
Lentils: Lentils are a super cheap source of protein and fibre and are a staple in our house. I love throwing them into soups and pasta or on top of salads or wraps.
Matcha green tea powder and/or organic coffee: Hello, antioxidants! I make a matcha tea or French press coffee every single day without fail. Nothing (nothing!) can get in the way of this daily ritual. Now if only it were still warm when I finally get to drinking it….
Dark chocolate: I always, always have some chocolate after dinner. #YOLO! My favourite bar is Green and Blacks Organic 85%.
Beet chips: I’m in a major beet chip phase right now that I don’t see ending anytime soon!! I love Hardbite’s Drop’n Mad Lightly Salted Beets Chips. They’re one of my favourite splurges as of late.
As an added bonus, many of these foods are great for my skin and will give it a boost from the inside out (deep-fried beets aside, perhaps, lol)! Also keep in mind that this list will change with the seasons…maybe I can do an update in the spring or summer. I hope it gives you a few ideas for your next grocery shop. Good luck with your goals!
Q2. I would like to make your Fail-Proof Vegan Chocolate Cupcakes with Salted Buttercream for a vegan family member but won’t have time to prepare them the day of, or even the day before. Would the cupcakes freeze well, do you think? Thank you!
Hey Natalie, Yes, the cupcakes freeze quite well! I suggest cooling the cupcakes fully before wrapping them up. If I’m storing them for more than a few days, I like to tightly wrap each individual cupcake in plastic wrap and then place all of them in an airtight container or freezer bag. Stored this way, they should be fine in the freezer for 4 to 6 weeks or so. To thaw, simply pop them into the fridge overnight, or place them on the counter for a faster option.

Q3. Hi Angela, I’m so looking forward to making your Vegan Brownies and have a question about the recipe instructions. Should I melt the Earth Balance Buttery Spread before I measure it for my batter?
Hey Dena, This is a great question! I always measure vegan butter, coconut oil, cacao butter, coconut butter, etc. from solid unless otherwise specified. Another thing to look out for is how it’s indicated in my ingredient list:
1/4 cup coconut oil, melted
When the “melted” instruction comes after the ingredient (in this case after coconut oil), it means to measure the coconut oil from a solid state/room temperature and melt it after measuring.
1/3 cup melted cacao butter
Rarely will I ask you to measure butter substitutes from a melted state, but you might spot this instruction here and there depending on the recipe. The above example is asking you to melt the cacao butter first and then measure out 1/3 cup.
These are things you’re probably already aware of, but it’s always nice to point them out from time to time in case others are wondering the same thing. Thanks so much for clarifying!
Q4. I’m making your Next Level Vegan Enchiladas tomorrow night for a family gathering! Do you think regular sprouted spelt flour would work instead of white spelt flour in the Enchilada Sauce? Thanks in advance!
Hey Rita, You can absolutely use whole-grain spelt flour, but I might suggest sifting it first to get the larger spelt grains/flecks out of it. I also think other flour alternatives could work, but you may need to play with the amounts a little to achieve your desired consistency.

“Another toddler snack idea is to mix puréed fruit and veggies with yogurt (I use whole milk yogurt but I’m sure a vegan yogurt would work as well) and drip/drizzle it on a baking sheet that’s oiled or lined with a silicone baking mat. Then I freeze the yogurt/fruit drops on the sheet for a few hours before transferring them to a jar to keep in the freezer. My toddler of 18 months loves these.”
What a GREAT idea!! Thanks Stephanie! I’ll be trying this for sure, especially as Arlo is cutting a gazillion teeth right now. Too bad I can’t give these to him in the middle of the night. ;) I may try it with my Super Thick Coconut Yogurt as I have some frozen coconut meat to use up. Thanks for sharing!
Comments (0) | Share on Facebook | Tweet | Pin It | Snapchat | Google+© copyright 2018 Oh She Glows. All Rights Reserved.
February 7, 2018
Vitamin Glow Warm Squash Salad


How’s your February chugging along so far? Mine is off to a solid start, and I’m already feeling a bit more positive now that the doldrums of January are past! As for things on the OSG front, we’re working away on our rebooted Friday FAQs and Things I’m Loving Lately series, as well as a couple new ones that will be launching in the coming weeks. And, of course, plenty of delicious plant-based recipe testing is going down, too. Things are just a-bopping around here!! It’s been fun getting into a groove with regular blogging again, and I’m so thrilled you seem to be enjoying the recent posts too.
I had a lot of requests to post this warm salad recipe after sharing it on Insta Stories and mentioning it in my most recent Things I’m Loving Lately roundup. Well, ask and you shall receive! I hope you love this cozy salad as much as I do. It’s a great way to use up any veggies lurking in the back of your fridge—I like to toss those on the pan to roast with a big batch of squash so I have plenty of leftovers for the next few days. The extra veggies and dressing make for a really quick reheat-and-serve lunch. If you’d like to pack this for a work- or school-day meal and still enjoy the “warm” aspect, you could store the squash separately and heat it up in the microwave before serving. Just a thought! I’d love to hear what you think if you try it out.

Vitamin Glow Warm Squash Salad
Vegan, gluten-free, grain-free, refined sugar-free, soy-free
This is a simple, warming salad that’s been on my regular lunch rotation all winter long! It’s so comforting and the vitamin A in the squash gives my skin a revitalizing pick-me-up. I’ve used butternut squash in this recipe, but feel free to use any variety of winter squash you have on hand. And if you’d like to throw some other veggies onto the pan while you roast the squash, be my guest—this hearty salad can be easily customized to suit your preferences and pantry! The directions are written so the recipe serves 4 people, but if you’d like to make a single serving at a time, you can find my method in the tips section below.
Yield
4 bowls
Prep time
20 Minutes
Cook time
35 Minutes
Total time
55 Minutes
Ingredients:
For the butternut squash:1 medium butternut squash1 tablespoon (15 mL) oil of choiceFine sea saltFor the Garlic-Dijon Vinaigrette:1 small (3 g) garlic clove1/4 cup (60 mL) apple cider vinegar1/4 cup (60 mL) grapeseed oil (or other light-tasting oil)2 teaspoons (10 mL) fresh lemon juice2 teaspoons (10 mL) Dijon mustardFine sea salt, to tasteFreshly ground black pepper, to taste1 tablespoon (15 mL) pure maple syrup, or to tasteFor the salad:1 (5-ounce/142 g) package baby romaine or mixed greens1 large (270 g) avocado, pitted and slicedHeaping 1/2 cup (65 g) chopped walnuts*2 tablespoons (18 g) hemp heartsSalt, pepper, and garlic powder, for garnish
Directions:
For the butternut squash: Preheat the oven to 400°F (200°C), and line a large baking sheet with parchment paper. Peel, halve, and seed the squash. Slice the squash into 1/2-inch wedges. Transfer to the baking sheet and toss with the tablespoon of oil. Spread the squash into an even layer and season generously with salt. Roast for 30 to 40 minutes, flipping once halfway through until the squash is fork tender and lightly browned. Meanwhile, prepare the Garlic-Dijon Vinaigrette: Finely grate or mince the garlic and place it into a small glass jar. Add the vinegar, oil, lemon juice, Dijon, salt, pepper, and maple syrup. Secure the lid and shake vigorously until combined. Taste the dressing and adjust the oil, salt, and maple syrup, if desired. You can also make the dressing in a blender or food processor, if you’d prefer. When the squash is nearly finished roasting, begin building your salad bowls: Portion 2 to 3 handfuls of the baby romaine/mixed greens into four large shallow bowls. Drizzle a tablespoon of dressing over each bowl and toss until the greens are fully coated. Divide the sliced avocado, walnuts, and hemp hearts into four portions, and evenly distribute on top of each bowl. When the squash is finished roasting, transfer several wedges directly from the pan to the top of each bowl. Finish each salad with a sprinkle of salt, pepper, and garlic powder, as well as a final drizzle of dressing. Serve immediately.
Tips:
* Feel free to use toasted walnuts, if you prefer, but rest assured that raw work wonderfully too!
You can absolutely make this salad for a single portion too! To build just one salad, I suggest portioning each ingredient as follows: approximately 2 handfuls of greens, 1/4 of a large avocado (sliced), 3/4 cup warm roasted squash, 1 to 2 tablespoons vinaigrette (to taste), 2 heaping tablespoons of chopped walnuts, and 1/2 tablespoon of hemp hearts.
Any leftover squash can be easily reheated over the next few days. Here is how I like to warm up leftover roasted squash: Coat a large skillet with oil and add your leftover cooked squash with a pinch of salt. Sauté over medium-high heat for about 5 minutes, until warmed through.

In case you missed it, I recently revamped my Two-Layer Raw Chocolate Brownies—just in time for Valentine’s Day! You can find the recipe on The OSG Recipe App (iOS/Android) and updated in the original blog post too. I can’t tell you how much I LOVE THESE BROWNIES….gahhhhh!! They would be a fantastic V-Day treat (and can be made ahead and stored in the fridge or freezer for easy prep!).

Comments (2) | Share on Facebook | Tweet | Pin It | Snapchat | Google+© copyright 2018 Oh She Glows. All Rights Reserved.
February 2, 2018
Friday FAQs: Smoothie swaps, my go-to vitamins, and more!

Happy February! Whew, I am SO glad January is behind us. We’re one month closer to spring (which, if you’re Canadian, often doesn’t start until MAY…lol…no big deal). Thanks for all of your questions and comments this past week. Many of your questions inspire me to test things out in my own kitchen (yielding delicious results!), so it’s a win-win situation over here.

Q1. I love the look of your Green Warrior Protein Smoothie! Do you think I can swap the dinosaur/lacinato kale for baby kale? I also don’t have celery on hand…what do you recommend?
Hey Melanie, You can definitely use baby kale in any smoothie calling for regular kale or baby spinach. It’ll work great. If you’re out of celery, no problem—you can simply omit it altogether. For a fun twist and creamy texture, try adding a couple tablespoons of avocado!
Q2. Love these posts. :) Quick question—can you tell me what vitamins you take? I am in need of some recommendations. Thanks!
Hey Tammy, Of course! I take MegaFood’s Baby & Me 2 multivitamin (the herb-free version), the MegaFood Blood Builder, vitamin D drops, Udo’s Choice Super 8 Hi-Potency Probiotic, NutraVege Vegan Liquid Omega-3, as well as a chewable zinc supplement every couple of days in the wintertime.

Q3. If I were to make your Apple Pie Oatmeal tonight, would it be okay to reheat in the morning? #oatmealnewb
Hey Lisa, Yes, absolutely! It will keep in the fridge for a few days too. You may want to add a splash of milk to this oatmeal when reheating as it tends to thicken up after sitting. It’s fantastic served cold, too! In addition to the blog and app, you can also find this recipe in The Oh She Glows Cookbook on page 49.
Q4. I make your Vegan Banana Bread all the time. It’s so delicious and I love that it’s pretty healthy!! I have been wanting to make muffins with it but am nervous about screwing up the bake time. Do you know how I could modify your recipe to make vegan banana bread muffins instead?
Hey Lindsey, So glad the banana bread is such a hit! When turning a quick bread recipe into muffins, I usually look to a similar muffin recipe as a guide. My Blissful Blueberry Banana Spelt Muffins are pretty similar. I bake those at 350°F (180°C) for 23 to 27 minutes, so you can probably use that as your guide when turning the banana bread into muffins! I would check on the muffins after about 20 minutes, and then keep checking every few minutes thereafter to be sure. Here are a couple methods I typically use to check for doneness: lightly press the centre of one muffin—if it springs back slowly, it’s ready or close to being ready. I’ll also poke one with a toothpick, and if it comes out clean, it’s probably ready as well. I’d love to hear how the banana bread turns out using a muffin pan!

Q5. Just wanted to ask if I could refrigerate a batch of your Favourite Hot Detox Tonic and drink it cold?
Hi Kari, Yes, you can absolutely chill it! My advice would be to give your tonic a good stir before drinking as the spices tend to settle on the bottom with time.
Q6. Yum! Does your Cilantro-Lime-Garlic Cashew Cream freeze well? Perhaps in ice cube trays? Thank you.
Hey Clea, Good question! My regular Cashew Sour Cream recipe freezes very well (I like to freeze it in silicone ice cube trays for easy removal), but I haven’t tried freezing this one before. I’m wondering if freezing would impact the flavour since there’s fresh cilantro and avocado in there. If you try to freeze it, I would suggest freezing just a small portion and then thawing it to see if the flavour or texture have changed before trying a full batch. We’d love to hear how it goes!

“I just made your Crowd-Pleasing Vegan Caesar Salad for lunch, and I can’t thank you enough! It was genuinely amazing, and I followed the recipe to a T. I have never been a huge fan of Caesar dressing because the store-bought ones are always so tangy and mustardy tasting. Your dressing blended perfectly and I didn’t mind the Dijon mustard at all. Next time I’ll add some tomatoes and avocados—there will for sure be a next time. Thank you again!!”
Jules, I’m so happy to hear my Vegan Caesar Salad surpassed your expectations! I love your idea of adding tomatoes and avocado next time. I like to make a wrap using this salad plus a few of my Crispy Breaded Tofu Strips—sometimes I’ll add some BBQ sauce for an extra kick too. It’s really out of this world!
Comments (4) | Share on Facebook | Tweet | Pin It | Snapchat | Google+© copyright 2018 Oh She Glows. All Rights Reserved.
January 30, 2018
Cheerful Vegan Nachos

HEALTHY COMFORT FOOD FOR THE WIN! Whohoo. No matter who you’re cheering for, if you’re looking for a tasty game day appetizer, this is the recipe for you. It could even double as a cozy Valentine’s Day meal in or I’m-so-sick-of-winter family pick-me-up. Not that you really need a reason anyway because, seriously, look at these plant-powered beauties! I posted this recipe to the app over the weekend and was thrilled to see so many of you run right to your kitchens to make them!
I have to say, I’ve had a pretty bad case of the winter blahs this month. I kicked off the new year feeling uninspired and was soon run down by a cold, random injury, rough parenting phase, and string of bad sleeps. Anyone else have a tough start to the new year? I’ll be welcoming February with WIDE OPEN ARMS and all the heart-eyed emojis this Thursday, I tell ya!
Not surprisingly, that low energy and lack of inspiration crossed over into dinnertime menu planning, so in a bid not to serve the same meal for the 15th time I came up with these nachos to change up our regular rotation. And I’m so glad I did—they were a huge hit! I also love that the All-Purpose Vegan Cheese Sauce and Spicy Black Beans can be made in advance so the meal comes together fast.
Here’s a fun GIF showing how I built the nachos! Full disclosure: I went light on the cheese sauce for these photos, but just know that in real life I’m dumping that stuff on!!


Cheerful Vegan Nachos
Vegan, gluten-free, refined sugar-free, soy-free
My family and I were getting a bit tired of our regular weeknight dinners so I came up with this crowd-pleasing nacho plate to freshen things up. It can also make for a cozy date-night-in meal alongside a good movie or game! The beauty of this recipe is that you can make a couple components in advance, and pick and choose which store-bought foods you’d like to include to save time (like salsa or guacamole). I encourage you to customize this nacho plate to your heart’s content! If you’re looking to cut down on prep work, you can make the All-Purpose Vegan Cheese Sauce and Spicy Black Beans in advance (they’ll keep in the fridge for a few days) so there’s less you’ll need to do the day of.
Yield
4 servings
Soak time
30-60 Minutes
Prep time
40 Minutes
Cook time
35 Minutes
Total time
1 Hour, 15 Minutes
Ingredients:
For the cooked toppings:1 batch All-Purpose Vegan Cheese Sauce*1 large (450 g) sweet potato, peeled and chopped2 teaspoons (10 mL) oil of choiceFine sea salt, to tasteChili powder, to taste1 batch Spicy Black Beans**For the fresh toppings:1 bag tortilla chips of choice1 medium (240 g) avocado (pitted and chopped) or guacamole***2 medium (20 g) green onions, thinly sliced3 to 4 tablespoons (45 to 60 mL) pickled jalapeños, drained****1/3 cup (80 mL) chopped jarred roasted red pepper, drained1/4 cup (20 g) finely chopped purple cabbageHandful (12 g) fresh cilantro, choppedSalsa, to taste*****
Directions:
Begin preparing the All-Purpose Vegan Cheese Sauce by soaking 1/4 cup cashews in a small bowl of boiling water for at least 30 to 60 minutes. Prepare the All-Purpose Vegan Cheese Sauce. While you’re making the cheese sauce, preheat the oven to 400°F (200°C) and line a medium rimmed baking sheet with parchment paper. Set the cheese sauce aside once prepared. Spread the chopped sweet potato onto the parchment-lined roasting pan and toss with the oil. Sprinkle with a generous amount of salt and chili powder. Roast for 25 to 30 minutes, until the bottoms are lightly charred. While the potatoes are roasting, prepare the Spicy Black Beans found in my DIY Burrito Bowl recipe (linked in ingredient list). After cooking, leave the beans in the skillet so you can reheat them just before layering onto the nachos. Gather and prep any fresh toppings you’d like to use so they’re ready to go. Please note my measurements are simply a guide. Feel free to add as much or as little of each as you wish! On a medium rimmed baking sheet or platter (if your sweet potatoes are finished roasting, feel free to set them aside and re-use the same sheet here), spread a layer of chips to cover the base entirely. For warm nachos, reheat the Spicy Black Beans in the skillet and the All-Purpose Vegan Cheese Sauce in your microwave or a small pot on the stovetop. Now it’s time to dress up those nacho chips! Layer the beans first before adding cheese sauce, roasted sweet potatoes, avocado (or guacamole, if using), green onion, pickled jalapeños, roasted red pepper, cabbage, cilantro, and salsa. Season with salt and serve immediately.
Tips:
* You may have leftover cheese sauce, but because blending a half-batch can be difficult, I suggest preparing the whole recipe as directed. I love having leftovers on-hand to mix into pasta, top off a bowl of chili, layer on a wrap, etc.
** You could also switch things up by using my Lentil-Walnut Taco Meat in place of the Spicy Black Beans! I’d recommend preparing the taco meat with canned lentils so it comes together quickly.
*** Looking for a guacamole recipe? Try The Freshest Guacamole in Oh She Glows Every Day, p. 65.
**** My go-to brand of pickled jalapeños is Sunrise Farms Organic Pickled Jalapeños. If you don’t have any on hand, feel free to drizzle Sriracha or hot sauce for a little extra heat.
***** For a delicious homemade salsa, try my Fresh Cherry Tomato Salsa in Oh She Glows Every Day, p. 63. Store-bought works too, though!
If you prefer a more classic take on cheesy nachos, you can also add a layer of shredded vegan cheese before the avocado (or guacamole), salsa, and cilantro. Pop the nachos in the oven for a few minutes, top with remaining fresh ingredients, and serve.

If you’re looking for more Valentine’s Day recipe inspiration, here is a round-up of some faves!
Ultimate Flourless Brownies for Two
No-Bake Chocolate Fudge Cookies
Roasted Beet Salad with Hazelnuts, Thyme, and Balsamic Reduction (The Oh She Glows Cookbook, p. 113)
Seductive Raw Chocolate Walnut Fudge
Psst…the first 6 recipes are also found in The Oh She Glows Recipe App (iOS/Android)!
Comments (10) | Share on Facebook | Tweet | Pin It | Snapchat | Google+© copyright 2018 Oh She Glows. All Rights Reserved.
Angela Liddon's Blog

- Angela Liddon's profile
- 134 followers

