
Josh Kilmer-Purcell's Blog, page 58
January 20, 2014
The Beekman Blaak Grilled Cheese

Who would think that you’d need a recipe for making a grilled cheese sandwich? But we’ve thought this before and then Josh’s recipe for making scrambled eggs became one of the most popular of all time on Beekman 1802 (click here)
We fell in love with the sandwich created by chef Norm Phenix of 204 Main Bar and Bistro in Sharon Springs, NY, and asked him to share the specifics of his concoction.
Here it is:
Grilled cheese w/ Beekman Blaak & mushroom Duxelles
Ingredients:
1 lb. crimini mushrooms, thinly sliced
1 cup diced onion or shallot
1/4 cup dry white wine
2 Tbls fresh minced parsley
2 tsps fresh thyme
Salt
Black Pepper
1 stick butter
1 loaf of favorite crusty bread
Instructions for the Mushroom Duxelles:
In two separate frying pans, sauté onions/shallots (first pan) and mushrooms (second pan) in two tablespoons butter, each
Saute onions and mushrooms until they have released most of their water and are beginning to turn light brown (8 to 10 minutes over medium heat).
Add 2 Tbls of white wine to each pan to deglaze. Continue cooking until liquid has evaporated.
Let cool for a few minutes, then place in food processor. Process until mushrooms and onions/shallots form a smooth paste.
Stir in parsley and thyme. Season w/ salt and freshly ground pepper.
Let mixture cool before making sandwich.
Instructions for Assembly
If you’re cutting your own loaf of bread, make sure that slices are no thicker than 1/2 inch. The cheese won’t easily melt on overly thick bread. Also, you want to keep a proper proportion among the cheese, bread, and mushroom mixture.
Remove the rind from Beekman Blaak and slice the cheese as thin as possible.
On the inside of one slice of bread, spread a thin layer of the mushroom mixture.
Lay a thin layer of cheese on the other slice and close the sandwich.
Instructions for Grilling
Preheat oven to 350 degrees.
In an oven proof frying pan, melt at least Tbls of butter per sandwich over medium high heat.
Place the sandwich in the melted butter, making sure the bottom layer is in full contact with the pan.
Once the butter starts to brown, the bread will be soon to follow. Flip sandwich once the first side has reached desired degree of brownness and crispiness.
Add a little more butter to pan if bread has soaked in all the butter and place in oven for about five minutes or until cheese has melted.
Tips from the professionals!
If you do not have an oven proof frying pan or you’re making a large quantity of sandwiches, transfer sandwiches to cookie sheet that has been warming in the oven once they have been browned on each side in the frying pan.
If you’re using a panini press, butter the outside of each slice of bread before assembling the sandwich.
Slice each sandwich in half before plating to make sure the cheese has properly melted. If not, return to oven until melted.
See what other great ideas develop seasonally at 204 Main. Follow them on Facebook by clicking here


January 18, 2014
Resolution Bracelet and Bead Loom Tutorial
Welcome to our first craft adventure of the new year! We’re a few weeks in and of course that begs the question, who has been able to keep their New Years Resolutions? Personally, I don’t make a single one. Years and years of making and breaking them has kind of soured me, but this year I want a change. I recently saw an interview on the Today Show with author Jon Gordon who wrote the book, One Word That Will Change Your Life. I haven’t read the book so I can’t vouch for that, but the interview I found incredibly inspiring. What I took away from it was that instead of making a list of specific resolutions you should instead come up with one word to focus on and in doing so, will automatically change your behavior. The word I chose is “Better”. I obviously always want to be a better wife and friend and mother, but it goes beyond that. For example, this year I want to commit to buying better. Instead of spending money on a lot of things, I want to buy less but of better quality. According to Mr. Gordon then, I need to focus on the word “Better” and that will help me when I’m faced with certain choices whether it be significant, like how to react in an argument or whether or not I should attempt one more round of cardio, or insignificant like purchasing something I don’t in any way need.
Because I was so inspired by this I wanted to make it the focus of my first project of the new year. I rolled it over and over in my mind, how can I incorporate this word into my daily life? Then the Beekman Boys came back from their trip to Kenya (have you checked out their photo stream on Instagram? Amazing images!) and I was instantly grabbed by the people they were meeting and their impressive and colorful beads. I put the two ideas together and ta da! The Resolution bracelet. My first idea incorporated the actual word I had chosen into the design but it felt a bit much and honestly I didn’t want to explain it to every person I came across. Instead I settled on a knot design to symbolize that I shouldn’t forget. So enough talk, let’s jump right in. It may look difficult but trust me, it can be done in under 2 hours with absolutely no experience.

Materials:
Cardboard or wooden box (tissue box, cigar box, shoe box, etc)
Utility knife or scissors
Heavy thread or specialized beading thread
Scotch tape
Collapsible eye beading needle
Assorted seed beads
2 large beads
Clasp
1. To build the bead loom cut the box if necessary to remove flaps so the top is open. Next, use scissors or a utility knife to cut slits for the loom threads. This design requires 12 slits on each side. For my specific loom I used a balsa wood box that a toy was packaged in and a steak knife to cut the slits.

2. Tape thread to the center of the bottom of the loom leaving a 4″ tail.

3. Wrap the thread around the box and into each slit. When all the slits are filled, tie the thread to the beginning tail and trim.

4. Take a long section of thread, about 2 arms length, and thread onto the beading needle. Tie the end of the thread to the first loom thread, just left of center. Leave an 8″ tail.

5. Pass the needle and thread under the loom threads and string on the 11 beads from the first column in the design. When stringing the beads, work from the bottom of the design to the top.

6. Ease one bead into each of the spaces between the loom threads.

7. Pass the needle back through the beads making sure the needle and thread stay above the loom threads.

8. Pull the thread tight and knot the thread to the beginning tail to keep the beads taught.

9. Continue on in this manner (except don’t make anymore knots) to build up the design.

10. When the design is finished make a single knot with the bead thread to the first loom thread. Cut the loom threads in the center of the bottom of the loom to release.
11. Tape one side of the threads and the beaded design to the bottom of the loom box and separate the threads into 4 sets (one set will have 4 threads, the rest will have 3).
12. Thread one set of threads into the beading needle and string on beads. Repeat with remaining 3 sets of thread.

13. When the threads are all strung with beads, thread all of the loom threads into the needle and slip on one large bead. Separate the threads into two equal sets, thread one end of the clasp on to one set of threads and triple the knot thread sets together. Thread all of the threads through the needle and pass the needle back up through the large bead. Trim the threads and repeat steps #11 to #13 with the opposite side.

There you go! I hope you enjoyed this first crafty project of the new year and I look forward to hearing how it comes out! And don’t be scared to experiment. Mix it up with more threads, less threads, bigger beads, a more intricate design, whatever you like!


Lucy Blaire has written for countless craft magazines including Sew News, Stitch, Simply Handmade, and ReadyMade; she has appeared
on PBS’s Sew It All TV; writes for her blog, East Camp Home; and runs her
Etsy shop, Lucy Blaire Handmade.
With what little time is left Lucy can be found living quietly in Catskill, NY with her husband Ben and baby Marian in their little house with the red tin roof.
A Cheese Ball for Football!

Buffalo Chicken Cheese Ball
Serves 15 to 20
Buffalo chicken anything is amazing—Buffalo chicken macaroni and cheese, Buffalo chicken pizza, Buffalo chicken salad, Buffalo chicken sandwiches—so naturally, a great big ball of Buffalo chicken and cheese joins the ranks of foods made better with wing sauce.
2 cups finely shredded cooked chicken
3⁄4 cup buffalo wing sauce, such as Frank’s RedHot Wings sauce
12 ounces cream cheese, softened
2 cups shredded sharp cheddar cheese
3 ounces blue cheese
1 bunch scallions, chopped, 1 tablespoon of the white part of the scallions reserved
Celery sticks, carrot sticks, and crackers, for serving
Toss the chicken in the wing sauce until coated. Using a stand mixer or a bowl and a spatula, blend the chicken mixture, cream cheese, cheddar, blue cheese, and the 1 tablespoon of the reserved white parts of the chopped scallions. Form the mixture into a ball, cover with plastic wrap, and refrigerate for at least 2 hours or overnight.
Before serving, roll the cheese ball in the remaining scallions.
Serve with celery and carrot sticks and crackers. This cheese ball is quite hearty, so you’ll need a knife for serving.
Excerpted from GREAT BALLS OF CHEESE, © 2013 by Michelle Buffardi. Reproduced by permission of Houghton Mifflin Harcourt. All rights reserved.

January 17, 2014
Willa Cather
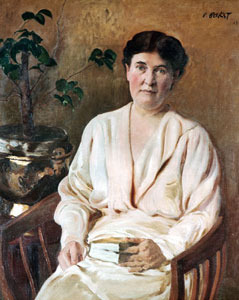
Willa Cather
In the autumn of 1911, Willa Cather, the renowned American novelist, worked on one of her most famous novels and other writings while visiting the Village of Cherry Valley to the west of Sharon Springs.
Willa Sibert Cather was born on December 7, 1873, near Winchester, Virginia, the daughter of Charles Fectigue Cather and Virginia Sibert Boak. When Willa was nine, her family moved to Red Cloud, Nebraska. She later attended the University of Nebraska in Lincoln. She became the editor of the school journal and contributed to local newspapers. On graduating at the age of 19, she moved to Pittsburgh to work in journalism, writing for various periodicals. She also found work as an English teacher. In 1903, she published her first book of verse, April Twilights, and, in 1903, her first book of short stories, The Troll Garden.
While living in Pittsburgh, Willa met Isabelle McClung, the daughter of Samuel McClung, a prominent Pittsburgh judge, and Fannie Amelia Merritt from Cherry Valley. Willa and Isabelle shared an interest in the arts, and the two women eventually traveled to Europe together.
Willa’s short stories caught the eye of S.S. McClure, the editor of McClure’s Magazine, which featured both political and literary content. In 1906, Willa moved to New York City to work for the magazine. Two years later, she became its managing editor.
In the fall 1911, while on leave from the magazine, Willa spent three months – October through December – in Cherry Valley, renting a house with Isabelle. During her time there, she completed the novel Alexander’s Bridge and the short story “The Bohemian Girl” and continued working on an earlier draft of a story that became the novel O Pioneers!, published in 1913.
By 1918, Willa had published two other novels, Song of the Lark and My Antonia. She soon quit her job at McClure’s to work fulltime as a writer.
In 1923, Willa was awarded the Pulitzer Prize for the 1922 novel One of Ours. Her 1923 novel, A Lost Lady, about changing mores in a small town, was loosely adapted into a movie starring Barbara Stanwyck in 1934. In 1938, Willa was elected to the American Academy of Arts and Letters. Her last novel, Sapphira and the Slave Girl, was published in 1940.
Willa died of a cerebral hemorrhage in 1947 in New York City. Before her death, she attempted to destroy all of her letters and, although many still exist, they are generally protected from reproduction by the terms of her will. She is buried at Jaffrey, New Hampshire, where she spent her autumns from 1918 to 1938.
Willa Cather is known for depicting the influences of the physical and cultural environment on her characters. Her time in the prairie country of Nebraska and in the small towns of rural New York State and New Hampshire, as well as her time in big cities, contributed to her depth of understanding about human nature.
The History Boys are
Chris Campbell has made his permanent home in Cherry Valley, NY. The Campbell family dates back to 1739 in this town, situated about eight miles from Sharon Springs. Some family members were captured by Tories and Iroquois allies in the Cherry Valley Massacre of 1778 during the American Revolution and taken to Canada, released two years later in Albany as part of a prisoner exchange. Chris is a rare book and map collector and has had a lifelong interest in history, especially relating to upstate New York and colonial land patents. He was the founder and first chairman of the Cherry Valley Planning Board and has worked as a surveyor and realtor as well as a researcher for the Otsego County map department. His hobbies include Ham radio.
Carl Waldman, also living in Cherry Valley, is a former archivist for the New York State Historical Association in Cooperstown. He is he author of a number of reference books published by Facts On File, including Atlas of the North American Indian and Encyclopedia of Native American Tribes, both originally published in the 1980s and both in their third editions. He is the co-author of Encyclopedia of Exploration (2005) and Encyclopedia of European Peoples (2006). Carl has also done screenwriting about Native Americans, including an episode of Miami Vice entitled “Indian Wars” and the Legend of Two-Path, a drama about the Native American side of Raleigh’s Lost Colony, shown at Festival Park on Roanoke Island in North Carolina. His hobbies include music and he works with young people in the Performance and Production Workshops at the Cherry Valley Old School.
A Note from Chris Campbell and Carl Waldman:
We’ve recently published a book entitled The Sharon Springs Timeline. The subtitle is A Microcosm of American History, with Dates Relating to a Remarkable Village and Neighboring Regions, from the 16th Century to Modern Times. This project came out of our blogs for the Beekman 1802 website because, in researching them, we found we needed an easily accessible source for important dates in local history (such as what year Willa Cather lived in Cherry Valley!). We also thought it a good idea to present an overview of the area’s fascinating history. The Timeline is now available only as an eBook, which can be ordered for $4.99 at Alva Press (http://www.alvapressinc.com/alva_thesharonsrpingstimeline.html), at Amazon.com, or at Kobo.com. We believe that The Sharon Springs Timeline will be helpful for all those interested in the history of this special corner of upstate New York.
January 16, 2014
5 Beautiful Things

The Gardner House
The last time I was in Sharon Springs, Brent urged me to visit the home of Michelle Curran. Michelle is the town’s resident real estate agent and was instrumental in helping Brent and Josh secure the Beekman Mansion in 2007. With my good friend Jessica Hodgson, a freelance photographer, I made the pretty trek up the long, winding driveway to Michelle’s historic hilltop home and was eager to see it.
The house was built between 1850 and 1854 by Dr. John Gardner for him and his family. The 8000 square-foot Italianate-inspired mansion is faced entirely with limestone, much of it quarried on site: an undulating 88-acre property that overlooks the Mohawk Valley. Michelle has lived in the house since the early 1990s after moving to Sharon Springs from Florida. Today, her two bouviers, Luc and Kali, and her cat, Annie, happily prowl the sprawling home, which Michelle has painstakingly restored – but only partially.
Part of the charm of the home is the rough-hewn patina that Michelle has maintained throughout its massive rooms: peeling paint and worn wood floors contrast with stately furniture and beautiful architectural trim, adding layers of atmosphere. Fourteen-foot ceilings and enormous Palladian windows keep the house bright and airy.
When Michelle gave Jessie and me the grand tour last spring, we couldn’t believe how beautiful it was – inside and out. Here are five of Jessie’s photos of the house. To see more of Jessie’s work, click here.

January 14, 2014
Gartending: Gin for what ails you!

How do you stay healthy without taking medicine from your doctor? Why not ask Klaus the Soused Gnome? He loves gin and he uses it to heal himself when he’s feeling poorly.
The invention of gin may have been to a Dutch physician in the 17th century. Holland and Germany (Klaus’s home) are the places where gin first achieved real popularity. Gin was used a tonic to treat gallstones, rheumatism, fevers and even stomach aches. Juniper was added not only for flavor, the juniper berries have a number of healing properties. Some of the healing includes acting as a diuretic and helping with arthritis.
And the flu!
Klaus is showing remarkable fortitude against all the people he comes in contact with who are suffering from the grippe. What is the grippe? A grippe is another word, in this case from France- that means the flu. Not just any flu, but something so horrible that it grips your very soul in a vise. This vise is then slowly tightened until you cannot move. Hence the grippe!
Fortunately for Klaus, he is made of sturdy terracotta. Gnomes usually don’t get sick. They get even more thirsty than usual! Klaus is a firm believer in staying healthy through drinking intoxicating liquors like botanical gin.
Botanical Gin is popular with folks who like to drink their liquor for flavor. There are various forms of Gin- the old style-London variety can be almost icy cold in its flavor profile. The London Style of dry gin is originally from England.
Botanical styles are part of the new craft- distilling era. These gins exemplify flavor first and the traditional rules for Gin last.
These new botanical gins can make a huge difference in a healing mixed drink. I want to taste something other than the burn of the liquor!
Stylistically, botanical style gin is quite diverse. The diversity of flavors range from freshly cut roses to tropical fruit aromatics to citrus juices to cucumber oil and finally the traditional juniper berry. Some gins even smell like the sticky pine tree sap stuck to your car windshield and still others have exotic aromas of Asian influenced spices like ginseng and star anise!
Modern day gin although still delicious with hand made tonic like Q-Tonic from Brooklyn, may actually be better served on the rocks with hardly any mixers. The “in your face” approach to craft distilling may be experienced right up close and personal!
Klaus on the other hand likes his gin mixed. He always says that the ice is the most important ingredient; so pay attention to your ice!
Klaus’ Magic Elixir
This cocktail should be served as a long drink. (A long drink is one that is served in a tall glass.)
Ingredients:
2 oz. Botanical gin such as Barr Hill, distilled from raw honey and spices (Caledonia Spirits in Vermont)
Cucumber slices frozen: in an ice cube tray overnight (use the narrowest “European” style cucumber you can find and cut them thinly so they freeze along with the water)
4 oz Perrier Sparkling Natural Mineral water in lemon essence
Dash of Aromatic Bitters like the NY Rye whiskey barrel aged- Basement Bitters from Tuthilltown Distillery in New York State
Japanese Shiso Leaf
Preparation:
Fill a tall glass with the cucumber infused ice
Add the Barr Hill Gin to each glass
Add a couple drops of the aromatic bitters directly over the Barr Hill Gin
Top with the Perrier Sparkling Natural Mineral water
Garnish with a Shiso Leaf slapped in your hand.
Klaus says you should put the leaf in one hand and then slap the other one against it. This releases the essential oils directly into the cocktail, infusing it with exotic flavor of the leaf.
But wait! There’s more!
Klaus has taken the classic French 75 drink and made it even more potent. Usually a French 75 is a magical drink perfectly geared to the winter months. Klaus twisted up the preparation a bit by adding a good splash of healing Absinthe along with a dollop of luxuriously silky simple syrup woven with fresh raspberry juice. It’s gorgeous in the glass and will look fabulous on your dinner table. Please just remember, it’s a potent cocktail and should be for medicinal purposes.
Don’t assume that you can drink like Klaus!
Klaus’s Oracle to Healing
For one very potent healing experience
Ingredients:
2 oz. Botanical Gin like Barr Hill from Vermont
¼ oz. Lucid Absinthe
Raw sugar cube
Several dashes of cocktail bitters such as Angosturabitters (Angostura works because it’s most available or Whiskey Barrel Bitters from Fee Bros.) your choice. I’d consider using Bitter End Thai Bitters as well.
Homemade simple syrup w/raspberry juice to taste (I like to make a thick, 2:1 ratio simple syrup- that is two cups of sugar to one cup of boiling water, then cool, add a few tablespoons of raspberry juice to about ½ cup of the thick simple syrup to make a raspberry simple syrup)
1 oz. sparkling wine to finish, I used Italian sparkling wine. You can use what you like.
Preparation:
Muddle several dashes of the healing aromatic bitters with the sugar cube in a cocktail mixing glass; Klaus says that all healing came from bitters at one time in the not so distant past. He points helpfully to the book Apothecary Cocktails, Restoratives from Yesterday and Today as proof to the healing potency of aromatic bitters.
Pour Absinthe and Botanical Gin into the mixing glass (stir)
Add Simple Syrup w/Raspberry juice to taste (stir)
Fill mixing glass ¾ with ice and then stir again to cool. Please don’t over-stir. This is not a diluted drink but it is a cold one
Strain into a tall “Collins” style glass with a couple hand cut ice cubes.
Top with the sparkling wine and some citrus fruit pinwheels against the flu.
And healing what ails ye against this infernal cold
Feel better soon!
January 9, 2014
5 Beautiful Things
Get Out There!
As I write this, the temperature outside my window is colder than the temperature inside my freezer. With half the North American continent locked in a “polar vortex” and complaining vociferously about it, it may seem absurd to extoll the virtues of winter activities. As a child of winter, however, (born in late December) I am bound by some unwritten, unsigned contract to love this season and sell it! Below are five very good reasons to love winter and spend some time outdoors.
1. Catch a Sunrise: During the summer months, the sun rises between 5:00 and 5:30 a.m. while many of us are still snoozing. In the winter, when the sun perks up around 7:00 a.m., you are much more likely to experience a beautiful sunrise on your way to work. Winter sunrises are especially clear and brilliant given the lack of foliage on the trees and the added glint of shimmery ice and snow. Pack your camera!
2. Dodge a Virus: Viruses love to congregate and multiply in warm places and it’s no coincidence that instances of viral infections increase during the winter months when we seal ourselves inside with close proximity to other human beings – and their germs. Venturing outdoors regularly is a smart move.
3. Perk Yourself Up: Instances of depression increase during the winter months. Low light levels and a general decline in physical activity can lead to the winter doldrums. These blue moods can often be remedied by brisk outdoor walks. Studies have shown that people who do winter activities outdoors see an increase in self-esteem, higher levels of vitality and a decrease in physical tension and depression.
4. Get your Vitamin D: Your vitamin D production plunges during the winter months when the days are shorter. According to a Norwegian study, a fair-skinned person needs only five minutes of sun exposure in July to attain a healthy daily dose of vitamin D. In January that time increases to well over an hour.
5. Burn Calories: An average woman can burn over 450 calories during an hour of cross-country skiing and more than 510 calories during an hour of ice-skating. Find an outdoor winter activity you love doing and commit to doing it at least once a week. You will get a workout and have fun at the same time.
Remember, always dess appropriately during the winter to avoid frost bite, hypothermia or a dangerous slip. Wear proper outerwear and footwear at all times. Also remember to make the most of this special season and experience its natural beauty!

Share YOUR favorite winter outdoor activities in the comments section below!
December 26, 2013
New Year, New You

The number one new goal for people in the New Year is to get into better shape, but it’s not always easy (or affordable) to go to a gym or to hire a trainer. So we asked our friend Dawna Stone to come up with a series of exercises that you could do anytime, anywhere.
You can print off these instructions and take them along with you or even give them to a friend destined to be your work-out partner.
That’s a Cheeseball Idea

Brent’s former colleague at Martha Stewart Living Omnimedia, Michelle Buffardi, has written a fun and clever entertaining book with easy recipes for cheese balls that will be the hit of any party.
And she’s shared one with us!
Pineapple-Pineapple
Serves 15 to 20
The pineapple is a symbol for hospitality and friendship and serves as an image of welcome . . . not unlike the appetizer. Nothing will welcome friends better than a pineapple-flavored, pineapple-shaped appetizer.
Ingredients
2 bunches scallions
16 ounces cream cheese, softened
1 cup shredded sharp white cheddar cheese
One 8-ounce can crushed pineapple, drained well
1 small jalapeño, cored, seeded, and diced
1⁄2 teaspoon ground cumin
1⁄2 teaspoon coarse salt
2 cups pecan halves, toasted, for decorating
Crackers, for serving
Instructions
Cut the green tops off the scallions; set aside. From the white parts of the scallions, chop 1 tablespoon and reserve.
Using a stand mixer or a bowl and a spatula, mix together the cream cheese, cheddar, pineapple, jalapeño, cumin, salt, and the reserved tablespoon chopped scallions until combined. Form the mixture into a ball, cover with plastic wrap, and refrigerate for at least 2 hours or overnight.
Before serving, remove the cheese ball from the plastic, mold into a pineapple shape, and set it on a platter—it should look like an oval with a flat top. Arrange the pecans to look like the skin of a pineapple (you may need less than 2 cups, but choose the best-looking pecans to decorate the cheese ball). Stick the reserved green scallion tops in the top of the cheese ball to look like the crown of a pineapple.
Serve with crackers.
For more fun entertaining ideas, check out the book, Great Balls of Cheese. Click here
December 25, 2013
Have Your Cake and Eat it Too! Day 25
Friday, December 27th
Just three more workouts in the “Have Your Cake and Eat it Too” workout series! I hope the workouts have provided you with a challenging, yet fun, exercise program.
Today’s workout will definitely have you ending the week on a positive note!
Today’s workout is designed to last 30 minutes and is developed so each individual can exercise at his or her own pace. Each exercise should be performed to failure—when you feel as though you can’t complete even one more rep—or to the max number of reps listed. For example if the exercise is squat jumps and lists a max of 50 reps, you should do as many reps as possible up to 50. If you complete 10 reps and find that you can’t do another rep while maintaining good form, then simply move on to the next exercise. If you can complete all 50 with good form, do so and then move to the next exercise.
If you get through all 5 exercises in less than 30 minutes (which should be the case), repeat the cycle until the 30 minutes is up.
Please note: Before adopting any new exercise routine, you should consult your physician.
Today’s full-body, calorie-burning workout:
Exercise 1: Burpees (Perform to failure or max 15 reps)
Exercise 2: Crunches (Perform to Failure or max 50 reps)
Exercise 3: Side Leg Lifts (Perform to failure or max 30 reps per side)
Exercise 4: Split Jump Squats (Perform to failure or max 20 reps each side)
Exercise 5: Standard Push Ups (Perform to failure or max 30 reps)
A detailed description and accompanying photo is provided for each exercise below.
Exercise 1: Burpees (Perform to failure or max 15 reps)
How to do it: Squat with your hands on the ground in front of you. Jump your feet back to plank (or push up) position. Jump your feet back under you to the squat position. Immediately jump up as high as you can with your hands straight over your head. Repeat. Note: if you want to make the move even more difficult, you can perform a push up when you are in the plank position.

Exercise 2: Crunches (Perform to Failure or max 50 reps)
How to do it: Lie on your back. Place your arms behind your head. Bend your knees and plant your feet on the floor. Tighten your core. Exhale as you slowly curl your head and shoulders off the floor. Your lower back should remain on the floor. Inhale and slowly bring your head and shoulders back down to the floor. Note: do not pull on your neck with your arms. Allow your abdominal muscles to raise and lower your head and shoulders.

Exercise 3: Side Leg Lifts (Perform to failure or max 30 reps per side)
How to do it: Lie on your right side with your right arm at a 90-degree angle supporting your head. Place your left palm on the floor in front of you. Bend your bottom leg slightly. Lift your top leg to 45-degrees and then lower just before you touch your bottom leg. Lift and lower your top leg for the entire series of reps. Repeat on your left side.

Exercise 4: Split Jump Squats (Perform to failure or max 20 reps each side)
How to do it: Stand with your right foot out in front of you with thigh parallel to the ground. Your back leg should be bent and your knee should be a few inches off the ground. Jump up and quickly switch legs in mid air so that your left leg is now in front and your right leg is now in back. Bend your legs as you land so that your back knee nearly touches the ground. Continue to quickly alternate legs. Note: keep your back straight throughout the exercise.

Exercise 5: Standard Push Ups (Perform to failure or max 30 reps)
How to do it: Lie on your stomach. Place your palms flat on the floor shoulder width apart. Push up off the ground so your arms are fully extended and you’re on your toes. Keep your back flat and engage your core. While maintaining a flat back, lower yourself down until your chest almost touches the floor. Push yourself back up by fully extending your arms.

I hope you enjoy today’s workout. Please share your feedback with me by commenting below.
About the Author:
 Dawna Stone is a health, fitness, and wellness expert. Her new book, Healthy You!: 14 Days to Quick and Permanent Weight Loss and a Healthier, Happier You is available on Amazon.com. To find out more about Dawna or to view her Healthy Living videos, tips and recipes, go to dawnastone.com
An American Council on Exercise (ACE) certified Health Coach, Stone has contributed health and wellness articles to numerous newspapers and magazines. She earned her bachelor’s degree from UC Berkeley, and her master’s degree from UCLA. An avid runner and Ironman triathlete, she lives in St. Petersburg, Florida with her husband, 6-year-old daughter and 4-year-old son.
Disclaimer: This information is intended to provide helpful and informative material and is not intended to treat, diagnose, prevent or cure any health condition, nor is it intended to replace the advice of a physician. Always consult your physician before adopting a new eating or exercise regimen. The author and publisher specifically disclaim all responsibility for any liability, loss or risk, personal or otherwise, which is incurred as a consequence of reading this information or participating in the exercises suggested in this material.
Copyright © 2013 by Dawna Stone


