Linda Hoye's Blog, page 183
September 1, 2014
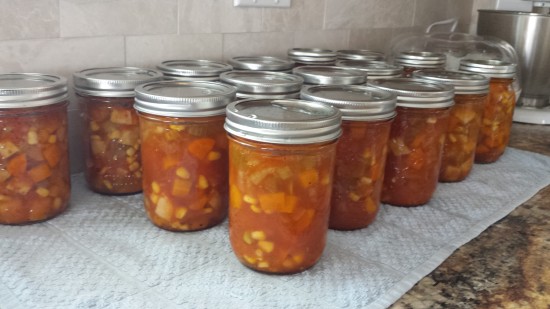
Canning – Spaghetti Sauce
It’s September and tomato season is rapidly coming to an end. We’ve been enjoying the season’s bounty and eaten a good number of, in my opinion, the most delicious fruit of summer. While we’ve enjoyed many tomatoes from my garden freshly picked and sun warmed, I’ve also used them in sandwiches, sauces, and other supper-time delights. Still more have ended up canned in the form of stewed tomatoes, vegetable soup, Sungold tomato jam, or just canned au natural.
I have limited garden space and, while I’m delighted with this year’s harvest, I’ve still purchased forty pounds of tomatoes from the local farmer’s market that I’ve preserved in the form of spaghetti sauce and soup.
Today, I’m sharing the spaghetti sauce recipe I used for the second time this year. I originally got this recipe from a website called Provident Living Today. The only change I made from last year is that I omitted the chili powder from the recipe. Chili powder just doesn’t belong in a sauce I’m going to serve on pasta or spaghetti squash.
Yield: This year 20 pounds of tomatoes gave me 15 pints of sauce but the yield in any given year is dependent on a couple of things. First, the type of tomato since some are juicier than others. Second, it depends on how thick of a sauce you want. The longer you cook it the thicker it will be but you’ll be reducing the yield. It’s completely up to personal preference.
Ingredients
20 pounds of fresh tomatoes
2 cups chopped onion
2 cups chopped green pepper
2 cups chopped celery
2 cups chopped fresh parsley or 3/4 cup dried parsley
4 chopped garlic cloves
1/2 cup olive oil
1 Tbsp. chili powder (as I mentioned earlier, I omitted it this year)
3 Tbsp. un-iodized salt (I use Kosher salt)
2 Tbsp. sugar
2 tsp. oregano (The recipe doesn’t specify dried or powdered. I used dried)
2 tsp. rosemary (Again, I used dried.)
2 tsp. allspice
1 tsp. powdered basil (I used dried. And more.)
2 tsp. pepper
1 tsp. cayenne pepper (optional) (I omitted)
2 tsp. thyme (I used dried.)
2 tsp. sage (I used powdered.)
1 tsp. cumin (I didn’t have any so I omitted it.)
Instructions
Peel the tomatoes and chop into bite sized pieces. Alternatively put them in the blender or food processor and puree them. (I peeled by blanching and putting them ice water.)
Combine tomatoes, onions, green peppers, celery, parsley, garlic, and olive oil in large pot. (I used my pressure canner.)
Bring the mixture to a boil and cook it for 1/2 hour, stirring every few minutes.
Add the rest of the ingredients.
Bring the spaghetti sauce back up to a boil and cook it over low heat for 2 1/2 hours stirring every few minutes. This is where it varies depending on the type of tomato you’re using and how thick you want the sauce. I cooked my sauce for about three hours and really would have preferred to cook it a bit longer to thicken it a bit more but it was getting late and I was tired. Lesson learned for next year: start this first thing in the morning!
Ladle sauce into hot jars, leaving 1 inch head space.
Adjust two-piece caps.
Process at 10 pounds pressure–pints 20 minutes, quarts 25. For my altitude here in Kamloops I need to process at 11 pounds pressure. You need to check the altitude for your location and adjust accordingly.


August 27, 2014
Canning – Stewed Tomatoes
The weather forecasters are predicting we’ll reach 38° C or 100° F today so I got an early start on the day and headed down to the garden to harvest tomatoes and do some general cleanup. By the time I got back home shortly after 8 a.m. the day was already warming up and the air conditioner kicked in shortly after. Normally in the morning I like to turn the thermostat way up and leave the doors open to let the breeze blow through. This morning I thought it would be prudent to shut up the house and keep it cool straight away though.
I had enough Brandywine, Black Krim, and Manitoba tomatoes combined to prepare a batch of stewed tomatoes to can. Ordinarily I’ve either frozen my tomatoes or canned them as is but I had some veggies I wanted to use up so I decided to stew them this time. I used a basic recipe from the classic Ball Blue Book.
Yield: About 7 pints or 3 quarts. This depends a lot on how juicy your tomatoes are.
Ingredients
4 quarts chopped, peeled, cored tomatoes (4 cups = 1 quart)
1 cup chopped celery
1/2 cup chopped onion
1/4 cup chopped green pepper (I had orange pepper so I used that. I use whatever I have on hand.)
1 Tbsp. sugar
1 tsp. salt
Instructions
Combine all ingredients in a large pot. Cover and cook for 10 minutes, stirring to prevent sticking. (I leave the cover off and cooked it for 15 minutes so the tomatoes cook down a bit and the mixture is a bit thicker. Personal choice.)
At the end of the cooking time ladle the hot vegetables into hot jars leaving 1-inch head space. Remove air bubbles, clean jar rims, and adjust two-piece caps finger-tight.
Process at 10 pounds pressure–pints 15 minutes, quarts 20 minutes. For my altitude here in Kamloops I need to process at 11 pounds pressure. You need to check the altitude for your location and adjust accordingly.

August 26, 2014
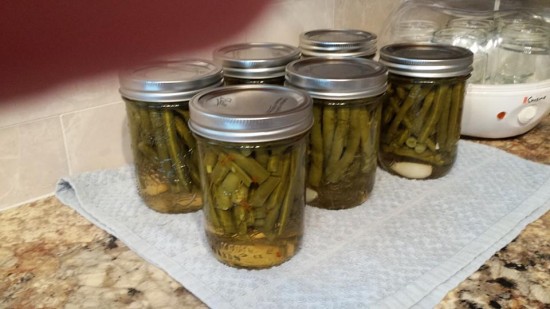
Canning – Dilly Beans
I made Dilly Beans on the recommendation of a friend who makes them with the beans from her garden. I had never even head of them before and she graciously shared her recipe with me. (Thank you Cindy Maisonneuve!) I cracked open a jar when we had company for lunch a few weeks ago and they were a big hit. Gerry suggested I might add more pepper flakes so I did that on the next batch. We really liked these!
Yield: the recipe indicates that this amount of liquid is enough for 5 pints. As in all things preserving-related, this varies depending on the size of the beans and how tightly you pack them.
Ingredients
Green beans
4 cups water
2 cups cider vinegar
2 cups pickling vinegar (I used plain white vinegar)
6 Tbsp. salt (I used Kosher salt)
6 Tbsp. Sugar
Garlic cloves
Hot peppers (I used a titch of red pepper flakes)
Heads of dill
Instructions
Wash the beans and trim the ends. Trim them to a uniform length that will fit into the jars leaving a 1 inch head space.
Mix the water, vinegar, cider vinegar, salt, and sugar in a pot and bring to a boil.
In each hot jar put a garlic clove, a head of dill, and the hot peppers (or red pepper flakes).
Pack the beans into the jars and ladle the liquid over the top filling to allow a 1 inch head space.
Wipe rims to ensure they are clean and apply lids and rings. Process in water bath canner for 10 minutes
For my altitude here in Kamloops I need to increase the processing time by 5 minutes. You need to check the altitude for your location and adjust accordingly.

August 25, 2014
Magic Stain Remover
A few weeks ago we were blessed to have two of our grandchildren and their parents join us for dinner. I served a simple but delicious (if I do say so myself!) meal of ribs, baked beans, coleslaw, corn on the cob, pickles, and buns. (Remind me. I’ll post the recipe for the coleslaw here in a few days. It’s CANNED coleslaw that’s crispy and delicious.)
Our dining chairs have a white pad and, inevitably, a titch of sauce from the ribs was dropped on one of them. I wiped it up as best I could and didn’t fret too much about it after that. It was simply a reminder of good times spent with our family in my mind.
Today, as I was treating a stain on one of Gerry’s shirts with a magic potion I’ve been using recently, I remembered the stain on that chair and decided to give it a go and see if I could remove what remained of the stain.

Presto! Magic! It disappeared before my very eyes!
I’ve used this mixture successfully to remove grass stains, spaghetti sauce, and an unidentified grease stain from our clothes. It’s not sold in any stores but you can mix up a batch of your very own in the blink of an eye.
1 tsp. Dawn dishwashing liquid
3-4 Tbsp. peroxide
2 Tbsp. baking soda
Sometimes I’ve had to scrub a bit and let the mixture sit for a bit (as I did for the grass stains) but it hasn’t let me down yet. Give it a go and let me know if it works for you!

August 22, 2014
Canning – Dill Pickles
Dill pickles are the easiest thing in the world to make. Most of the prep time is in washing the cucumbers and preparing them. Once that’s done the rest is smooth sailing.This year I got 20 pounds of locally grown cukes from the green grocer. They were all the perfect size for pickles and I got 15 quarts of regular dills and 5 quarts of sweet dills from them.
I used recipes from Saving the Seasons.
Dill Pickles
Yield: This is the basic recipe from the book that yields 4 pints. I increased the amounts to correspond with the volume of cucumbers I had.
Ingredients
3 pounds of small pickling cucumbers
2 cups white vinegar
2 cups water
2 Tbsp. pickling salt (I use Kosher salt)
Fresh dill – enough to provide 1 head per jar
Mustard seeds – 1 tsp. for each quart jar or 1/2 tsp. for each pint jar
Garlic cloves – 1 clove per jar
Instructions
Wash cucumbers and cut a thin slice from the ends of each one.
Combine vinegar, water, and salt in pot and bring to a boil.
Place 1 sprig fresh dill, and 1 garlic clove in each jar. Add mustard seeds.
Pack cucumbers tightly in jars.
Pour boiling vinegar mixture over cucumbers leaving 1/2 inch head space.
Process in a boiling water bath for 10 minutes for pints or 15 minutes for quarts.
For my altitude here in Kamloops I need to increase the processing time by 5 minutes. You need to check the altitude for your location and adjust accordingly.

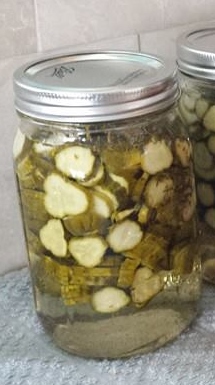
Sweet Garlic Dill Pickles
Yield: This is the basic recipe from the book that yields 4 pints. I increased the amounts to correspond with the volume of cucumbers I had.
Ingredients
2 1/2 pounds medium-sized cucumbers sliced 1/4 inch thick
Fresh dill – enough to provide 1 head per jar (I was out of fresh dill so used 1 Tbsp. of dried per jar instead)
Garlic cloves – 1 clove per jar
3 cups sugar
1 cup vinegar
3 cups water
2 Tbsp. pickling salt (I used Kosher salt)
Instructions
Pack sliced cucumbers tightly into jars.
Add 1 garlic clove and dill to each jar.
Combine sugar, vinegar, water, and pickling salt in pot and bring to a boil.
Pour liquid over cucumbers in jars leaving 1 inch of head space.
Process in a boiling water bath for 10 minutes for pints or 15 minutes for quarts.
For my altitude here in Kamloops I need to increase the processing time by 5 minutes. You need to check the altitude for your location and adjust accordingly.

August 21, 2014
Canning – Split Pea or Habitant Soup
I’ve never been a fan of split pea soup. Gerry likes it so I decided this would be a good staple to have on the shelf during the winter as my goal is to stop purchasing all store-bought canned goods. I served a bowl of this for lunch and it’s actually really quite good. Who knew?! The nice thing about this is that I can make a batch anytime I find ham on sale.
The recipe I used is derived from the classic Ball Blue Book.
Yield: 5 pints or 2 quarts.
Ingredients
16 ounce package of dried split peas
2 quarts (8 cups) water (next time I make it I’ll use my own vegetable broth)
1 1/2 cups sliced carrots
1 cup chopped onion
1 cup diced cooked ham
1 bay leaf
1/4 tsp. allspice
Salt and pepper to taste
Instructions
Combine dried peas and water in large pot.
Bring to a boil, reduce heat, and simmer for about 1 hour or until peas are soft.
Puree the cooked peas in a food processor.
Return puree to saucepan and add remaining ingredients.
Summer for 30 minutes.
Ladle soup into hot jars, leaving 1 inch head space.
Adjust two-piece caps.
Process at 10 pounds pressure–pints 1 hour and 15 minutes, quarts 1 hour and 30 minutes. For my altitude here in Kamloops I need to process at 11 pounds pressure. You need to check the altitude for your location and adjust accordingly.


August 20, 2014
Canning – New Potatoes
I love the idea of having cooked potatoes on the shelf for a quick meal. I admit I was skeptical about how canned potatoes would turn out so I made a small batch first to test them out. I opened one of the jars and fried up the potatoes in butter with a bit of onion and they were delicious so I carried on with doing more. I found that new Yukon Gold potatoes seem to be the best ones for me.
The recipe I used is derived from the classic Ball Blue Book. I’ve processed 8 pints and 10 quarts. That should help see us through the winter!
Ingredients
2 – 3 pounds white potatoes per quart
Salt – 1 tsp. for each quart jar or 1/2 tsp. for each pint jar (The recipe says this is optional. I used it.)
Water
Instructions
Wash potatoes well. Very well. The recipe indicates that the potatoes need to be peeled but I found a lot of conflicting options about this step on the internet. Since I never peel new potatoes when I’m cooking them normally, I elected to skip this step. I did, however, take great care to ensure the potatoes were clean and cut out any eyes or blemishes.
Rinse potatoes again.
Leave small potatoes whole; cut large ones into desired sized pieces.
Cover with water in a large pot and boil for 10 minutes. (I only boiled them for 5 minutes as I was afraid they would end up mushy after processing.)
Pack hot potatoes into jars and add salt to each jar if desired.
Add boiling water to each jar leaving 1 inch head space.
Using a non-metallic tool, remove air bubbles.
Process at 10 pounds pressure–pints 35 minutes, quarts 40 minutes. For my altitude here in Kamloops I need to process at 11 pounds pressure. You need to check the altitude for your location and adjust accordingly.


August 19, 2014
Guest Post – Kathleen Pooler
Today I am pleased to welcome Kathleen Pooler, author of her recently published memoir Ever Faithful to His Lead: My Journey Away From Emotional Abuse discussing the role that her faith played in helping her find freedom from abuse.
Abuse can take many forms–not all of which result in wounds that are visible on the outside. As one who has endured more than one kind of abuse in the past, I can tell you with certainty that emotional and verbal abuse is every bit as damaging as physical abuse.
Many times, the victims of abuse find themselves in a place of confusion and denial and are reluctant to put the label of “abuse” on behaviour directed toward them. They may feel guilty, responsible, or ashamed about what is going on behind closed doors. Acknowledging it, calling it what it is, is often the first step in helping them to begin the long and difficult climb out of the cycle of abuse toward a healthier life.
Please join me in welcoming Kathy today. I encourage you to read her very important book. More importantly, if you identify with anything in this post or in Kathy’s book, I implore you to reach out and get help for your situation.

Real courage owns up to the fact that we face a terrifying task, admitting that we are appropriately frightened, identifying sources of help and strength outside and within ourselves, and then going ahead and doing what needs to be done.”
- Dr. Alla Renne Bozarth taken from Wanda Maxey’s website
Finding freedom from domestic abuse is a theme in my memoir, Ever Faithful to His Lead: My Journey Away From Emotional Abuse. I believe that increasing awareness of domestic abuse prevention may help others who may feel trapped in abusive relationships.
Facing the Truth:
It took many years of writing before I decided to share my story of abuse. I think abuse comes in many forms and while I did not incur bruises or broken bones, I subjected myself to years of mental and emotional abuse at the hands of two different husbands. The key for me was not establishing healthy boundaries for myself and relying on the other person to change. I hadn’t found my voice. When I felt physically threatened by my second husband, I escaped in the middle of the day with my two children. It wasn’t until after I left my second husband that I fully realized I had subjected myself and my children to not just one but two abusive relationships. That was in 1989. When I started writing a memoir in 2000, it was to be about dealing with my alcoholic son. As I wrote, I realized that I couldn’t tell his story until I told my own.
One of the themes that emerged is the consequences of not embracing your inner voice that tells you something is not quite right.
The welfare of my two children was an overriding concern that guided me out of two abusive relationships. Though it seemed to take much longer than, in retrospect, I wished it had taken, I was able to extract myself from both marriages before any more damage was done.
The Role My Faith in God Played in Helping Me Find Freedom From Abuse:
I always had a faith in God and yet, it wasn’t until I was a single parent with two school-aged children after my first divorce that I found God in a personal way. However, I must have lost sight of that connection, for a few years after, when I met my second husband, I seemed to be driven by a need to be an intact family again rather than guided by faith. It turned out to be at a steep cost.
When I embraced that God, my Higher Power, was with me in my daily struggles, not hidden somewhere on an altar in Church, I began to grow in my faith. As I did, I began to find, claim and honor the strength within.
When I Acknowledged I Was One of God’s Children, I Found the Inner Strength I Needed to Set Myself Free:
Awareness and acknowledgement that I was indeed in an abusive situations (denial can play a big role) and needed to get out was my first step. Next, armed with this awareness, I developed a support system and an escape plan ahead of time. My bags were packed. This could only happen when I admitted I’d made a mistake and needed to act on my fears .
I Learned to Love Myself Enough to Want Something Better for Myself and My Children.
Again, to listen to, honor and embrace my inner voice.
What’s the Lesson Here?
Don’t put up with unacceptable, hurtful behavior, whether it be mental, emotional or physical. The first time another person violates your boundaries, take action to protect yourself. No excuses and don’t listen to their excuses. Do not accept unacceptable behavior from anyone. Ever.
Find a source of strength to endure the struggles and fight for a better life. We each need to find our own source of strength. For me, my faith in God was my strength. When things seemed hopeless, I had hope through my faith.
What are the safety measures all of us would be wise to follow?
As I mentioned earlier, establishing a support system of family, friends, community agencies with phone numbers, safe places to go. Most important, do not isolate yourself. Seek counseling if you find yourself in an abusive relationship to understand your own role in attracting and allowing abusive people in your life.
Do whatever it takes to take care of yourself. That’s the best thing you can do for your children.
How I look at life and God differently now than before I experienced an abusive relationship?
With counseling, faith, supportive friends and family, I have been able to see my role in allowing abusive relationships and to forgive myself for subjecting myself and my children to unacceptable behavior. I am very grateful that I was able to extract myself from two abusive marriages and learn from my mistakes. In finding my voice, I found a life of joy, peace and gratitude. I finally feel deserving of all the gifts God wanted for me all along. It is very empowering for I know I am in charge of my choices.
My faith was an anchor that brought me back to myself.

God wasn’t lounging at the pool, watching a mountain sunrise, or dreaming by a babbling brook when he said those words he spoke. He was on a battlefield:
“Be still, and know that I am God.”
***
How about you? Have you ever found yourself in an abusive situation? Do you have any lessons to share or words of advice for others? Has your faith helped or hindered your journey?
We’d love to hear from you. Please leave your comments or questions below~

Kathleen Pooler is an author and a retired Family Nurse Practitioner whose memoir, Ever Faithful to His Lead: My Journey Away From Emotional Abuse, published on July 28, 2014 and work-in-progress sequel, Hope Matters: A Memoir are about how the power of hope through her faith in God helped her to transform, heal and transcend life’s obstacles and disappointments: domestic abuse, divorce, single parenting, loving and letting go of an alcoholic son, cancer and heart failure to live a life of joy and contentment. She believes that hope matters and that we are all strengthened and enlightened when we share our stories.
She lives with her husband Wayne in eastern New York.
She blogs weekly at her Memoir Writer’s Journey blog: http://krpooler.com
Twitter @kathypooler
https://twitter.com/KathyPooler
LinkedIn: Kathleen Pooler: https://www.linkedin.com/pub/kathleen-pooler/16/a95/20a
Google+:Kathleen Pooler: https://plus.google.com/109860737182349547026/posts
Goodreads: https://www.goodreads.com/user/show/4812560-kathleen-pooler
Facebook:
Personal page, Kathy Pooler : https://www.facebook.com/kathleen.pooler
Author page: Kathleen Pooler/Memoir Writer’s Journey: https://www.facebook.com/memoirwritersjourney
Pinterest (http://www.pinterest.com/krpooler/)
One of her stories “The Stone on the Shore” is published in the anthology: “ The Woman I’ve Become : 37 Women Share Their Journeys From Toxic Relationships to Self-Empowerment” by Pat LaPointe, 2012.
Another story: “Choices and Chances” is published in the “ My Gutsy Story Anthology” by Sonia Marsh, September, 2013.

August 18, 2014
Canning – Beet Pickles
I first tried making beet pickles a couple of years ago with a recipe I got from the Ball Blue Book. They were not like the ones my mom used to make and I didn’t care for them at all. The recipe called for spices like cinnamon, cloves, and allspice, which should have been a clue to me that they weren’t the same kind of pickle I remembered from my childhood.
This year I combed through my mom’s recipe files that I’m fortunate to have and found the one she used.
Yield: I had five pounds of beets to work with and filled seven quarts. I tripled the volumes in this recipe for the syrup ingredients and that amount was just about perfect for the seven quarts.
Ingredients (I tripled the volume of everything.)
3 cups vinegar
1 1/2 cups water
1 cup brown sugar
1 1/2 tsp salt (I used Kosher salt)
1 Tbsp. mixed spices (I used pickling spice)
Instructions
Cook beets in lightly salted water (I didn’t salt my water) until tender. Drain, rinse in cold water, and peel.
Cut into thick slices and fill hot jars.
Bring sugar, vinegar, water, sugar, salt, and spices to a boil.
Add syrup to beets and pack into jars. Wipe rims to ensure they are clean and apply lids and rings. Process in water bath canner for 30 minutes
For my altitude here in Kamloops I need to increase the processing time by 5 minutes. You need to check the altitude for your location and adjust accordingly.
The pickles need to sit for at least 2 weeks before opening.


August 15, 2014
Canning – Vegetable Soup
I want to have a good supply of soups on the shelves for the winter for those days when we want a small bowl of soup for lunch or need a quick supper. I also want to eliminate store-bought canned goods from our diet so was on the lookout for some soup recipes to can.
I’ve made a few batches of this vegetable soup as tomatoes ripen in the garden. It’s a delicious recipe that can be switched up as need be depending on what I have available.
The recipe I used is derived from the classic Ball Blue Book.
Yield: 8 pints or 4 quarts.
Ingredients
8 cups peeled, cored, chopped tomatoes
6 cups cubed and peeled potatoes (I used new Yukon gold ones)
6 cups diced carrots
4 cups shelled lima/butter beans (I was not able to find these beans. In one batch I used some broad beans (also known as fava beans) that I found at the farmer’s market, and in another batch I used yellow wax beans. The amount I used was whatever I had on hand.)
4 cups cut corn kernels (I used frozen corn)
2 cups diced celery
2 cups chopped onion
6 cups water (I used my own vegetable broth)
Salt and pepper to taste
Instructions
Combine all ingredients in a large pot and bring to a boil. Boil for 5 minutes.
Ladle soup into hot jars, leaving 1 inch head space.
Adjust two-piece caps.
Process at 10 pounds pressure–pints 55 minutes, quarts 1 hour and 25 minutes. For my altitude here in Kamloops I need to process at 11 pounds pressure. You need to check the altitude for your location and adjust accordingly.