Linda Hoye's Blog, page 182
November 11, 2014
Morning, a Magpie, and Maya

It was a pleasant morning, a brisk five degrees Celsius outside–with the wind chill it felt closer to zero–and the sun was breaking through the clouds. It was cool enough for a sweater, maybe even a jacket, cool enough for most folks to need a pair of shoes outside, certainly cool enough that one wouldn’t expect to see a barefoot woman running down the cul-de-sac.
We share our home with a little Yorkie named Maya who has big brown eyes capable of enticing us to do her bidding at any given moment, and a personality so sweet it’s impossible not to love her to pieces. This morning I was puttering around the house and noticed her sitting on the arm of the sofa in the library looking intently out the front window. I thought she had found a sunny place to stretch out or that she was watching the last of the autumn leaves fall from the maple tree in the front yard.
A few minutes later I was in the kitchen when I heard the click-click of her little paws coming into the room. She stood in front of me and looked up with those beautiful eyes attempting to perform a mind meld to convey her wishes to me.
“Outside?” I asked her. “Do you want to go outside?”
She immediately scurried in the direction of the front door, looking back at me to confirm that I had understood her message.
“Okay, let’s go outside then.”
It doesn’t matter what season it is I live in bare feet and I concede to wearing shoes only when I leave home. Regardless of the weather, when I step out on the front step to let Maya out I am barefoot. She does her business and at this time of year, not fond of the cold weather, quickly turns tail and hurries back inside for a treat. This morning she had something else in mind though–another, dare I say devious, reason for wanting to go outside–and as soon as I opened the screen door she bolted. Down the sidewalk and around the corner of the garage, she was gone in a flash.
“Maya!” I called as I hurried down the sidewalk worried that her attention had been taken by large dog or, worse, a coyote or bear.
I rounded the corner of the garage in time to see her bolting down the cul-de-sac toward the common parking area chasing after a magpie that had been spooked from the tree in our front yard when I opened the door. There was nothing to do but go after her–bare feet and all.
At least it was late enough in the morning that I was dressed and fairly presentable. A few weeks ago when Gerry was out-of-town I let her out just after dawn, still wearing pajamas and with my hair askew, only to be greeted by my next door neighbour’s son who was walking out to his car. We exchanged perfunctory greetings, I urged Maya to hurry up, and as quickly as possible slid back into my house where I took a quick peek in the mirror to see just how bad I really looked. Trust me. The image that I saw in the mirror wasn’t pretty and the vision of that early morning greeting probably scarred the retina of that gentleman permanently.
This morning as I ran down the street, my bare feet cold on the pavement, the garage door of another neighbour began going up as I ran past and I offered a quick prayer of gratitude that I was at least dressed and this neighbour was spared the vision of a screaming banshee running down the cul-de-sac in her night attire. I could only hope he wouldn’t notice my bare feet.
Maya stood under a tree in the common area, her head tipped up, barking madly at the magpie. The bird flitted around on the branches, mocking her I’m sure, as my Yorkie scolded it and warned it never to return the tree in her front yard again. Satisfied that her message had been conveyed, Maya finally turned toward me and began prancing back toward home as if nothing had happened.
I tried to avoid the gaze of my neighbour who was fiddling with something at the back of his garage as I gingerly tip-toed across the pavement toward home and we arrived without further incident. Maya went right to the spot in the kitchen were her treats are kept and looked up at me expectantly waiting for her post-potty treat.
“You don’t even deserve a treat after that little episode”, I grumbled.
She looked up at me with those big eyes, innocent as could be, as I begrudgingly reached down and handed her a treat which she took delicately from between my fingers. That she took it so gently was perhaps her acknowledgment of the folly of her behaviour since she often very nearly takes a piece of my finger along with the little treat.
The lessons gleaned from this morning’s episode could be many. I could keep a pair of slippers at the front door to slip on when I take Maya outside. I could pull on a house coat, and perhaps a hat, in the morning if I’m forced to go outside before I’ve showered and dressed for the day. I could slip a long leash on Maya before we go outside to prevent a magpie chasing episode or I could scope out the tree for rogue birds before opening the door.
I could, and might, do any of these things, but chances are pretty good that if you live in my neighbourhood at some point regardless of the weather you’ll see me outside barefoot, and possibly pajama clad, waiting for a little Yorkie to perform her morning ablutions or scold a cheeky magpie.


October 27, 2014
Coming Home To The Library
A few years ago, for a brief time, I wrote a column for a local newspaper. Today, I’m sharing with you the first of those columns that was published on September 9, 2010 in the Covington-Maple Valley-Black Diamond Reporter.
I’ve had a library card for as long as I can remember. I can still picture the library in the city I grew up in; it was an old brick building set at the edge of a park in the middle of the city.
Moose Jaw Public Library image courtesy of the Institute for Stained Glass in Canada
I found it comforting to be in the library in the winter when the frigid wind blew outside; the blanket of peace inside the library warmed me as I sat on a small plastic chair in the children’s section browsing through books, searching for just the right one to take home.
In the summer months when it was too hot to play outside, the library was a silent refuge from the oppressive summer heat. Countless stories sat on the shelves waiting for me to enter in and allow myself to be transported to another world.
Sometimes, the library came to me in the form of a bookmobile that parked just down the street from where we lived. I always took advantage of the opportunity to stock up on a new stack of books that I could lose myself in for a few hours.
Throughout my life, whenever I wanted to learn about something new, I went to the library. I learned to quilt by reading library books; I learned about my Mennonite heritage by reading library books; I learned how to take care of family pets by reading library books; I learned what it meant to have faith by reading library books.
I started taking my children to the library when they were infants, wanting to instill my love of books and libraries in them at the earliest possible age. They grew up going to the library and quickly learned to appreciate the value of a book. Now, I am pleased to see my children passing on their love of books and reading to their own children.
When my husband and I moved to the Pacific Northwest three years ago I stopped going to the library. I got used to going to a different grocery store and a different hair stylist, but somehow I neglected to connect with a new library. I started buying my books online or from department store chains, but every time I drove past the library I reminded myself that I needed to sign up for a library card. I just never seemed to get around to doing it.
Until today.

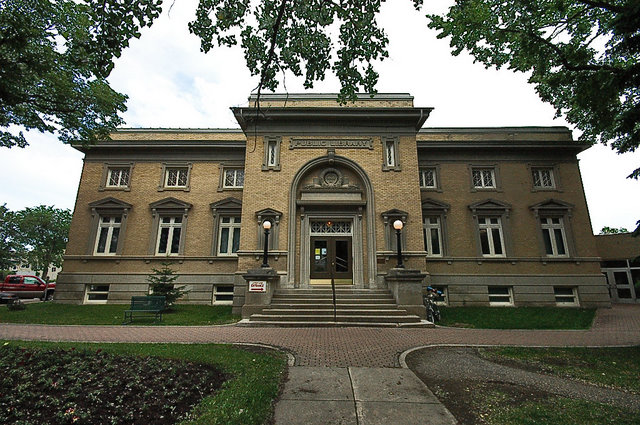
Covington library image courtesy of King County Library System
As I was on my way home this afternoon, something prompted me to turn into the parking lot of the Covington library. As I walked through the tree-lined courtyard toward the glass doors of the library, I wondered what sort of library I might find inside. Would this new library have the same allure that the libraries of my past had held for me?
As soon as I entered the unfamiliar, yet somehow still familiar, library I started to feel at home. I was greeted by a smiling face at the information desk and within a few minutes I had a brand new library card.
With my card in hand, I strolled through the library familiarizing myself with where everything was. There was the children’s section, magazines and books on tape, shelf-after-shelf of fiction and literature, and there behind the rows of computers was the non-fiction section I had unconsciously been looking for.
The familiar Dewey Decimal numbers posted on the ends of the shelves directed me to the sections I once spent so much time browsing through. My body remembered the library-posture of tilting my head to the right to read the titles on the spines of the books; my mind recalled the hours spent in the library browsing, reading, and forgetting about everything else except the books.
I checked out three books from section 305 (They have self-checkout now!), and as I left the library with my books in my arms, my walk seemed a little bouncier, and I seemed to breathe a little easier.
Having obtained a library card and checked out my first batch of books, I guess I can say that I am officially planted here for now.
I guess I’m home.

October 25, 2014
Knitting and Praying
A few years ago I decided I wanted to (re)learn how to knit. When I was a child my mom taught me the basics and believe my granddaughter has a little scarf that I made for one of my dolls at the time. I distinctly remember struggling my way through the test required to earn my Brownie knitting badge and I’m not sure if I even managed to earn the badge. In time, what little I had learned fell by the wayside and I was firmly entrenched in the non-knitter status.
My interest in the craft was piqued in recent years as I read about a simpler life and envisioned a life of homesteading, raising chickens and goats, and gardening. My dream of having a farm was not to be but nevertheless I am continuing to incorporate into my life basic, simple, things I hold dear–knitting being one of them.
As I mentioned, I decided to take up knitting a few years ago. I even wrote about it here, here, and here. With the help of a books, YouTube, and various websites, I struck out on my quest to become a knitter. I quickly learned that this was not a skill I was going to become proficient in overnight and as I learned the basics of knitting and purling, as I knit a few rows and then unravelled them to start over again, I clung to my belief that this was a skill that I needed to have in my life.
Here’s what I learned almost immediately.
I don’t like the feel of aluminum or plastic needles; bamboo needles only for me please.
Knitting with acrylic or other non-natural yarn made me feel nauseous; I can’t explain it but that’s what I experienced. For now I knit with only 100% cotton yarn.
So, with my Takumi bamboo needles of various sizes and styles and Lily Sugar ‘n Cream yarn I set off to become relatively proficient at knitting. I struggled my way through a couple of coffee cup sleeves that we still use when we get a cup of steaming hot Tim Hortons coffee, as well as a couple of not-so-pretty dish clothes. I found it comforting to sit by the fire on a wet and dreary Sunday afternoon with my knitting projects but as I was still working, and busy with other things, my knitting time was limited.
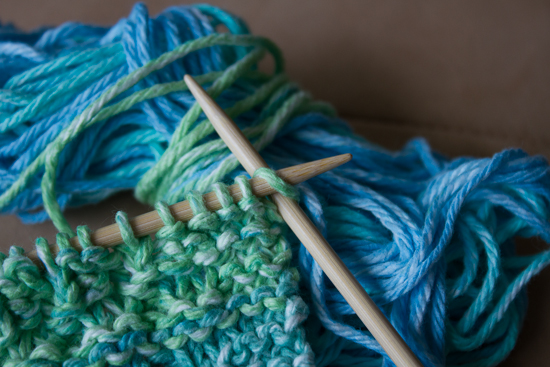
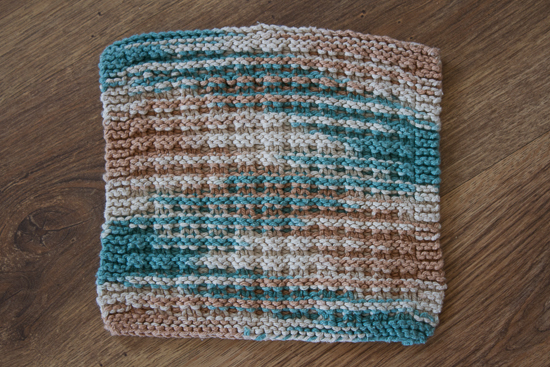
This year as the gardening season began to wind down and the weather started turning cooler I started thinking about knitting again. I remembered a post on one of my favourite blogs, Down to Earth, that featured a waffle-weave cloth and decided to give it a go with some leftover yarn. (The original pattern came from a site called Homespun Living.)
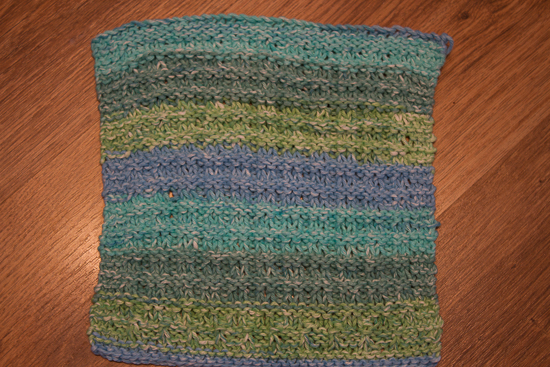
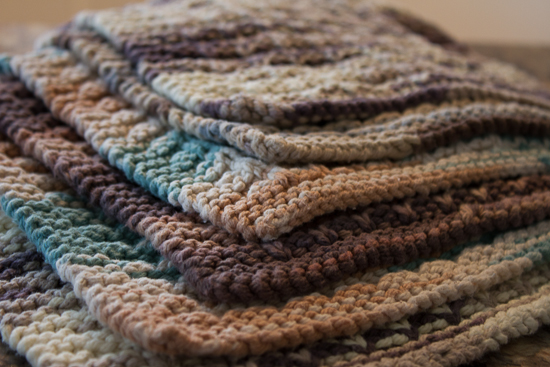
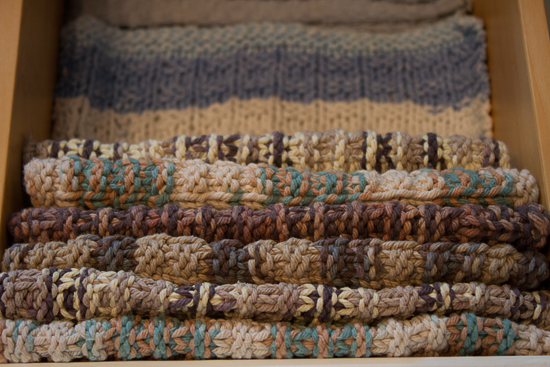
I was pleased with how the first cloth turned out and debated whether I should try another pattern for my next one. Instead, I decided to stick with the waffle weave cloth to try to hone my knitting skills. I’ve made nine cloths since the season turned and I have become a knitting advocate. This is a craft that is portable and can be done anywhere, it produces something that is aesthetically pleasing and useful in the home, and it is soothing for the soul.
I’ve found that my knitting time is optimum for helping me to relax, mull over ideas, and pray for loved ones. I can sit down with a glass of water and knit a few rows, and say a few prayers, in between other projects around the house; I can settle in to my favourite spot by the window with a cup of tea and let the click-click of the needles take my mind where it wanders. The waffle weave pattern is simple enough that I can even chat with Gerry while I complete a few rows. We’ve been faced with a family crisis in recent months and it’s been especially good for me to have my knitting to help me calm my mind and provide opportunity to pray for the situation.
I’m not sure how many dish cloths I really need but I’ll keep making them for the time being. A few may make their way into Christmas stockings too. Beyond that, I expect I’ll eventually have to branch out and make something other that simple dish cloths but for the time being knitting these waffle weave cloths is serving multiple purposes in my life.

October 10, 2014
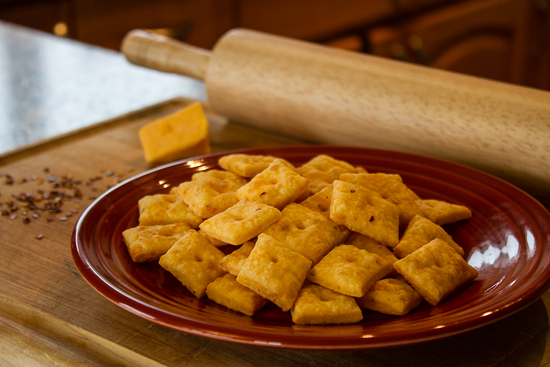
Cheese Crackers
Somewhere along the line I lost my rolling-pin. Well, I don’t imagine I really lost it, I suspect it was a deliberate choice on my part to part company around the same time I decided to pass the baton for baking and decorating Christmas sugar cookies to my daughter. I know I gave her my entire assortment of cookie cutters; the rolling-pin may have been part of the endowment too.
Having been sans rolling-pin for a few years my plan to learn how to make crackers fell by the wayside. Instead, I collected recipes on my Pinterest board and kept the idea in the back of my mind for a post-retirement project. This week I decided it was time to break into the cracker-making mode and so I popped over to my favourite online shopping site–Amazon.ca–and ordered a rolling-pin that arrived on my doorstep like magic two days later.

There were two factors in my choice of cracker to make this week. First, my obsession with cheesy rice cakes that I partake in almost nightly; and second, a fridge that is chock-full of cheese due to recent stellar sales on cheese at the grocery story. Cheese crackers it was!
I’ve had a recipe stored on my Pinterest board from In The Kitchen With Kath for a while. There are many similar recipes floating around cyberspace; this is the one I chose to follow. It couldn’t be easier.
Yield: I got two large cookie sheets of 1 inch crackers.
Ingredients
1 1/2 cups (about 6 ounces) of grated sharp cheddar cheese
4 Tbsp. unsalted butter cut into small pieces
3/4 cup flour
1/2 tsp. salt
1/2 tsp. crushed red pepper flakes
1 Tbsp. milk. (I actually ended up using closer to 3 Tbsp.)
Instructions
Preheat oven to 350 degrees.
Put the cheese, butter, salt, and red pepper flakes in the food processor and pulse a few times until the dough is crumbly.
Add the milk and process until the dough forms a ball. I added the 1 Tbsp. of milk the recipe called for and processed the dough. It was nowhere near close to forming a ball and so I just added a bit more a few times until it was the right consistence. Guessing the difference in what I needed to use has something to do with altitude. Who knows.
Roll the dough on a floured counter (with your brand new rolling-pin!) to about 1/8 inch thickness.
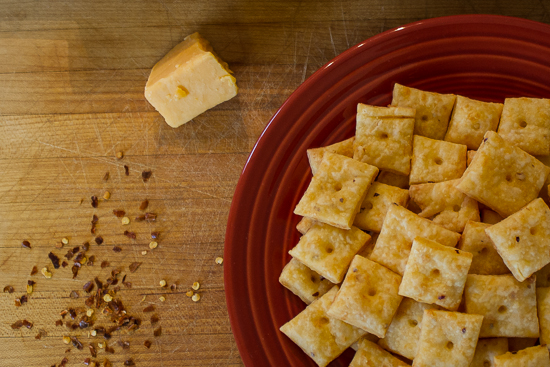
Cut the dough into 1 inch squares with a sharp knife.
Use the flat end of a skewer (I used a chopstick) to poke a hole in the middle of each cracker.
Put the crackers on a parchment-lined baking sheet allowing about 1/4 inch between each one. (Parchment paper is my new best friend. I can’t believe it’s taken me so many years to discover it!)
Bake for 12-15 minutes until the edges are just starting to brown.
And that’s it! Couldn’t be easier, right? The recipe says to store in a covered container to be eaten within a couple of days. There’s no way we’ll eat all of these crackers within a couple of days–well, we could, but we won’t–and so I’m going to freeze some of them.
These are absolutely delicious! Cheesy and with just a little bit of a bite. If the quality is still good after freezing I am going to make a lot of these to have on hand around the holidays. Much better than those store-bought preservative-laden crackers that we love to hate.

October 2, 2014
Signs and Seasons
The signs are everywhere. Change is in the soon-to-be-frosty air. Winter is coming.
We’ve started putting to rest the garden. The last of the tomatoes are either eaten, canned, or in the dehydrator; the spaghetti and butternut squash has all been harvested and the gourds are sitting on my deck; all that remains are a few carrots, beets, and some rainbow chard. I’ll leave the root veggies for a few more weeks unless we get a hard freeze. The chard will likely come out in the next few days.
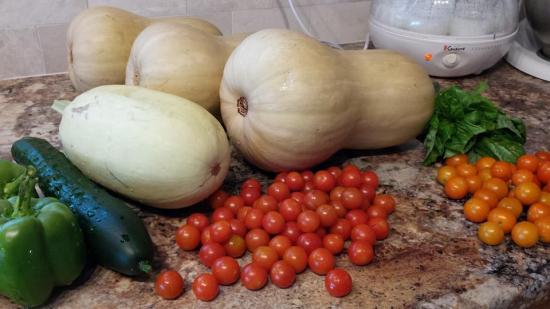
The pantry shelves are full of over two hundred jars of assorted preserves and the freezer is filled with salmon, halibut, and assorted fruits and vegetables. I get a little thrill–and a huge sense of accomplishment–every time I go into the storage room. More than once over the summer as I sat down at the end of the day to rest my aching back I thought ahead to the coming winter and felt a bit like the ant in the Aesop fable about the Ant and the Grasshopper.

Gerry donned his vest when he went out early this morning for a men’s meeting and I’m sitting here wearing a long-sleeved shirt because there is a bit of a chill in the house. We just enjoyed a lunch of smooth and freshly made butternut squash soup, I’m burning a pumpkin scented candle, and considering if I should start packing away my Capri pants. There is a low hum coming from outside as the landscapers are blowing out the sprinkler lines. Maya has begun sporting her dog-jamas as the nights get cooler. Yesterday Gerry had the snow tires put on the car.

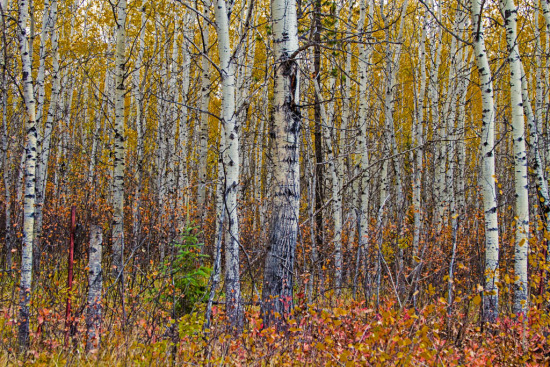
As much as I enjoyed the summer–Oh the glorious heat of a Kamloops summer!–I’m embracing autumn. I’m anticipating Gerry and I taking day trips to capture images of the fall foliage with our cameras. We’re looking forward to going to see the spawning of the salmon in this, a dominant year of the run. I’m already appreciating making nourishing homemade soups and stews and spending cozy afternoons with my knitting projects.
I’m even looking forward to Old Man Winter showing up eventually–though I do hope he chooses to make a late appearance this year. This will be the first Canadian winter for us since we moved to Washington State in 2007 where we rarely had snow and I kept flowers in the yard all year round. There’s something comforting about knowing that this year when the arctic winds blow, as they’re bound to, we’ll be cozy at home watching the slow fall with a larder filled with food and no need to venture outside if we don’t want to.
I’m not Pollyanna-ish to believe that I won’t get sick of winter long before he loosens his tenacious grip though. I know I’ll join the multitudes bemoaning the cold weather and longing for the first signs of spring early in the new year. But for now, I’m remembering the summer fondly, appreciating autumn, anticipating winter, and remembering that spring will come again.
“If Winter comes, can Spring be far behind?” ~Percy Bysshe Shelley

September 29, 2014
Canning – Black Pepper-Rosemary Apples
One of my goals with canning this year is to create a pantry filled with things I can use to pull together a meal over the winter. I found this recipe in the Better Home and Gardens Canning magazine and it seemed perfect to use with a pork tenderloin or pork chops. In fact, I had a bit leftover after canning and used it with pork chops that night. Gerry proclaimed it to be a “keeper” so I know we’ll enjoy this again and again over the coming months.
Yield: I got eight pints from this recipe.
Ingredients
1 lemon (I used organic lemon juice from a bottle.)
7 pounds of apples (The recipe calls for Fuji or Braeburn apples. I used Macintosh ones.)
4 cups water
1 1/4 cups sugar
1 tsp. snipped fresh rosemary (I used rosemary from my garden.)
1 tsp. snipped fresh thyme (I only had dried so I used a very scant teaspoon.)
1 tsp. cracked black pepper
1/2 tsp. salt
Red onion cut into thin wedges–about 1 cup
Instructions
Fill a large bowl half full with cold water and the juice of 1 lemon. (I used a couple of tablespoons of bottled organic juice.)
Peel, core, and cut apples into 3/4 inch wedges. Place wedges in lemon-water mixture as you slice them to prevent browning.
Combine water, sugar, rosemary, thyme, pepper, and salt in a large pot. Bring to boil, stirring to dissolve sugar.
Drain apples and add them, and the onion, to the sugar mixture.
Return to boiling, reduce heat, simmer uncovered for 5 minutes.
Pack hot apples and onion into hot pint jars leaving 1/2 inch head space.
Ladle hot syrup over apples and onion, maintaining the 1/2 inch head space.
Wipe rims to ensure they are clean and apply lids and rings. Process in water bath canner for 20 minutes
For my altitude here in Kamloops I need to increase the processing time by 5 minutes. You need to check the altitude for your location and adjust accordingly.

September 24, 2014
Canning, Thirties Style
a4I mentioned a while ago that I was going through some old recipes that came from my grandma’s house. I came across a scrap of paper with faded pencil script on it that I found interesting.

I found a few similar pieces of paper addressed to one of Grandma’s neighbours and hand-delivered, I imagine, by my mom or her sister. I expect that they stood in the neighbour lady’s kitchen, perhaps munching on a gingersnap, while waiting for the response to be written out so they could deliver it back to my grandmother. This was the most efficient way of communicating in a tiny hamlet on the dusty prairie where there were no telephones.
It seems so far away from the instant communication we are used to these days. Just the other day I marveled at how I appreciated being able to take a few minutes to check in with friends and family via Facebook while I stood at the stove stirring a pasta sauce for the evening meal. I love the convenience of text messaging and Facebook status updates. I appreciate the online groups I belong to where I can find recipes and ideas for my latest canning endeavour.
Not so with my grandmother in the 1930s. Here is the question she posed to her neighbour. (I love the salutation–it’s so formal, so respectful, so polite. Please disregard the errors in grammar and punctuation.)
Mrs. Armstrong,
How do you do those berries up in cold water. Would you please write it down.
Here is where I imagine my mom–bare foot, hair disheveled from having been blown about in the hot prairie wind, her slender frame attired in a simple cotton dress–standing in Mrs. Armstrong’s kitchen impatiently waiting for the older woman to jot down the response that follows.
I do mine with hot water, Belle. I sterilize the sealers then put the berries in and pour hot water on them. Put the sealers in the oven till the fruit starts to cook then seal them tight and let them cool. I put the lids rubbers and all on when I put them in the oven but not seal tight. I tighten them and then turn them back about a half turn. Don’t fill the sealers too full of water–about an inch or so from the top. Put the sealers in a large bread pan and put some water in it to set the sealers in. I never break any but don’t have a direct draft on them when you first take them out of the oven
Donalda Armstrong
I can tell you for certain that, based on what I’ve been reading in a canning group that I am a member of, that there are people today who are still using a method similar to the one described by Mrs. Armstrong to preserve food.
I’m all about living simply and I have a great appreciation for many of the practices from years gone by. I believe that, in some cases, we’ve allowed our lives to deviate too far from the core values, work ethic, and attitudes of our grandparents and those who came before them. I choose to spend my time and energy on things like gardening, preserving the season’s bounty, and cooking from scratch. I’m a rebel in our neighbourhood because I hang my clothes out to dry (I don’t have a clothesline yet but I’ve got a super clothes horse that fits my purpose for the time being.) For the majority of things I don’t use commercial cleaners, I use water, vinegar, and baking soda for most things; I’m experimenting with making laundry and other soap.
Yet common sense tells me that this isn’t a safe way of preserving food these days so I am happy to use my water bath canner for acidic foods like jams and pickles, and my pressure canner for low-acid vegetables and soups.
I’m also not prepared to give up the instant communication I have with text messaging and Facebook. I have no kids at home I could get to deliver handwritten notes to the neighbours anyway.
This is one of the many blessings of my retired life–the opportunity to slow down, live simply, get back to the basics, and yet still enjoy those conveniences of the twenty-first century that I choose to partake in.
It’s a good life.

September 23, 2014
Canning – Apple Butter
When I asked Gerry to pick up some apples so I could make sauce I didn’t expect him to bring home fifty pounds of apples! I’m glad he did though, as it afforded me an opportunity to try a couple of new recipes like this one for apple butter.
Apple butter is new to me. I had occasion to try pumpkin butter spread on toast last year and really enjoyed it so I thought that apple butter would be tasty too. For those, like me, who are unfamiliar with fruit butters it may surprise you to learn that there is no actual butter in it. I expect that the term butter comes from the smooth texture of the product that is ideal for spreading on bread, toast, or crackers.
I found many recipes for Apple Butter but this one was, by far, the easiest. I also like this one because it has less sugar than many of the other ones. I found it on the Simple Canning site.
Yield: I got eight random-sized jars (smaller than the 12 ounce jelly jars) out of this batch.
Ingredients
Apples – peeled and cored, enough to fill your crock pot (I used Macintosh apples)
1-2 cups of sugar (I used 1 cup)
1 tsp. cinnamon
1/4 tsp ground cloves
1/4 tsp salt
Instructions
Peel, core, and slice apples. Put them into your crock pot filling it up to the brim.
Mix together sugar, cinnamon, cloves, and salt. Pour over top of the apples.
Put cover on crock pot leaving it very slightly ajar to allow moisture to escape so the apple butter to thicken.
Cook on high for an hour.
Turn down to low and cook for about 10 hours stirring occasionally. You may want to leave the lid off during the last hour or two depending on how thick it looks. Eventually, you will be able to use a whisk to further break up the apples.
The recipe suggests you start this at night and cook it overnight. I am not sure how this would work since I did need to stir the apple mixture periodically. My recommendation is to start it very early in the morning and let it cook all day.
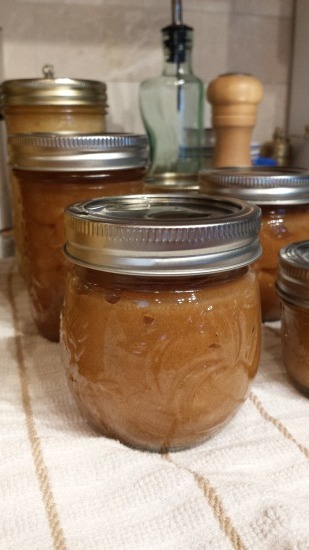
When the apple butter is cooked down and is a beautiful dark colour use an immersion blender to break up any remaining chunks of apple to create a smooth butter.
Fill jars (I used the smallest jars I had–smaller than half pints.) leaving 1/4 inch head space.
Wipe rims to ensure they are clean and apply lids and rings. Process in water bath canner for 10 minutes.
For my altitude here in Kamloops I need to increase the processing time by 5 minutes. You need to check the altitude for your location and adjust accordingly.

September 21, 2014
Flower Cheese
Saturday
About three years ago I read a post about a beautiful flower cheese on author, illustrator, gardener, and all-around inspirational woman, Sharon Lovejoy’s blog. I filed that post away in the recesses of my mind with a plan to make a flower cheese of my own one day.
At the time I was a novice wanna-be gardener but the following spring I planted nasturtium and borage flowers which were, at the time, unfamiliar to me. In the years since. I’ve had those plants in my garden every year, have enjoyed the edible flowers in spring salads, and appreciated the bees they attracted to the garden.
I began making my own yogurt when we retired, and this summer I made a small batch of cheese from the yogurt. We enjoyed it for lunch one day with crackers and some of my Sungold tomato jam. It was delicious!
With this yogurt cheese making ability under my belt, and with an abundance of edible flowers in my garden, when I learned there would be a gathering at the community garden tomorrow it seemed like a perfect time to make and serve the beautiful flower cheese.
On our way home from the farmer’s market we stopped at my garden plot where I picked a selection of borage and nasturtium blossoms. I washed them, separated the petals, and set them on paper towel to dry.

I had just made a fresh batch of yogurt (I do this two or three times every week) and so had plenty on hand to make into cheese. I took four jars, dumped them into the middle of a large piece of cheesecloth. Then, I gently stirred in most of the flower petals, snipping the larger nasturtium petals into smaller bits. I saved some of the petals to decorate the finished cheese with. These, I left on the damp paper towel and wrapped in a plastic bag which I put in the refrigerator.
Next, I rigged up a way to suspend the cheesecloth bundle over a bowl until the next day. That’s really all there is to making yogurt cheese–suspending the yogurt so the whey can drip out leaving you with a creamy and delicious cheese. Depending on the consistency of the yogurt you start with this can take anywhere from a day to a couple of days.

Sunday
The whey (about two cups) had all drained out of my little bag of cheese by morning but I left it hanging in the refrigerator until this afternoon when I was ready to assemble my dish. Then, I poured the whey into a mason jar and put it back in the refrigerator. I’ll use it for some other purpose within a few weeks.
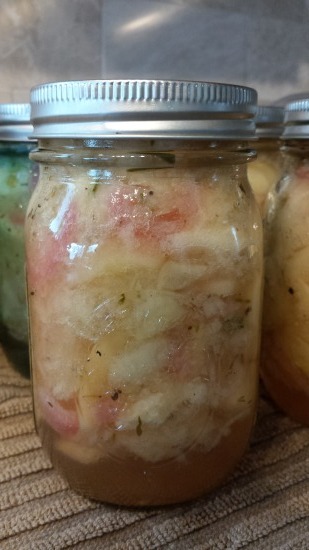
Here’s what the actual yogurt cheese, with flowers mixed in, looked like. I make my yogurt with local whole milk; the yogurt cheese has the consistency and flavour of a very rich cream cheese.

I want to serve the cheese with bread crisps so I prepared them by slicing a baguette into thin slices, tossing with olive oil, seasoning with sea salt, and baking at 350 degrees for nine minutes.

Finally I assembled my dish by placing the bowl of flower cheese in the centre of a larger bow, surrounding it with the bread crisps, and garnishing with more fresh flower petals on top. I had intended to put some nasturtium blossoms around the outside of the dish as well but I didn’t pick enough yesterday to do that. Oh well…I think it looks pretty as it is anyway, don’t you?

You can also flavour this cheese with an assortment of herbs and spices instead of flowers too. I’ll probably experiment with that over the winter.
Now, we’re off to enjoy the sunshine and warm temperatures with our fellow gardeners. Happy Sunday!

September 3, 2014
Canning – Tomato Soup
I didn’t plan on canning tomato soup but when my sister-in-love sent me this recipe I couldn’t resist picking up 25 pounds of tomatoes at the farmer’s market on Saturday and trying it. Sure glad I did because it’s delicious! It’s the freshest-tasting tomato soup I’ve ever had and couldn’t be easier to make.
Yield: 25 pounds of tomatoes gave me 21 pints of soup. Note that the recipe is for 4 pounds of tomatoes. I tripled the recipe and made two batches.
Ingredients
4 pounds fresh tomatoes coarsely chopped
6 cloves garlic coarsely chopped
10 basil leaves
Instructions
Combine ingredients and simmer for 10-15 minutes.
Remove from heat and add 1 Tbsp. honey or 2 Tbsp. brown sugar (I used honey) and salt and pepper to taste (I used freshly ground black pepper and about a teaspoon per 4 pounds of tomatoes. Personal preference.)
Let cool for a few minutes.
Blend in food processor or blender until smooth. I used the food processor for the first batch and it worked fine. On the second batch I used my immersion blender and that was quicker, easier, and blended better.
Ladle soup into hot jars, leaving 1 inch head space.
Adjust two-piece caps.
Process at 10 pounds pressure–pints 20 minutes. For my altitude here in Kamloops I need to process at 11 pounds pressure. You need to check the altitude for your location and adjust accordingly