
Kristin Halbrook's Blog, page 7
September 6, 2010
Ode to Zucchini
But back to zucchini. Here's what I want to know: Why do we grow the dang things in the first place? When it comes down to it, I probably buy zucchini once, maybe twice a year in the grocery store. The things are bland, sometimes bitter, and have a lackluster texture. And yet we grow them and burden ourselves with 15 pound monstrosities that we stare out for days until the monsters break us and we search cookbooks, online, friends for recipes to consume the things. Why do we do this to ourselves???
I have a theory. I think we grow zucchini because it's the dependable crop. Even when our tomatoes stay stubbornly green and our melons get all pissy and refuse to ripen and the corn is obnoxiously small, we know that zucchini plant won't let us down. It soldiers through good and bad weather, assuring us that, yes, we are gardeners of skill and merit! Those massive leaves, the prickly stems, the huge fruit that are 1 inch long on Monday and 15 inches long Tuesday are our confidence boosters. Peas are the same for me, actually. Every year they do so well and I have zillions of peas, but I just plop myself down in the garden and eat young peas straight from the pod. Zukes, on the other hand, need to be dealt with. So here's a handful of actually interesting and tasty ways to deal with the things, when you aren't able to get a team of baseball players together.
Korean-style Zucchini Pancakes: My zucchini eveningie began here, with these pancakes as a side dish for dinner. The recipe is here, along with pictures galore (since the pancake crispy waits for no camera - or at least not mine). I love the classic Korean green onion pancake and the seafood one too, so I figured zukes wouldn't go amiss. Turns out, they're great! With the dipping sauce (see the comments for sauce recipe) these might have been my favorite part of the meal.
Chocolate Zucchini Bread: Sounds strange, but apparently zuke brownies are the thing nowadays (who knew?). Plus, I'm an avid fan of Chocolate Chip Pumpkin bread in the Fall (and they're all in the squash family, right?) so I figured I'd give it a try. The bread's really good. Didn't notice the zucchini much and the loaves are nice and moist. It's a quick bread (tea loaf) so it comes together quickly. Here's the recipe:
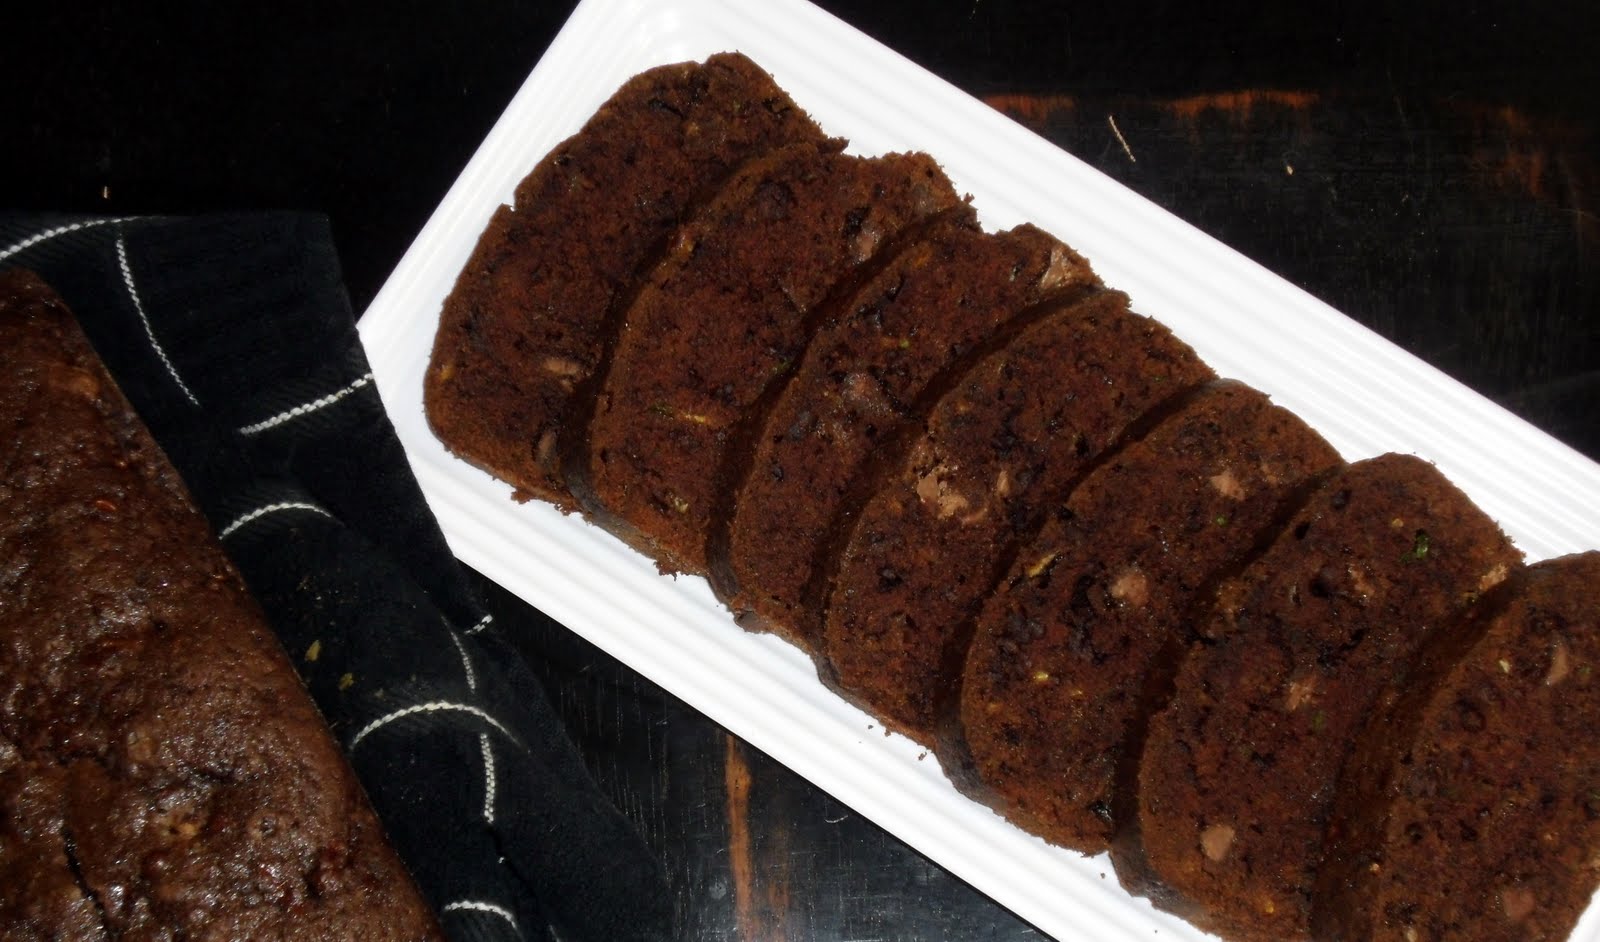 Chocolate Zucchini Bread
1 3/4 cups granulated sugar
3 large eggs
1 cup vegetable oil
2 cups shredded zucchini
1 Tablespoon vanilla extract
3 cups all-purpose flour (next time I'm using half white, half whole wheat)
1/2 cup cocoa powder
1 teaspoon salt
1 1/2 teaspoon baking soda
1/4 teaspoon baking powder
1 cup chocolate chips (I used milk to contrast with the cocoa - like 'em)
Preheat oven to 350 degrees. Grease and lightly flour two standard size loaf pans. In a large bowl, mix the sugar, eggs and oil until well-blended. Stir in the zukes and vanilla. Sift together the flour, cocoa, salt, baking soda and power. Add the dry ingredients to the egg mixture and mix until just combined. Stir in the chocolate chips. Divide the batter evenly between the loaf pans and bake for one hour, or until a tester inserted in the center comes out clean. There might be melted chocolate on the tester (from the chips) but you don't want thick, uncooked batter on the tester. Allow the loaves to cool in their pans for five minutes, then turn out onto cooling racks.
After I made the batter for the Choco-Zuke bread, I still had zucchini left over. The hunt for another recipe brought me to this savory bread: Zucchini Jalapeno Parmesan Bread. I like cheese and jalapeno in breads for the richness and kick they provide. This was a definite winner. Pieces of this would be great with chili (not that I'd ever give up my precious, precious cornbread) or a southwest style salad.
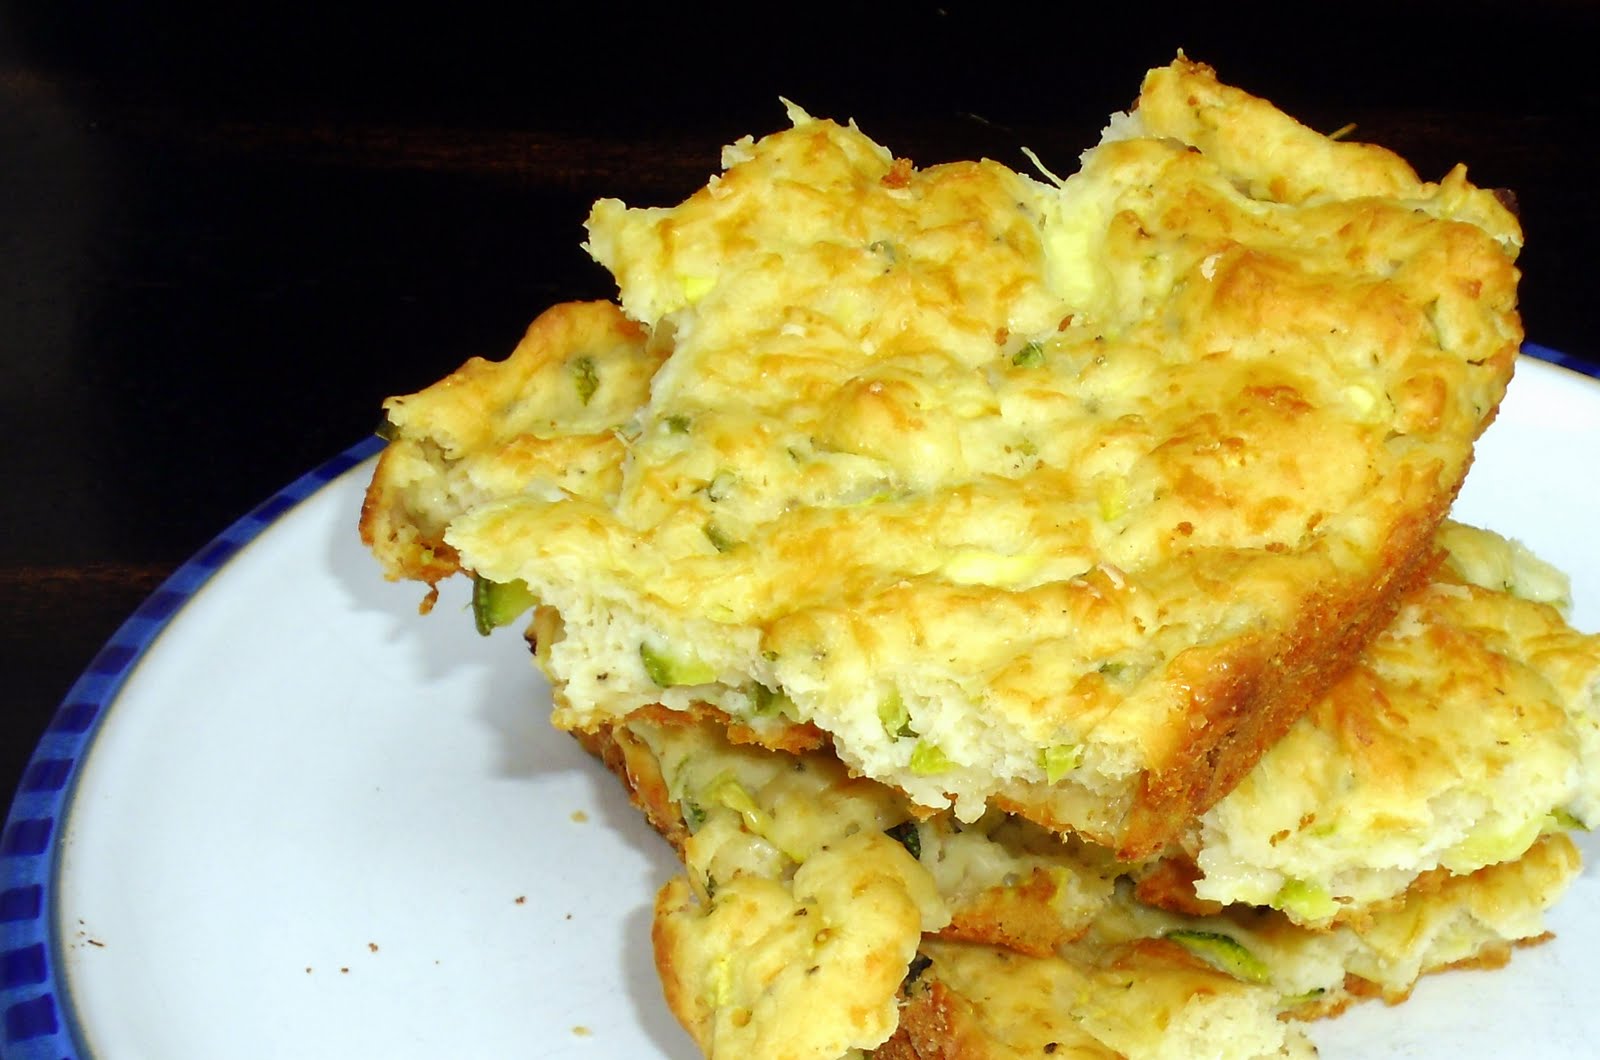 Zucchini Jalapeno Parmesan Bread
2 large egg whites
1 cup shredded zucchini
1/4 cup plain yogurt, nonfat or lowfat
1/2 - 1 jalapeno pepper, depending on your spiciness preference
3 Tablespoons grated parmesan cheese, divided
1 cup all-purpose flour
1 teaspoon baking powder
1/4 teaspoon salt
1/2 teaspoon freshly ground black pepper
Preheat oven to 350 degrees. Grease and flour and 9-inch square baking pan. In a medium-sized bowl, whisk the egg whites until foamy, one to two minutes. Add the zucchini, yogurt, pepper and 2 tablespoons cheese and mix until well-combined. Stir in the flour, baking powder, salt and pepper. The mixture will be fairly thick. Spread the mixture evenly in the pan. Top with the remaining tablespoon cheese and bake 40 minutes or until the top and edges are golden brown and lightly crusty. Remove bread to a cooling rack.
Was I out of zucchini yet? Of course not. But I managed to use the last bit in this, a recipe courtesy of Michelle, who has demanded (more than once) that I make this. It's for a zucchini spice cake made with olive oil. That might turn some folks off at first, but olive oil in sweet, Fall-spiced dishes isn't new to me, so I was happy to give it a whirl. After all, Michelle insisted it was the best zucchini-based anything she'd ever had. And it's pretty dang good. I made cupcakes instead of the whole cake for ease of freezing and portability. The cakes are delicious with the lemon glaze but also great with a simple sprinkling of confectioners' sugar.
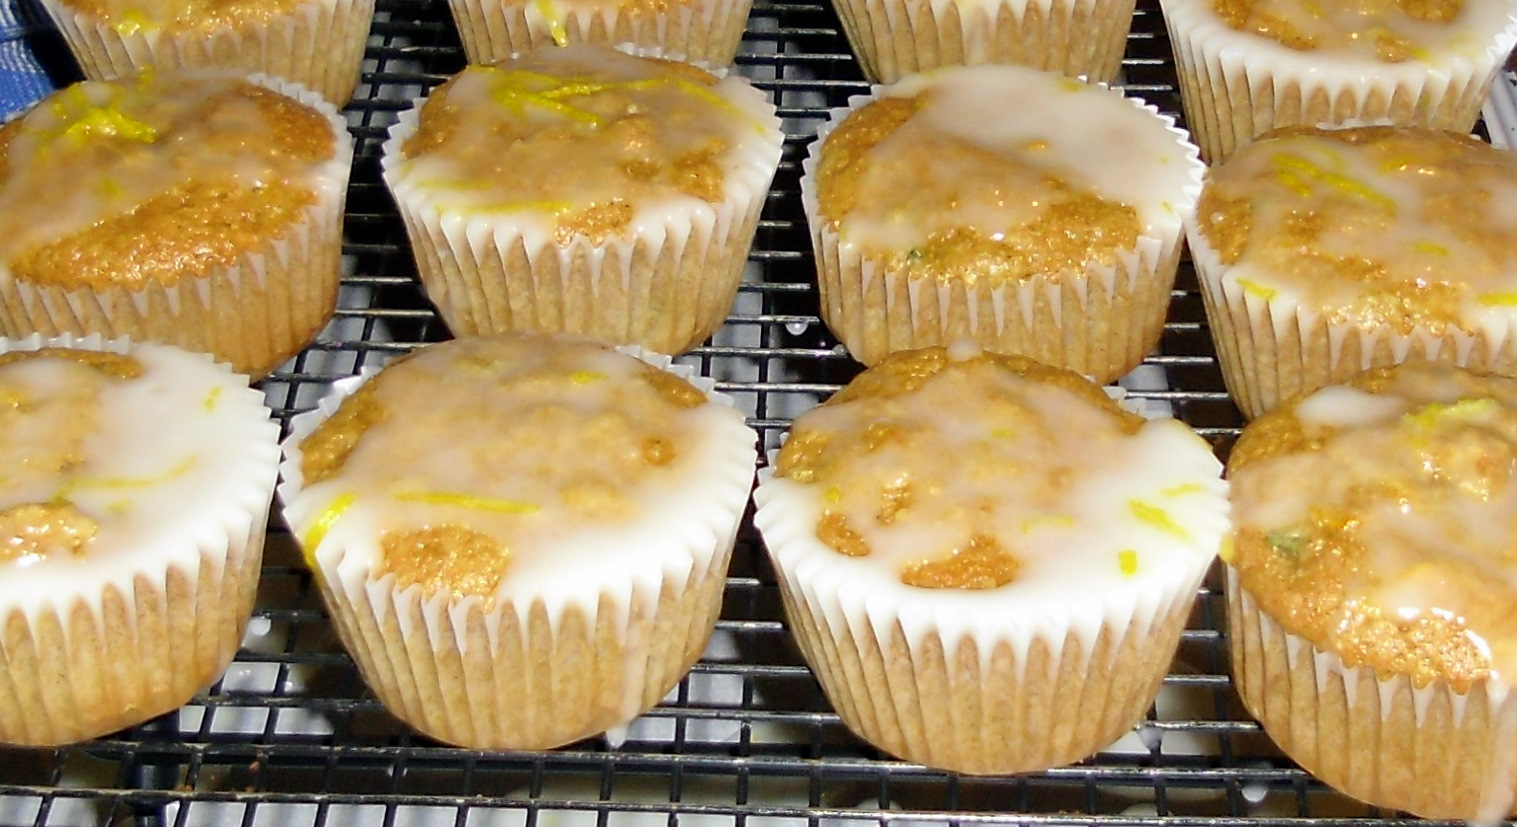 Zucchini Olive-Oil Cake with Lemon Crunch Glaze
adapted from "Dolce Italiano" by Gina DePalma
For the cake:
1 cup walnut pieces (I used blanced, slivered almonds because that's what I had on hand and they were perfect)
2 cups unbleached all-purpose flour
1 teaspoon baking powder
1/2 teaspoon baking soda
1 teaspoon salt
2 teaspoons cinnamon
1 teaspoon ground ginger
1/2 teaspoon ground nutmeg
3 large eggs
1 3/4 cups granulated sugar
1 cup extra-virgin olive oil
2 teaspoons vanilla extract
2 1/2 cups grated zucchini or other summer squash
For the glaze:
1/4 cup freshly squeezed lemon juice
1/2 teaspoon lemon zest
1/3 cup granulated sugar
1 cup confectioners' sugar
Preheat the oven to 350 degrees. Position a rack in the center of the oven. Grease and flour a 9-inch cake pan or grease and flour or line two cupcake pans (for 24 cupcakes). Place the nuts in a single layer on a baking sheet and toast them until golden brown, 12 to 14 minutes. Cool the nuts, then chop them in the food processor until they resemble fine crumbs and set aside. In an electric mixer fitted with the paddle attachment, beat the eggs, sugar, and olive oil together on medium speed until light and fluffy, about 3 minutes. Beat in the vanilla. Add the flour, baking powder, baking soda, salt, and spices on low speed until thoroughly combined, then raise the mixer to medium speed for 30 seconds. Stir in the nuts and zucchini, scraping down the sides of the bowl as you do so. Pour the batter into the cake pan or scoop into cupcake pan, filling the cups 3/4 full. Bake 45-50 minutes for the cake or 23-25 minutes for the cupcakes, until golden brown and a tester comes out clean. While the cake is baking, mix all the ingredients for the glaze in a medium bowl. Once the cake has cooled in the pan for ten minutes, remove to a cooling rack and brush the glaze over the top. It's easier to drizzle the glaze over the cupcakes. Allow cake to cool completely for the glaze to set.


May 15, 2010
Mini-Chocolate Chip Meringue Cookies
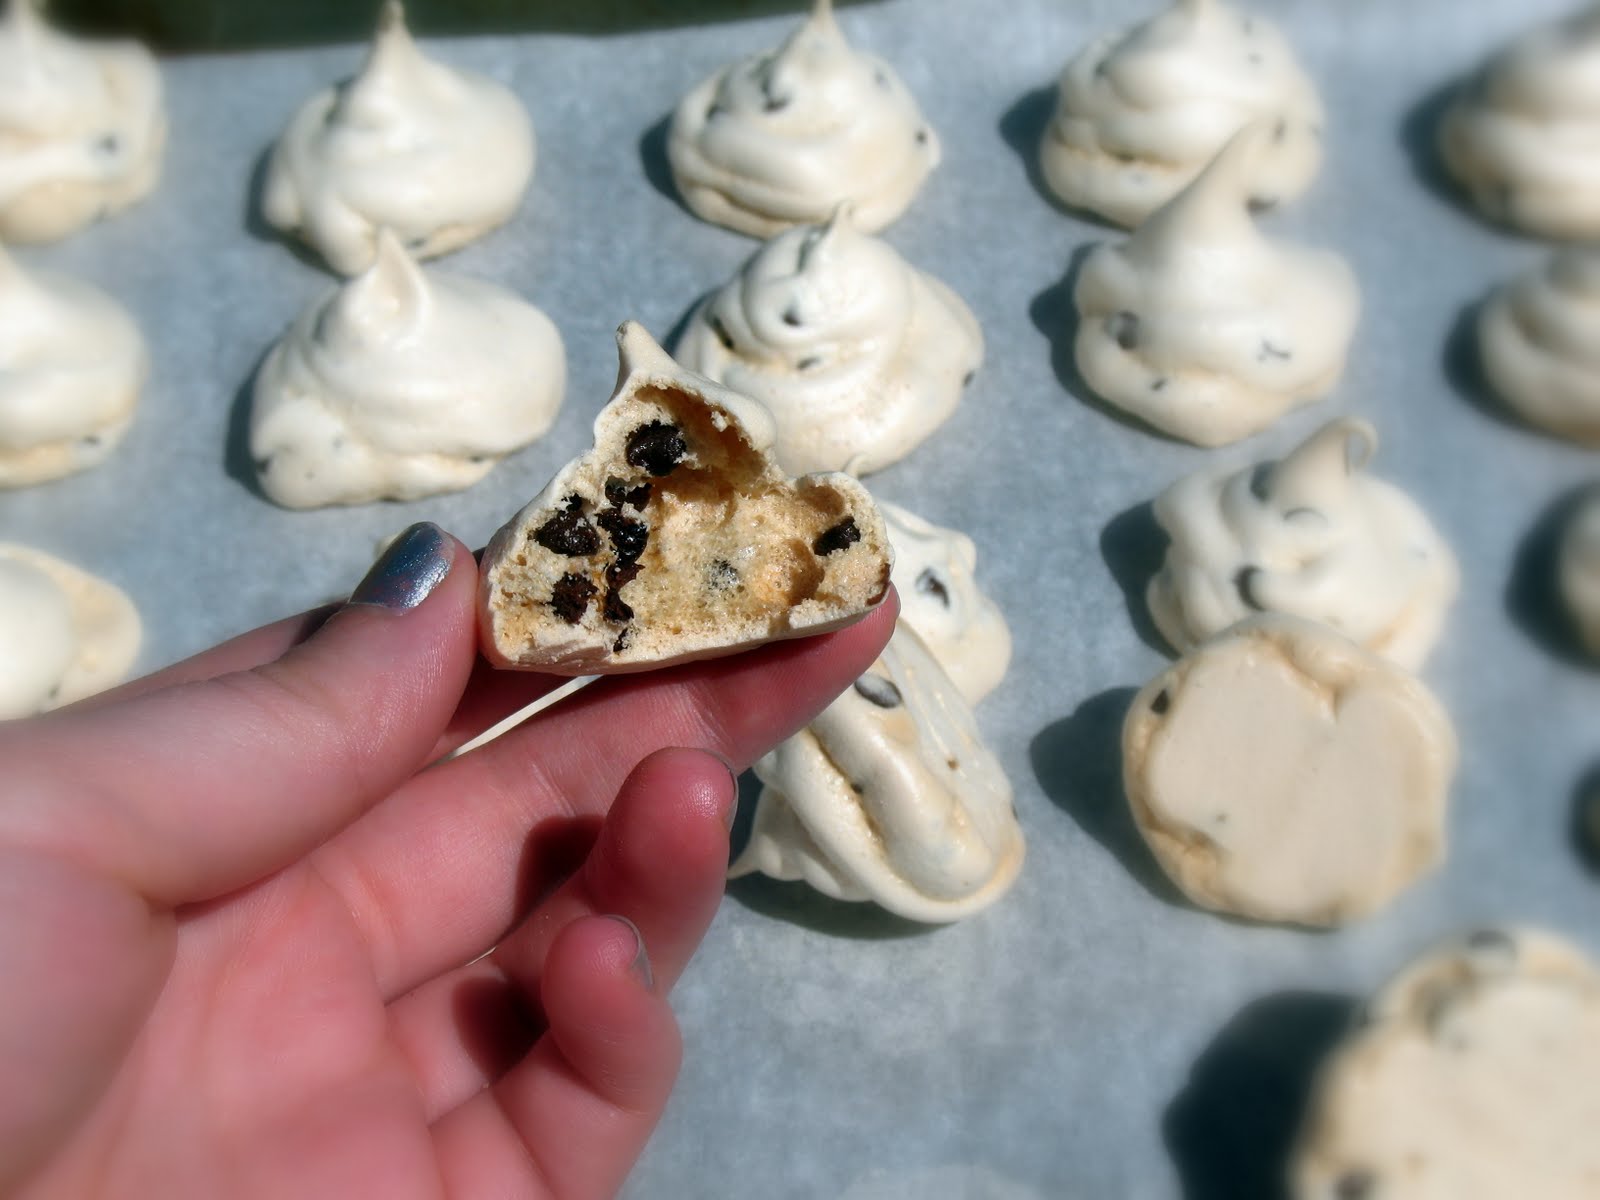 Although these are cookies, they aren't too much like the cookies most are used to. The ingredient list is very small (no butter!) and the finished product has a texture and flavor unlike any other cookie method. Meringues are crispy and airy, with just a teeny bit of give. They are sweet and simple in flavor. You will often find meringues dressed up with nuts, curds and chocolate, like these.
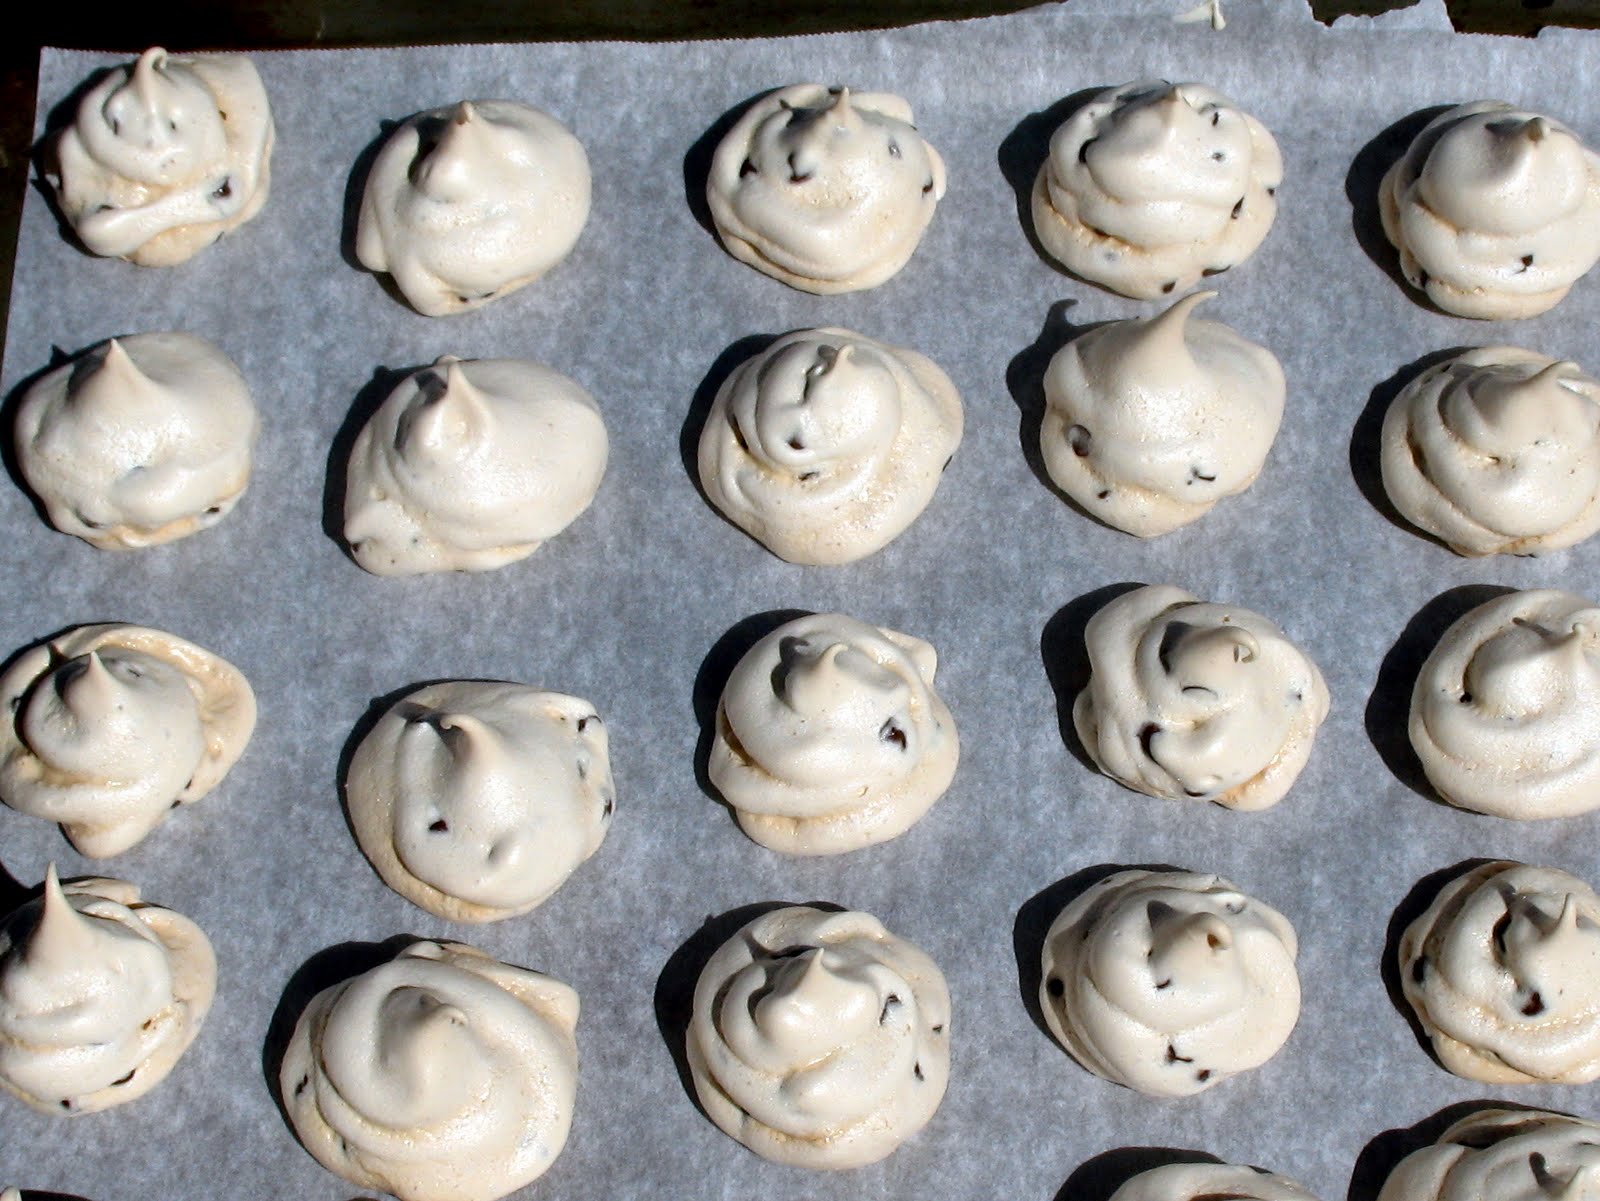 Yes, I know what they look like. :/
Incidentally, one good thing about such a simple cookie is that they are low-fat and so you don't have to feel too bad indulging.
Mini-Chocolate Chip Meringue Cookies
1/2 cup sugar, preferably superfine. If you don't have superfine or can't find it, try pulsing the sugar in a food processor for a few seconds.
3 egg whites, at room temp.
Pinch salt
Pinch cream of tartar
1/2 teaspoon vanilla
2/3 cup mini-chocolate chips
Preheat oven to 250 degrees. Line two cookie sheets with parchment paper.
Using the whisk attachment on a handheld or stand mixer, begin beating the egg whites on medium-low speed until foamy. This will start to unravel the proteins so air can be captured in the whites. Once foamy, add the salt and cream of tartar and raise the speed to medium high, beating until firm peaks form. Continue beating, slowly adding the sugar in a steady stream, taking a minute or two, then add the vanilla.
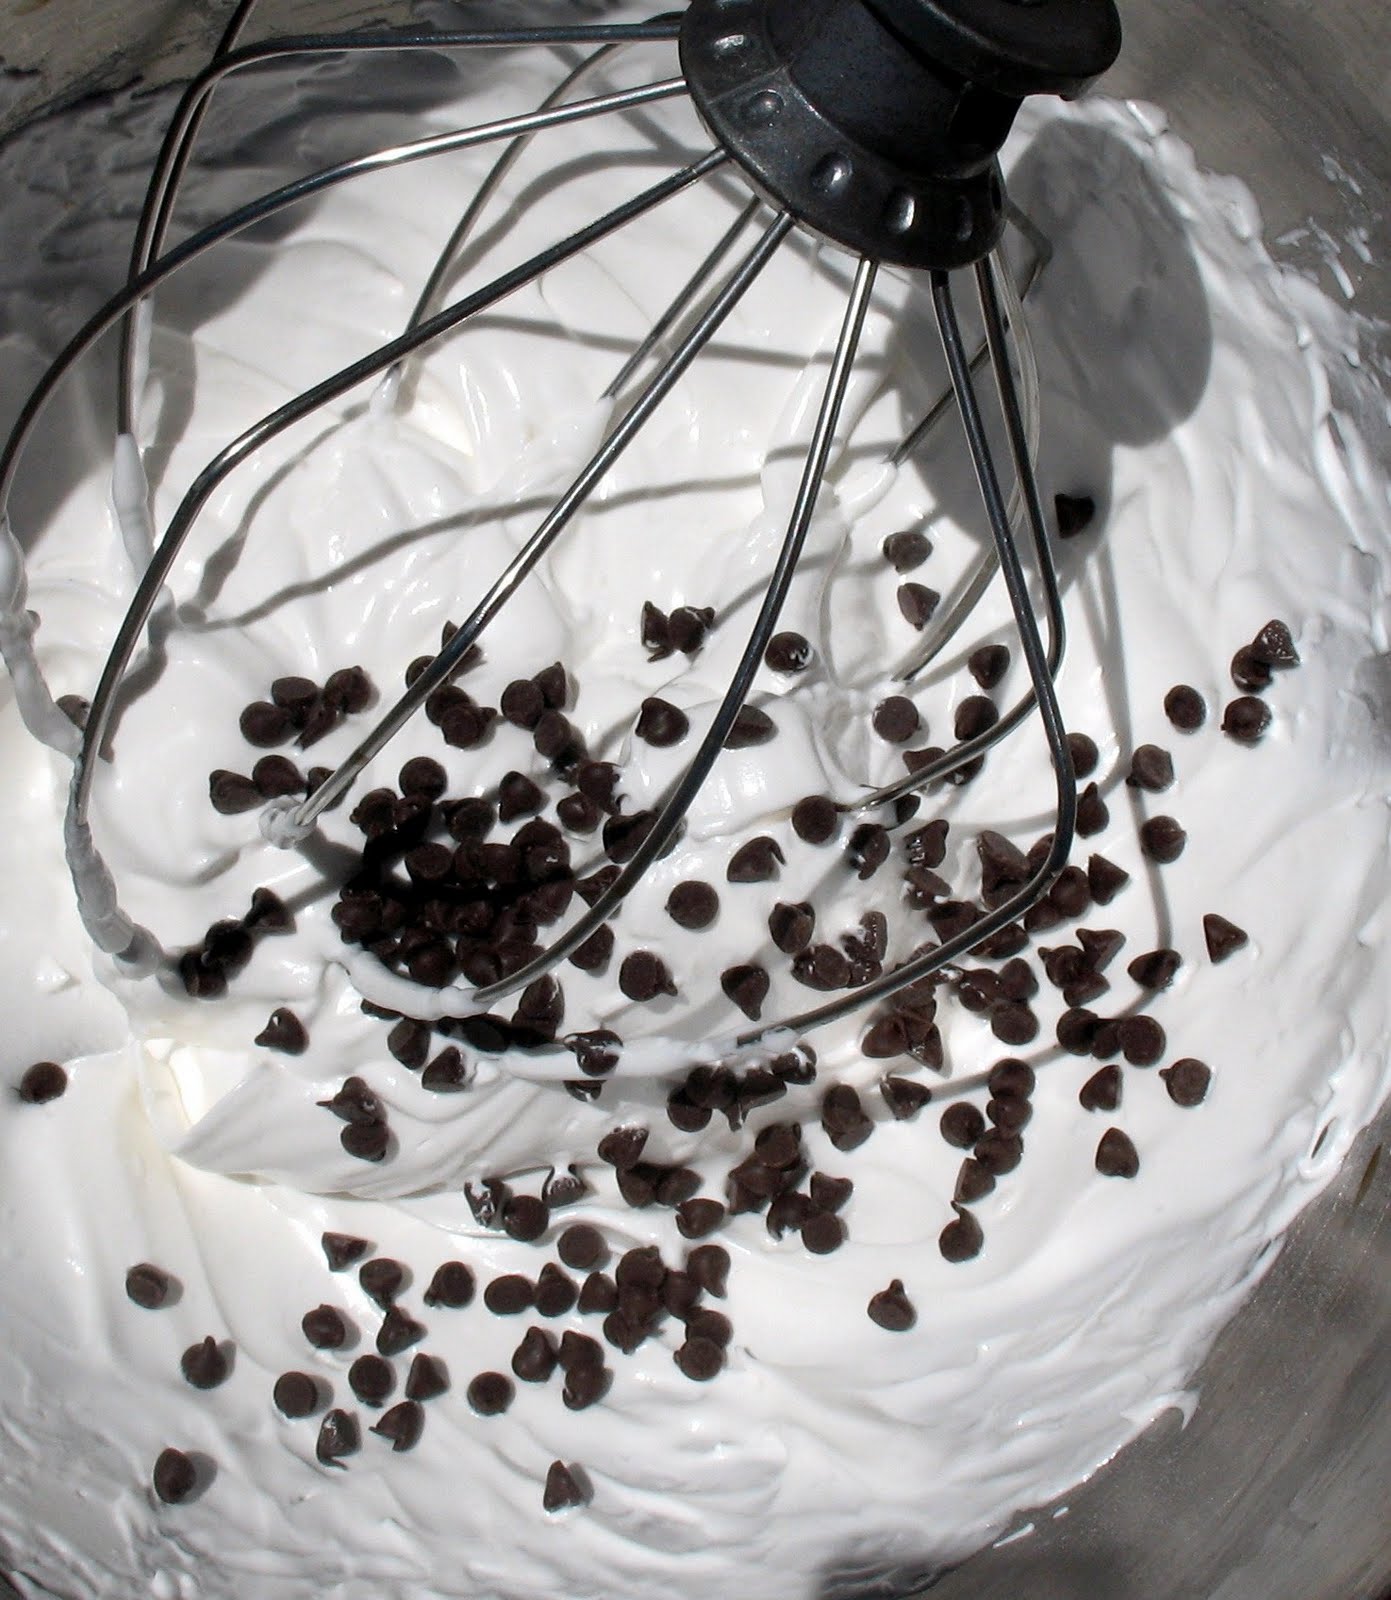 Remove the bowl from the mixer and fold in the chocolate chips. Using a glass to hold your bag, fill a pastry bag with the batter and pipe mounds of meringue onto your cookie sheets. I admit, I got lazy here and used a baggie without a tip. It happens.
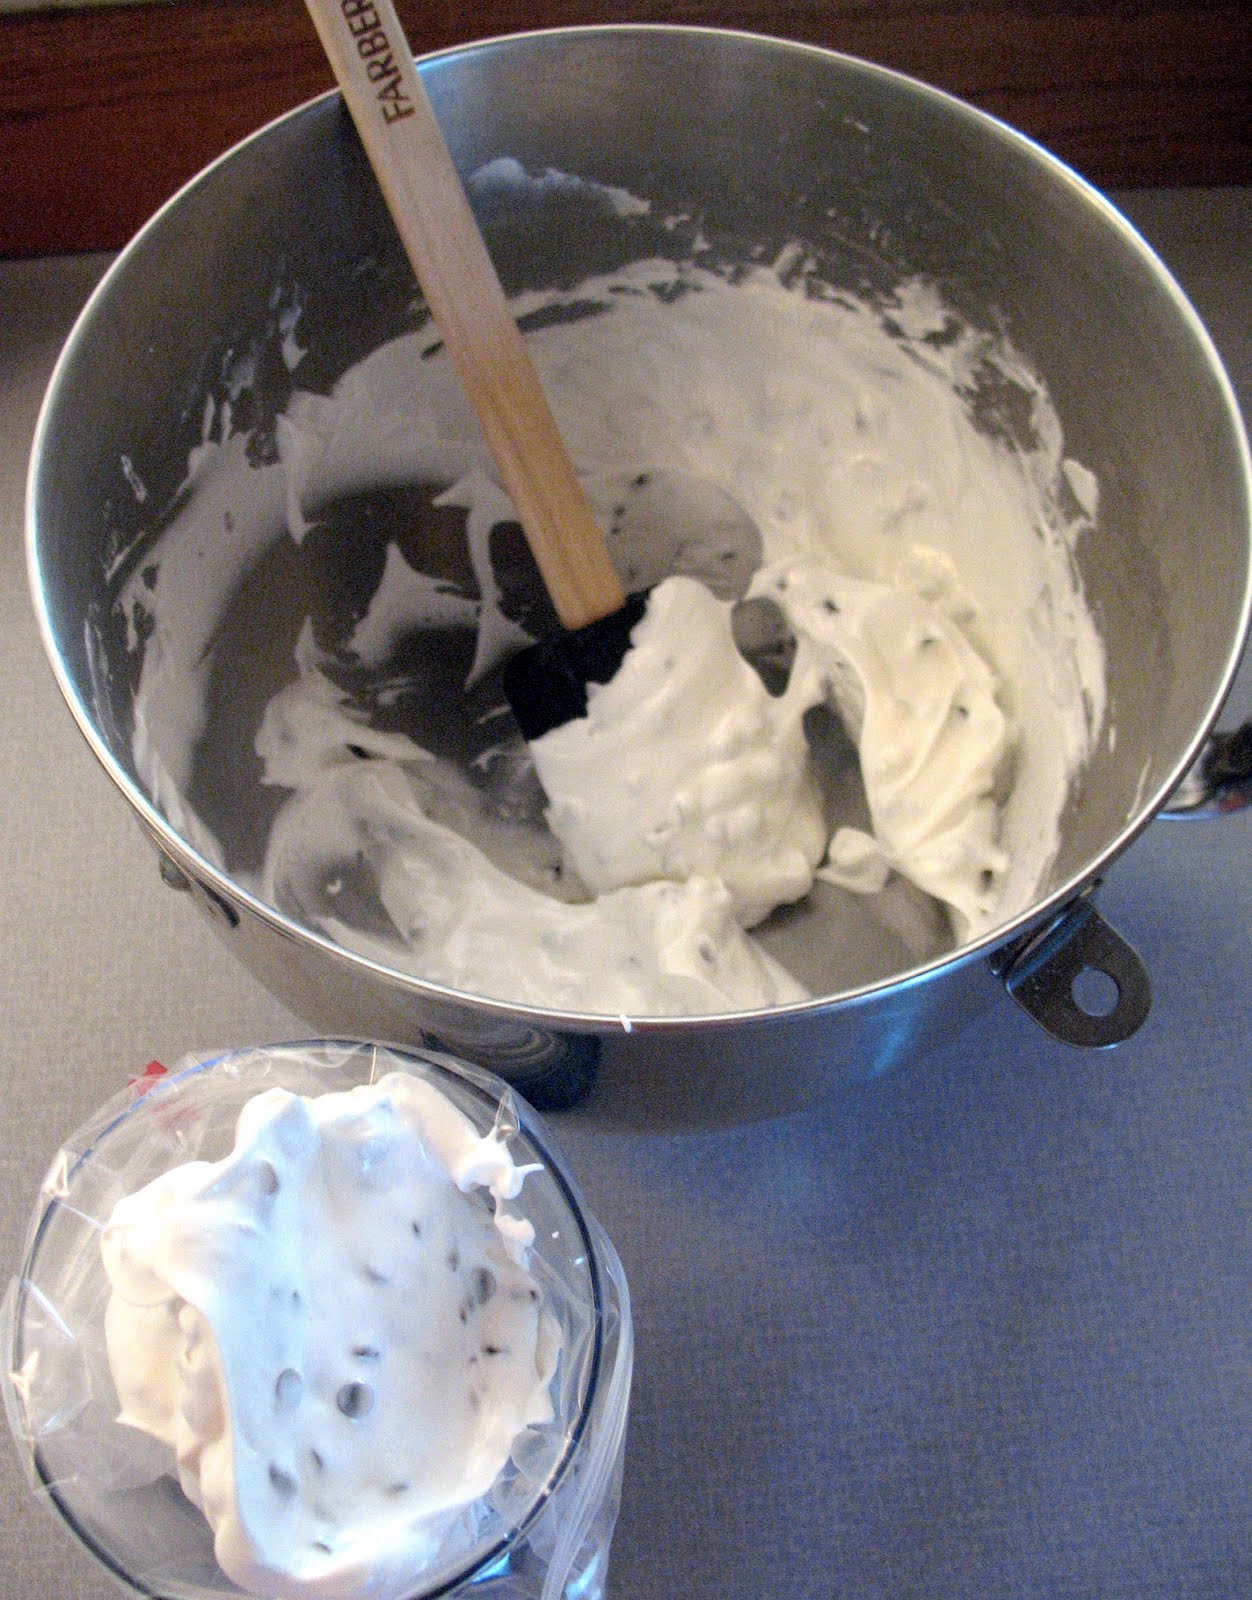 My meringues were approximately 1 inch in diameter, with a two inch peak. Alternatively, you can simply drop teaspoonfuls of batter onto your cookie sheets.
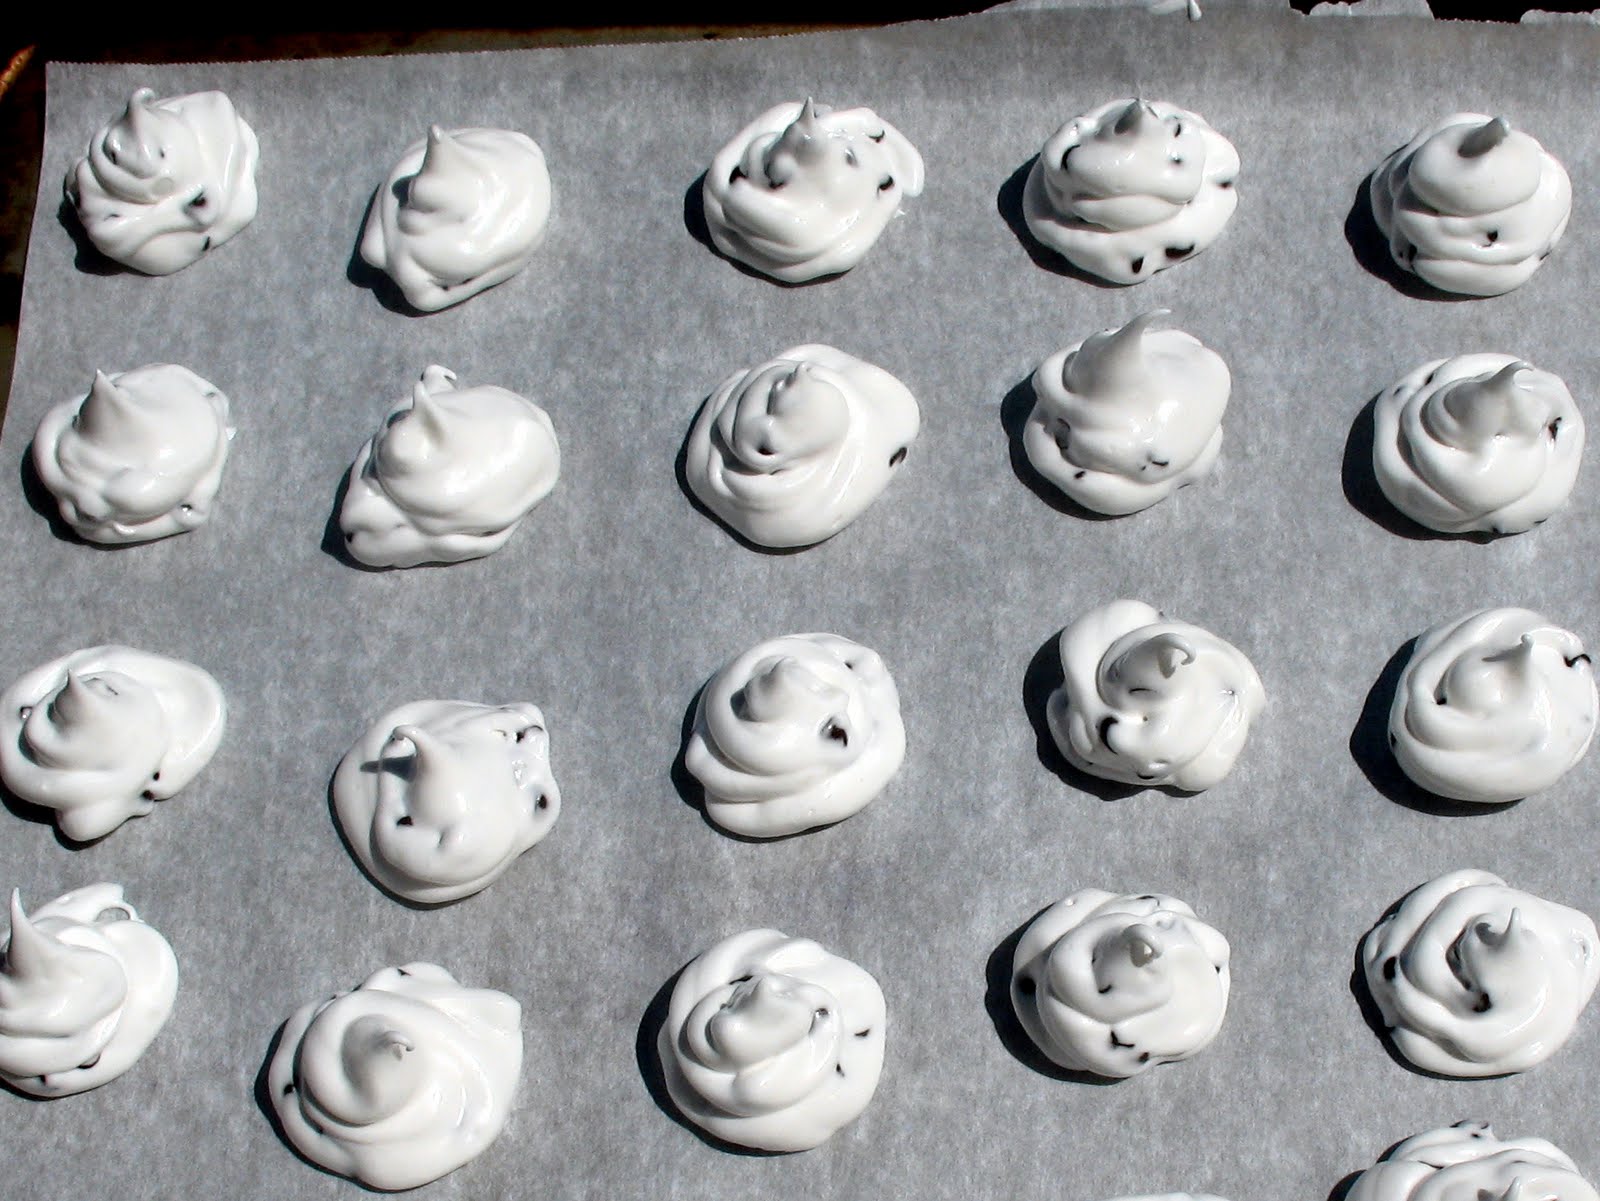 Bake the meringues for 50-60 minutes, or until they come cleanly off the parchment paper. Turn off the oven and let the meringues dry in the oven an additional fifteen minutes. Remove to a wire rack to cool.
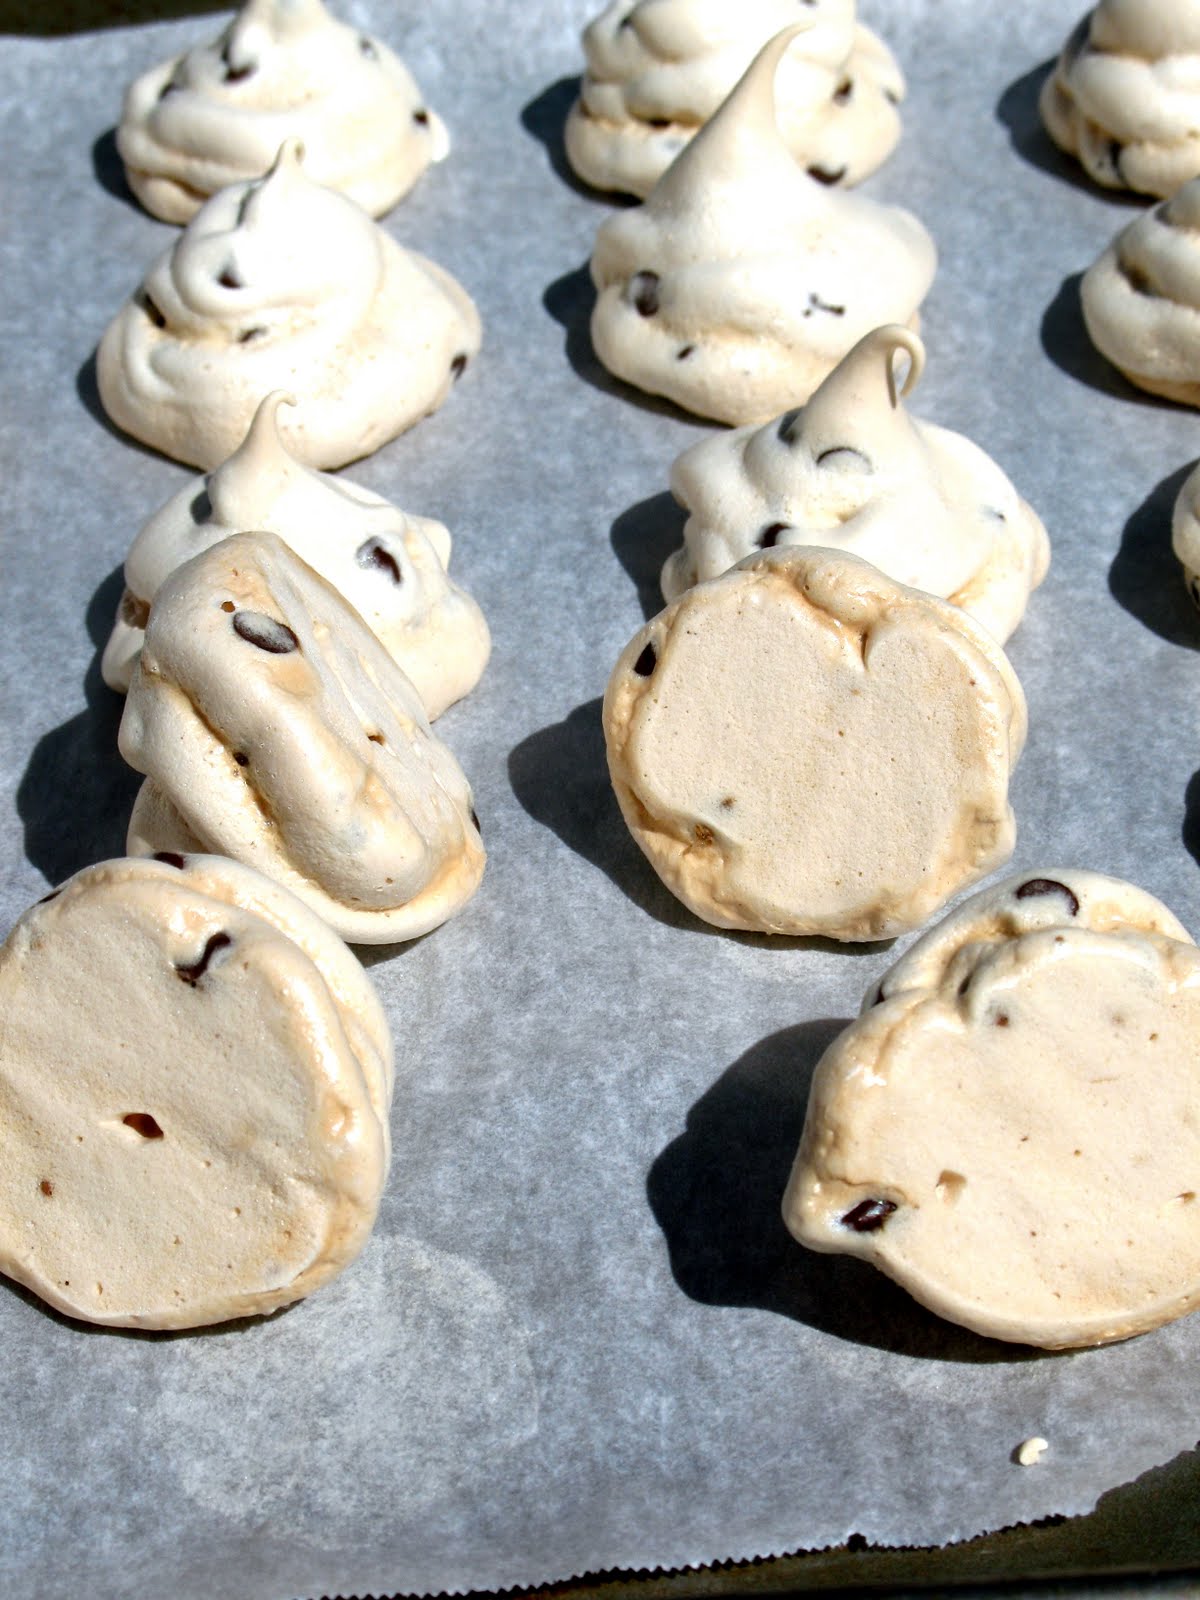 See how cleanly they come off? If they weren't done, they would stick.
Problem Solving:
1) Meringues are finicky around moisture, so don't make on wet or humid days. If you must, plan on airing them out after the first hour, at 175 degrees, for up to 30 minutes until dry. Even then, serve quickly, because the meringue will pull moisture from the air and become chewy.
2) Your egg whites must be at room temperature or they won't beat properly. This is contrary to what you might already know about cream, which must be whipped while cold. Aged egg whites whip better than fresh. How to age an egg white? Separate your eggs and leave the whites, in a covered container, on the counter overnight.
3)I like to whip my egg whites until soft peaks form, then finish them off with hand whisking. This lets me avoid the problem of over beaten egg whites (which aren't good for anything).
4) Play around with your own additions. Mini chips are great, but also try nuts or dried fruit. Or, try filling the cookies with curd, jam or cream after they are baked and cooled.
5) Store cookies in a tightly covered container to avoid moisture issues.
April 18, 2010
THE BEST Chocolate Chip Cookie Recipe Ever. No Joke.
Okay, so I know I'm not the first person to toss that proclamation out to the wind, but, really, it's the truth. I've come up with the best CCC recipe and I'll tell you what, how and why.
To begin, since I was a wee thing, I've been a fan of Chocolate Chip Cookies. I mean, what kid doesn't like a warm, gooey cookie, oozing melted chocolate, right from the oven?
(LALALALALALALA I CAN'T HEAR THE NAYSAYERS WITH BIZARRE CHITLENS WHO DON'T LIKE CCCs!)
I finally, finally decided to embark on that lauded and most humble quest: Determine which of the bazillion CCC recipes out there is THE BEST.
So I baked. And I ate.
Tough job.
And I made others eat.
And I didn't find THE ONE.
I found . . . two. But I'm getting ahead of myself. Let me just say, that after dozens of dozens, I narrowed the list down to four recipes. And these are fairly standard recipes. No vegan, no toasted barley flour, none of that gluten-free or low-fat nonsense (I mean, not for me. I know some folks need gluten-free). I even restrained from adding things like nuts (I am known to add chopped, toasted pecans to my CCCs) or, heaven forbid, raisins (gross. also, shame on you!).
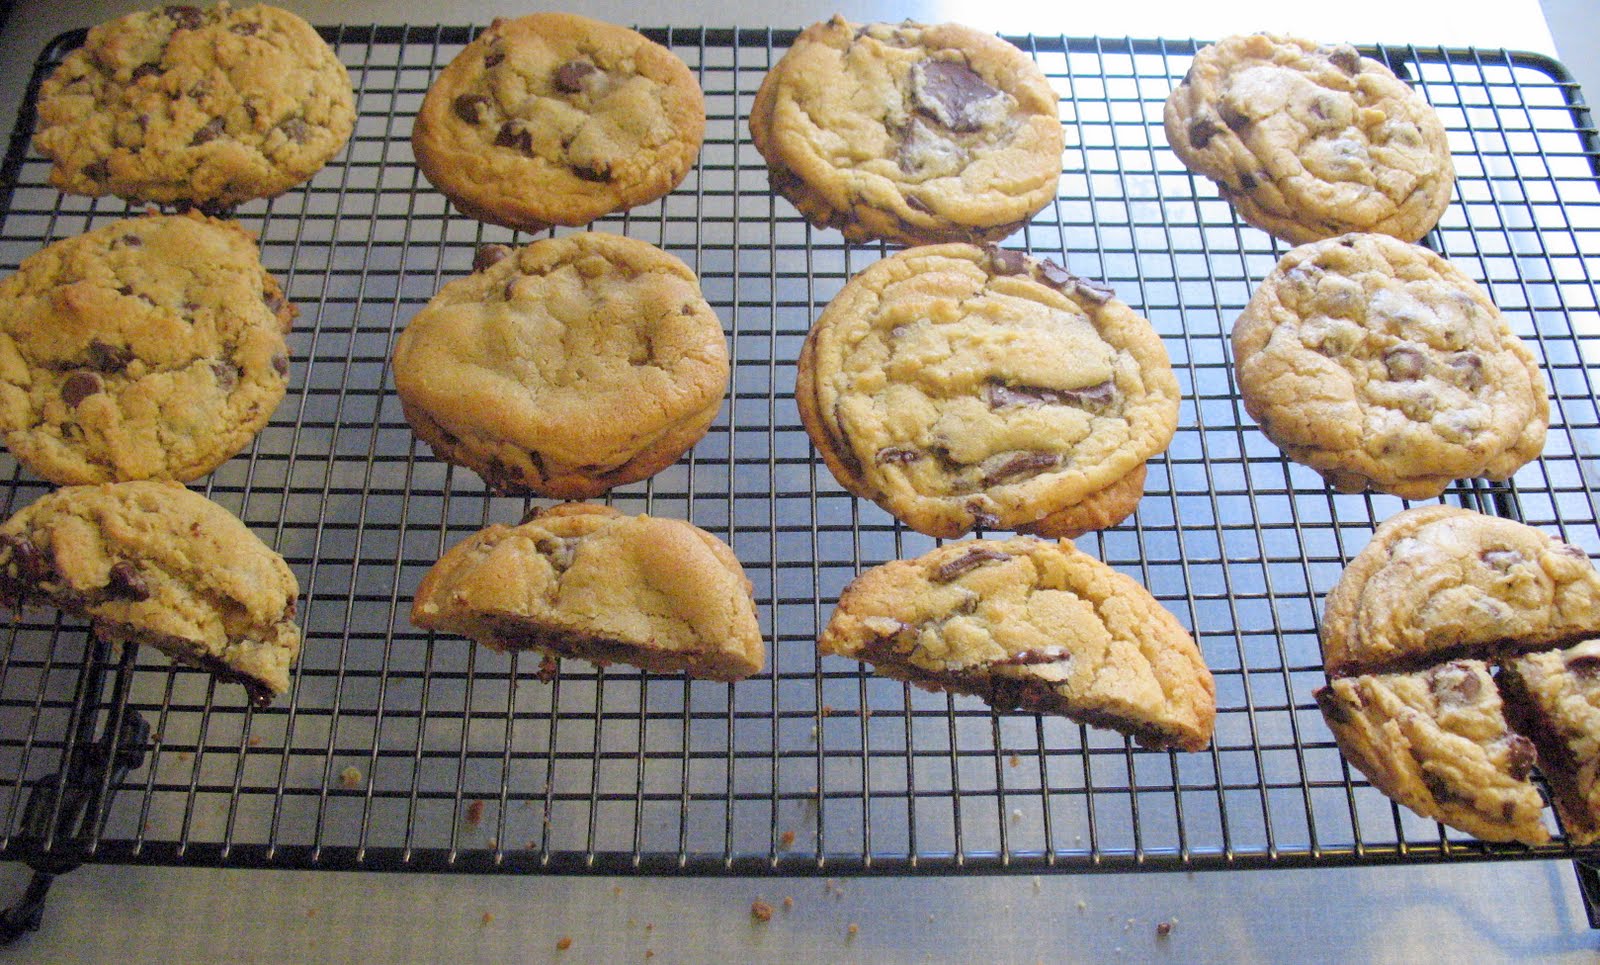
So, four recipes, each with something really wonderful going for them. Here they are, side-by-side. The first (l-r) is the Mrs. Field's recipe, passed along to me by my grandma. The link below goes to a recipe that looks pretty much the same. This is one of those that uses ground oats as part of the dry ingredients. Second is the Cook's Illustrated CCC recipe, using browned butter and no mixer. Third is the NYT/Jacques Torres recipe, with two types of flour (cake and bread) and a sprinkling of sea salt on top. Also, instead of traditional chips, this recipe calls for chocolate disks. More on how I dealt with that later. Finally, we have the Neiman Marcus recipe. Yeah, that one. The one that probably was responsible for launching Snopes.com.
I baked and I smelled the GAH OH SO YUM MOUTH-WATERING smells wafting through the air. Then I gathered some opinionated folks and we dug in. THIS WAS NOT AS EASY AS IT LOOKS! But it was delicious. Each cookie was fabulous, bringing something unique to the table. Here are some of my thoughts for each:
1. Mrs. Fields: I really liked the nutty flavor and rougher texture the oatmeal provided. The recipe I'd received calls for grating a bittersweet bar of chocolate into the dough (not Hershey's. Ew), which, while I didn't do this time, I have done before and think it does add some deeper flavor to the cookie.
2. Cook's Illustrated: I wasn't sure about melted butter in a cookie. I've done that before and ended up with flat, thin cookies that spread all over the baking sheet. But these surprised me. No, these KNOCKED MY SOCKS OFF! I really loved the flavor of the browned butter, the caramel/toffee notes lingering long after I took a bite. And they didn't spread more than they should have, as you can see.
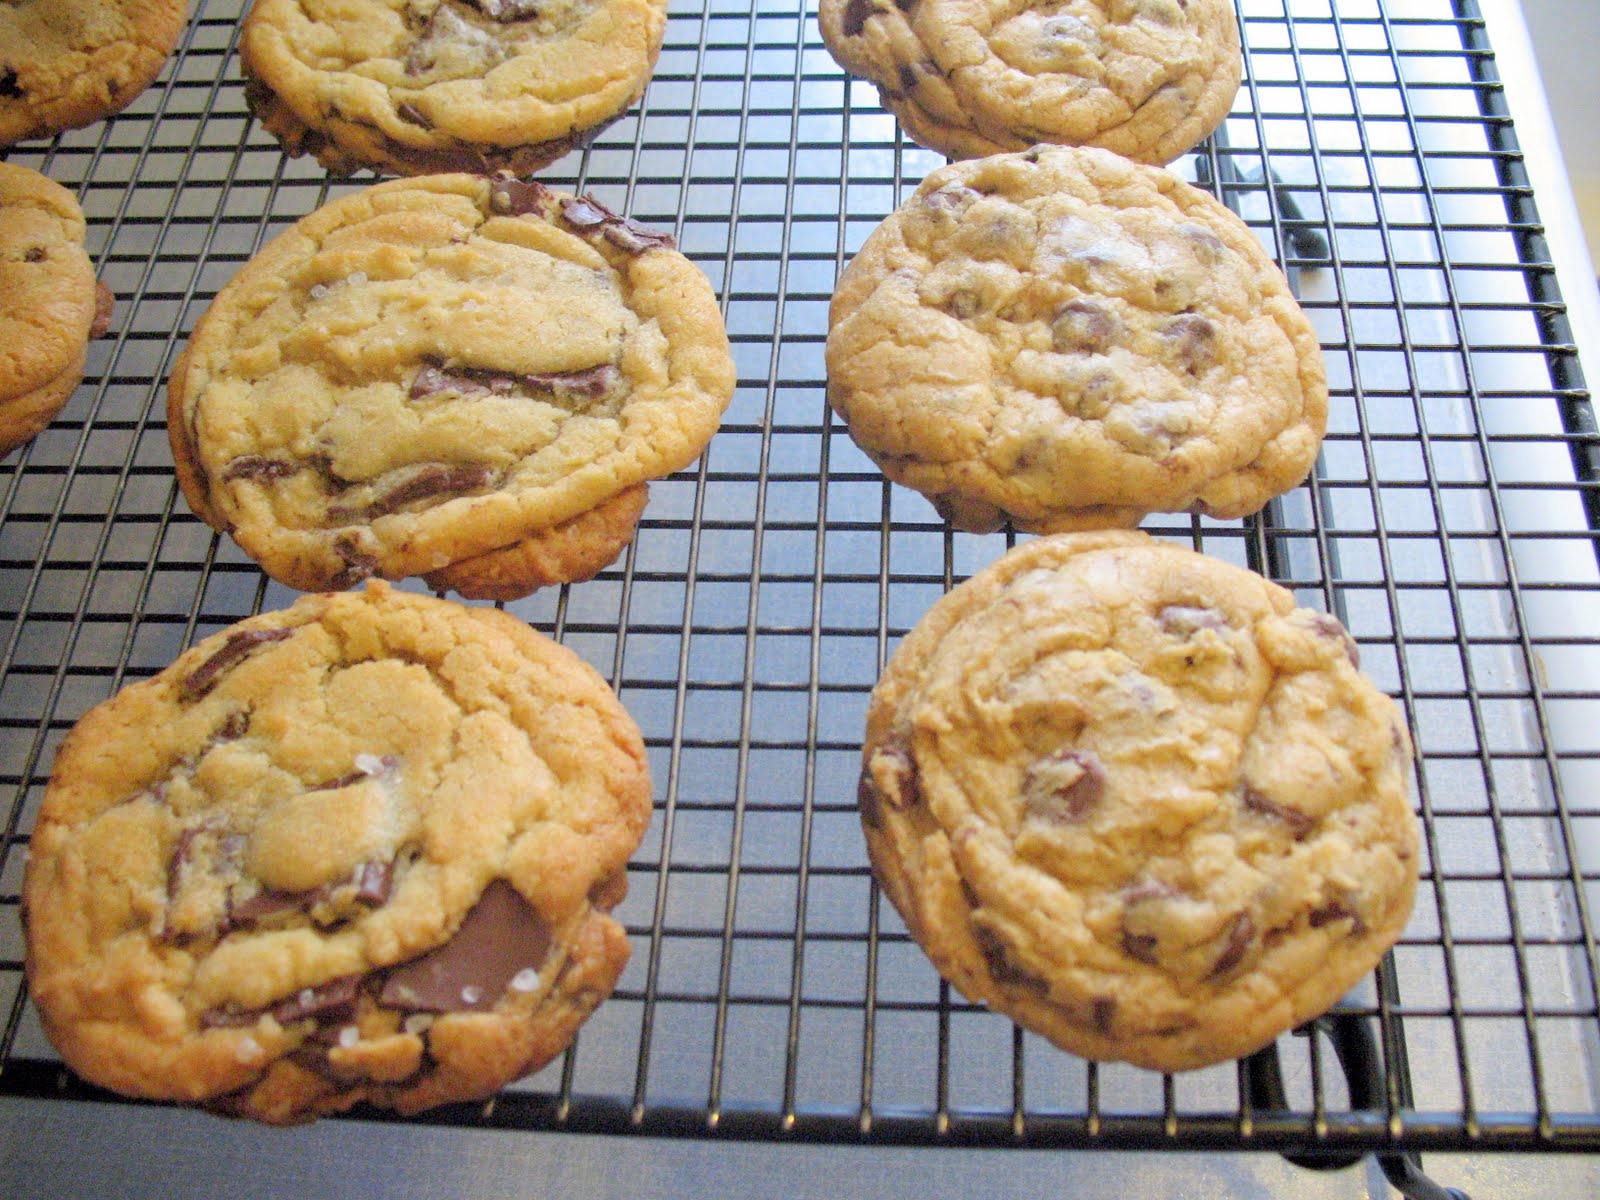
3: NYT/Jacques Torres: Seeeeeeaaaaa Saaaaaaalllt. OMG, yes. I don't know what, exactly, the mixture of flours does to the texture, but I'm assuming that's responsible for the wonderful, crackly top. And I was skeptical about how much superior the use of chunks, or disks, would be compared to chips. I'm a skeptic no longer. Large, thin pieces of chocolate are THE WAY TO GO.
4: Neiman Marcus: Notable because it uses a much higher proportion of brown sugar to white, and because this was the fattest and chewiest of the lot. I loved the texture, even though the flavors were rather standard. Note I didn't use the espresso powder called for in the recipe. I just don't have that in my pantry. Maybe that would have made a huge difference, maybe not.
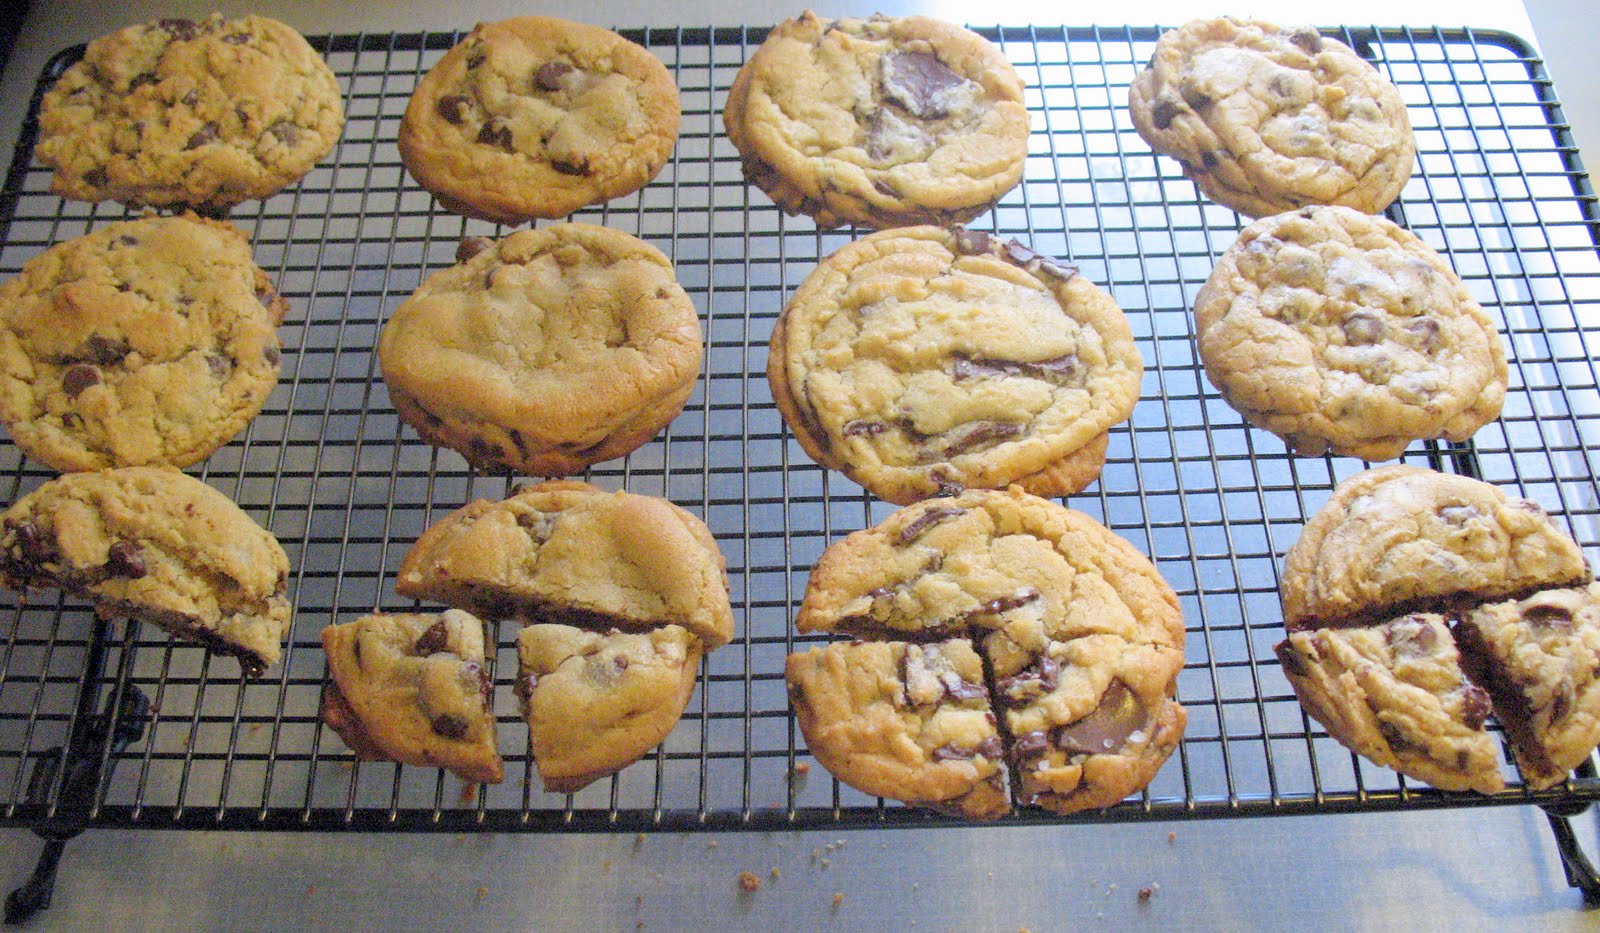
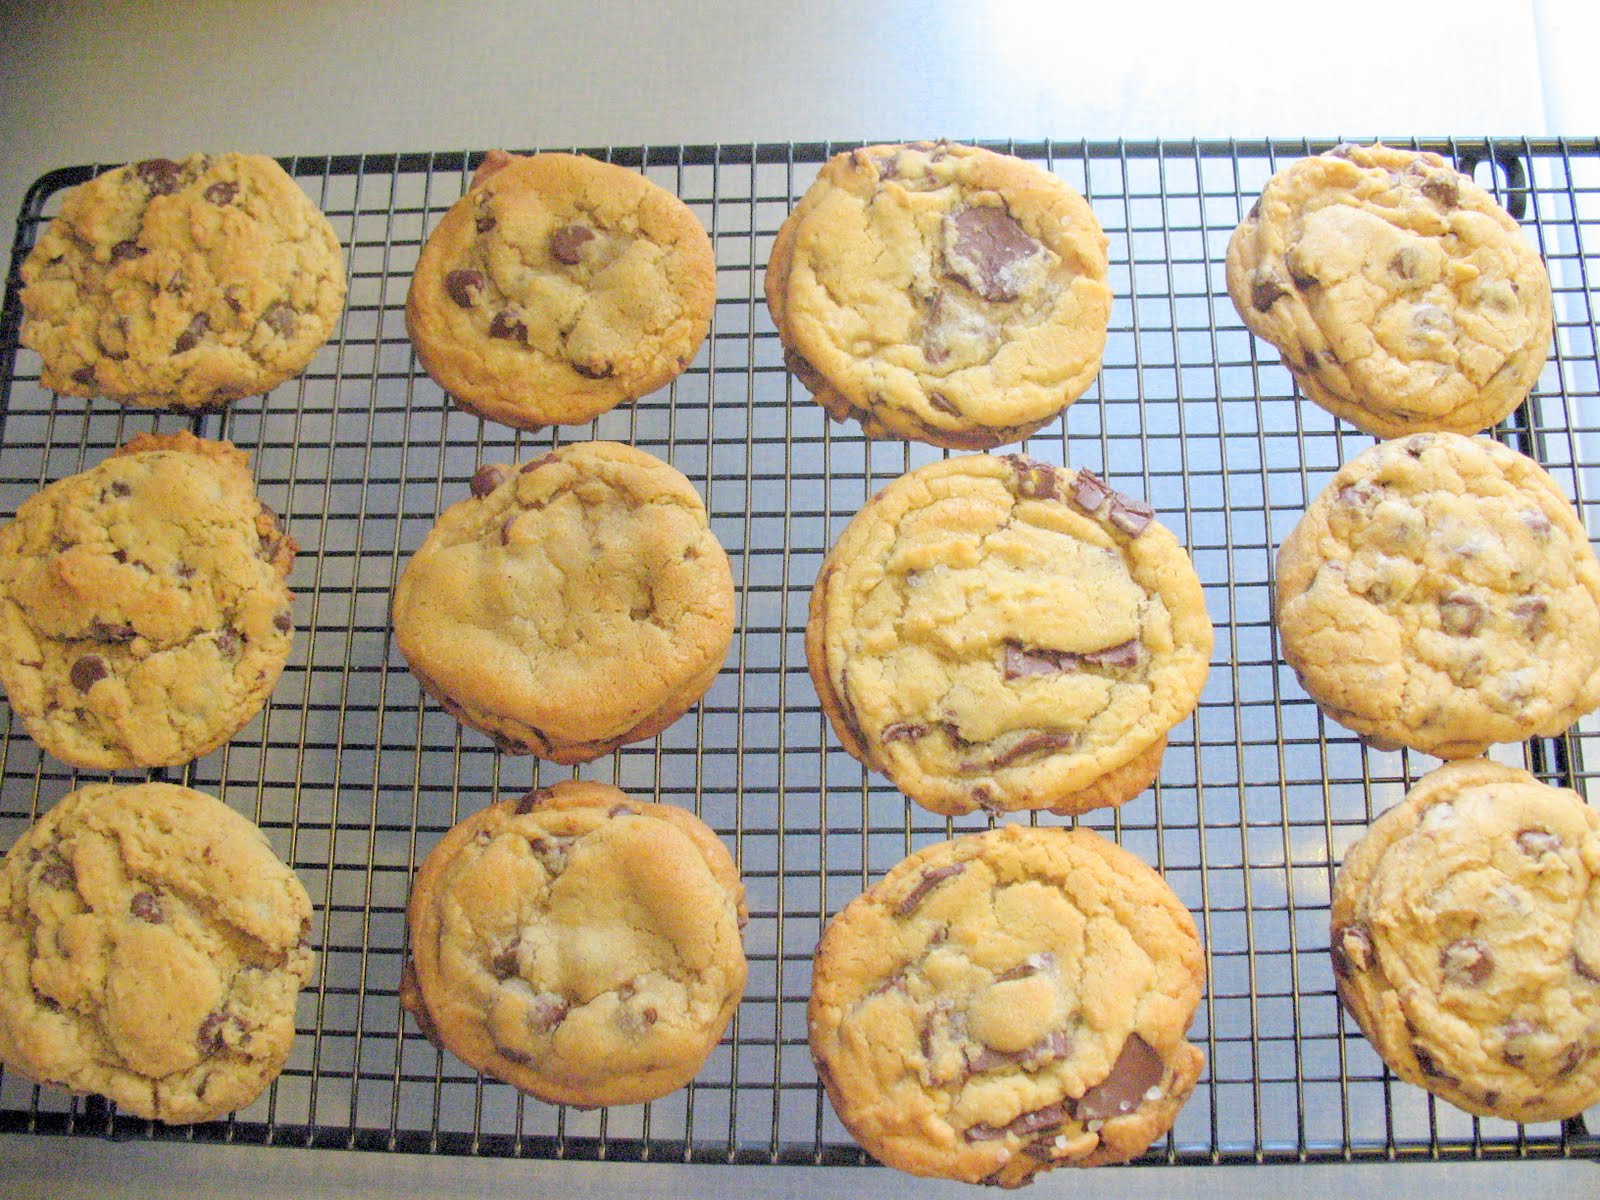
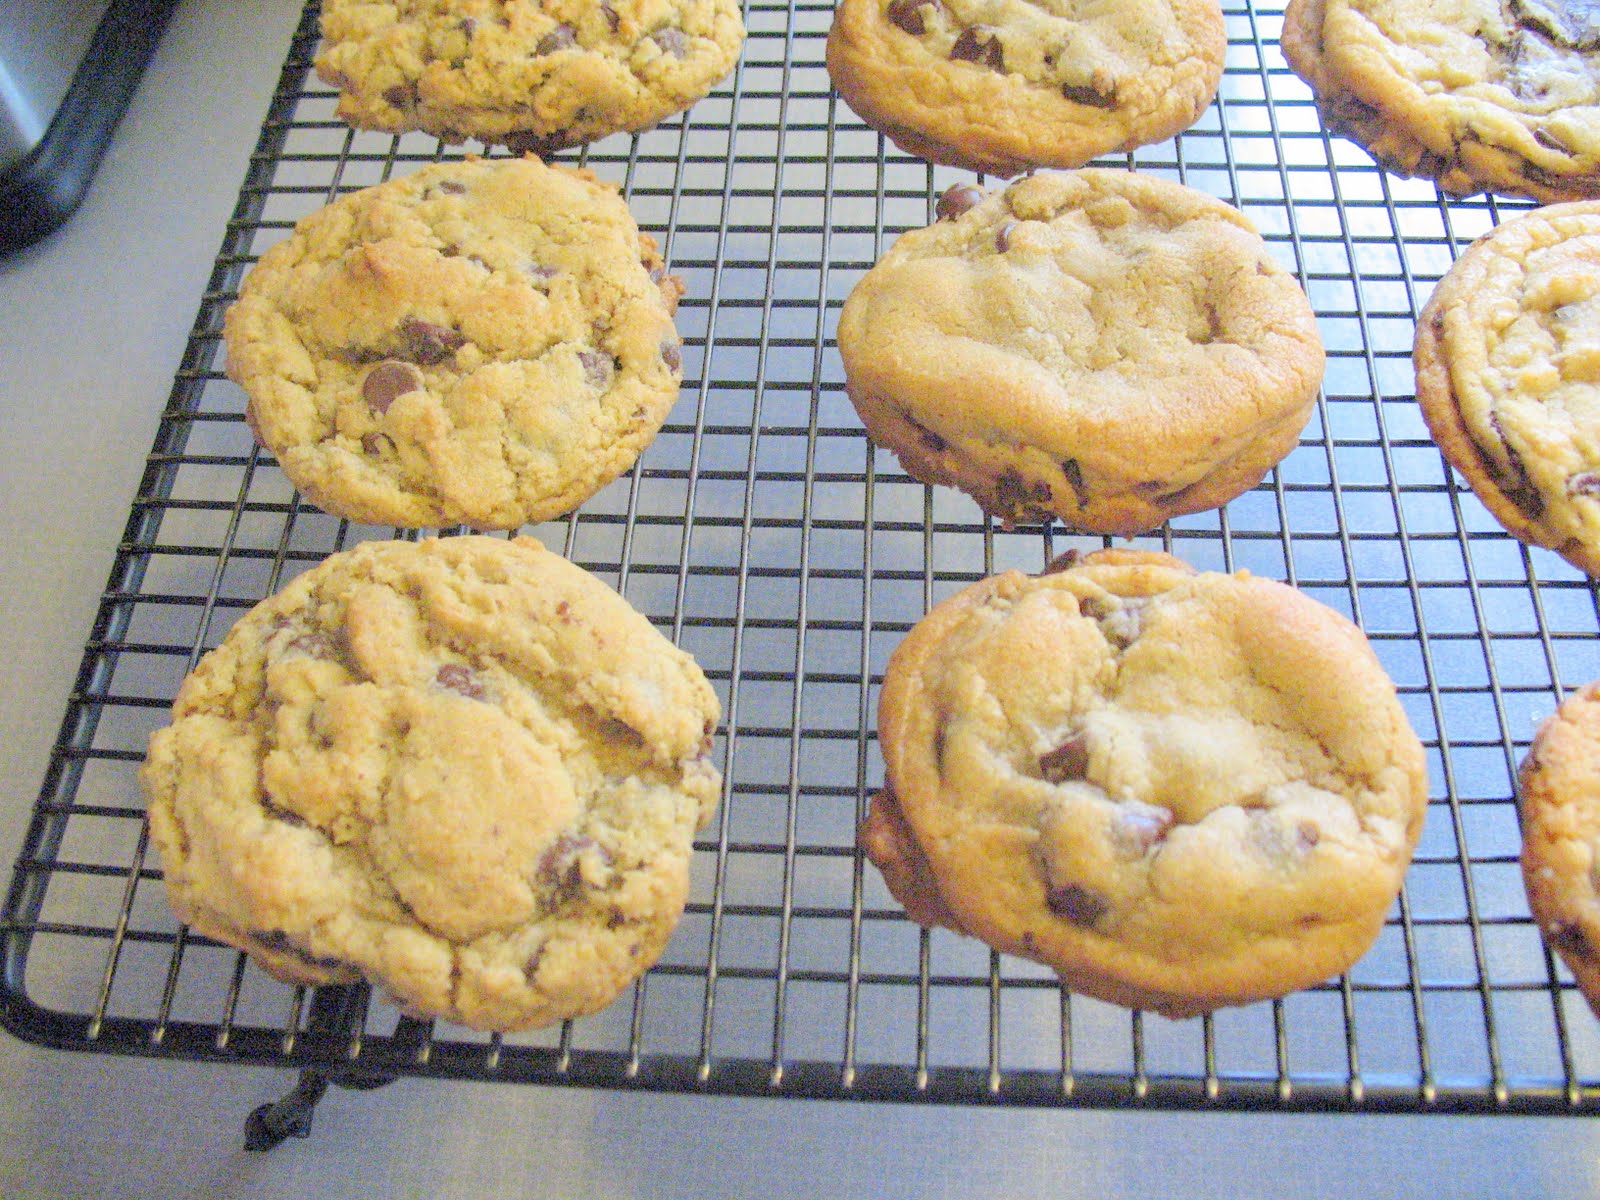
In the end, the NYT/Jacques Torres recipe was my all-around favorite. The problem, though, was that I really, really loved the flavors the browned butter adds to the Cook's Illustrated cookie. So I combined the ingredients of the former with the technique of the latter, hoping, hoping, hoping it would turn out all right.
It did.
YES! Marvelous cookies! The BEST EVER!!!!
Really. It's true.
Here's the recipe, just for you.
THE BEST Chocolate Chip Cookie Recipe Ever (note: you can bake these right after mixing, but they really are better after 12+ hours chilling time in the fridge. Just FYI)
2 cups minus 2 tablespoons (8 1/2 ounces) cake flour*
1 2/3 cups (8 1/2 ounces) bread flour*
1 1/4 teaspoons baking soda
1 1/2 teaspoons baking powder
1 1/2 teaspoons salt
2 1/2 sticks (1 1/4 cups) unsalted butter
1 1/4 cups (10 ounces) brown sugar
1 cup plus 2 tablespoons (8 ounces) granulated sugar
2 large eggs
2 teaspoons natural vanilla extract
1 1/4 pounds thin chocolate chunks/pieces. See below.
Coarse sea salt
Whisk flours, baking soda and baking powder together in medium bowl; set aside.
Heat 2 sticks (1 cup/16 tablespoons) butter in 10-inch stainless steel or other non-dark skillet over medium-high heat until melted, about 2 minutes. Continue cooking, swirling pan constantly until butter is dark golden brown and has nutty aroma, 1-3 minutes. Remove skillet from heat and transfer browned butter to large heatproof bowl. Stir remaining 4 tablespoons (1/2 stick) butter into hot butter until completely melted.
Add granulated and brown sugars, 1 1/2 tsp salt and vanilla to the bowl with butter and whisk until fully incorporated and uniform in color. Add the eggs, one at a time, whisking after each addition. Whisk until mixture is smooth with no sugar lumps remaining, about 30 seconds. Let mixture stand for 3 minutes, then whisk for 30 seconds. Repeat process of resting and whisking 2 more times until mixture is thick, smooth and shiny. Using rubber spatula or wooden spoon, stir in flour mixture until just combined, about 1 minute. Stir in chocolate chunks.
Refrigerate dough at least 3 hours, or up to 36 hours.
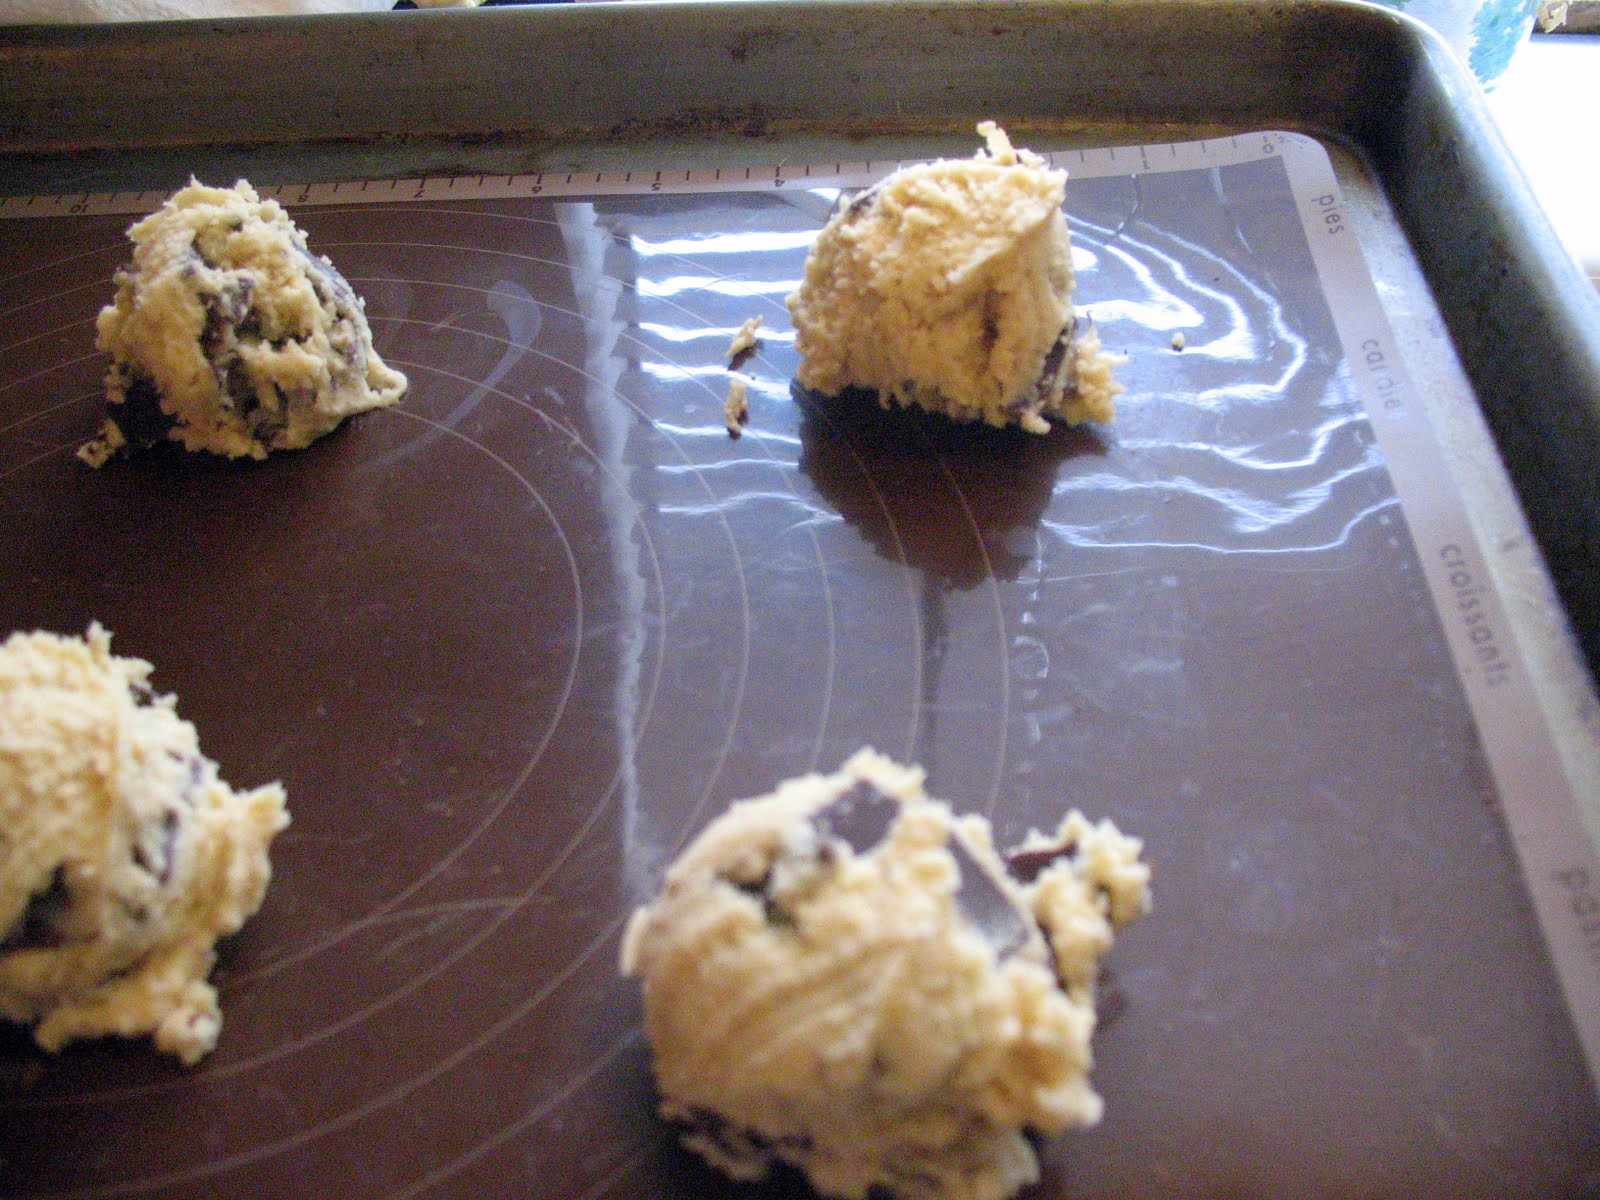
When ready to bake, preheat oven to 350 degrees and line cookie sheet(s) with silpat or parchment paper. Use a medium, 2-inch cookie scoop or tablespoon to scoop dough into balls in the cookie sheet, leaving two inches around all side of the dough balls. Turn any chunks poking up horizontal (and tuck in any that are poking out). Sprinkle each ball with sea salt, pressing the salt in with your fingers so it adheres.
Bake until golden brown and crackled, 18-20 minutes. Let sit on cookie sheet for five minutes, then transfer to wire rack to cool.
* Be sure to use the "spoon and level" method of measuring flour or your dough will be too dry. Spoon your flour into your measuring cup until it overflows (NO PACKING DOWN), then use a flat edge (back of a butterknife, for me) to level the flour, returning the excess to the the canister.
About the chunks:
I suppose I probably could have made a quick run to Trader Joe's for these. Or special ordered them. But part of the charm of chocolate chip cookies is that you usually have the ingredients on hand. So this is how I made my own "disks." The first time I made them, I used only semi-sweet chips, but the second time I swirled bittersweet, semi-sweet and white chocolate together.
Thin Chocolate Chunks
1 1/2 pounds good quality chocolate chips, such as Guittard or Ghiradelli (or better, if you've got 'em)
Heat oven to 300 degrees.
Line a baking sheet with silpat or parchment paper, though I prefer the silpat for this application. Pour the chips on to the lined sheet and arrange in a single layer. Pop the sheet into the oven. Begin checking on the chips after five minutes. When they look very glossy, pull the sheet out and, with a flat-bottom pastry spreader, smooth the chocolate into one thin layer.
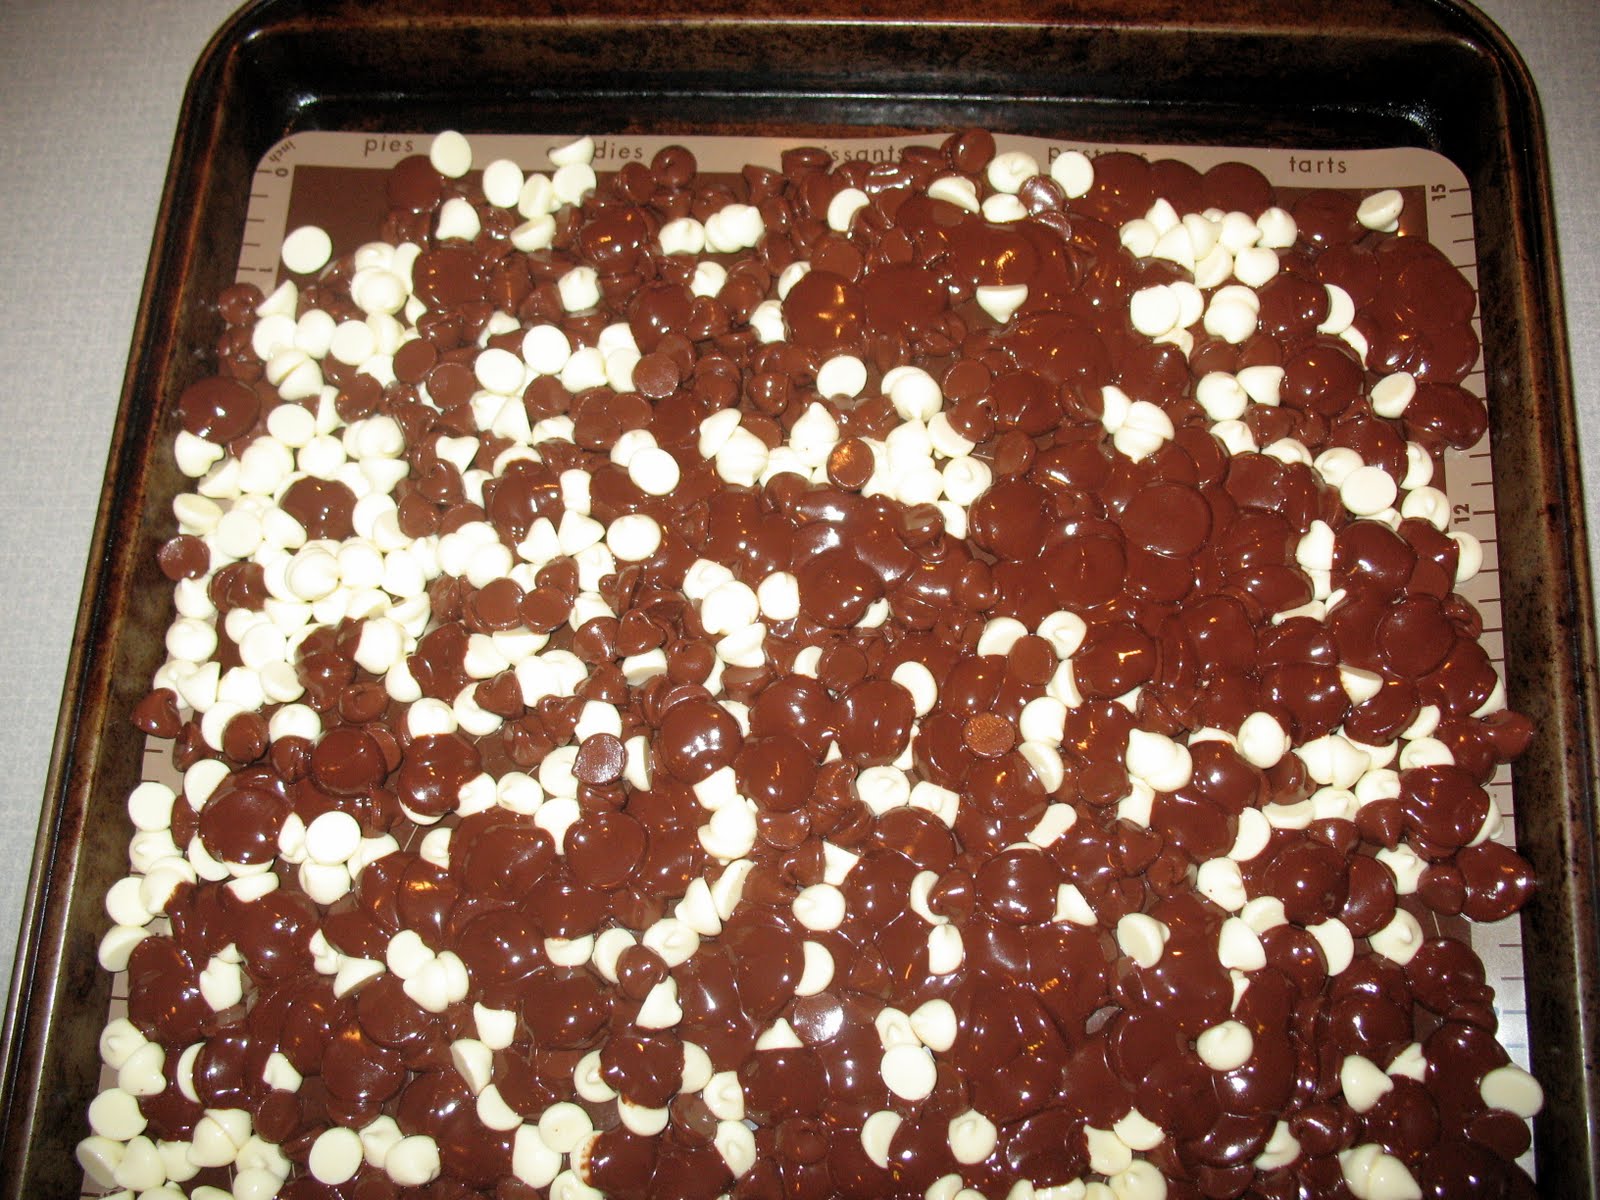
Immediately put in the fridge (or freezer, if you have room/are short on time) and chill until hardened. Remove and peel the chocolate from the silpat/peel the paper off the back of the chocolate. Working quickly, break the chocolate into 1-inch-sized chunks. Use as indicated in recipe.
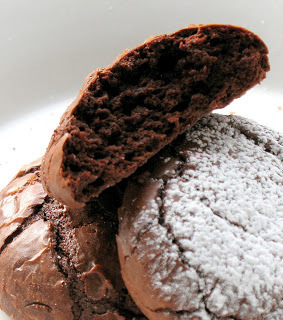
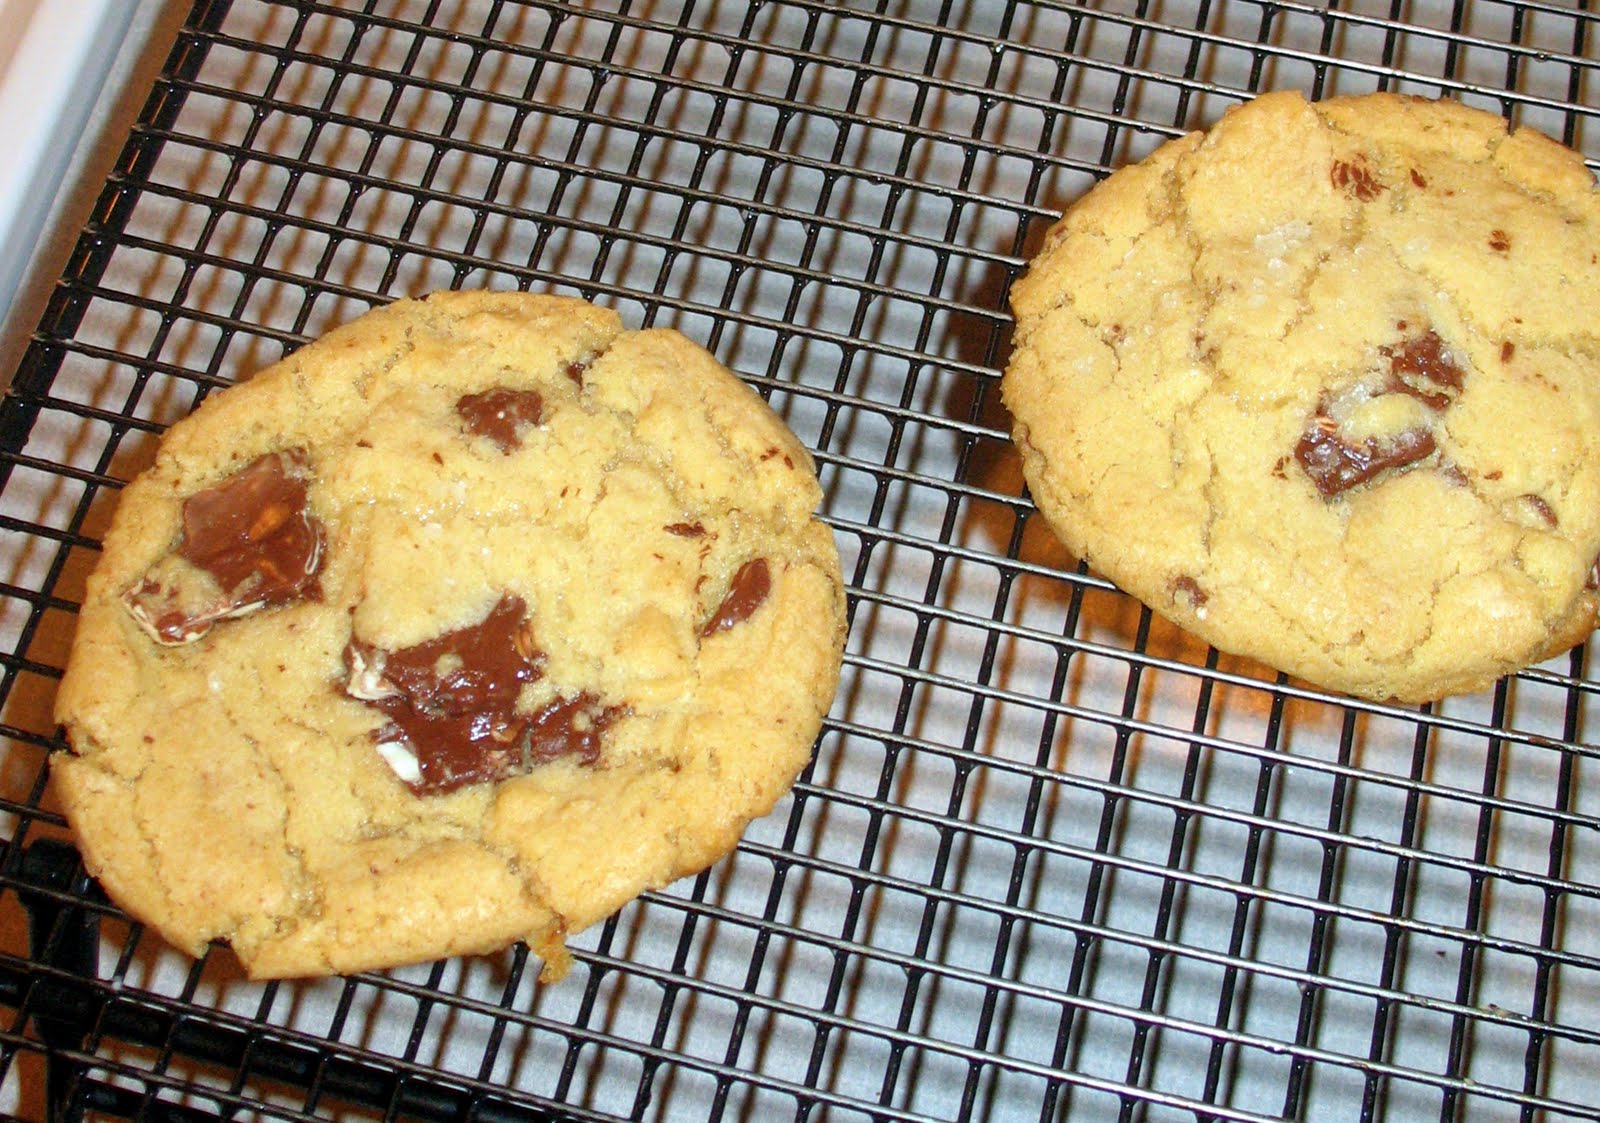 The WINNER!!!(sorry for the crappy picture. We . . . kind of . . . ate almost all of them before I thought to grab my camera. Plus, it was late. And dark. So, light issues. Ya know.)
DO TRY THEM! And let me know if they are the BEST CCC you have ever had!
January 7, 2010
Millionaire Bars
 I'm a pretty big fan of Twix candy bars, so when I came across this recipe and read that it tasted like a grown-up version of a Twix, I had to try it. There are three steps to making the Millionaire Bar - supposedly named so because of their richness - but each step is quite easy. If you can make cookies, stir milk in a pot, and melt chocolate without disaster, you can make these bars.
 Millionaire Bars (adapted from Joy of Cooking):
Shortbread Crust:
1 1/2 sticks (3/4 cup) unsalted butter, room temp
1/4 cup granulated sugar
1 teaspoon vanilla
1/8 teaspoon salt
1 1/2 cups unbleached all-purpose flour
Preheat oven to 350* and lightly grease a 9 x 9 baking pan.
Cream the butter and sugar until fluffy. Add vanilla and salt. Stir in the flour just until the dough begins to come together in walnut-sized chunks. Press the dough into the prepared pan and bake 20 minutes or until golden brown around the edges. Cool completely. Begin the filling as soon as the crust goes into the oven.
Caramel Filling:
1 (14 oz) can sweetened condensed milk
Pour the milk into a heavy saucepan and cook over low heat, stirring often, 60-90 minutes, until golden brown. Alternately, cook the caramel in a double boiler, covered, stirring occasionally (every 15 minutes or so). The only difference in the methods is the amount of attention given the caramel and the tools needed. When thick and deep golden, spread caramel evenly over cooled crust and refrigerate until caramel is cool and set.
Chocolate Topping
6 ounces good-quality dark or semi-sweet chocolate (I use Guittard)
1 Tablespoon butter
Coarse sea salt (optional)
Melt the chocolate and butter slowly over low heat and spread over the cooled caramel layer. Sprinkle sea salt over the chocolate. Refrigerate until set. Slice and enjoy. Store the bars, covered, in the fridge.

Are they as good as Twix bars? Oh, yeah. Better. Much better. I was wary using the canned milk as the base for the caramel, since I normally would make my own with butter and sugar, but there was no off or tinny flavor at all. And although the sea salt is optional, I wouldn't make these without it. I think the salt brings out the flavor of both the caramel and the chocolate and provides a lovely counterpoint to the crumbly shortbread.
January 2, 2010
My Kind of Pizza

I was going to post pictures and a recipe for Cream Cheese cookies, but my pics came out all blurry. Boo. Instead, you get to see what we ate for dinner last night.We're a household of pizza eaters. Except, really, for me. The pixies and the dragon like just about every type of pizza, with classic pepperoni or salami topping their list of . . . toppings. Me? I like less traditional, like this Garlic Chicken with Spinach, Marinated Artichoke Hearts and Pine Nuts on a thin crust, toppped with a drizzle of olive oil and a sprkinkling of provolone and asiago cheeses. Yum.

November 29, 2009
Potato Rolls or OMG . . . BREAD!!!!

I was poking around on Foodgawker (more about that site later . . .) when I came across a picture of these fantabulous looking crescent rolls. I clicked over to the host blog and discovered Not So Humble Pie, a fun food blog run by a stay-at-home mom here in Seattle. Go Seattle moms!! I browsed the oh so yummy pictures for a bit before deciding that I HAD to use my leftover mashed potatoes in Mother Humble's Potato Roll recipe.
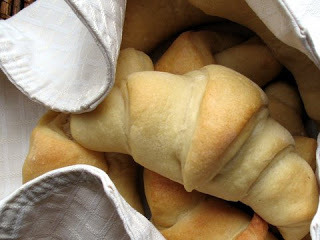
I'd made a crackly crusted hard roll for my own Thanksgiving Day feast, so I was ready for something soft and tender and finely textured. This recipe makes an enriched dough, full of butter, eggs and milk. I'll refer you to NSHP's blog for the recipe, adding the caveat that if you are using leftover mashed potatoes with salt already in them, you will want to reduce or eliminate the amount of salt in the recipe. As you can see, my rolls came out with a beautiful golden-brown exterior and a nice crumb. Though you can't see the taste, I can assure you they are delicious.
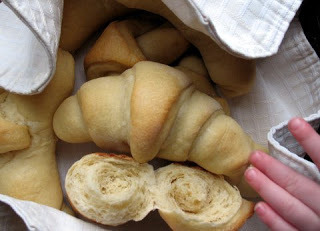
The recipe makes a large batch of dough, so I baked up half of it and put the other half in the freezer for a later date. I'm afraid it won't be too much later, since every set of fingers in the house has been reaching for these soft, flavorful rolls. Wonderful dipped in soup, so good warm, delightful with homemade raspberry jam, these rolls are a winner!
November 8, 2009
Lemon Curd's Not Just a Trifle
Because of its intense flavor, lemon curd can be used sparingly as a filling for cake, pie or lemon bars, a topping on shortbread cookings or scones, or do as my mom does and eat it straight with a bit of whipped cream on top. Sealed (and water bathed) in a jar, lemon curd can be stored in a cool dry place or can simply hang out in your fridge until gone. Citrus fruits are in season when the weather turns cold, so lemon curd is a beautiful taste of summery tang in the middle of winter. The recipe I used can be found here, at the Joy of Baking website.
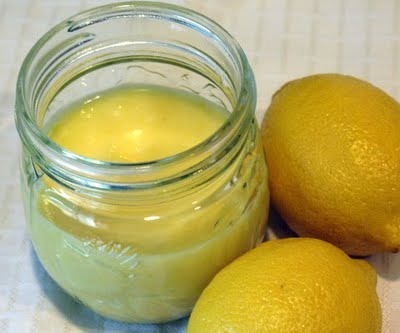 Now, I'd had plans for my lemon curd besides sitting there, looking all sunshiny and pretty. I was going to make cupcakes with lemon curd filling and marscapone frosting. But I'm still getting used to a new oven that appears to run hot - from the bottom - and so my cupcakes came out iffy. The poor things had funky bottoms and fallen tops. :( But I'm all about turning lemon-curd-planned-baked-goods into different lemon-curd-baked-goods as the situation demands it. I let the cupcake monsters cool and broke them up to use in a trifle.
If you've never had a trifle, you must remedy that ASAP! Trifle is a dessert with layers of cake, fruit, custard/pudding/creamy something, and whipped cream. I've made all sorts of trifles with cakes ranging from angel cake to pound cake to brownies in a variety of flavors; chocolate pudding, white chocolate mousse, and vanilla custard; strawberries, blueberries, bananas and oranges; and regular and flavored whipped creams.
For this trifle I used the aforementioned cupcake pieces, lemon curd, sweetened raspberries (the last of my summer freezer stash) and plain whipped cream. This makes for a rich and tangy combination, with the lemon and the raspberries cutting the sweetness of the cream and cake.
It is imprerative that you serve the trifle in a pretty glass dish, either a large bowl (my large trifle dish is an elegant footed affair) or individual glasses, as I did here. You want the attractive layers to been seen and enjoyed even before they are tasted.
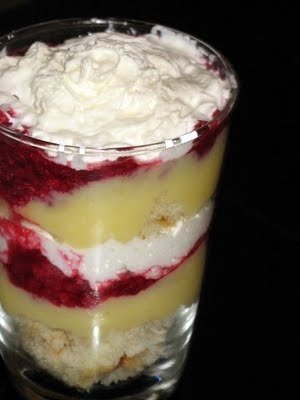 *as always, you must take my amateur photography with a very large grain of sea salt. Thanks.
October 15, 2009
Sour Cream Whole Wheat Pancakes
The night before saw the family dragging into the house after a five hour drive, wanting nothing more than to unpack as quickly as possible and go to bed. Little thought was given to the fact that there was almost nothing in the house foodwise, since I don't like leaving a bunch of perishables when we are gone for more than a couple of days. Unfortunately, that meant there wasn't much to make for breakfast the next morning. We had . . . about 1 cup of milk on hand, one egg, 1/2 cup all-purpose flour, no cereal - not exactly fixings for a substantial breakfast. So I improvised and came up with these pancakes.
Sour Cream Whole Wheat Pancakes
3 TBSP butter, melted and cooled
3/4 cup fat-free milk
3/4 cup sour cream
1 egg
1/3 cup all-purpose flour
2/3 cup whole wheat flour
1/2 tsp salt
1/2 tsp baking soda
1 tsp baking powder
2 TBSP sugar
1. Preheat skillet on medium-low heat.
2. Whisk butter, milk, sour cream and egg together until smooth (I do this right in the measuring cup)
3. Stir together dry ingredients. Make a well in the center of the dry ingredients. Pour the wet into the well and combine. Don't overmix; it's okay if there are some small lumps in the batter.
4. Let the batter sit for 10 minutes for the whole wheat flour to absorb some of the liquid.
5. Grease skillet with a thin coating of vegetable oil or butter. Drop batter onto the skillet, two heaping tablespoons per pancake.
6. When the tops of the uncooked side begin to bubble, flip the pancakes and cook another minute or two until done.
7. Serve with butter and your favorite syrup.

The girls really loved these pancakes, coming back for seconds. Mixing the flours meant the pancakes weren't too heavy (plus, whole grain bonus!) and the sour cream gave them a creamy richness. Definitely on our "make again" list. We had them with real maple syrup, but I think they'd be just as good with a fruit syrup or sliced fuit or cinammon sugar . . .

Sorry, none left. They were just too good.
October 4, 2009
Fudge Drops
 At the market yesterday I picked up couple of bags of Guittard's Extra Dark (62%) Chocolate Chips. Extra dark chocolate packaged in a pretty red bag? I couldn't resist. So today, when the chocolate cravings hit, I contemplated what to do with the chips. Brownies would have been a great showcase for the chocolate, but I wanted something a little more sturdy. I turned to this recipe from one of my favorite baking books of all time, The King Arthur Flour Baker's Companion Cookbook:
 Fudge Drops
Ingredients
- 12 oz. ( about 2 cups) bittersweet or semisweet chocolate chips
- 2 T butter
- 3/4 cup sugar
- 3 large eggs
- 2 tsp espresso powder (I never have this, so I didn't use it)
- 1 tsp vanilla extract
- 1/4 tsp baking powder
- 1/4 tsp salt
- 3/4 cup flour - powdered sugar (optional)
Directions
1. Preheat oven to 325 degrees. Melt together chocolate and butter in microwave or double boiler. 2. In a separate bowl, beat together the sugar and eggs until well combined. 3. Add espresso powder (if using), vanilla, baking powder, and salt. 4. Stir egg mixture into melted chocolate and mix until smooth.5. Stir in the flour.6. Let the batter sit for 5 minutes to thicken; it should be the consistency of thick cake batter. 7. Drop the cookie dough in round blobs (I used a large and small cookie scoop for this) onto greased or parchment-lined cookie sheet. Leave 2 inches between cookies for spreading.
8. Bake 10-12 minutes, until tops are shiny and cracked. They should be cooked all the way through, but just barely; the batter in the center should still be moist, but not raw or liquid.9. Remove cookies from oven, let cool on cookie sheet for 5 minutes, and transfer to wire rack to cool completely.10. Dust the tops of the cooled cookies with powdered sugar if you like.
 The cookies turned out dark as midnight with a very rich chocolate flavor. The powdered sugar helps offset the richness, but you will certainly want a glass of milk with these. I loved the dark chocolate in this recipe; the cookies, with their limited ingredients, are an excellent vehicle for good quality chocolate.
*Please excuse my attempts at food photography. Much as I lovelovelove food photographers, I am not one. :)


