
M.J. Pullen's Blog, page 2
October 30, 2019
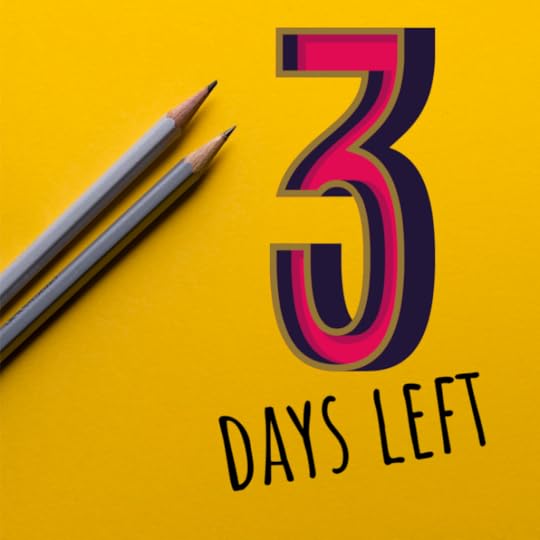
NaNoWriMo 2019: 2 Days until Kickoff!

Managing Your Time
If you read yesterday’s post, hopefully you already have your Word Count Goals established for each day of November, and you’ve decided the best way to keep up with your progress. Today’s checkpoint is all about setting aside the time to get in all this extra writing.
Note: I’m approaching this topic with the assumption that most participants in NaNoWriMo are setting aside extra time in their day for their NaNo project, in addition to all the normal duties of life: work, family, etc. These tips may also be helpful if you’re fortunate enough to have time set aside for writing already, but need help structuring it so you can be more productive.
One of the simplest (but not necessarily easiest) ways to set aside extra time for writing is to get up a little earlier than usual each morning to get a head start on your writing for the day. When I had a full-time day job with an hour+ commute, I used to get up at 4:30 three mornings a week to write, and work until the kids got up at 6:00 and I had to start getting myself (and them) ready.
This worked pretty well for my situation. I have an office at the end of our upstairs hallway I can go to without waking the whole house up, and it even has an attached bathroom. I put a small light on a timer in the office so I wouldn’t have to stumble around in the dark, and I have an electric kettle with instant coffee and tea available so I didn’t have to go down to the kitchen. (We have dogs who sleep downstairs, and waking them is tantamount to waking the whole house!)
With this cozy setup, I was able to get myself up and writing by around 4:45, and because my mind was still quiet and uncluttered by the reality of the day, I was able to focus on just the writing. I often found I was more productive in that hour or so, than I am in three or four hours of unstructured time later in the day. If you try this method, here are some tips that worked for me:
Close your browser windows and all other projects on your computer the night before, so you’ll wake up to only your WIP (work in progress) on your screen.Before bed (or at the end of the previous day’s writing session), make a short bulleted list on a sticky note or pad with three or four things you know you want to write that day. This keeps your sleepy brain from being too foggy and unfocused.If you’re someone who really needs your sleep, try going to bed earlier and avoid watching TV at night to help your brain shut down sooner and wake up fresher.Give yourself a small treat or comfort (like my coffee kettle) in the morning to help you wake up and reward you for getting up before everyone else!Make sure you tell your housemates your plan so (a) they don’t think you’re a burglar if they hear you and (b) they can help hold you accountable by asking if you got up as planned.Stretch! Spend a few minutes stretching before you start work, to get the blood flowing.
Getting up pre-dawn isn’t for everyone, however. If you’re not a morning person, and it generally takes until your fifth cup of coffee for your brain to click into gear, this routine might simply leave you tired at ten a.m. with no words to show for it. Other great times to work in some writing:
Weekends. In my house, you don’t have to get up at 4:30 to be awake before the rest of the house. Even if I skip sleeping in and get up at 6:00, I can usually get in a good hour or more of writing before people start emerging from their rooms asking me to cook things. During NaNoWriMo, I let my supportive spouse and kids know I won’t be cooking as much (if at all), and I put a sign on the office door with a time it’s okay to come in and say good morning. Evenings. Most of us spend more time than we’d care to admit in the evenings watching television or visiting social media. If you spend that time writing instead, you’ll not only meet your NaNoWriMo goals, you’ll probably be much happier for it.Lunchtime. You’d be amazed how much you can get done sitting in your car or at a nearby park or coffee shop on your lunch break. Pack a lunch or plan to buy one in a spot where you can work, and bring headphones to tune out distractions. If you can’t take your computer or other device to work with you, you can still work at lunch by writing longhand or making notes on your phone, or even into a voice recorder to transcribe later. All those words count!On the train. I mentioned this earlier, but if you take a train or vanpool to work, use that time to write. Again, the situation may seem less than ideal, but you’d be surprised what you can accomplish.Incidental moments. I’ve written words on my phone in the grocery store checkout line; I’ve made notes while waiting in the carpool lane (with the car off, of course). I’ve written entire chapters at my sons’ gymnastics or baseball practices. The more flexible you are with your writing time, the more words you can sneak in while staying connected to your work.
Tracking Time
You might find it useful to track the time you spend writing and how many words you get written during each writing sprint. This can help keep you goal-focused in the moment, and allow you to look back and see patterns later on. You can do this in a simple spreadsheet or by making notes when you start and stop a writing sprint. There are also some great time-tracking apps that help, too.
Be Focused/Be Focused Pro: If you have an iOS system and want to track the time you’re spending on your writing, I recommend the Be Focused app. It’s a timer you can set for regular intervals with breaks in between. I love that it’s right on the desktop, so I don’t have to refer to my phone or a separate timer, and I can set it to play sounds or not to mark the intervals of time. Be Focused defaults to a standard of 25 minute intervals with 5 minute breaks (the Pomodoro Technique) and allows you to customize the interval length. You can also delineate each task on your to-do list, so you’ll know exactly how you’re spending your time. For better or worse!
If you’re not on a Mac or iPad, here’s a list of great Pomodoro timers for Windows/PC.
However you track it, the most important lesson any writer can get from NaNoWriMo is that putting in the time matters, and even the little bits add up. Just like eating an elephant, a novel happens one bite at a time, and it’s consistency rather than speed that really matters in the long run!
Need help with your project, or a friendly face to hold you accountable? I help writers during NaNoWriMo and all year long. Visit my coaching page for details.

Keep Writing.
Get tips, publishing perspectives and occasional rants delivered to your inbox. Sign up for my newsletter (click the “Tips for Writers” checkbox). And don’t forget to Like & Follow The Distracted Writer Facebook Page for updates and tips in your feed.
The post NaNoWriMo 2019: 2 Days until Kickoff! appeared first on MJ Pullen, Author.


October 29, 2019
Countdown to NaNoWriMo – 3 Days to Go
Yesterday, you got my insightful analysis of a few writing platform options for composing during NaNoWriMo. Hopefully you’ve found a writing system that works for you. With just three days to go, you might be starting to think about how you’ll track your progress and manage your time.
Let’s Talk Goals: Word Count
50,000 words / 30 days = 1,667 words per day. Easy enough. What looks like a simple mathematical formula on November 1st might feel like derivative calculus by the middle of the month. As you’re thinking about your overall goal, I recommend customizing your daily goals to your own personality and situation.
First, if you can get more than the average word count you’ll need in the first few days of November, when you’re running on excitement and espresso, it’s a good idea to do that. Getting ahead gives you some cushion for those inevitable days when things will come up, like your kid has to go to urgent care for an infected splinter or your mom calls out of the blue to ask if you can make the dressing and sweet potatoes for Thanksgiving.
Speaking of Thanksgiving, if you’re in the U.S., you’ll know already that this large family holiday does still occur in November, even when you’re writing. For some of us, that means less time to write because we’re cooking and fending off well-meaning suggestions about our love lives or child rearing from family members. For others, Thanksgiving might mean a break from work or school for a day or even a week, with more time to write than usual. Plan accordingly!
I find it’s helpful to set a word count goal for each day on the calendar, putting more words on some days than others and building in breaks. For me, this works better than the simple average of 1,667. But you might find the consistent daily word goal works better for you. Either way works!
Tracking Your Words
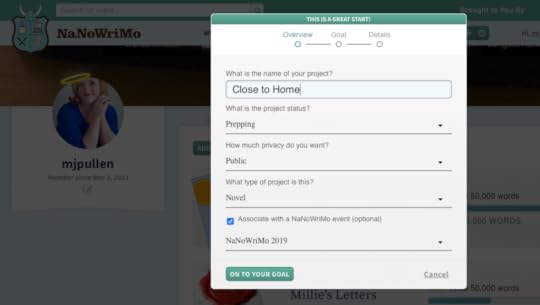
NaNoWriMo has its own built-in progress charts for your novel’s word count, and gives you lots of the desirable positive reinforcement that helps writers keep going and going and… you get the idea. You can even use NaNoWriMo’s project tools at other times of the year. If you associate your project with NaNoWriMo, it will automatically give you a word count goal of 50,000 and a writing window of 11/1-11/30. You can also tell other participants some thing about your story, and link a Pinterest page or playlist.
NaNoWriMo will help you track your progress against the standard goal of 1,667 words per day, which can be a great motivator, especially with the accountability of thousands of other writers typing along. (Full disclosure: while I’ve participated in NaNo several times and completed my 50,000 word goal once, I totally quit logging my words about halfway through — I was working with a group of friends offline, and I found that accountability more compelling!).
I wanted to share some of the other tools I’ve found helpful for keeping up with word counts, goals, and time. These are great in November and the rest of the year, too.
Pacemaker – this simple online program lets you create custom word count goals for any length of time, and adjust for factors like days off, weekends and holidays. It has some fun pre-programmed patterns, and you can even view paces that others have created for inspiration. (When I checked the site while writing this blog, there were already a couple of NaNoWriMo goals set up on the home page!)
And if you want a little extra help from the experts boosting your word count during those times, check out these great resources:
Keep Writing.
Get tips, publishing perspectives and occasional rants delivered to your inbox. Sign up for my newsletter (click the “Tips for Writers” checkbox). And don’t forget to Like & Follow The Distracted Writer Facebook Page for updates and tips in your feed.
This post contains affiliate links, which means the author may receive a nominal commission for items purchased through these links. Commissions are typically a fraction of the item’s cost and do not impact your purchase price in any way. Thank you for your support!
The post Countdown to NaNoWriMo – 3 Days to Go appeared first on MJ Pullen, Author.
October 28, 2019
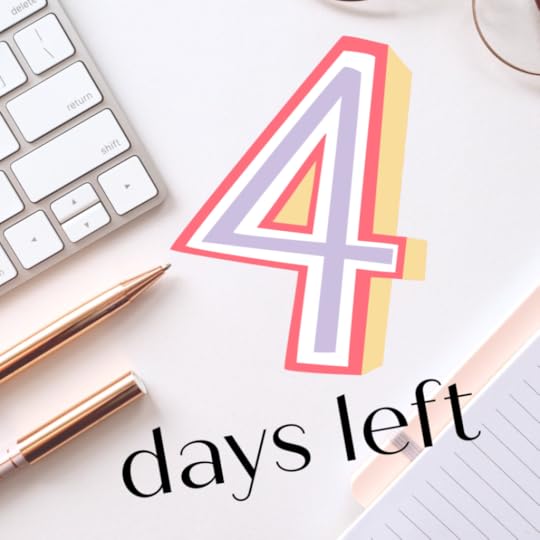
NaNoWriMo T-Minus 4 Days: Writing Software and More
Alright NaNoWriMers… If you’ve been following my little countdown, you’ve already got your story idea ready, braced your family/friends for impact, and made some notes about your characters and possibly your plot.
Of course, all the content-related stuff will continue to evolve and change as you go along. So now it’s time to turn our attention to the more practical aspects of the writing process. Little details, like how and where will you be writing this story? How are you going to manage your time, get your words in, and keep track of things as you go?
Today, let’s focus on the nuts and bolts of writing 1,667 words a day.
Chances are, if you’re serious enough about writing a novel that you’re taking on a challenge like NaNoWriMo, you already have some sense of how you prefer to write. Maybe you already have your blank Word document set up with your heading styles changed to your favorite fonts and colors. If you write longhand, you might have a crisp new notebook with its virgin pages waiting, and a stack of your preferred pens at the ready.
Perhaps you’ve even stockpiled the ribbon and correction tape for your old-school typewriter, in which case I have nothing to teach you. Go now from this place with your infinite coolness and my utter respect.
If you’re not sure where to start, or if you find the rigor of fast drafting a little intimidating, this might be the time to check out some programs & apps to help you stay organized.
Outside of word processors, Scrivener is probably the most popular writer-specific software program among serious writers. I use Scrivener a good bit in the early stages of drafting and organizing a story, because I like the index card/cork board functionality, and the fact that you can rearrange chapters easily, as well as write a synopsis or notes on “top” of the chapter that is visible when you’re sorting but doesn’t remain with the text. Even if you normally draft in a linear fashion and don’t move things around, I’ve found that the pressure of drafting quickly can sometimes be alleviated by the ability to jump around in your document easily and shift things around in large chunks later, which is all but impossible to do in Word.
Scrivener is a full-featured program, and not terribly expensive, plus it’s available for both Mac and PC (but it will not talk to your phone, if you’re hoping to make notes on the run during NaNo). If you’re brand new to Scrivener and don’t adapt to new software easily, you might find it a bit overwhelming to learn in a few short days before NaNoWriMo, but it’s certainly worth doing in the long run.
If you have a Mac/iPhone/iPad combination, and especially if you’re hoping to make notes or add to your chapters while you’re mobile, Ulysses is hard to beat for simplicity and flexibility. Ulysses works on subscription, and you’ll need to download the app for any device you want to use with it–plus it only works with iOS devices. That said, it’s worth the modest annual investment if you need flexibility. Like Scrivener, you can divide your work in Ulysses into folders and groups as well as single sheets, and any of those can be moved around. Because it syncs between your phone and computer, Ulysses makes it easy to stop in one place and pick back up in another seamlessly, which anyone who’s ever tried to write from the bleachers of a kid’s basketball can tell you is a priceless feature.
Ulysses has a lot fewer features than Scrivener, but that’s why it can sync to your phone without draining all the memory. It uses markup language instead of rich text formatting, but you can learn a few simple symbols to delineate things like headings and bulleted lists. I’ve also found that it can be less distracting to write without the formatting, knowing you can make things beautiful later. That freedom is a good fit for the liberating spirit behind fast drafting in NaNoWriMo. And I can say from direct experience, you’d be surprised how many words you can get in while waiting on a train platform!
If you want to write on the run, and from different devices, you can always try online Word processors like Google docs. There’s also a newer online service called Storyshop that is web-based and geared more toward fiction writers than simple document servers. It allows you to save character information and connections as well as writing your story in chunks and outlining. In terms of features, it’s pretty much between Ulysses and Scrivener. Like Ulysses, it works on a subscription model, but it is higher priced each year. But if you do the free trial and like the interface, it’s a flexible option that works through any web browser on any device.
Finally, if you’re a slow typist or have physical limitations (like carpal tunnel syndrome or RSI), NaNoWriMo might be the perfect time to try using voice recognition software like Dragon NaturallySpeaking. Dragon works best with a PC, but I’ve had success using it on an iMac with a software called Parallels. Dictating fiction takes some getting used to, but it works best if you take the plunge and push yourself to work through it. And once you do, many writers find their word output is much higher with dictation than even very fast typing. NaNoWriMo might be just the right incentive to get going on a new method.
Whichever tool(s) you select for writing your novel, make sure you have it set up and tuned to your preferences before NaNoWriMo launches November 1st. Set up the document, adjust the view, the format, the titles… all the little things that can be a distraction when you’re trying to focus on writing.
Tomorrow, we’ll talk about tracking your time and all those words!
Keep Writing.
Get tips, publishing perspectives and occasional rants delivered to your inbox. Sign up for my newsletter (click the “Tips for Writers” checkbox). And don’t forget to Like & Follow The Distracted Writer Facebook Page for updates and tips in your feed.
This post contains affiliate links, which means the author may receive a nominal commission for items purchased through these links. Commissions are typically a fraction of the item’s cost and do not impact your purchase price in any way. Thank you for your support!
The post NaNoWriMo T-Minus 4 Days: Writing Software and More appeared first on MJ Pullen, Author.
October 27, 2019
Five Days to NaNoWriMo: Plot What Now?
Okay, if you’re signed up to do NaNoWriMo this year, we’re rounding out your final weekend of freedom before the serious writing gets going on Friday. I hope you’ve enjoyed it! Done something fun? Spent time with your family? Great. Because November 1st, you’re turning into a WRITING MACHINE.

It would not be amiss for the novice to write the last paragraph of his story first, once a synopsis of the plot has been carefully prepared – as it always should be.
H. P. Lovecraft
In my first two countdown blogs, I talked about getting yourself set up for National Novel Writing Month and sketching out your characters. Today, we’re going to take those beautifully fleshed-out characters and make them do stuff. Day -5 is about plot. Now’s the time to break out your Word document, Scrivener synopses, or actual index cards. We’re going to be writing almost 2,000 words a day next month. Let’s get a scene or chapter list going to map our route.
You can use Cherry Adair’s Plotting by Color method. Or make a 40-space grid like my friend Chrissie Manby taught me, and write one short sentence or phrase for each block, representing 40 chapters or scenes. (Turn those into 1250 words a piece and you’re in business for 50K by November 30!) Even if you just kick it old school with an outline á la 8th grade English class, you’ll have something to go on.
“But, Manda, I don’t want to plot. I’m a pantser…” (or a panther, if autocorrect has anything to say about it). That’s okay. If you’re a discovery writer, there are still things you can do to prepare yourself for the basic storyline you want to write. And to paraphrase one of my favorite writing teachers, Damon Suede: We’re all plotters. It’s just that some of us write a big, messy outline… called a first draft.
Video added for coolness rather than relevance, but it DOES give you something to do while you’re brainstorming on Day 27…
Whether you plan to plot your story extensively or not, I recommend at least refreshing yourself on basic story structure so you will have some helpful reminders along the way of where your story should be going. That way, when you’re staring at your word count on November 15 and wondering what you’re going to do with the next 1,667 words, you’ll have some idea which part of the story you’re in and which direction will lead you out of the woods.
There are lots of great resources on story structure: from Syd Field to James Scott Bell and many others. My current favorite is Save the Cat Writes a Novel by Jessica Brody. If you have time to squeeze this book in over the next four days, DO SO. (The audiobook includes a downloadable PDF as well, which is convenient if you need to use your commute time productively this week).
No time for a whole writing craft book ? Fear not. Chapter Two alone provides an overview of the Save the Cat 15-Beat Structure. Just writing a few notes about each of the 15 beats can help you decide if the story in your head is going to flow easily onto the paper in November, or if you’ll need to make adjustments.
If you truly do want to just start writing and see what happens (or if you’re reading this at 11:50 p.m. on October 31st because you’re doing NaNoWriMo on a drunken Halloween candy dare), that’s okay, too. Here are some questions to get your mind churning, so your subconscious can begin plotting even if you don’t.
Who is your hero at the beginning?What are her goals–internal and external? How can you–sadistic author that you are–thwart her progress by throwing obstacles in her way?What is the worst thing your hero can imagine happening?How would that event ^^^^ transform him?Who would your hero want to spend time with LEAST?What would happen if she were trapped with that person ^^^^ in an elevator (proverbial or literal)?What will be your hero’s low point? What will redemption look like (if there is any)?
And if I’ve learned anything from years of studying writing, it’s this: when in doubt, RAISE THE STAKES. Keep making things worse, until your hero makes the fundamental internal change that will make things better again.
Remember: whether you plot in advance or not, it’s always okay to change things up, to go off-book if you’re not feeling the story as you originally imagined it. The key to fast drafting in NaNoWriMo is to just. Keep. Writing. Everything can be fixed in post.
Resources
This post contains affiliate links, which means the author may receive a nominal commission for items purchased through these links. Commissions are typically a fraction of the item’s cost and do not impact your purchase price in any way. Thank you for your support!
Keep Writing.
Get tips, publishing perspectives and occasional rants delivered to your inbox. Sign up for my newsletter (click the “Tips for Writers” checkbox). And don’t forget to Like & Follow The Distracted Writer Facebook Page for updates and tips in your feed.
The post Five Days to NaNoWriMo: Plot What Now? appeared first on MJ Pullen, Author.
October 26, 2019
The Writer Prepares: Six Days to #NaNoWriMo 2019
Welcome to the week-long Distracted Writer #NaNoWriMo Preparation Countdown! If you’re new to the blog or NaNoWriMo, start with the first post.
NaNoWriMo starts on Friday, and I’m busy (a) finishing up edits on another book so I can be free to start drafting, and (b) preparing my story so when November 1st hits, I can hit the keyboard running.

Prep List for Day -6
If you’ve already broken the news to your family and begun jotting down story ideas as I suggested in the previous post, Day -6 is the time to begin getting to know your characters.
Now, I admit, I debated whether to put character or plot first on this list, because–as all writers know–it’s pretty much a chicken-and-egg situation. Plot, character and emotion all move in cycles to create good story. You can’t have one without the other two.
The reason I’m suggesting you start with character, is that developing character is a task both plotters and discovery writers (pantsers) can appreciate equally. And I believe–on some fundamental, primal level–that all story springs from the basic humanity of both the writer and her characters.
If we had time, I could teach a whole seminar on character arc and development, (or I could take the shortcut of simply having you read Lisa Cron’s Story Genius). But since this blog is written to be read less than a week before you start your novel, let’s keep speed and efficiency at the forefront.
As you think of your story’s heroes, villains, love interests, protagonist, and antagonist, I recommend making short character sketches of the key people in your story in advance. You don’t have to stick to your notes, but it’s nice to have the basics down before you start writing. That way you won’t get sidelined during a NaNoWriMo writing sprint because you can’t think of a German name that means “flower.”
I, personally, am not a huge fan of character “dossiers” or long interviews that include things like your hero’s porn star name, favorite color, and childhood pets. Unless those things are a big part of the story, stopping to think about them will only bog you down. I like to keep my character sketches fundamental, and then add details as the story demands it. For NaNoWriMo purposes, you may want to keep these in a document on your desktop, Scrivener, or a handy, old-school stack of index cards.
Which Characters?
That’s a great question. Yes, it’s helpful to know a little bit about every character in your book, if only so that you don’t get the details confused from one scene to the next. On the other hand, secondary characters can (IMHO) always be cleaned up in post. The characters you may want to flesh out before you start writing are:
Your story’s hero (also called the main character or protagonist — even though those terms don’t mean exactly the same thing). For NaNoWriMo purposes, this is the main character to whom the primary story belongs. If you have multiple main characters, it’s usually the one whose perspective readers get first.Your story’s villain/antagonist. The antagonist is the character or force that puts obstacles in your main character’s way, forcing him or her to grow. When the antagonist is a person who bears your hero some amount of ill will, we call that person the villain. But the antagonist is isn’t always a bad person–in many romance novels, the love interest is the antagonist–and in fact, isn’t always a person at all. It could be an institution, nature, God, circumstance, or even a part of your hero herself.The love interest. (Self-explanatory, yes?)Key supporting characters. For our purposes, this will include anyone whose presence is fundamental to the telling of your story. The boss who pits one coworker against another. The best friend who helps your hero overcome something. The sibling who creates a crisis that must be resolved. The mentor who gives the hero advice. The Scarecrow, Tin Man and Lion.
Here’s the information I typically consider essential:
Character Name (First & Last)Where are they from? What language to they speak? Accent? Family?Key Physical Details (include things most likely to impact the story or be noticed by other characters – tall/short, skin color, hair length/style, hair color, eye color, prominent features, physical disabilities, etc.)Relationship & Family Status (at the beginning)Who is your character when the story starts? What does he care about? What does she want most in the world (external goal)?How has your character been wounded (psychologically and emotionally, as well as sometimes physically)? What did those wounds teach her about life? What is your character’s biggest fear and why? What would it mean to have to face that fear?Who will your character become by the end of the story? How will she be transformed by the trials and tribulations of the plot?What will be your characters new goal by the end of the story? How will his priorities and values change?
Some other ways to get to know your character before starting the story:
Look for pictures online of people who remind you of your character. I often find an actor or two who remind me of my characters and use their pictures as a reminder/inspiration when writing. If you’re writing a character whose physical appearance is unusual or entirely made up, consider taking a shot at sketching it out yourself. Remember, this is just for you, no one else has to see it!Make a Pinterest mood board with pictures that remind you of your characters. It doesn’t have to be just physical appearance, but other details like hobbies, passions, or even abstract representations of feeling. Whatever inspires you. This is great to do for the setting as well, or just to set the mood for the whole book.Write (or rehearse in the mirror) a short speech in your character’s natural voice, about his view on life, her external goals, or even his personal history. This isn’t a speech that will go in your book, but help you understand the character better.
Remember that you’ll come back to edit and add to your character sketches as the story goes on, but having a well-developed sense of who you want them to be makes writing their stories so much easier.
Keep Writing.
Get tips, publishing perspectives and occasional rants delivered to your inbox. Sign up for my newsletter (click the “Tips for Writers” checkbox). And don’t forget to Like & Follow The Distracted Writer Facebook Page for updates and tips in your feed.
The post The Writer Prepares: Six Days to #NaNoWriMo 2019 appeared first on MJ Pullen, Author.
October 25, 2019
NaNoWriMo 2019: T-Minus One Week
If you’re thinking of participating in this year’s National Novel Writing Month (NaNoWriMo), you’re not alone. NaNoWriMo is a great way to get started on a book for the first time, the tenth time or even hundredth time. The goal is to write 50,000 words in 30 days, and to do it knowing thousands of your writerly friends and neighbors are doing the same.

I’ve done NaNoWriMo (successfully and unsuccessfully) several times in the past. My favorite thing about it is that even if you fail to meet your November goal, it’s often a wonderful jump-start into the writing process and into a story. Two of my most popular books, Regrets Only and Every Other Saturday, started out as NaNoWriMo projects.
No matter where you are in your process, speed drafting is a wonderful exercise for writers at all levels. It teaches you to get your inner critic out of the way and JUST WRITE, which often produces more genuine and risk-taking results than writing with too much time to ponder. Not to mention, the public accountability of declaring yourself a Writer for the month can be terrific motivation when the going gets tough.
And let’s face it, the going will get tough.
This year, I’m using NaNoWriMo as an opportunity to complete a first draft of my next Occupational Hazards novella, working title Close to Home. For me, November 1 is more than just the start date for writing that novella, it’s a deadline to finish edits on another book I’ve been editing since somewhere around 1964. (Which is weird because I was born in 1975.)
To help keep me on track, I decided to do a little countdown to NaNoWriMo this year. If you’re participating, too, please let me know in the comments and be sure to follow along with the blog this week as I make daily suggestions for ways to prep for November!
Day (-7) To-Do List
Register for NaNoWriMo . Update your profile, add a picture and add the project you’re working on this year. If you can, consider donating to the NaNoWriMo Foundation to support their programming for young writers. Not only will this bring good Karma to your month of writing, but we also tend to take things more seriously when we’ve invested in them financially–even in small amounts. (Once you’re registered, find me on the NaNo site and say hi!)Choose your story idea, if you haven’t already. This may be obvious, but it is the next step. I mean, can you start NaNoWriMo with no idea what you’re writing about? Sure. There are no hard and fast rules for NaNoWriMo. (In fact, it may surprise you to learn there are no hard and fast rules for writing in general!) But I’ve found that the more clarity I had around my NaNoWriMo projects in the past, the more successful I was at completing them. And there’s nothing more frustrating than sitting down on November 1st with six gallons of coffee and your heart in your throat… only to stare at the blank page for an hour. Even if you have only the vaguest ideas, jot them down, and start mulling them over for the next week!Talk to your family. Or your roommates, your friends, your coworkers… whoever you interact with and depend on most. Especially if it’s your first time doing NaNo, or if you’re not used to churning out 1500-2000 words per day, writing this much can be an adjustment. You’ll need support. You’ll need understanding and patience. You’ll need someone to pry your head off the keyboard and pour caffeine down your throat… Give them a heads up now, and they’ll support you when you need it most next month.
I talked to my family about NaNoWriMo last night, and my 10 year old actually wants to participate with me! He’s set a goal of 1000 words, which I think is pretty good for a 5th grader who’s not terribly enamored with writing (especially when it doesn’t count toward schoolwork). He did get to meet his favorite author last week when Alan Gratz came to visit one of our local libraries, and it’s definitely inspired him to read more. So we’ll see if that translates to writing!
 Skywalker meets Alan Gratz at the Decatur Library.
Keep Writing.
Get tips, publishing perspectives and occasional rants delivered to your inbox. Sign up for my newsletter (click the “Tips for Writers” checkbox). And don’t forget to Like & Follow The Distracted Writer Facebook Page for updates and tips in your feed.
The post NaNoWriMo 2019: T-Minus One Week appeared first on MJ Pullen, Author.
September 10, 2019
Someone Misses You
Author’s Note: This post originally appeared on Instagram and my personal Facebook page. I’m adding it here in hopes it will reach more people over time. Thanks for reading, and for all the compassion I’ve received in response. You are all so loved and appreciated.
 Peggy, Senior Picture – Pelham, Georgia (1965-66)
People say I look like her, but it’s so much deeper than that. I have the same tendency to sing in the car, eat carbs when I am sad, and to say I don’t want to be a gossip right before launching into the gossip. I love romantic movies and road trips and I still make her lasagna recipe.
Like my mother, I sometimes have more empathy than I know what to do with; and I see this in my boys when their emotions are too big for their little bodies to hold. I see in them, too, a deep sense of justice—which can turn to pain when it isn’t reflected by the world around them. I try to nurture all I see of her in them, and also teach them the hard lessons I’d prefer they never gain through experience. I tell them how I had to learn to protect myself, to take care of myself, to ask for help. To not avoid confrontation at the expense of my own feelings (or in defense of others). I work at it. And I still don’t always feel like I am on solid ground.
But I have resources she didn’t, I’ve escaped the trauma she couldn’t. And still. I miss her every single day. It’s been 18 years, and the anger has faded to a hard little pebble, like shrapnel that’s healed into the tissue of my life. But grief never goes away. The unanswered questions still echo through the years, haunting my steps and my tears and the need to call to ask her how to handle a colicky baby or make her cranberry bread or what was the address of our house in Sunnyvale. She’ll never know these little people, who would have adored and idolized her and given her more to live for than that one terrible moment allowed her to imagine. She’s missed so much, and I miss her, and even two decades later it feels raw and unfinished.
If you have that one terrible moment, or even a series of mundane moments where the pain is too exhausting to be considered terrible, if you are hurting or lonely or at the end of what seems possible, please reach out to someone. Just form the words, speak them with a voice soft or rusty or loud or wailing.
And everything after that will be fractionally easier. Because someone—someone you know or will meet or who may not even exist yet—someone misses you.
September 4, 2019
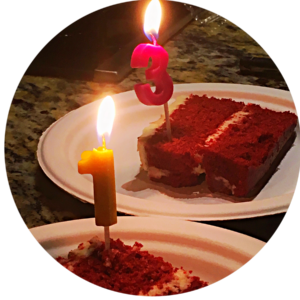
On Red Velvet Cake and Other Marital Mishaps
Earlier this week, Hubs and I celebrated our 13 year wedding anniversary. It’s widely known that home improvements are the traditional gift for the thirteenth year, right? (Okay, so really it’s lace, but… WHY?)
In any case, this year Hubs and I gave one another the super romantic gift of new windows for half the house. Nothing says “enduring love” like the tinkling sounds of hydraulic nail guns and long, whispered conversations about wood rot…
Since our actual anniversary took place amidst a flurry of construction, baseball practice, and meetings at the elementary school, we didn’t get out for a quiet dinner in a candlelit restaurant with white tablecloths or anything. But we did observe a time-honored tradition of enjoying one of our least favorite desserts, Red Velvet Cake.
Neither of us can say for sure how the Red Velvet Saga began. An early date, maybe? Before we knew one another well enough to be comfortable being totally honest? A visit to a restaurant where Red Velvet Cake is the signature dessert, at a time when our relationship was new and impressionable?
 Store-bought on paper plates on a weeknight – definitely our style.
 At any rate, somehow each of us got the idea early on that Red Velvet was the other’s favorite dessert. And then, because we are both excruciatingly considerate about little things, we frequently each ordered or suggested Red Velvet Cake on future outings as a kindness to the other.
Hubs would point out that a restaurant had a yummy-looking cake on the menu because he thought I liked it. Which, of course, only reinforced my idea that it was his favorite. So when I picked up a box of gourmet cupcakes for a party or to celebrate our anniversary, I always made sure there was a red velvet in the mix. Which made him even more sure that I loved it the most….. and so on.
This went on for years. It was like The Gift of the Magi for baked goods. Sometimes I think of all the chocolate mousse and tiramisu and key lime pie we missed during that time and nearly weep.
We were six or seven years into our marriage when we finally figured it out. While the details are fuzzy, I remember standing in our kitchen, looking at an untouched cupcake or to-go slice and telling Hubs, “you should eat that. It’s your favorite.”
He looked genuinely confused. “No. It’s your favorite.”
“What? You love it. You’re always ordering it.”
“For you. Because you love it.”
“Are you kidding? Do you think I’m someone else?”
Well. You get the idea.
What we learned that day was that, while both of us think Red Velvet Cake is just fine every once in a while, neither of us would order it first given other options.
We learned that both of us are stubbornly kind and loving, and make a tremendous effort to politely meet one another’s needs. A good thing, on the whole, I’d say.
We also learned that sometimes it’s possible to be too polite and considerate of one another’s needs. A loving relationship should be a safe place to say what you like and don’t like. And to ask for what you want first, sometimes.
I can’t remember how it came up again, but we told this story to the kids a few weeks ago. They both thought it was hysterical and that special kind of weird only parents can be.
So when I came home on our 13th Anniversary this week with a store-bought red velvet cake to eat after baseball practice, it was an immediate, shared inside joke with the kids. We laughed together, we lit silly candles, and we told the whole stupid story again. None of us finished our slices, though. Apparently ambivalence toward Red Velvet is an inherited trait…
This is how family stories start, I think: one funny thing leads to another, and sharing it over and over brings more connection, until it’s part of the foundation of who we are together.
And you know what? I couldn’t ask for a better anniversary gift than that.
Hungry for More?
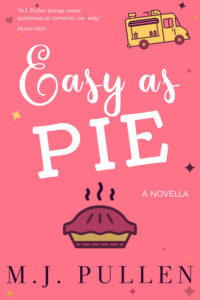
My new contemporary romance novella Easy as Pie is out this week! Fill up on tasty food truck cuisine, reality TV drama and a delicious Irish bartender… all in a short, two-hour read, and all for under $2!
Available NOW for Amazon Kindle and all Kindle-friendly devices.

Stay in touch! For exclusive content, updates and giveaways, be sure to join my Distracted Readers newsletter list. You can also join our Facebook group.
This post contains affiliate links, which means the author may receive a nominal commission for items purchased through these links. Commissions are typically a fraction of the item’s cost and do not impact your purchase price in any way. Thank you for your support!
The post On Red Velvet Cake and Other Marital Mishaps appeared first on MJ Pullen, Author.
August 13, 2019
Shut Up and Take the Picture
Y’all probably know by now that I was in a car accident a little over a year ago and (for what seemed at the time like a minor accident) it has seriously changed my life… Sometimes in ways I don’t even think about. When you deal with chronic pain, after a while it becomes your new normal. You just cope around it and get on with your day as best you can.
The other day, my attorney asked me to gather some pictures of myself pre-accident, showing my level of activity and demonstrating previous abilities that I’ve lost. As I scrolled through recent years of photos and searched on terms like “sports,” “hiking,” and “holding kids,” I ran through all the feels…

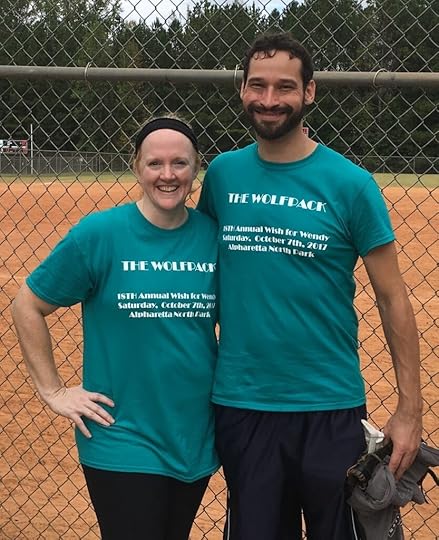
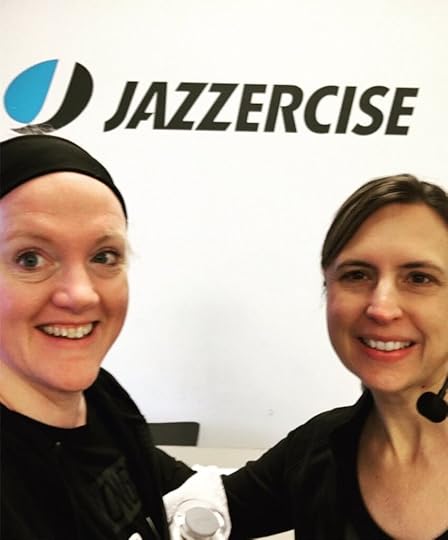
First: sadness. I felt an enormous sense of loss for things I’m missing. Hiking, camping, softball, Jazzercise, reading, tossing my kids around, doing puzzles, picking up my friend’s toddler… these are things that were once an integral part of my health, happiness and identity. And for now, I can’t do most of them; and things like reading and hiking are severely limited.
For the past fourteen months, I’ve been so focused on figuring out how to manage the pain and how to do the things I still can do, I haven’t taken stock of all the things I’m missing out on. Seeing all of it there together in living color brought on a wave of unexpected grief. Like I’ve lost part of myself in the last year, and I can only hope that with time and training I’ll be able to bring most of her back.
Pride. Yeah, okay, maybe I can’t do everything I used to do right now. And maybe some things–like tossing my growing kids around and probably playing softball with any proficiency–were bound to come to an end soonish anyway. But as I looked over the things I’ve done in the last few years, I realize that I’m more of a fun mom and general badass than I sometimes give myself credit for. I never have and never will be an elite athlete, and I may or may not ever meet “healthy” weight standards.

But damn, y’all. According to Google Photos, that hasn’t been holding me back. I’m super proud of the pictures showing me being active with my kiddos, committing to exercise challenges, and having fun with my life. Seeing those pictures is really helping inspire me to dig in and work hard to get as much of my health back as I can.
I dig that girl in the pictures. I want to be her again.

Gratitude. I’m grateful for my overall health, good fortune, and the wonderful people in my life I’ve shared all those moments with. For my kids and Hubs and my wonderful Jazzercise family and friends who say things like “hey, let’s go zip-lining in the redwood forest!” or “we’ve never walked 39 miles in two days in Chicago together… don’t you think it’s about time?”

Because when I look through these pictures, I’m almost never alone in them. And when I am alone (like when I traveled by myself in England a few years ago), it was almost always just hours before or after I made or met a friend. And those solo journeys wouldn’t have been possible without the love, support and trust of a guy who is happy to go with me anywhere, and to hold down the fort at home when I need to go alone.

Acceptance. Sometimes I hate pictures. When I stop to take a selfie or let someone snap a candid shot of me while doing something active or revealing, I often hesitate. Do my knees look fat? Are my wobbly thighs showing? Do I look too sweaty, dirty, washed-out, bloated, or tired? Will people think I’m self-absorbed if I stop to take a selfie on every time there’s something cool in the background? Am I self-absorbed just for worrying about whether people think I’m self-absorbed??

Don’t lie. You know what I’m talking about. You’ve totally been there.
But looking back through the visual record of vacations and softball tournaments and the rest of it… I don’t see the chubby thighs or wrinkles or arm fat I always think I’ll hate. I could see my weight fluctuating over the years, of course, but even when I look back at my heavier self, all I see is how much fun I was having. How happy my family looks. What an adventure we’ve had.

Remember that trip where the kids hated that we forced them into Hawaiian shirts, but all was forgiven when we got ice cream and ran around on the beach at sunset? Remember biking 24 miles pulling both boys in a trailer? (My thighs sure do — they may be wobbly but they’re still stronger for it!) Remember we had such a blast camping but ended up in urgent care after a spider bite?

These photos and memories are my treasures. And I’m glad they’re here, glad I didn’t wave away the camera because of cellulite and imperfections and hating my face in profile. These photos are proof of what I’m capable of, far beyond what a lawyer or insurance company needs to know (although that has turned out to be pretty important, too!)
They’re proof of a life lived to the fullest: risks taken, games played, mountains climbed, hugs given, grins cheesed… All the things that really matter in the end.
So next time there’s a camera pointed your way, I hope you’ll just smile, relax and enjoy the ride.

Your turn! Post a picture in the comments that makes you feel proud of your life, even if you weren’t super excited about having it taken at the time.
Post a comment below and you’ll be entered to win a monthly prize! Each month, I’ll be giving away books (mine or other great authors’) and/or Amazon gift cards. Winners will be drawn from commenters on my blog posts and the Distracted Reader Email List.
The post Shut Up and Take the Picture appeared first on MJ Pullen, Author.
August 12, 2019
Author Toolbox: Basic Graphic Design Tools
Please note that the information in this post is based solely on my direct experience and individual usage, and is current to my knowledge as of August 2019. Please reach out in the comments if you spot errors. The software providers listed frequently update the functionality and design of their products. Be sure to test out each option to see how it works for you before purchasing.
I’m not a graphic designer, by any stretch of the imagination. But as a working writer who does most of her own marketing, I’ve learned a thing or two. And there are some basic design tools I find useful for quickly editing pictures, creating social media graphics, and playing around with visual ideas for inspiration.
 Some of us have other talents, okay?
And while I unequivocally recommend investing in a professional book cover designer before taking your book to market (if you’re self-publishing), sometimes being able to sketch out a digital cover concept lets me home in on the genre and mood of a story, and even helps me to visualize potential titles. (Sometimes the title in my head doesn’t work in the context of a cover.)
If you have a clear vision for your book cover or a fun idea you want to share with your designer or publisher, it’s sometimes helpful to be able to create your own mockups for inspiration. Bear in mind, however, that we authors are almost always limited in our ability to conceptualize commercial covers for our own work. The objective, seasoned eye of a trusted design professional will almost always give better results for the reader than anything we might come up with on our own.
A few basic graphic design skills and tools can also help you work with the designs your book cover artist provides. Many designers will include 3D renderings and various versions of your book cover at little or no additional cost. Some will even provide basic graphics for ads on social media sites. Being able to work with those pieces to create your own posts, ads, etc. can save you lots of time and money in the long run.
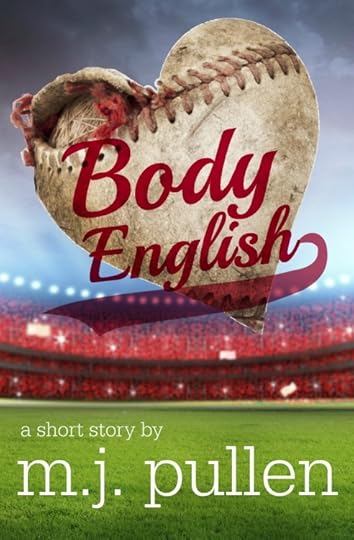
With a few tricks I gleaned from my former marketing career and working with patient, talented designers — I’ve even designed my own covers for and handful of short stories and lead magnets over the years. For example, I spent a few hours on a Saturday creating this simple cover for my free short story, Body English. While it wouldn’t hold up as a retail cover (I’d pay a real designer if I were planning to sell this as a book), it’s served its purpose as a lead magnet nicely.
If you’re ready to ramp up your book marketing efforts, engage more with your audience, or learn to do a bit of graphic design work for yourself, there are plenty of affordable graphic design options for authors. To get you started, I’m outlining the ones I use most often: Adobe Photoshop, Canva, and Picmonkey. Please feel free to mention other favorites in the comments!
Photoshop
Of course you’ve heard of Adobe Photoshop. It’s been synonymous with photo edting for so long that its name is a verb. If you have some existing graphic design skills, or you want detailed control over the minutia of your designs, Photoshop is still the industry standard.
Photoshop Benefits
Because it allows you to work with layers, Photoshop can be useful for fine-tuning designs or working with base designs from your book cover artist to create your own graphics. It’s by far the most flexible–and the most complex–of the options I’m presenting here.
There are virtually no limits to how extensively you can edit a design in Photoshop, the size of the canvas, or the resolution. Your design is yours, in all its separate parts. If you save a graphic and realize you need to tweak the font size or delete the sale tag, it’s easy to pull up and manipulate without having to re-download a final version. Photoshop allows you to make extremely fine edits to photographs and graphics, so that they are almost undetectable. (Be careful, though, it can be addictive!)
Photoshop Drawbacks
Difficulty level = expert.
With great power, comes great confusion.
Spider-man’s accountant
Because of its complexity, Photoshop is the hardest design tool to use, particularly for beginners. If you’ve never used an Adobe design product before, the controls aren’t super intuitive, and there’s a pretty steep learning curve. You may find yourself spending half your design time watching YouTube videos to master it.
That’s a worthwhile investment if you want lots of control over your designs, or you’re planning to do significant edits (beyond built-in web filters and simple touch-ups) to your photographs. If you need graphic design or photo editing capabilities for purposes beyond supporting your writing, Photoshop could be your thing. If not, you might want to experiment with one of the web-based options instead.
 Photo credit: Adobe Photoshop Tutorials
Photoshop Elements is a slightly trimmed down version of the software that provides more help to new users, and is a good compromise for beginners who want both ease of us and flexibility. It should suit most authors’ purposes nicely.
Text limitations. If you’re using Photoshop for anything other than graphics with a few lines of text, the program starts to struggle and may give you fuzzy, hard-to-read results. For more text-intensive pieces (like a PDF version of your newsletter, sell sheets, or even book interiors), you’ll also want to get Adobe InDesign, which allows for better integration and flow of text and images.
Try Photoshop
Adobe Photoshop CC (the full version) is available through the Creative Cloud photography plan for around $10/month and includes the companion LightRoom photography editor as well as all updates. If you need multiple Adobe products (like InDesign, Adobe Stock, Illustrator, etc.), there are more comprehensive plans for $30-50/month. Or, you can choose to fully license the easier-to-navigate Photoshop Elements software for a one-time fee of just under $100.
Like most software purchases, the monthly subscription option means you can cancel anytime and you’ll always have the most up-to-date version of the software. With the full license, you’ll own the current version forever without having to pay again. It all depends on how extensively you’ll be using the software and for how long.
Canva
Canva is my current favorite web-based design program for most things. More fully-featured than a photo editor, Canva’s specialty is pre-made social media and other graphic templates that it’s easy to customize as your own. You can choose a template and customize everything from the colors to the text to the photograph. Or you can start from scratch and design your own using the simple drag and drop features.
Canva Benefits
Canva is easy and intuitive to use, and the stock templates are generally well-designed. It’s a great place to get ideas and to learn what works (and doesn’t) with social media designs in particular. If you keep things simple–and you should–you can create or customize designs very quickly. Then download them to your computer to post wherever needed.
Canva lets you upload and store your own photos, book covers, etc., to use over and over as often as you like. You can also take advantage of free or low-cost stock photography, icons, and graphics. It even has some book cover templates built in so you can quickly envision how a concept will look or build an inspirational cover to spur on your writing. (Again, I recommend caution when designing your own covers for publication – it can be really risky to publish a less-than-professional cover).
Another huge benefit of Canva for marketing is the Brand Kit, available with the Pro subscription. See details in the Pro section below.
Canva Drawbacks
Almost all my complaints about Canva come down to working with photos and user-uploaded graphics. There are only basic photo editing tools in Canva: about the same ability to edit you’d find on a simple phone app. You can apply a few basic filters (think Instagram), and adjust things like saturation, contrast, and warmth. But you can’t easily touch-up a photo the way you can with PicMonkey (see below) or Photoshop.
And: photo grids. Ugh. Canva uses grids and frames to apply your photos or artwork to a design. It takes a minute to figure out how to use these, but it’s pretty simple once you do. And if the design you have in mind fits one of their (many) pre-made grids exactly, you’re golden. But other than increasing the spacing between pictures (which, oddly, does not create a matching border around them), the grids aren’t adjustable. You can’t change the dimensions to make one frame wider and the others narrower, for example — which can be really frustrating when you’re working with preset graphics. Like book covers.
 This is what using photo grids looks like in Canva. While there are lots of pre-designed options and it’s easy to drop your photos into the grid, they can’t be customized or tweaked.
You also can’t apply a frame to an existing object in your design. You have to add the frame, and then drag the picture or object into it. And again, if the frame or border you happen to like is square, you can’t apply it to a rectangular book cover (you can adjust which part of the book gets cut off but that’s about it).
Example: Say your design calls for a collage of pictures–maybe you’re doing a promotion with other authors and you need six picture openings for headshots and book covers. You can’t add or delete picture openings – too bad if you can only find a grid with four or eight openings – nor can you change the size or proportions of the openings within a grid. So if the headshots need to be short and square but the book covers need to be taller to see all the text–you’re out of luck. You can add each photo and book cover to your design manually, of course (without using the grids), but that requires a lot more work and you’ll almost never get them aligned perfectly. For quick, easy collages that allow you to quickly adjust proportions, I recommend PicMonkey.
NOTE: With both Canva and Picmonkey (as with pretty much any online photo editing software), your completed graphics are only exportable as flat files (.jpg, .png, etc.)–not in layers. So if you made a beautiful ad only to discover that your text is too big or the color is a little off, you can’t tweak your downloaded file on your computer. You’ll have to go back to the program, make changes, re-download, and save over your previous file.
This is minor, but you should know that Canva works a little differently than you might be used to when it comes to file retention/saving. If you open a design to edit it, your changes are automatically saved to the original file and you can’t revert back–except by clicking ‘undo’ over and over. Changing the file name at the top doesn’t create a new copy (like a ‘Save As’ feature), but simply overwrites the old file with a new name. So if you want to use a previous design as the model for a new design you MUST remember to create a copy and give it a new name BEFORE you start editing. Sometimes I’ve opened a design and started tinkering before I realized that I should have made a copy. It’s workable, but can be frustrating if you are working on several designs at once and lose track of your versions.
Despite these frustrations, I still work in Canva more often than any other graphic design tool. I like having quick drag-and-drop access to my own uploaded files as well as free or inexpensive stock photography and graphics. There are enough templates that I can almost always find something that will work for what I’m trying to do. And frankly, sometimes Canva’s limitations can save me from myself and prevent me from over-designing and making something too busy.
If I need more control over the layout, I either start fresh and do everything manually or use Photoshop or Picmonkey.
Getting the Most from Canva – Pro Version
The basic version is of Canva free, and I definitely recommend starting there. But I’ve found that I really like the Pro subscription at $120/year billed annually (or $12.95/month for monthly billing) — prices at the time of this writing.
With the Pro version, you get lots more design templates, stock photos, and graphics already included. You can also resize your designs with Pro, and there’s a super-cool feature called “Magic Resize” that lets you take the same basic design and create a bunch of different copies in various sizes all at once. The content on each size will then have to be adjusted a bit to your desired layout, but it’s a huge timesaver if you want to create several items with essentially the same content.
For example: say you’re going to a conference and you need to create business cards, bookmarks, flyers, and a couple of different social media graphics with your author headshot, latest book cover, and the same basic text. You can create one version to start with and use Magic Resize to copy the background color, graphics, and text to all the other sizes. Then, just adjust each one individually as desired rather than starting from scratch.
Since I use Canva frequently, I love that the Pro version offers more folders for sorting my designs: I can sort promotion graphics by different book titles, for example, and have separate folders for quotes, edited pictures, blog graphics, joint promotions, etc.
But the best, most under-appreciated feature of Pro (in my opinion), is the Brand Kit. This tab lets you save your brand’s color palette(s) for easy access when you’re creating. If you don’t know your brand colors, just ask your book cover or website designer to send you the main color codes (Hex#) for your design. [If you’re serious about branding or just starting out, you can get some help from a professional like Color Me Kate.]
Canva’s brand kit lets you upload and save your own purchased fonts, and set default fonts for Heading, Subheading, etc. You can also save brand logos for easy access, and save templates if you create the same kind or style of graphic on a regular basis. All this makes it simpler to create a consistent look for your posts, ads, etc. Brand consistency is so important for helping readers recognize and get to know you!

You can see in this screenshot what the Brand Kit feature looks like. My brand is still evolving, and I’m still experimenting with the best way to create visually engaging posts. But you can see that I have saved color palettes and logos for both my fiction brand and my consulting/freelance brand. I’ve uploaded some fonts that I’ve purchased over the years to help me create a look that aligns with my books.
If you start using Canva and enjoy it, I definitely recommend the Pro version. It’s easily worth the $10/month.
PicMonkey

I’ve used PicMonkey as a basic photo editor for years, and while it’s no longer my first go-to for design, its simple, easy-to-use photo editing capabilities are still strong enough that I continue to pay for the Basic plan every year in addition to Canva. (Note that I have “grandmother” pricing, see below for more!)
PicMonkey Benefits
PicMonkey is simple and intuitive, once you’ve experimented a bit to get the lay of the land. It has a pretty (occasionally cutesy, but I’m okay with that) interface, and its photo editing features are well beyond what you can do in Canva, while being much simpler to use than Photoshop.
Like Canva, PicMonkey has a drag-and-drop functionality in which you can upload your own photos to incorporate into your design. Unlike Canva, you can build collages from your own images in PicMonkey and easily delete, add, or move the frames around to customize it for your needs. If a collage design you like has 10 spaces for photos but you only have 9, simply delete the unwanted box and the spacing will adjust accordingly. If you leave a space blank, it simply won’t be there when you export to the editor (so it becomes the color of the background and you can overlay graphics onto it.) You can increase or decrease the borders between pictures, too, which is really nice when you’re trying to keep a clean look or leave room for text, etc.
 PicMonkey Photo Editor
The photo editor is much more robust in PicMonkey than in Canva, as well. You can do many of the same basic filters and color adjustments, but there are many more textures and overlays for photos than in either Canva or Photoshop. It’s actually a lot of fun to play with in that regard.
PicMonkey has touch-up features designed just for pictures with faces–these aren’t available in Canva at all, and are more advanced features in Photoshop. And while I am all about real beauty (seriously), there are times where I’m running on no sleep and need to soften the bags under my eyes a tiny bit; or when my teeth appear extra-stained in the lighting, or I forgot to put on lipstick and I look half-dead. It’s nice to be able to do quick, minor fixes that allow me to feel comfortable posting something I might not otherwise want to put out in the world–and it saves me the time of getting all dolled up like a professional model just to put up a selfie with today’s coffee mug or a book I’m giving away.
Like Canva, PicMonkey has text capabilities, a few built in graphics and some basic social media templates you can use to start your design. Their library of templates isn’t as robust as Canva’s, but they do offer lots more blank templates–so you can choose the size of the social media graphic you need and still start with a blank canvas.
PicMonkey Drawbacks
PicMonkey started out as a pretty robust free editor, but they’ve moved to a pretty strenuous pricing plan, in which you can’t do much with the free version any more. Apparently their software developers started getting these weird cravings for rent money and food for their kids. Sheesh.
The net result is that you can’t do nearly as much with PicMonkey’s free version as you can with Canva’s. There was always a premium PicMonkey option (it used to be called Royale, which made me feel fancy), and I’ve always found it worth paying for. But some early users of the free version found it irritating when features they were used to getting for free migrated to the premium version.
 Did you just call me basic?
My formerly Royale, now “Basic” subscription price has gone up over the years too–and I’ve lost some features like the ability to use my own fonts without upgrading further–but they’ve still made an effort to grandfather in old-timers at lower pricing than the current retail. And even the retail price for Basic is lower than Canva Pro, if you need some extra functionality but not all the bells and whistles.
The newest version of PicMonkey looks and feels more like Canva, but the navigation is a little different and takes some getting used to. There are lots of cool options, but the interface can be a little overwhelming to new users.
Like Canva, PicMonkey allows you to save your own photos and artwork to the “Hub,” but it doesn’t allow you to access those uploads in the sidebar for quick drag-and-drop like Canva. Not a huge deal, unless you’re experimenting with 40 different headshots of yourself to see which one looks best on a business card. Not that I would know. I’ve heard, that’s all.
Since their pre-made template library is more limited than Canva’s, PicMonkey doesn’t have as many already-designed template options–including, notably: they don’t offer book cover templates. And while I complained about the sizing issue on Canva’s many drag-and-drop frames, so far PicMonkey doesn’t offer frames at all–except for those that encompass the entire canvas (and those also cannot be custom-sized).
Even though PicMonkey doesn’t offer a truly free version, you can pay the annual fee and get the Basic version (which has just about everything the average author/marketer could want) for about $6 a month, or $8 if you pay monthly. With the Pro version, you can use your own fonts, get unlimited storage and export as PDF (in addition to JPG and PNG already included in Basic) for $10/$12 month — the same as Canva’s Pro version. Read more about PicMonkey pricing here.
The Bottom Line for Authors
To sum up, any of these three options can be useful for authors. If you also dabble in photography, want to teach yourself more about graphic design, or don’t mind investing the extra time to learn how to get things juuuuust right, Photoshop might be a good fit for you. It’s the only option of the three you can straight-up buy, rather than doing a recurring subscription. That’s nice if you only need to do design intermittently and aren’t super worried about updates. It’s also great for working with layered files from a designer (with permission), or in combination with other Adobe products.
PicMonkey and Canva are the user-friendly, web-based options. Over the last couple of years, they’ve become similar beasts in many respects, and their pricing structures are not terribly different. So:
PicMonkey is easier to use with existing photos and gives you more options for touching up and filtering. There is much better functionality for collages and and more blank canvases for the design-minded. It’s easier to adjust the size of overlays, too. If you plan to edit lots of selfies or other photos of humans, PicMonkey beats Canva every time.
If graphic design isn’t your thing, and you’re not planning to do lots of posts with multiple pictures, Canva offers many more existing social media templates for inspiration. I also love their Brand Kit for keeping things consistent. And if you like the idea of designing your own book covers for inspiration or free giveaways online, Canva has some fun places to start.
Personally, I keep the Canva Pro plan for most design uses and brand consistency; but still find it’s worth paying for the PicMonkey basic for picture editing and quick, clean collages. As these two platforms evolve and add features, I imagine I’ll be able to put all my graphical eggs in one basket. Until then, the time I save by having both options is worth the cost.
Can’t decide? If you want to try the drag-and-drop functionality but don’t know which is better for you, I recommend trying out both of these on the monthly plan (or free version) for a few weeks to see which one suits your needs. Then switch to the annual plan for the discount when you’ve found your happy place.
Have you tried these programs and spotted features or drawbacks I missed? What is your favorite way to edit photos or create social media posts? Comment below and help out your fellow writers.
This post contains affiliate links, which means the author may receive a nominal commission for items purchased through these links. Commissions are typically a fraction of the item’s cost and do not impact your purchase price in any way. Thank you for your support!
Keep Writing.
Get tips, publishing perspectives and occasional rants delivered to your inbox. Sign up for my newsletter (click the “Tips for Writers” checkbox). And don’t forget to Like & Follow The Distracted Writer Facebook Page for updates and tips in your feed.
The post Author Toolbox: Basic Graphic Design Tools appeared first on MJ Pullen, Author.


