Majanka Verstraete's Blog, page 2
November 30, 2023
Crafting: Ceramic Christmas Figure – Penguin
Time Required: 1h-1h30
Difficulty: Easy
Review of kit: 4 out of 5 stars
Last time, I showed you a ceramic figure of Santa Claus that I painted. I bought three figures in this set: Santa Claus, a reindeer, and a penguin. After finishing Santa Claus, I decided to give the reindeer a shot, and I have to say, I enjoyed painting the penguin a lot more than I did Santa Claus, mainly because I didn’t have to do any colour mixing myself. Well, I did mix white and red to make pink for the cheeks, but I didn’t need much, so it was easy to do.
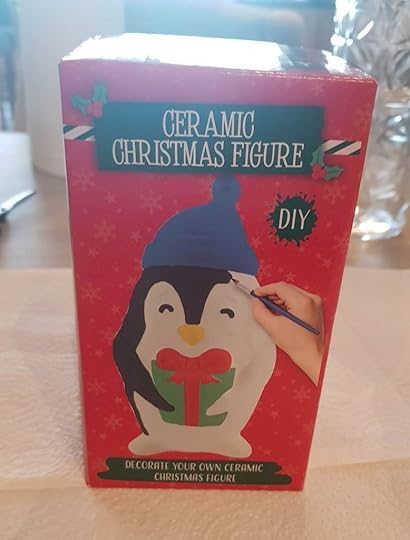
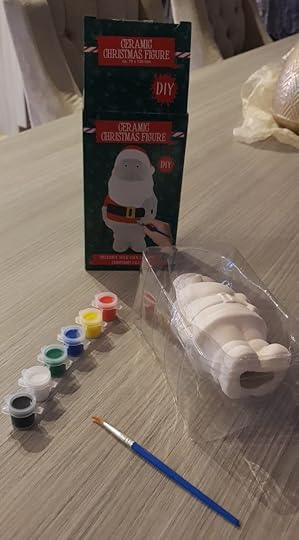
I decided to use the same colours as displayed on the kit, since I rather liked the colours.
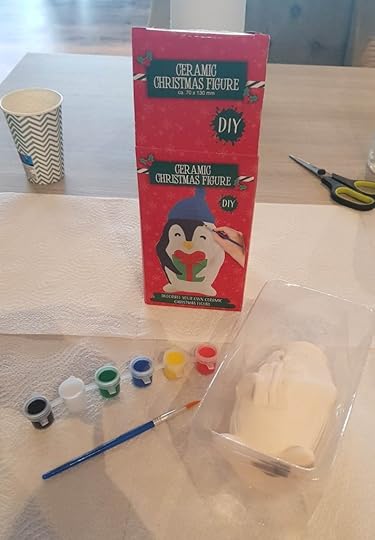
Similarly to the other kit, this kit included paint in the primary colours and black and white, a ceramic figure and a paint brush. Basically, everything you need to get started.
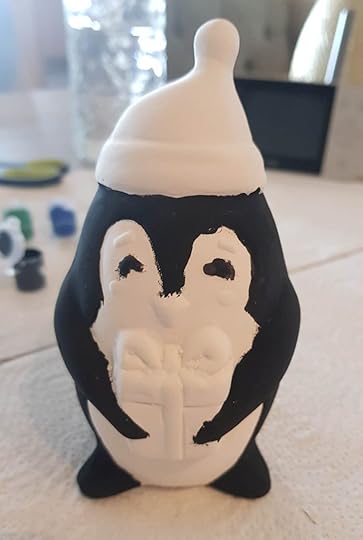
I decided to start by painting the biggest part of the penguin black. I usually give two layers of paint, but the black only needed one layer. That was a good thing, since I nearly ran out of black paint.
After working with black, I decided to paint the hat next. The hat received two layers of paint.
Next, I worked on the gift the penguin is holding. It wasn’t that easy to paint this, and I noticed that in the picture, it looks rather sloppy. In real life, it doesn’t look that bad especially since you don’t usually zoom in on it.

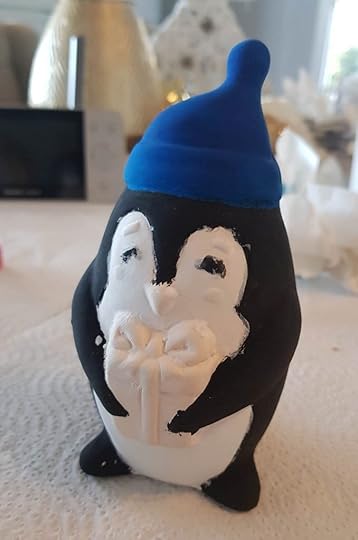
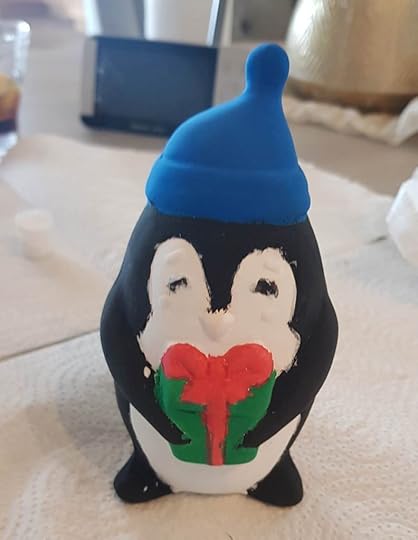
And here is the finished picture! I re-did part of the eyes and added pink on the cheeks.
I really like how this penguin turned out, especially when it’s standing next to my other Christmas decoration. Next time, I’ll give the reindeer a shot. If you want to get started with one of these figures, I do recommend the penguin though, since you don’t have to mix any colours for this one.


November 23, 2023
Crafting: Ceramic Christmas Figure – Santa Claus
Time Required: 1h – 1h30
Difficulty: Easy
Review of kit: 3 out of 5 stars – downside is that only some colours are included, not all
I found some fun crafts for this Christmas season, including a ceramic figure of Santa Claus. I bought this figure in the Action store in Belgium, where it cost about 1.50 EUR, so it was quite cheap and it did provide me with an hour of fun.
The box contained three items: the ceramic figure, paint in six colours (primary colours plus black and white) and a small paint brush. The paint brush was actually the ideal size for painting the figure, and was easy to paint with without leaving any stains.
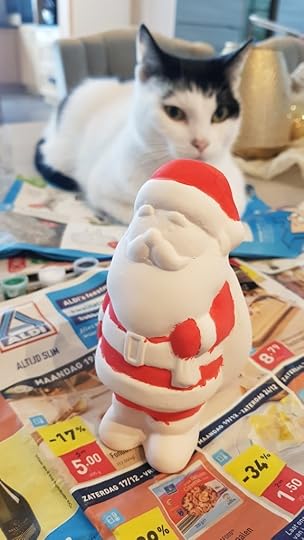
I started by painting Santa’s clothes in red. You can see a close-up of the figure above. It was quite detailed (with eyes, moustache, bushy eyebrows). My loyal feline helper, Teigetje, helped me paint.

A close-up of the figure with two colours painted: red and black. I decided to start with the colours provided by the painting set, and any colours that required mixing, I would do at the end. I gave two layers for each colour.
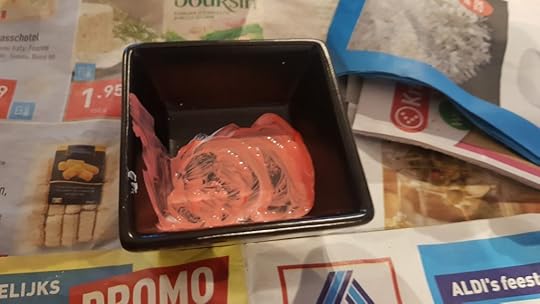
After finishing with the base colours, I had to mix a few of the colours up to get the shades I wanted. Unfortunately, that wasn’t such a success as it was difficult to get the right shade.
I wanted to mix pink for Santa’s face, and while the colour looked okay-ish when I had mixed it, the moment I applied it, I thought it looked too pink. Same with Santa’s beard: I wanted to go for a light grey (since I didn’t want too much white considering Santa’s outfit already has a lot of white) but I ended up with dark rather than light grey.
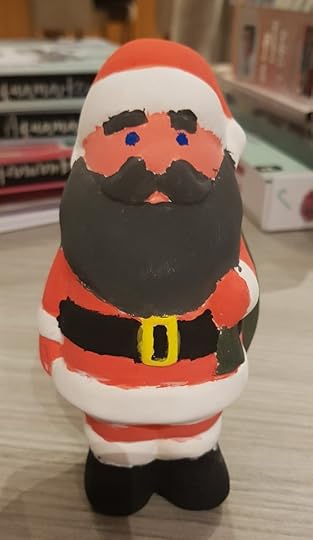
Above is the final result. As I mentioned, I’m not that pleased with the pink or grey, but it was fun to paint this figure. I spent about 1h- 1h30 painting Santa. I would say it’s also a fun item to craft with kids since they can get creative on Santa’s outfit. However, one downside is that you have to mix certain colours to end up with the right shades, and it’s difficult to get the correct colour.
Next week, I’ll work on a Christmas-themed clay figure.
November 19, 2023
Crafting: Winter House
Time Required: 2h if you colour the parts, about 30min if you only assemble the parts
Difficulty: Easy
Review of kit: 4 out of 5 stars
I’ve always been fond of these winter-themed houses. Some people have so many houses, you could just call it a street. I decided to start with one and to see if I enjoy crafting them as well. Turns out that I rather like working on these. It doesn’t take that long (in fact, if you don’t colour in the parts, you can get one done in about 30 minutes, I’d say).
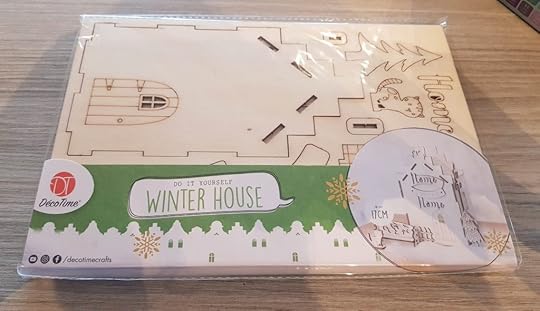
According to the guidelines, it was recommended to colour these using Aquamarkers. I bought a set of Aquamarkers in hues of purple and blue. Perhaps not the best colour choice for winter houses, but the set included white-ish colours (which I used to colour the snow) and I didn’t want to spend a lot of money on different sets of aquamarkers in case I didn’t like doing this.
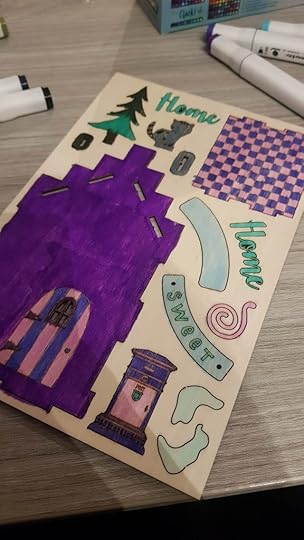
Anyway, I began by colouring all the parts beforing removing them. A lot of people don’t colour these, and that’s totally fine, but I wanted to see what it would look like with a dash of colour.
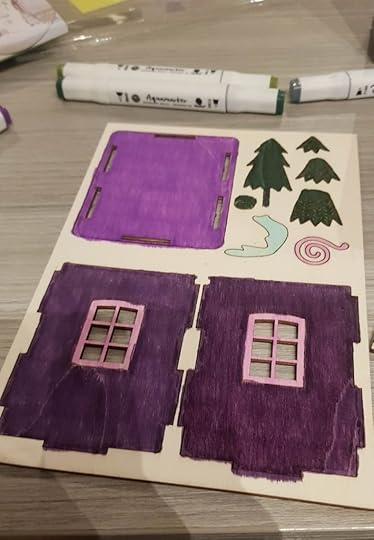
Another panel that I coloured first. I decided to use the darkest colours for the walls, and lighter colours for the windows.
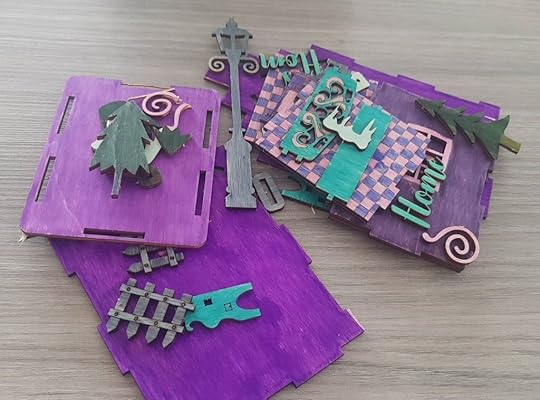
After colouring everything, I removed the parts from the wooden panels. This went quite easy, except for the word “Home”. I lost once letter “e” on that, but that was easily fixed with some glue.
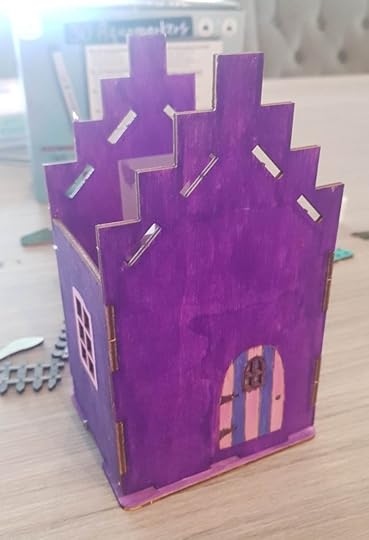
I first put together the base of the house. Although the pieces lock together, I also used glue just to make sure it would hold.
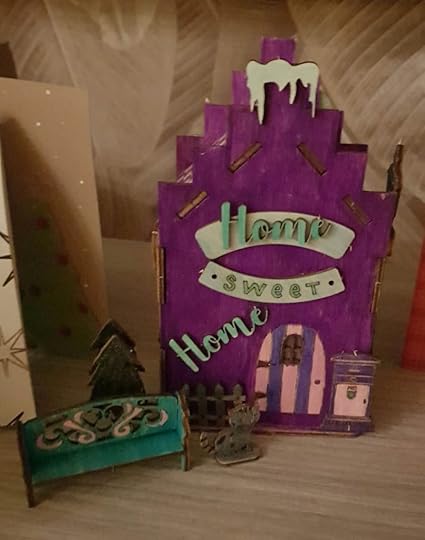
And here is the finished result, with all the details added. The house looks quite nice inbetween my other winter decorations.
This would also be a fun activity with kids, as it doesn’t take that long and it’s basically just colouring and assembling. Or just something relaxing to do on a cold winter’s night.
February 16, 2023
Crafting: Paint By Number – Cats
Time Required: 4 to 6 hours depending on number of layers
Difficulty: Medium
Review of kit: 4 out of 5 stars
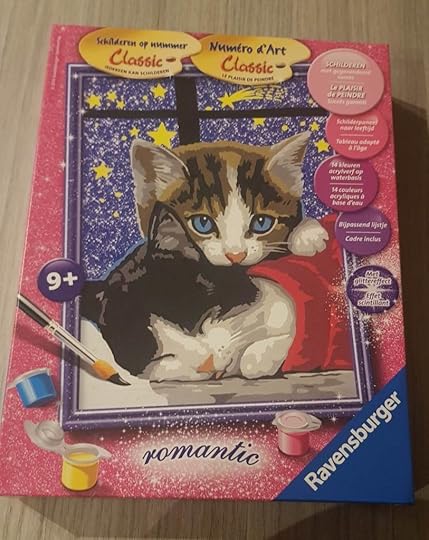
I still had one of these paint-by-numbers sets lying around that I purchased years ago… woops. I didn’t get around to doing it then, although I do like to paint-by-number, but I just never really got around to it. So, since I had some spare time on my hands, I decided to finally finish this project.
While the kit is listed as age 9+, some parts of it were tricky to paint. Perhaps this was because of the age of the kit, and half of the paint having dried out already. I could salvage most of the paint by adding water, and mixing it with water, though. It’s probably a lot easier if you – unlike me – don’t wait 10 or so years to get started on this. You’ll also probably need to use less layers.

The kit contained several elements: paint brushes, paint, the painting itself with the drawing of the cats on, the frame, and glitter. The brush was still in good shape, but like I mentioned, most of the paint had dried (mea culpa, though, not the kit to blame for that). But as you can see, besides some water, this kit has everything you need to get started.
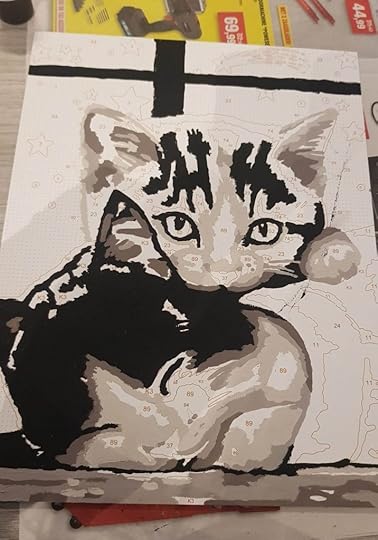
Above is a close-up of the first layer, with some colors painted, others not yet painted. I found it really relaxing to work on this painting, and it’s a nice bonus that the cats resemble my cats.
And after a few more layers, and adding glitter… Tada!
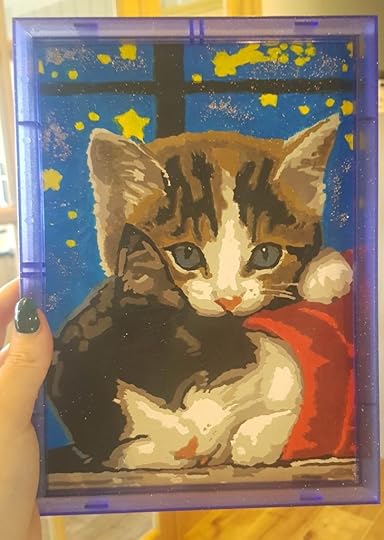
I was debating whether to add the glitter or not, but ultimately, the painting seemed to demand it. Plus, this painting will be used to decorate the nursery, so it could use a whimsical touch. I really like the outcome of this painting, despite struggling with the paint. The cats look a bit like two of my cats – Teigetje and Kyra, which is a nice bonus.
February 14, 2023
Urban Legends Investigated: Madame Tussaud’s Chamber of Horrors
 Madame Tussaud’s is obviously a real place. In fact, it’s a famous tourist attraction. Whatever makes people intrigued by wax museums, I’ll probably never know as I don’t care about it in the slightest. Just no my thing. Maybe I watched too many horror movies about people being turned into wax figures, but I find wax museums creepy.
Now, making wax figures is an art, one that Marie Grosholtz (as Madame Tussaud was really called) knew like no other. I’m certainly impressed by the skill that is required to make a figure look so lifelike. But sometimes truth is more horrifying than art. Especially the gruesome exhibit in the Chamber of Horrors… One could think the exhibition is so gruesome, the blood so horrifying, the wounds so realistic, that it might be real men and women being subjected to these terrors, rather than wax figures.
But that’s just an urban legend, right?
Well…
The French RevolutionTo give some background about Madame Tussaud’s history: by her late teens, she was already quite famous as a wax sculptor. She resided in Paris at the time and she did hang around with the high society of the day, including the royal family who had even hired her to teach art.
All seemed to be going well for Marie Grosholtz, until the French Revolution broke out. Suddenly, the people she was friends with, the royal family who had hired her… They became enemies of the people.
Marie undertook the no doubt arduous and upsetting task of modelling the severed heads of the people subjected to the guillotine, both for propaganda and record-keeping purposes. Some of these people she had known personally. As a royalist, Marie wasn’t safe for the French Revolution either, and she was eventually arrested but managed to escape.
Exhibition in LondonIn 1802, Marie had married and taken the surname Tussaud, from her husband. She left France with one of her sons and headed to England. She began to display wax figures in a touring exhibition. A major part of her exhibition featured figures of the French Revolution depicted as they had been at the moments of their deaths… Gruesome, to say the least.
It is a horrible sight nowadays to think about, but one can only imagine the spectacle it must’ve made in the 1800s when the events of the French Revolution were still just recent history.
Marie’s first permanent exhibition was set up in 1835, and like in her exhibition, she stationed the French Revolution wax figures in a seperate room. Over time, this room would gain its most famous name: The Chamber of Horrors.
The VerdictSo, did the Chamber of Horrors ever house the remnants of actual dead people? Nope. It’s just wax figures, but they’re so realistic because they’re based on the actual death masks that Madame Tussaud saw during the French Revolution. And in my book, that’s already creepy enough.
Urban Legends InvestigatedPreviously in this series:
Urban Legends Investigated: The Noise Coming From Inside ChildrenUrban Legends Investigated: The ExpressionlessUrban Legends Investigated: Dear David – Part 1 / The StoryUrban Legends Investigated: Dear David – Part 2 / Is Dear David Real?Urban Legends Investigated: Slender ManUrban Legends Investigated: The Bleeding HouseUrban Legends Investigated: Peter BergmannUrban Legends Investigated: Missing in the Odessa CatacombsUrban Legends Investigated: The 1962 Halloween MassacreUrban Legends Investigated: The Clock Man VideoUrban Legends Investigated: NoEnd HouseUrban Legends Investigated: The Ghosts of VersaillesUrban Legends Investigated: The 67 Exorcisms of Anneliese MichelUrban Legends Investigated: Clown Sightings of 2016Urban Legends Investigated: The Burning of Bridget ClearyIf you liked this post, you might enjoy my book, Ghost Slayer Twenty-one-year-old Kaelyn has spent half her life hunting ghosts and killing them. But she’s not like the other ghost hunters who have to rely on spells and curses to banish ghosts back to where they came from, hoping that they don’t come back. When Kaelyn kills a ghost, they stay dead.
But in Mortimer Hall, a behemoth of a house, Kaelyn is about to face the most powerful and life-threatening ghost she ever met, and what she doesn’t know is that the ghost has been waiting just for her.
Release Date: June 6, 2018
Format: eBook, paperback
Price: $3.99 (eBook)
Buy eBook from Amazon.
Buy paperback from Amazon.
February 8, 2023
TV Series Review: Devil in Ohio

Devil in Ohio is a TV mini-series about a psychiatrist, Dr. Suzanne Mathis, who shelters a young girl who escaped from a Satanic cult. The girl in question, Mae, was chosen by her family to participate in a horrific Satanic ritual.
Mae, terrified, decided to run away. Unfortunately, the past keeps plaguing her and she suffers from post-traumatic stress disorder. The series hints cleverly at some aspects of the cult – paranormal in nature – that could very well end up being true, and not just all in the minds of obsessed cult members. I thought that was a clever touch, and one of my favorite things about the show, to be honest. It always keeps the viewer guessing what is real and what isn’t.
Dr. Suzanne Mathis is played by none other than Emily Deschanel, aka Bones. Maybe it was because I just binge-watched three seasons of Bones while on pregancy leave, but I actually felt like I was watching yet another episode of Bones, although in a slightly scarier setting. There’s not that much difference between Bones and Dr. Suzanne Mathis personality-wise.
I liked the family that is at the core of these events: Dr. Mathis’ children, Helen, Jules and Dani, and her husband Peter. It was interesting to see the family dynamics change over time, and how each character thought they were doing the right thing (from their perspective). Mae’s family probably thought the same, except their deeds are slightly more horrific than coming home from work late or putting work above family time yet again – I’m looking at you, Dr. Mathis.
The story itself could’ve done with a few more creepy vibes, in my opinion, but I liked the pacing – not too fast, but not too slow either – and the characters. For a mini-series, it delivers most of what I was hoping for based on the premise, and it exels in some parts, like characterization. I saw this series getting a lot of bad reviews online, but I didn’t think it was too bad. It delivered what it promised: a short, slightly chilling but mostly thought-provoking series about a cult in Ohio.
February 7, 2023
Real Haunted Houses: Crenshaw House
 Crenshaw House is a historic residence in Equality Township, Gallatin County, Illinois. Constructed in the 1830s, it was the family home of John Crenshaw, his wife and five children.
John Crenshaw leased salt works owned by the state. He was allowed, as per the law in force at the time, to use slaves at the salt works since apparently “no free men wanted to do this” as the job was so harsh. Either way, due to this caveat in the law, Crenshaw at one point owned (and I use the word loosely here) over 700 slaves.
Needless to say, Crenshaw was a wealthy man and he used this fortune to build Crenshaw House. It was constructed in classic Greek style with large columns and a balcony. Abraham Lincoln even visited the house once, during a ball. However, it wasn’t all sunshine and roses.
Crenshaw, being extremely greedy although having already amassed a vast fortune, decided to use his mansion as a “station” on the Reverse Underground Railroad that transported escape slaves and kidnapped free men and woman to sell them as slaves in the slave states. The third floor of the house, the attic flour, houses 12 rooms that were reportedly used by Crenshaw as a slave jail.
This isn’t just speculation, by the way, because Crenshaw actually got convicted of this offense multiple times in the 1820s and 1840s.
The kidnappings and terrible fates people suffered in the attic of Crenshaw House is the reason why today it is considered as haunted. The house was open to the public for quite some time and visitors have reportedly heard cries, rattling of chains, or felt cold chills or feelings of immense sadness.
Unfortunately, the house is currently closed to the public. Hopefully, one day it will reopen again and share its secrets with the world.
Previously in this series:
Real Haunted Houses: Franklin CastleReal Haunted Houses: Villesca Axe Murder HouseReal Haunted Houses: The Sallie HouseReal Haunted Houses: LaLaurie HouseReal Haunted Houses: The Bell Witch FarmReal Haunted Houses: Ann Starrett MansionReal Haunted Houses: Sturdivant HallReal Haunted Houses: Whaley HouseReal Haunted Houses: House of Seven GablesReal Haunted Houses: Woodruff Fontaine HouseReal Haunted Houses: Cedar Grove MansionReal Haunted Houses: Sauer CastleReal Haunted Houses: The Pink PalaceReal Haunted Houses: House of DeathReal Haunted Houses: Joshua Ward HouseReal Haunted Houses: The Lemp MansionReal Haunted Houses: Los Feliz Murder MansionReal Haunted Houses: Winchester Mystery HouseReal Haunted Houses: Bliss MansionReal Haunted Houses: Croke-Patterson MansionReal Haunted Houses: Thornewood CastleReal Haunted Houses: Drish HouseReal Haunted Houses: Old Shelby HotelReal Haunted Houses: Barker’s Slave QuartersReal Haunted Houses: Winter PlaceReal Haunted Houses: Sweetwater MansionReal Haunted Houses: Oakleigh HouseReal Haunted Houses: Bragg-Mitchell MansionReal Haunted Houses: Jemison – Van De Graaff MansionReal Haunted Houses: Redmont HotelReal Haunted Houses: Cedarhurst MansionReal Haunted Houses: GaineswoodReal Haunted Houses: Kenworthy HallReal Haunted Houses: Schweppe EstateEnjoyed this article? Read Fractured! When Piper discovers an old antique mirror on the attic of her new home, she has no idea what terror she unlocked.
Eerie shadows lurking in the night and estranged voices crying out for help are only the beginning. As Piper’s world comes crumbling down, she realizes everything that she believed was imaginary, might have been real all along.
Something is very wrong with that mirror. And if she doesn’t find out what, the mirror might end up killing her.
With some help of old and new friends, Piper tries to get to the bottom of the mystery. One thing is for certain: the mirror preys on the guilty. But what exactly is she guilty of?
Release Date: September 16, 2013
Format: eBook and Paperback
Price: $3.99 for eBook and $13.99 for Paperback
InkSpell Publishing | Amazon (PB) | Amazon (Kindle) | Kobo | B&N | ARe
February 6, 2023
Valentine’s Day Decorations
With Valentine’s Day just around the corner, I’ve begun decorating the house with some Valentine’s Day decorations. That meant I finally had to get rid of the Christmas decorations…
Bye, bye Christmas tree…
Hello, teddy bears, candles and roses.

I don’t have as much decorations for Valentine’s Day as I have for Christmas, and I couldn’t really find anything I could craft. For Christmas, I found all these cute crafting kits in a local cheap store, and I also found some crafting kits for Easter this time around, but nothing for Valentine’s Day.

In light of that, I decided to keep the decorations simple, but I still like them a lot. They bring some colour and the hearts are so cute.
If anyone has any crafting ideas or tips, or any links to Valentine’s Day themed crafts or crafting kits, please let me know in the comments. Oh, and if you want to share a picture of your Valentine’s Day decorations, please do so! I’m curious to see how everyone is decorating.
Monday Musings #53
 Monday Musings is a post in which I talk about my writing goals for the upcoming week. My last post has already been a month ago… Woops. But I promise to do better this month. I promise!
Anyway, my resolutions for this year were:
Write at least 4 days a week. Doesn’t matter what I write: could be working on my manuscript, writing posts for my blog, anything writing-related. Editing counts too. => I did manage to do this, but I wrote mostly posts for my book review blog, I Heart Reading. Still, writing is writing, and I did also finish See All Evil and published the updated manuscript, so that’s progress too!Blog more regularly. I’m aiming at at least 2 times a week, but honestly, I’ll be glad if I make it 1 time a week as well. => I did blog about once a week on this blog, and I blogged regularly on I Heart Reading, so I’m counting this as a win for now.Eat healthier. This is an overall goal, and of course there can be cheat moments. I’m not saying no to French fries for a whole year, haha. => I didn’t do too bad last month, and I exercised a lot, so that’s good too!Finally take the book marketing course I signed up for aaaaaages ago. => No progress yet.Spend more quality time with my family and friends, since that’s the most important thing in life. => So true, and I did do some fun things with friends this past month! Hopefully I’ll manage to keep up the momentum.As for this week, my writing goals (and other goals) are:
Write two posts on my author blog.Re-publish Valentina and the Haunted Mansion (Valentina’s Spooky Adventures #1) now that my rights have returned to me.Re-publish the paperback version of Valentina and the Haunted Mansion.Re-publish the hardcover version of Valentina and the Haunted Mansion.Write and schedule five reviews on I Heart Reading.Finish my two paintings in progress and blog about it.Put up the Valentine’s Day decorations.Print pictures of 2019 for in my photo album (I didn’t manage to make one with the 2018 pictures until I was on pregancy leave… Yep, I have a ton of years to catch up on).Exercise at least 5 times this week (1 time down already).Write 5k in Hear All Evil (Academy of the Wicked #2).
What are your goals for this week?
January 27, 2023
Crafting: Disney Princess String Art Cinderella
Time Required: 30 min – 1 hour
Difficulty: Hard
Review of kit: 1 out of 5 stars
I purchased this Disney Princess String Art kit (which also doubles as a night-light) with the intention of using it to decorate Seraphyn’s room. I bought it for like 1 EUR so it was very cheap. However, online you can buy the same kit for 15 and sometimes even 20 EUR.
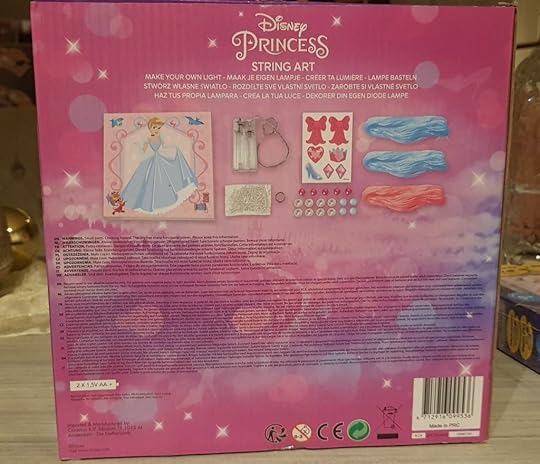
The backside of the box showed its contents: string in two colours, stickers, decoration, a battery holder and of course, the frame to put the string art on featuring a drawing of Cinderella.
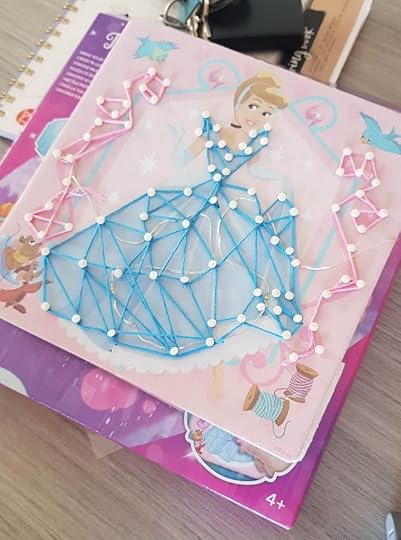
The string art process wasn’t explained at all, so I improvised but I didn’t think it was that easy. As per the box (as you can see above), apparently children age 4+ can do this, but I beg to differ. I really struggled with all the strings, especially without proper explanation.
Plus, you couldn’t push the pins in too deep since you still had to criss-cross the electrical wire through the string art, which didn’t exactly make things easier.
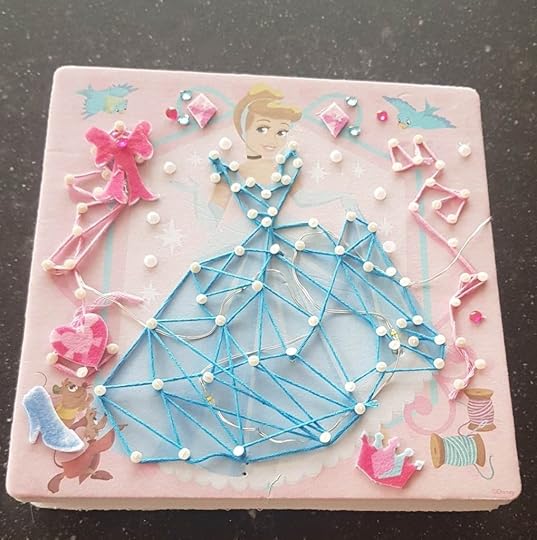
After finalizing the string art, it was just a matter of adding the stickers and other decorations, and tada.
I have to say I’m glad I’m done with this project, but I’m not impressed either. I bought it very cheap, so I can’t complain that much (what can you pay nowadays for 1 EUR?) but for people who paid 15 EUR for this…The material is subpar, there’s not even a frame, and if you want to hang this decoration somewhere, you definitely need a frame for it. The instructions are totally unclear as well.
My recommendation? Don’t buy this at full price, and don’t buy it for kids. There are a lot of other crafty kits out there that offer far more value for money.